Last Updated on December 24, 2022 by Mathew Diekhake
Windows Sandbox is available starting from Windows 10 build 18305.
Windows Sandbox is a unique desktop environment that allows you to run applications in complete isolation from everything else on the computer.
A sandbox environment means you can run potentially untrusted applications and not have to worry about them being malware because they won’t be able to move from their isolated locations.
The Android operating system is much simpler in nature, and subsequently, it can always keep apps in sandboxed environments. The Windows operating system, however, has far more features, and it’s not possible for system administrators to use Windows only in a sandbox. With this new Windows Sandbox feature, you can now at least use a sandbox environment whenever you want to make sure what you’re installing won’t cause harm to the computer.
Windows Sandbox is disabled by default. You can find it from the list of optional Window features in the Windows Features dialog and enable it from there. Additonally, you can also enable and disable Windows Sandbox from the Windows PowerShell and Command Prompt applications.
The following tutorial demonstrates how to enable and disable Windows Sandbox when you’re using a version of the Windows operating system starting from build 18305.
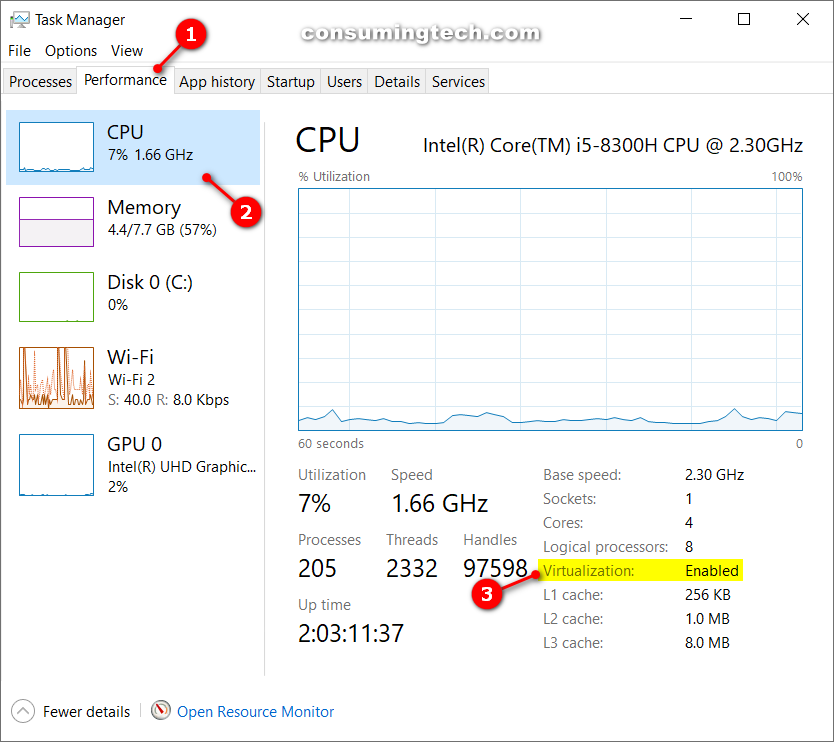
Note: Virtualization needs to be enabled in the UEFI/BIOS settings before you can enable Windows Sandbox. You can verify if your computer has Virtualization enabled from the Task Manager. To find it, open Task Manager, click on the Performance tab, select CPU, and then look under the CPU graph for whether Virtualization is enabled or disabled. Most computers should have this feature enabled by default.
Method One: How to Enable/Disable Windows Sandbox in Windows Features
Here is how you can enable and disable the Windows Sandbox optional feature from the Windows Features dialog in Windows 10:
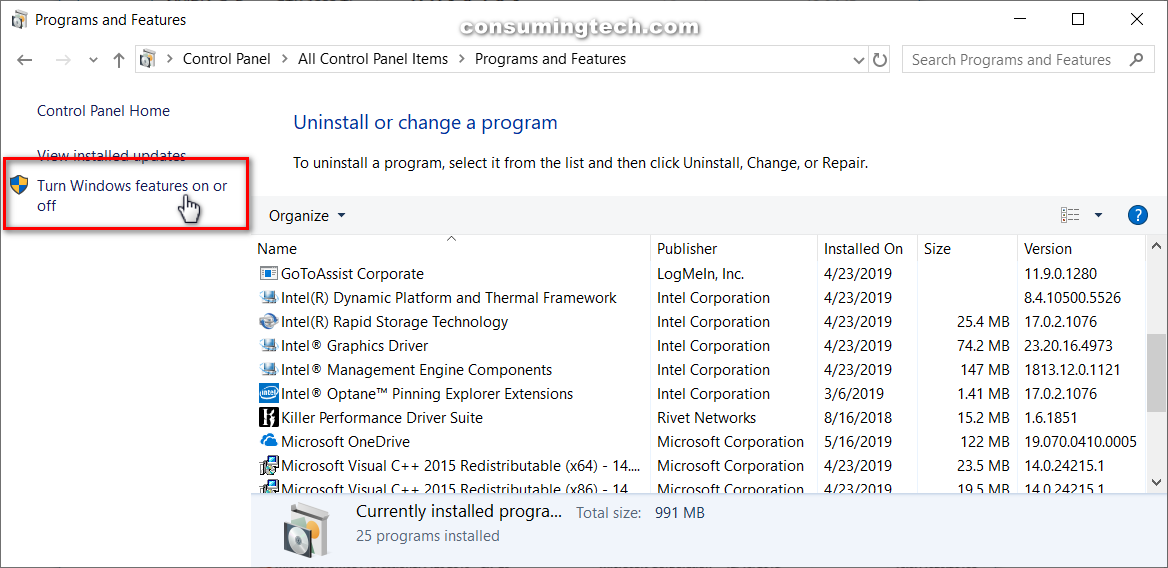
1. Open Control Panel in icons view, and then click on the Programs and Features icon from the list of All Control Panel Items.
2. Click on the Turn Windows features on or off link. (click to enlarge screenshot below)
3. From the Windows Features dialog, check or uncheck the Windows Sandbox box, and then click on the OK button to save the changes. (click to enlarge screenshot below)
4. The Windows operating system will then search for the required files if you’re enabling Windows Sandbox.
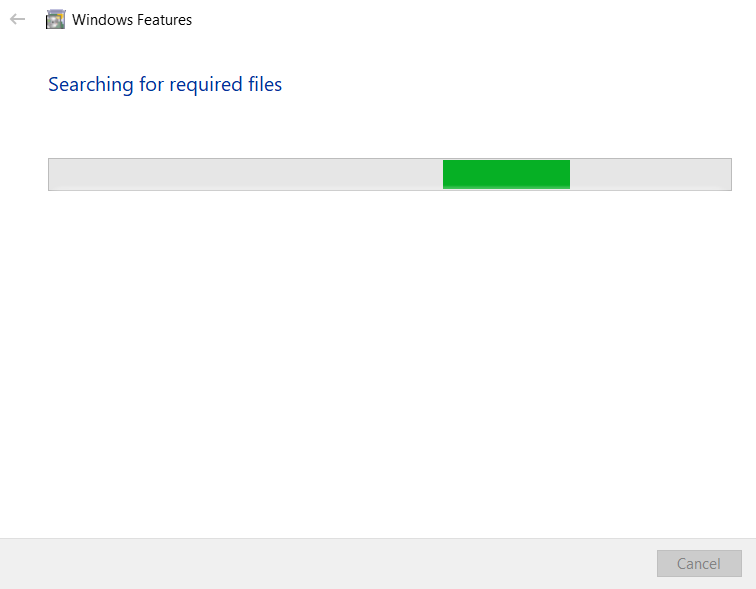
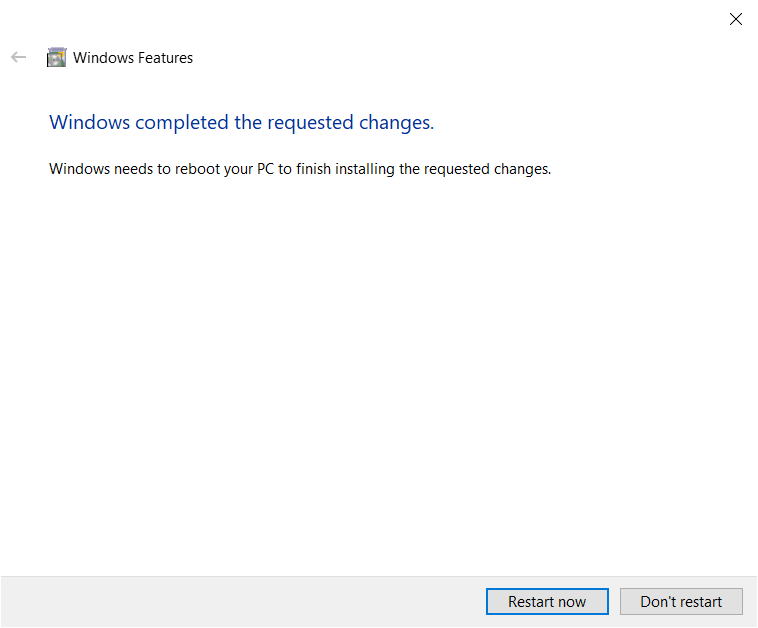
5. When found, click on the Restart now button to restart the computer and have it ready to use the Windows Sandbox.
Method Two: How to Enable or Disable Windows Sandbox in PowerShell
Here is how you can enable and disable the Windows Sandbox optional feature from Windows PowerShell:
1. Open the elevated Windows PowerShell.
2. If prompted by User Account Control, click on the Yes button.
3. Type one of the following commands, depending on what you want to achieve, into the Windows PowerShell window and then press the <Enter> key on your keyboard to execute it. (click to enlarge screenshots below)
To Enable Windows Sandbox:
Enable-WindowsOptionalFeature –FeatureName "Containers-DisposableClientVM" -All -Online
To Disable Windows Sandbox:
Disable-WindowsOptionalFeature –FeatureName "Containers-DisposableClientVM" -Online
4. You need to restart the computer to apply the changes. When PowerShell asks if you want to restart now, press the Y and then Enter keys to restart the computer.
Method Three: How to Enable or Disable Windows Sandbox in Command Prompt
Here is how you can enable and disable the Windows Sandbox optional feature from the Command Prompt:
1. Open the elevated Command Prompt.
2. If prompted by User Account Control, click on the Yes button.
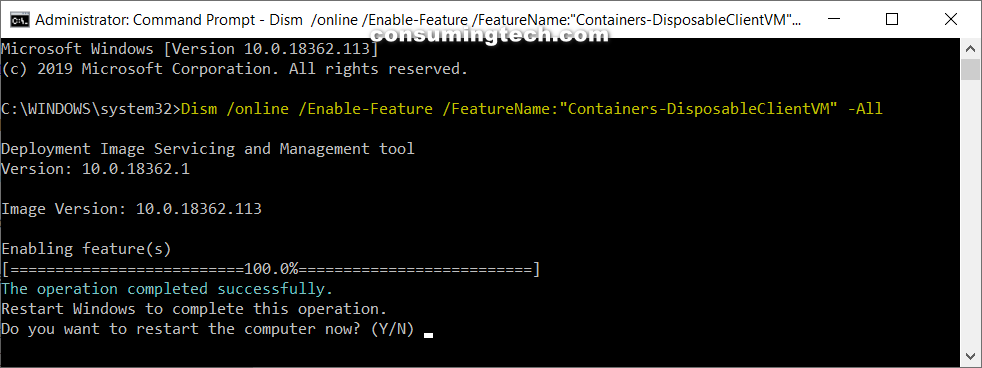
3. Type one of the following commands, depending on what you want to achieve, into the Command Prompt window and then press the <Enter> key on your keyboard to execute it. (click to enlarge screenshots below)
To Enable Windows Sandbox:
Dism /online /Enable-Feature /FeatureName:"Containers-DisposableClientVM" -All
To Disable Windows Sandbox:
Dism /online /Disable-Feature /FeatureName:"Containers-DisposableClientVM"
4. You need to restart the computer to apply the changes. When PowerShell asks if you want to restart now, press the Y and then Enter keys to restart the computer.
That’s all.
Related Tutorials
- How to Turn On/Off Sync Office 2016 Files with OneDrive in Windows 10
- How to Help Cortana Learn Your Voice for ‘Hey Cortana’ in Windows 10
- How to Install and Uninstall Graphics Tools in Windows 10
- How to Open and Change Settings for Apps in Windows 10
- How to Turn On/Off Developer Mode in Windows 10
- How to Change Theme of Office 2016 for Windows
- How to Change Default Download Storage Location for Movies & TV in Windows 10
- How to Enable/Disable Windows Subsystem for Linux in Windows 10
- How to Install Windows Subsystem for Linux (WSL) Distros in Windows 10

