Last Updated on December 26, 2022 by Mat Diekhake
Every time you use the Windows 10 operating system, processes are running in the background. A process is something that is currently running. Be it an app or program, if it’s running, then it’s going to be showing up as a process in the Task Manager.
The Task Manager offers a way for you to manage the processes that are running. With the Task Manager open, users can choose to view the CPU, memory, disk and network usage of the processes themselves or switch the tabs over and assess performance, the app history, users, startup, services, and details.
Each of the tabs does something different, and the guide below walks you through everything you need to know about them and everything else that is available in the Task Manager.
The following tutorial demonstrates all the different ways you can open the Task Manager when you’re using a version of the Windows 10 operating system.
How to Open Task Manager from Taskbar
The most common way to get the Task Manager open is by right-clicking on the Taskbar and then selecting “Task Manager” from the menu. The reason this is the most common way is that it has been an option since Windows XP to do it.

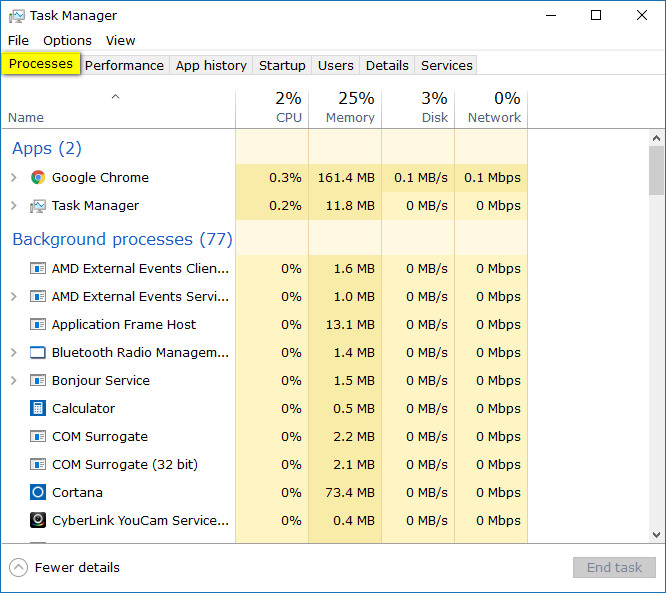
Now that you have the Task Manager open, it’s time to find out what you can do with it. The first time you open up the Task Manager, you are shown the “Processes” tab, meaning everything that you can see from inside the Processes tab is now on the computer’s screen. The Processes tab is the most important tab to have because it allows you to track and manage the processes on the computer. If a particular process is using up a lot of the computer’s resources, it shows up here in the CPU or Memory columns. You’ll know when something is using up lots of the CPU because you’ll hear the computer’s fan kick into overdrive. You’ll also lose some performance—or even a lot depending on how much of the CPU a problematic process is using.
It isn’t difficult to understand how the processes area works. You have the name of the processes in the left side pain. Just like with earlier versions of Windows such as Windows XP, you need to be on the look out for any strange names being shown as processes. Thanks to the help from Google, you can now copy and paste any unusual names that you cannot identify as a usual process and then find out if it is a virus or not.
Also, sometimes processes that are not viruses can still cause you problems with excessive memory and CPU usage. You can see the names of the processes that are creating those problems from this tab. When you find an issue, you should have no worries using the Google search engine again for finding out how to solve the problem. For example, if the Processes tab in the Task Manager is showing you that your antivirus program is creating excessive CPU usage (or worst case scenario of 100% CPU usage), then you can head over to Google and type something along the lines of “the name of the anti-virus and high CPU in Task Manager” to find some handy solutions.
How to Open Task Manager from Cortana Search
The search field available in the Windows 10 taskbar (to the right side of the Start button) is available for you to search for just about anything. The Task Manager is another one of those things that you can find from the search field. To do it, just type “Task Manager” into the search field and then click on the Task Manager desktop application that becomes available for you to click on under the Best match section.
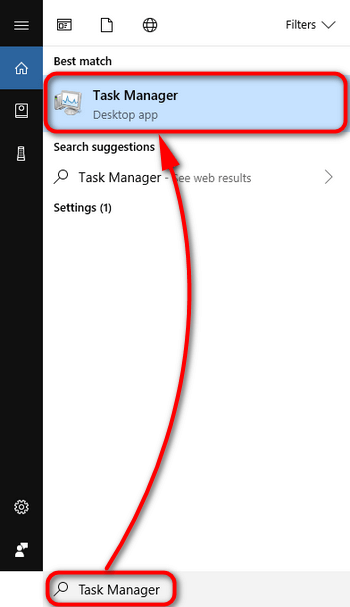
The Task manager is now open.
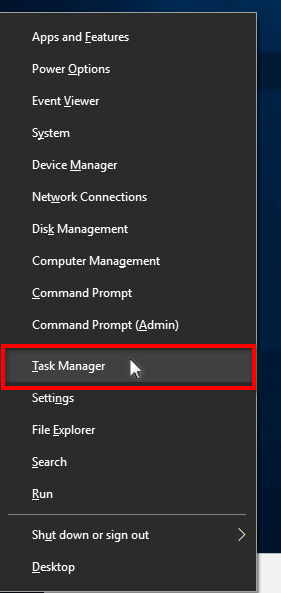
How to Open Task Manager from Power User Menu
Another way you can open the Task Manager is by using the Power User menu, otherwise known as the Win+X menu. To bring up the Quick Links menu, press the Windows logo key + X on your computer’s keyboard and then wait for it to pop up on the desktop. The Power User menu will work on top whatever you have on the computer’s display, even if you are currently using a web browser.
When the Power User menu is showing up, look for where it says “Task Manager” and click on it.
The Power User menu can be fickle at times. For example, the Windows 10 Settings app allows users to swap the Command Prompt with the PowerShell. It can also display different things depending on what software your version of Windows 10 is currently running. But for the most part, the same entries will be available when you view—and thankfully, the Task Manager is always one entry that hasn’t changed throughout any of the versions of the Windows 10 operating system to date.
Options Available from Task Manager
1. Processes
The Processes tab is the first tab that opens when expand the Task Manager from its “More details” view. Here you can view and manage the processes, including the applications you have running and the processes that are running in the background helping the Windows 10 operating system operate smoothly.
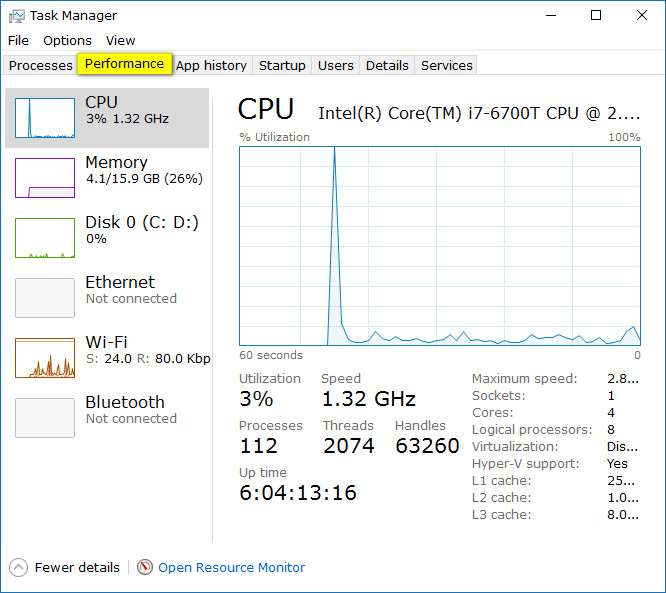
2. Performance
The Performance tab gives you a much better in-depth view of the same performance meters that you had available to you in the columns from the Processes tab. One of the main additions that you now have is the live graphs that give you an explanation of how the performances are changing real-time instead of just the figures that were available before.
The Performance tab also has another handy feature where you can double-click on the left or right side of the screen and toggle between summary view and normal view, depending on what you prefer.
Also, if you click on an option from the left side pane, it then shows more details about it in the right side pane. For example, if you click on the “CPU” from the left pane and then look at the graph in the right pane, you see a whole bunch of useful information like its utilization, speed, processes, threads, handles, maximum speed and so forth.
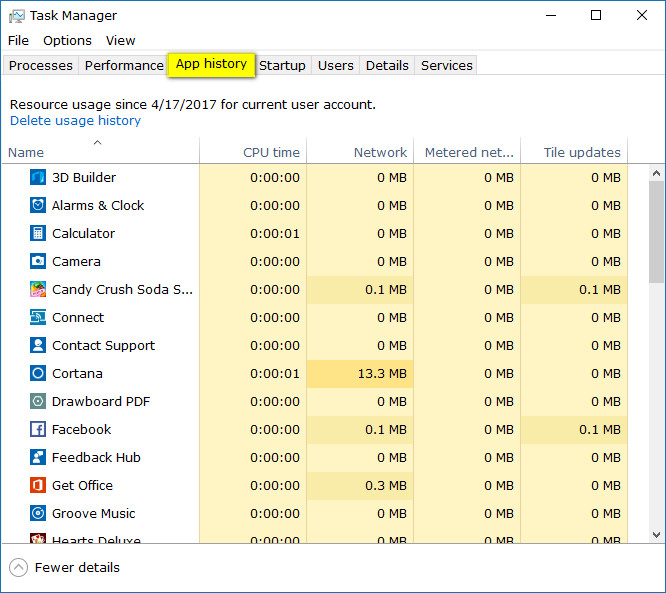
3. App history
The App history tab is helpful for assessing how much data (or “resources”) the apps have used. It used to be that by default it would show the Windows Store App resource utilization when you clicked on the tab, but now it just shows you the full list of apps that are installed on your version of Windows 10 and none of them highlighted.
If you are currently viewing the App history tab, you can click on the “Options” link in the menu above the tabs and find out the complete history for all processes in the past. Moreover, there’s also a link available directly beneath where it shows you the date of the resource usage that allows you to delete all the stats in the past too.
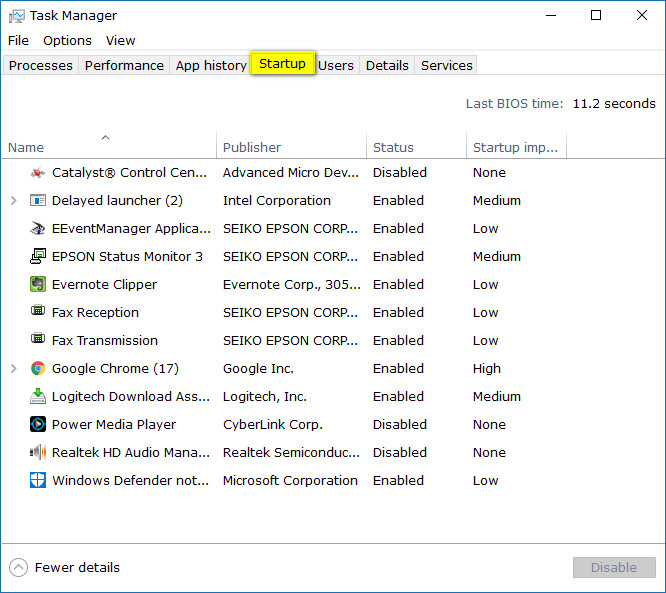
4. Startup
The Startup tab lets you check out the startup performance as well as pick and choose what you want to happen at the startup. You might often hear people say to reduce the number of things that startup when the computer first boots because that creates the quickest load times. That explanation is very correct, but you also need to keep certain things for the startup. That said, it’s not too difficult to pick out the things that you don’t need as well.
Sometimes if you install something like an instant messenger application, it can automatically set itself up to become one of your startup applications, so that it opens each time you turn on the computer. That is good for their businesses, but if it’s not convenient to you, then you can obviously take that off from being a startup process because it has nothing to do with a process that the Windows operating system needs to run properly. Apply that same kind of logic when assessing things that might be required by the Windows operating system. If it looks like it might be something that Windows or your computer needs to work, then don’t attempt to remove it.
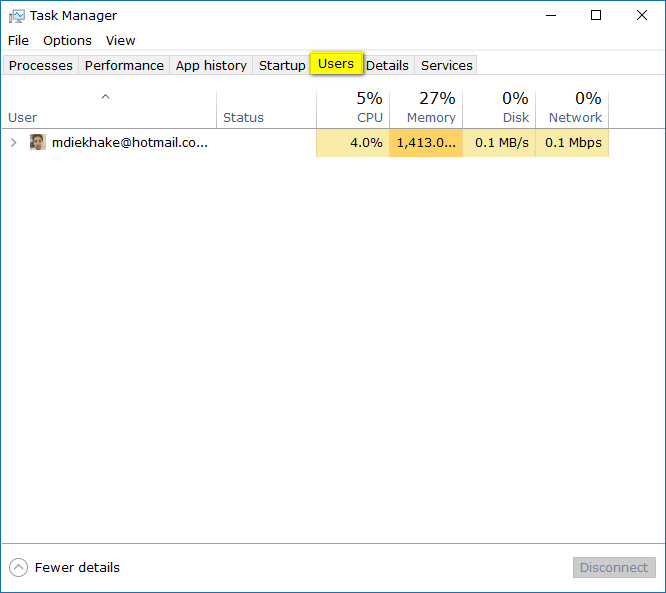
5. Users
The Users tab shows what user accounts are using the computer and the resources they are using up.
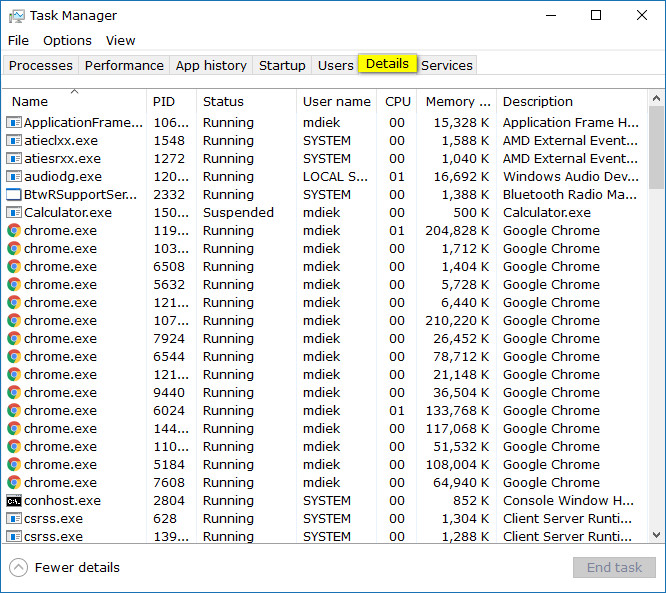
6. Details
The Details tab gives you further information about the processes that are running on the computer. For example, if you were to go back to the Processes tab, you would see that Google Chrome is a process, but it would just show the one for the browser. The Details tab will go into much more details and list everything to do with the Google Chrome browser and all of its processes. These additional executable Chrome processes are likely to do with plugins, but the same kind of detail is available for anything that might be running, not just web browsers like Google’s Chrome.
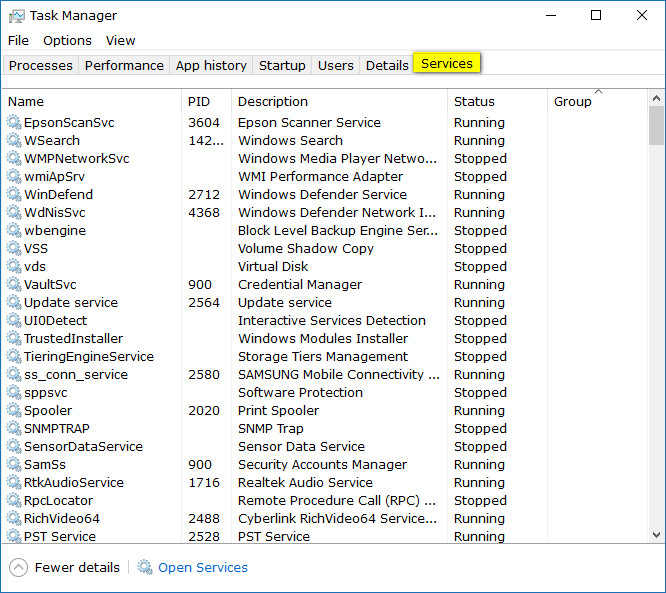
7. Services
The Services tab lets users view and manage the services that are running on the computer.
The Task Manager is often one of the hidden features that people learning about Windows beyond the Settings app, and File Explorer will find out about and start using, but few people bother to click out of the Processes tab and check out what the other tabs entail. Now that you are a Task Manager guru, you know that there is much more useful stuff available from the Task Manager.
Related Tutorials
February 4, 2019 @ 04:54
I have a fairly new computer that i spent a lot of money on. It’s a desktop computer with 16 GB of RAM.
I’m not sure how long I’ve had the problem for but I’ve noticed Task Manager says 100% disk usage after first starting up the computer for about the first 5 to 10 minutes and it slows down the computer a lot where I’m having to wait as if I’m still using a 32-built processor running Windows XP and have built up a whole lot of processes that don’t be taken away. I have only just recently noticed the issue from Task Manager but for a very long time my computer has been slow out of the gates. It can take at least a few minutes before I can start using a web browser like Chrome. I can’t remember if it was always like that since the very beginning, but it has been for most of the time I’ve owned the PC.
I can see the processes that are causing the high disk usage, and the sad thing is it jumps around between quite a few processes and they are all processes that Microsoft is running.
The only thing I can think of is maybe I was tricked into buying a computer that was short on some hardware that Windows needs to be able to run properly. The first process that was causing the issue was Skype. I can’t recall the second process but I Google’d it and it said it was from Microsoft and something to do with Windows 10 components. Now this third process is the Superfetch which is also from Microsoft.
It eventually drops down to very low levels once the services have completed doing whatever they were doing. But these services consistently take minutes every time I turn on the computer. It’s not just an occasional thing. If it were an occasional thing I could understand.