Last Updated on February 25, 2024 by Mat Diekhake
Windows 10 offers a few options to scan with Windows Defender. When you start using Windows 10, you’d be forgiven for wondering where the Windows Defender is and if it’s operational. But in truth, all versions of Windows 10 do come with a built-in antivirus, just as it did with all versions of Windows 8. That antivirus is still called Windows Defender, and it’s almost the same program as you knew before. The main difference is that you now have several ways to get access to running full scans, custom scans, offline scans, quick scans, and even scanning individual folders or drives without having to run a scan for anything else.
While our modern-day operating systems do a great job of picking up malware and doing it quietly in the background without using many resources, there is still one downside that hasn’t changed much: the scan can take a long time to finish, even for the “Quick scan” option from the Windows Defender user interface. That’s where scanning an individual folder or drive comes into play. Folder scans can be completed in just a few seconds, whereas you can be forced to wait many minutes for a full scan of the entire computer to complete. This is the main reason for learning how to use Windows Defender more efficiently in the guide below.
One of the common misconceptions out there is that Mac’s don’t get viruses. That opinion, which somehow managed to flow right around the world, was hurting Microsoft. They have counterintuitively managed to come up with a decent solution: include antivirus in the modern Windows operating system. That way Windows users also think their computers don’t need protection. In truth, both Mac and Windows OSs running on any computer are always going to be susceptible to viruses. But the Windows Defender app in Windows 10 is doing a great job making people feel as secure as possible.
The following tutorial demonstrates how to run antivirus scans with the Windows Defender antivirus software that comes preinstalled in all versions of Windows 10.
How to Scan with Windows Defender Using Context Menu
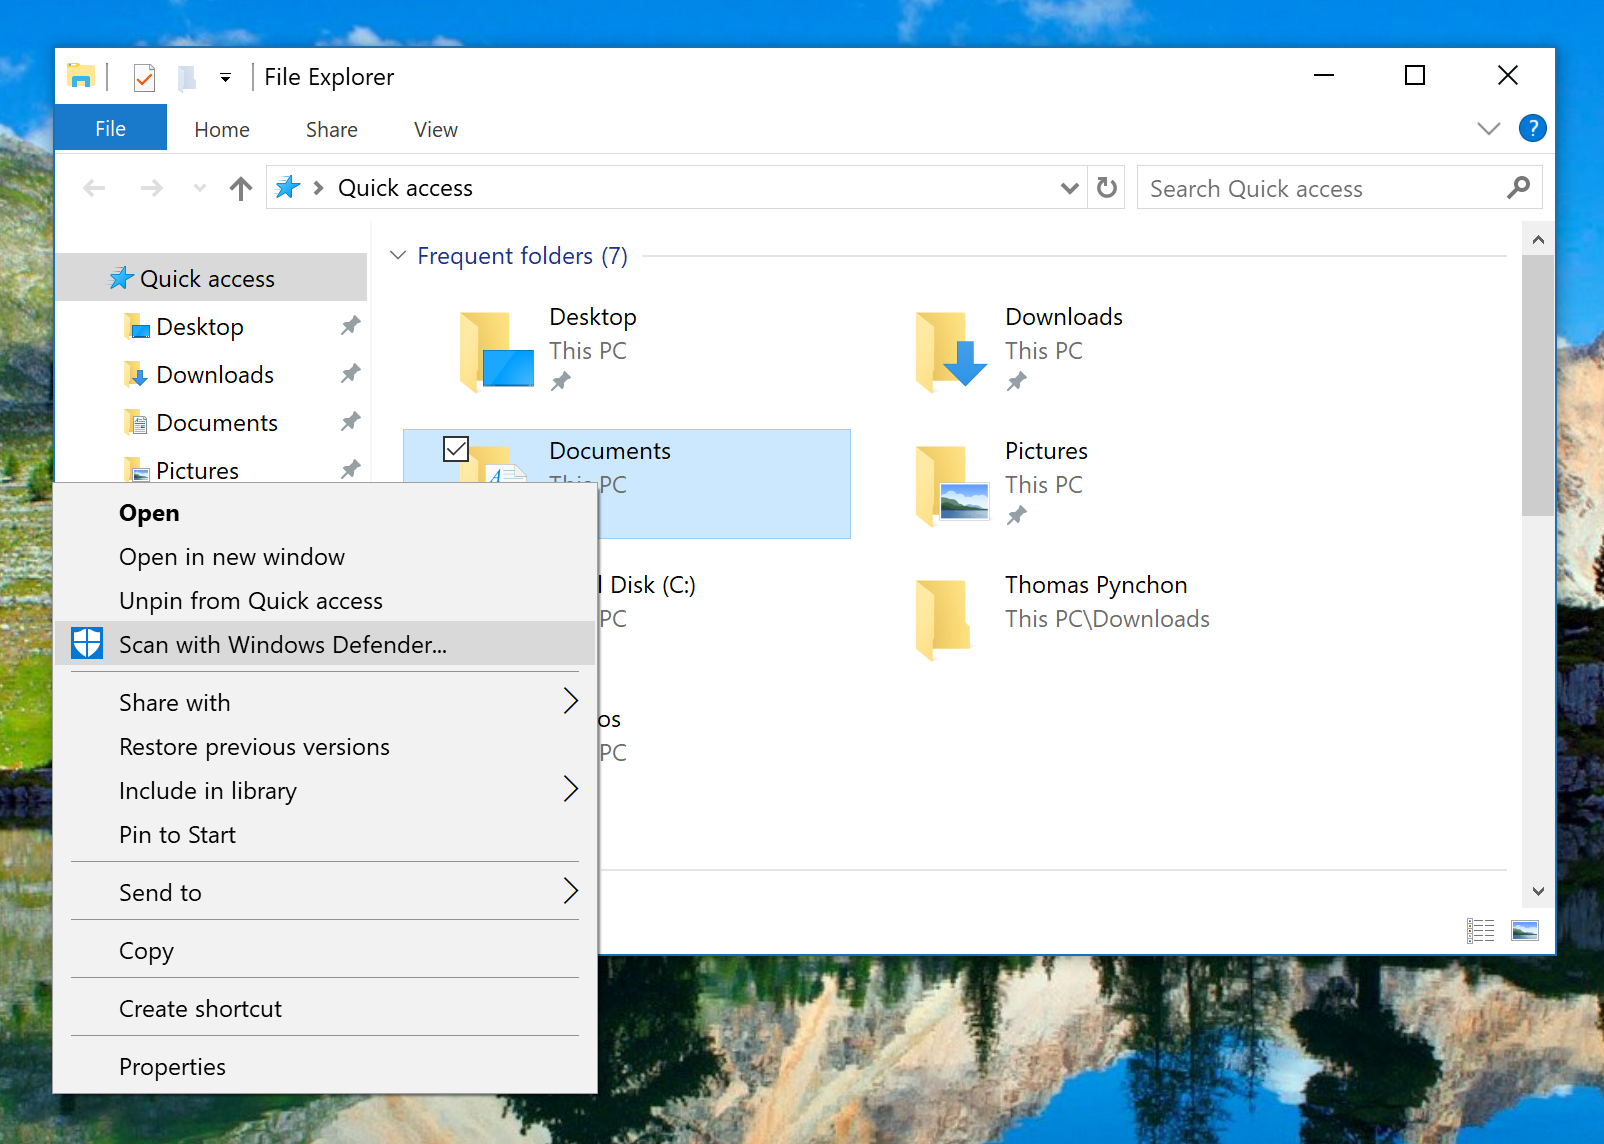
Open the File Explorer by navigating to the Start menu > File Explorer. Find the folder or drive that you want to scan with the Windows Defender and then right-click on it to bring up a menu that allows you to select Scan with Windows Defender…
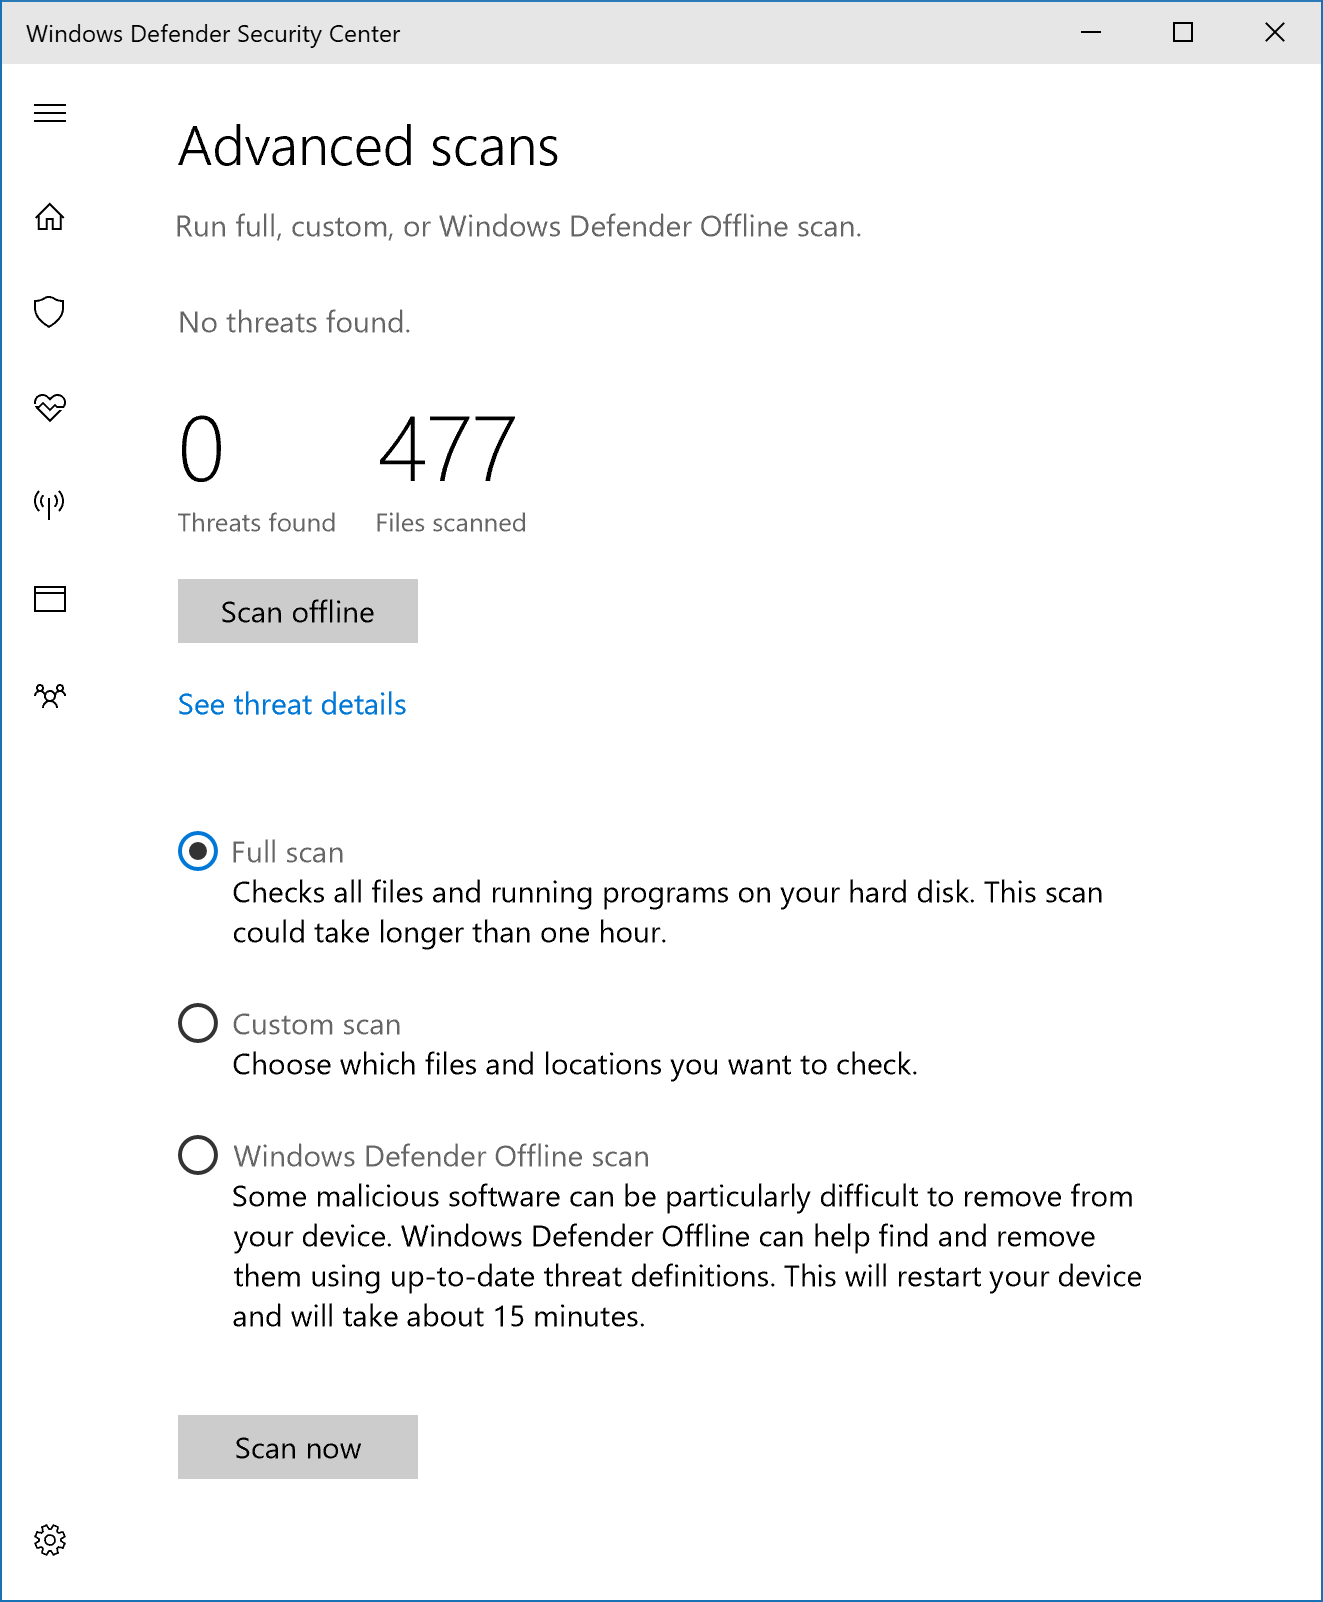
After you click on that button, the Windows operating system greets you with the Windows Defender Security Center. It opens up with the scan results for you, so you don’t have to navigate anywhere else. In the screenshot below, you’ll notice that Windows Defender has scanned 477 files and 0 threats were found. That is my results. Yours will look like something similar.
Like most antimalware programs, the Windows Defender runs in the background. There is no need to scan files manually, the exception being if you want to remove malware immediately. Most modern computers have sufficient hardware for Windows Defender to run in the background, so you won’t even notice it. You can thank Microsoft for Windows Defender’s seamless integration. The current versions of Windows Defender use fewer resources in Windows than they used to. That helps in the silent system assessments taking place on your computer.
As we have come to expect from Windows Update, these Windows Defender scans only take place periodically—not all the time. That means there could potentially be something suspicious in a file that your antimalware protection hasn’t picked up on yet. Those are the times when you want to scan these files manually by doing the step above.
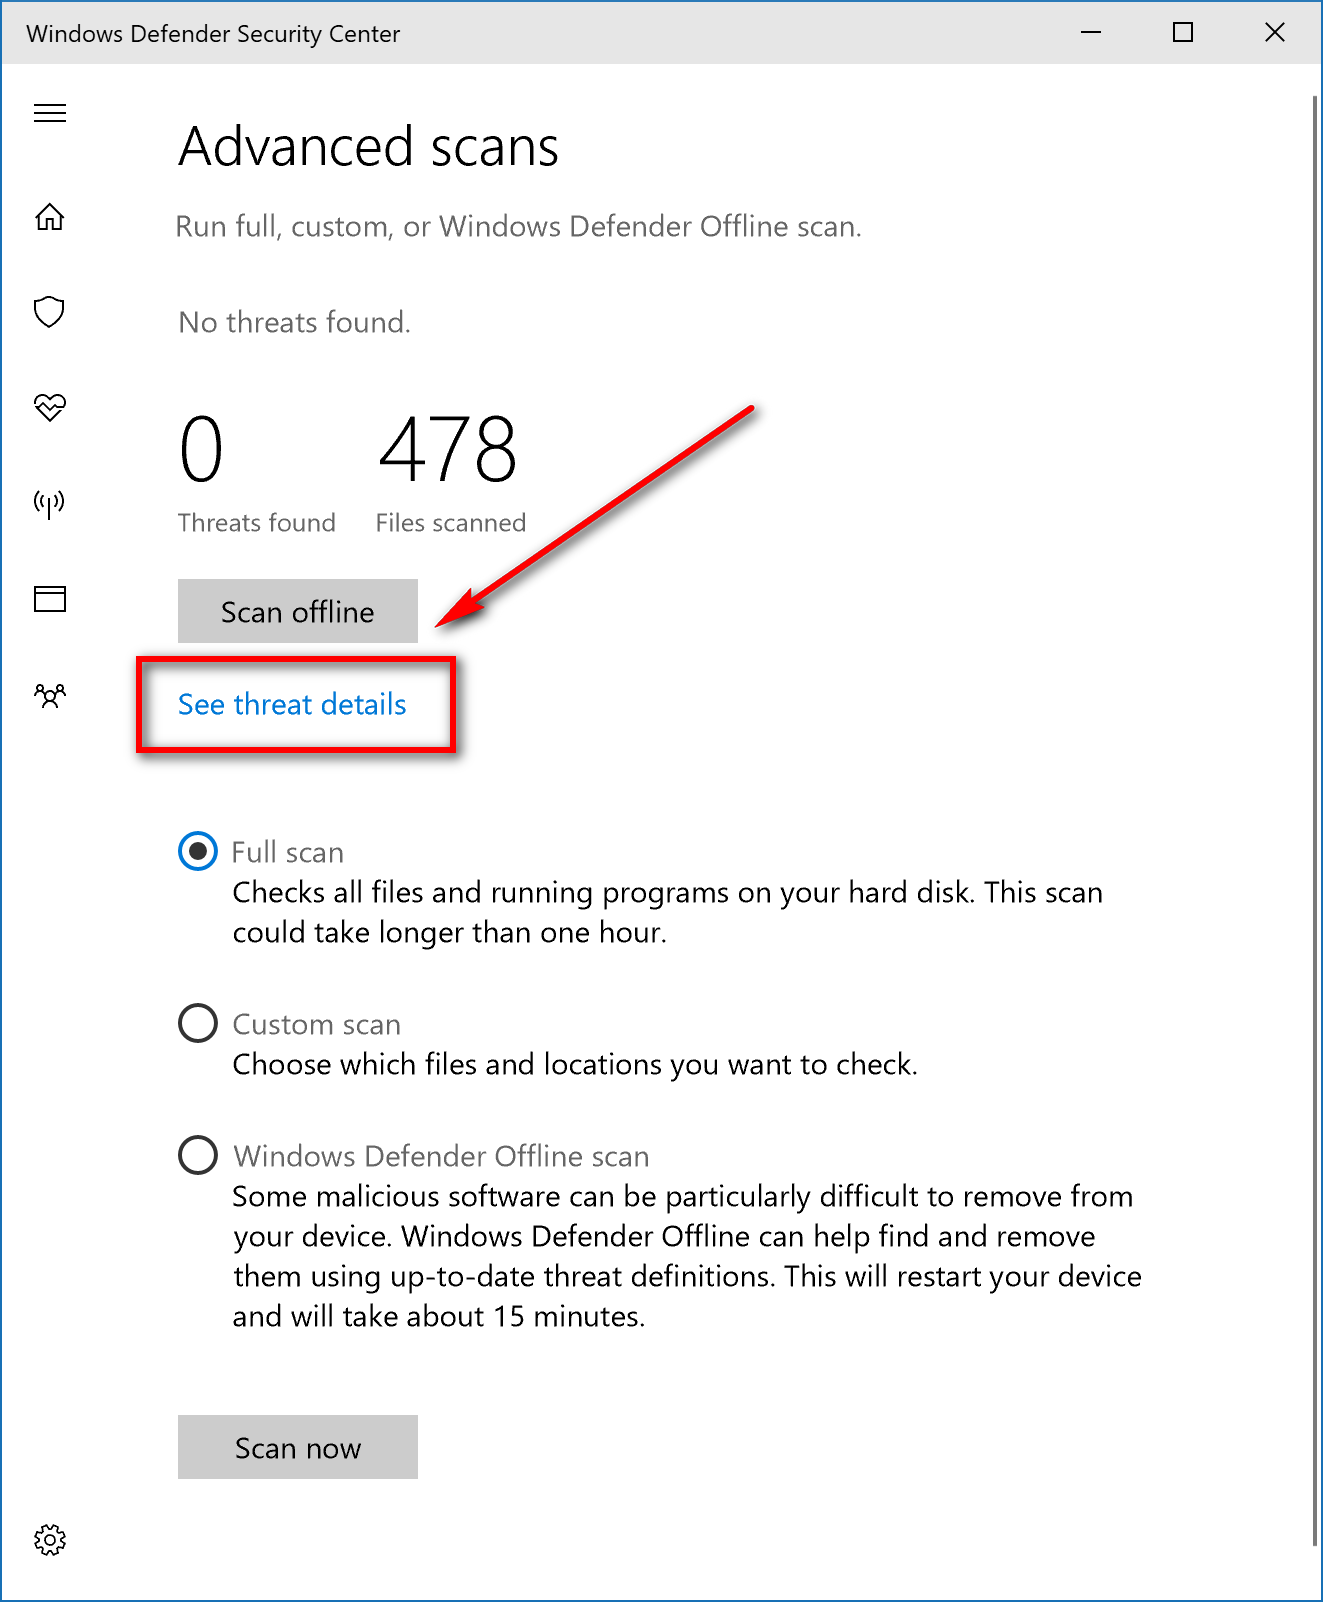
If your results show that a threat is found, then you will probably want to click on the See threat details link given below the result so you can see further information regarding the threats. You’ll also see another button available if a threat is detected that says Clean threats that you can click if you just want to quarantine them right away.
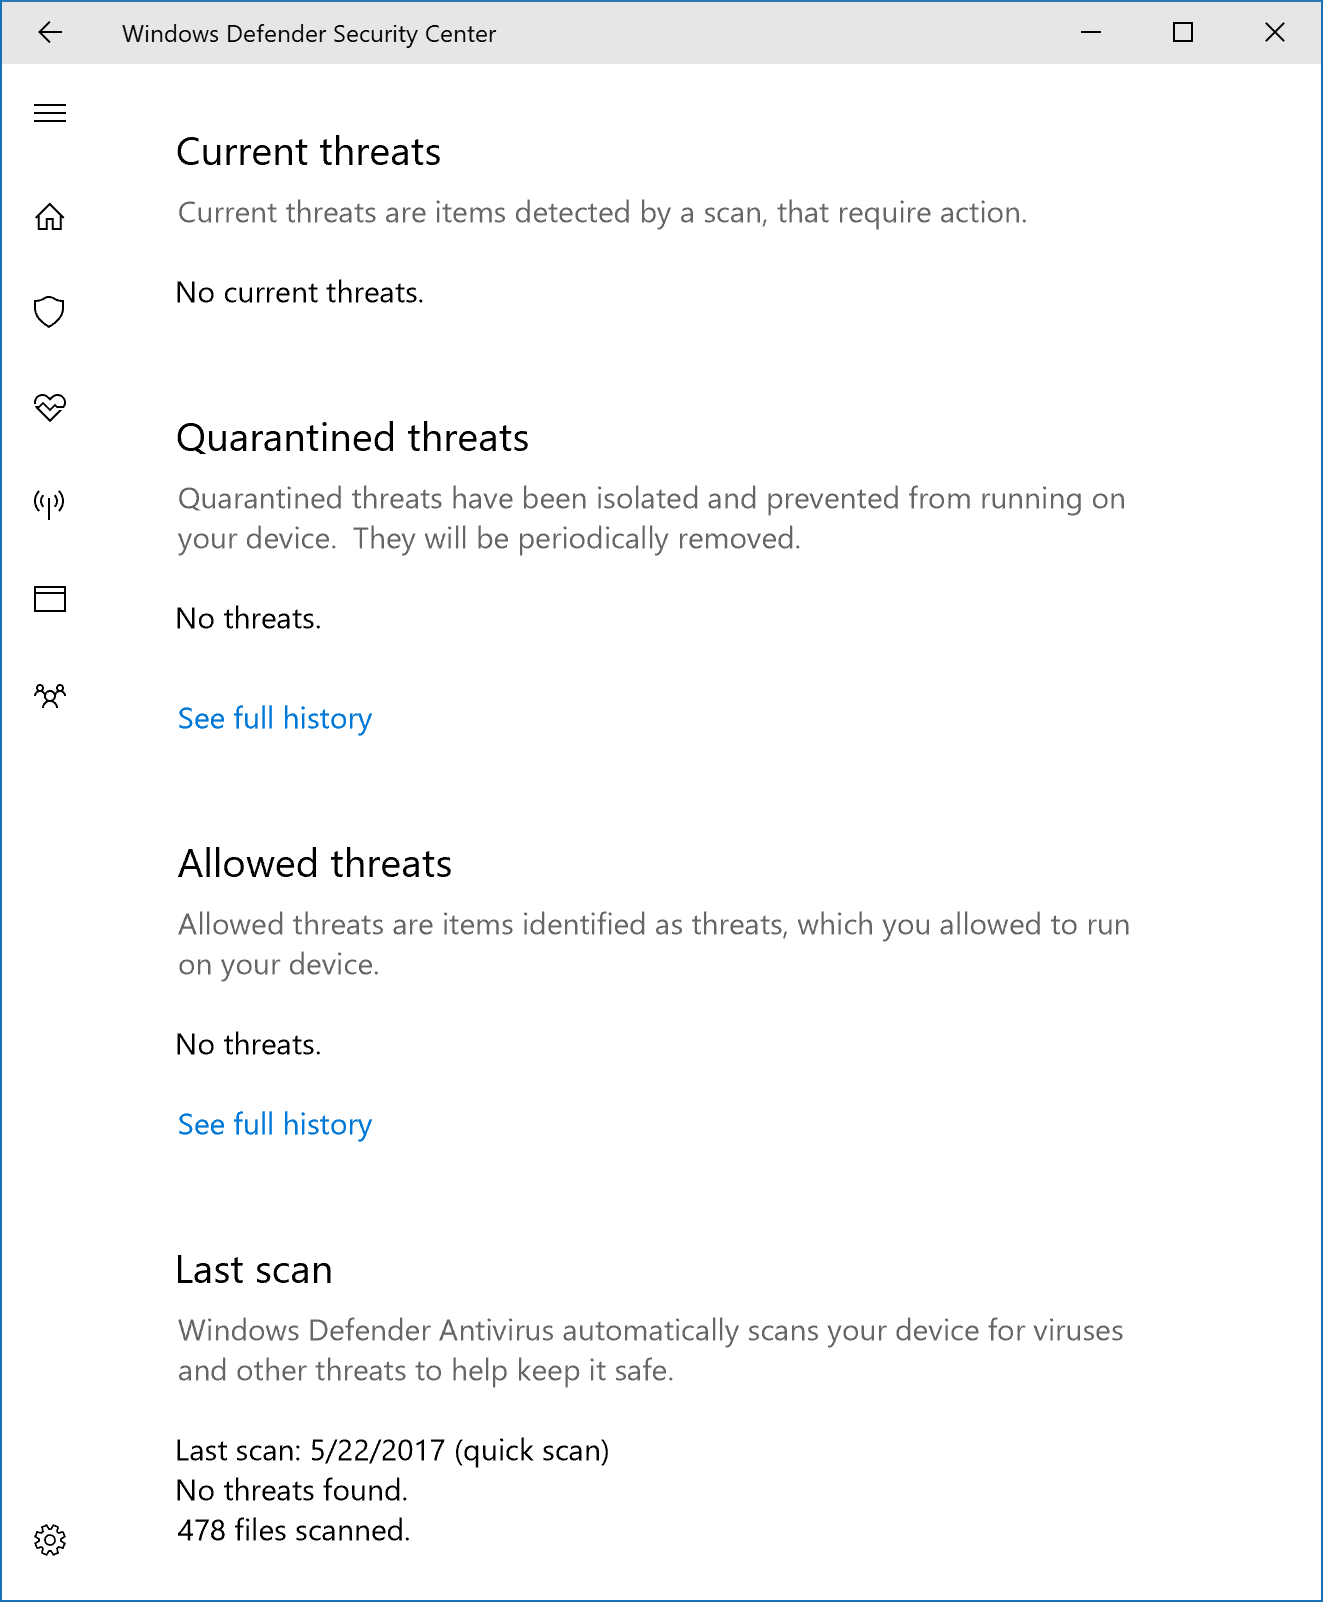
If you did have threats found, you would get them shown under the Current threats section. These are potential threats to your computer that require you to choose what you want to do with them. If you want to quarantine all threats that are found. The quarantine (or vault as it is called in other software) is like a jail for the threats that it has found.
You’ll also notice an Allowed threats section. There are occasions when Windows Defender will detect something as a threat, but you know for sure that it is not a threat. Those are the cases that you want to allow the threats to still run around your operating system.
If you accidentally didn’t quarantine a threat that you wish you did, then you should always run another scan and make sure it is quarantined after the next scan completes. These scans for folders or drives don’t take a long time to complete, so there’s no excuse for not doing another scan of the individual folder or drive.
You also have access to many other options in the left pane. The screenshot below is the same user interface you see when you get access to the Windows Defender that is available from the system tray in the taskbar.
How to Scan with Windows Defender in Windows Defender Security Center
You might not notice it because for many computers it isn’t given in the system tray, but the Windows Defender icon is still available there. All you need to do is click on the arrow that is available to the far left side of the system tray and then click on the shield icon like shown in the screenshot below. That’s what your Windows Defender logo looks like.
![]()
Sometimes users can click the icon, and yet it doesn’t do anything. If you find yourself in a situation where you are clicking the mouse or touchpad on the Windows Defender logo, and it isn’t opening, then you need to right-click on it instead and then choose the Open option that becomes available.

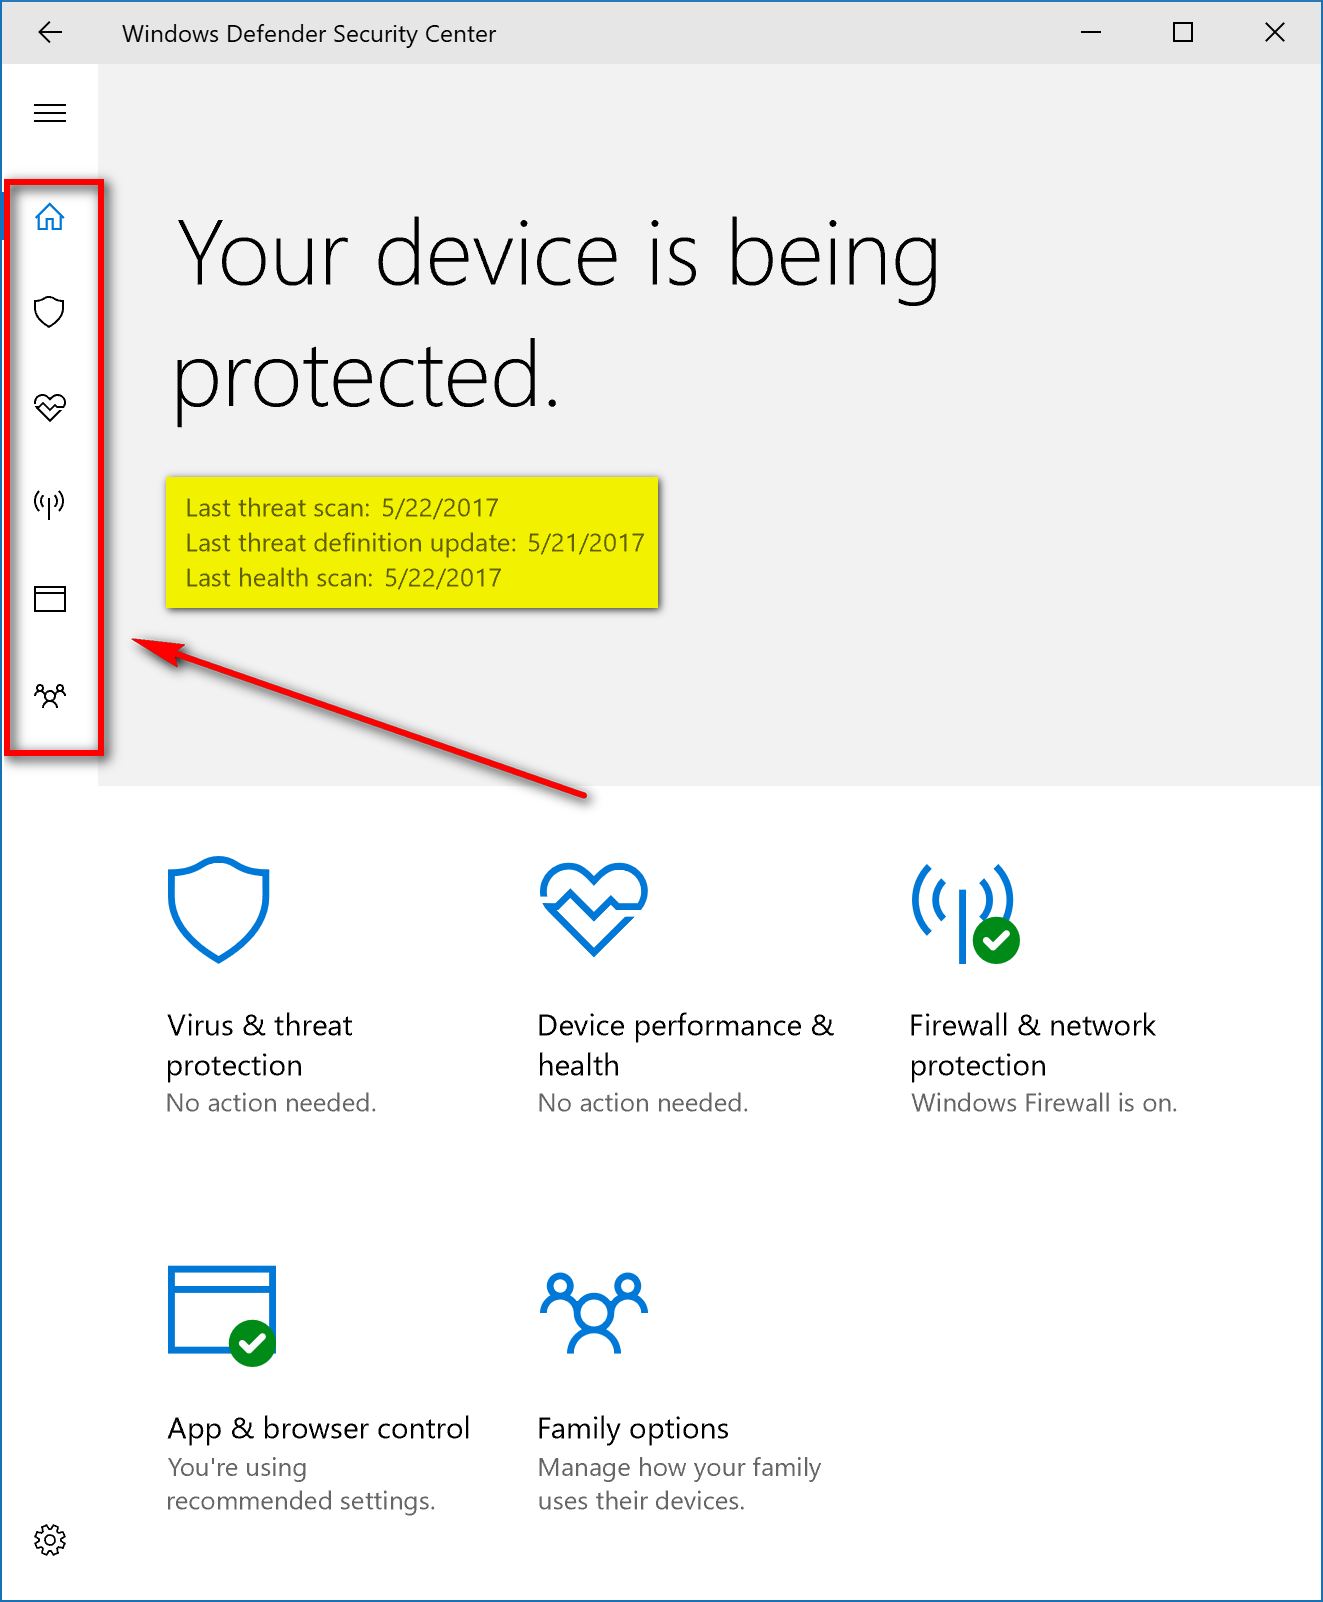
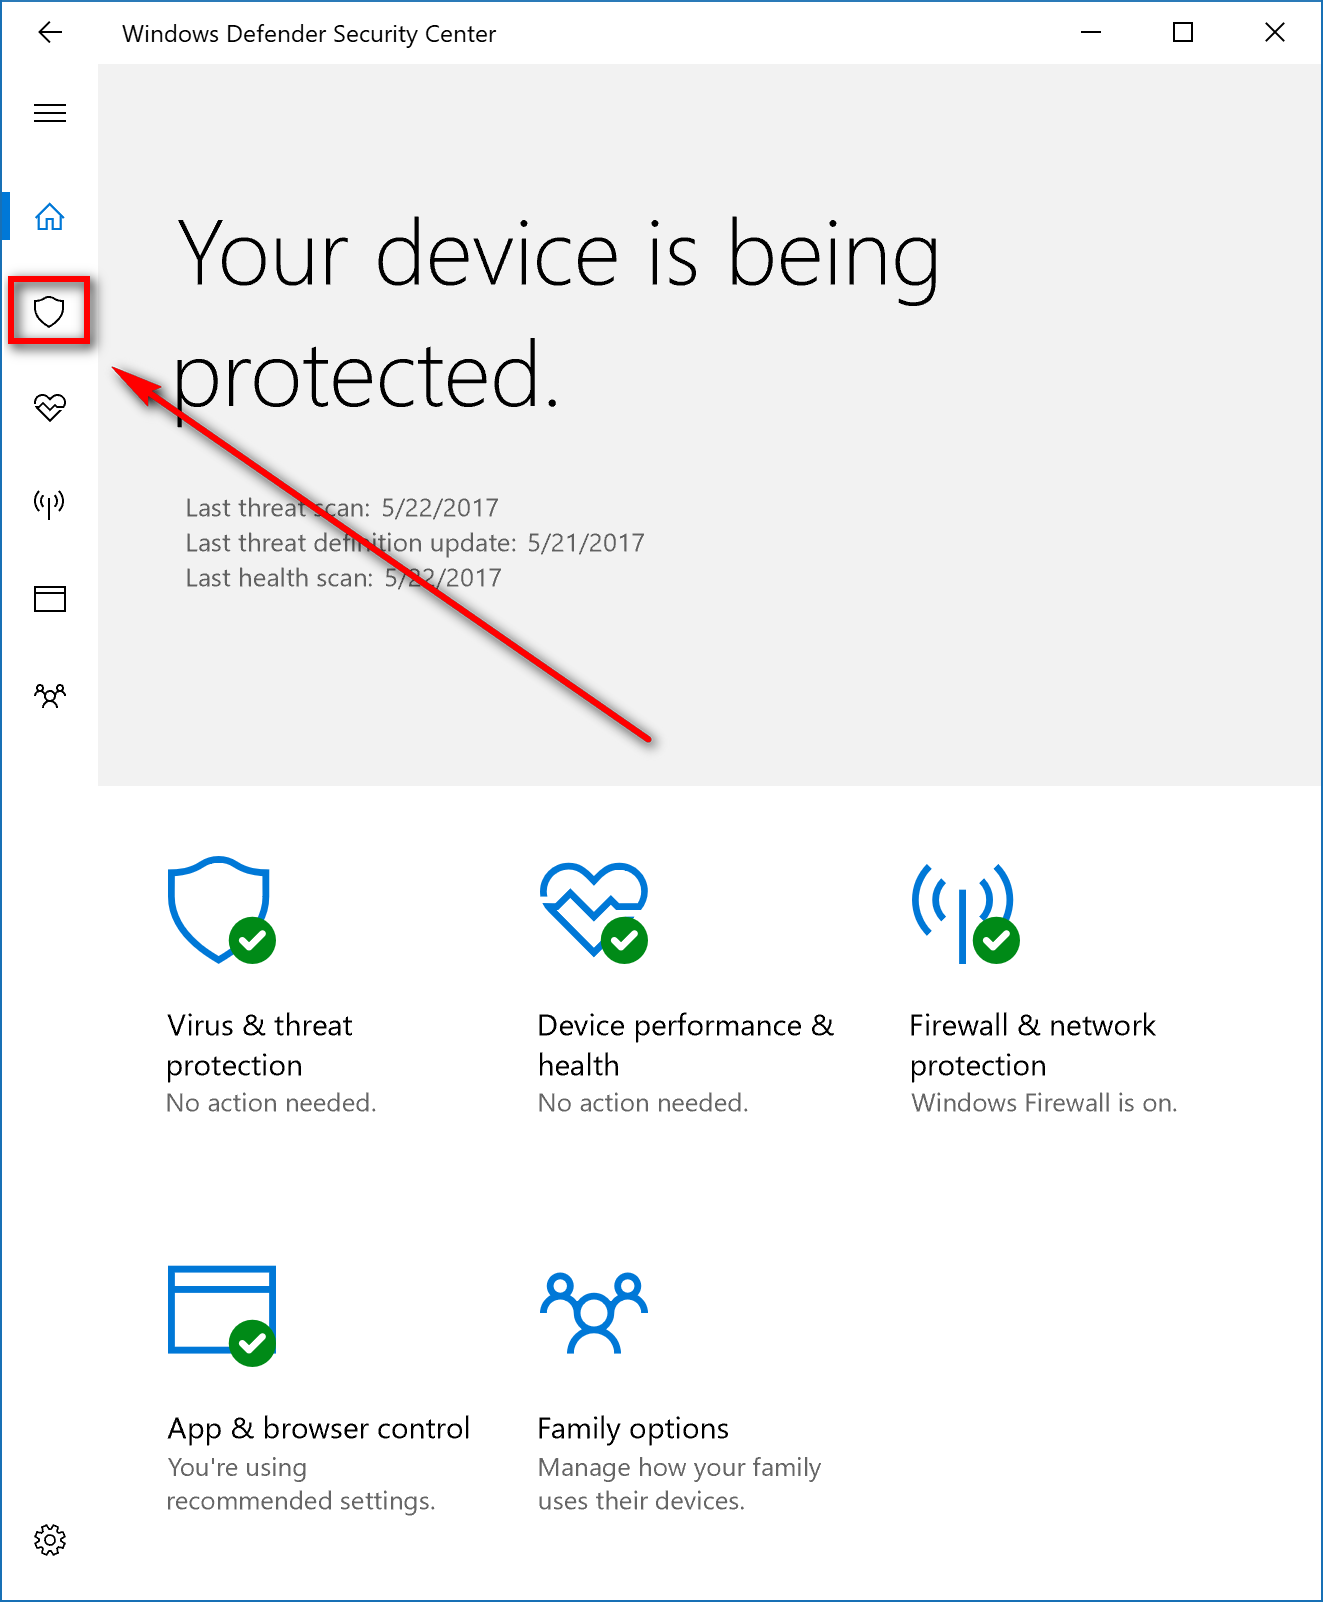
The first screen that you see let’s you know if Windows Defender is protecting your device or not (in other words, you are aware that it is on like it should be.) To get started with running scans, click on the shield icon in the left pane.
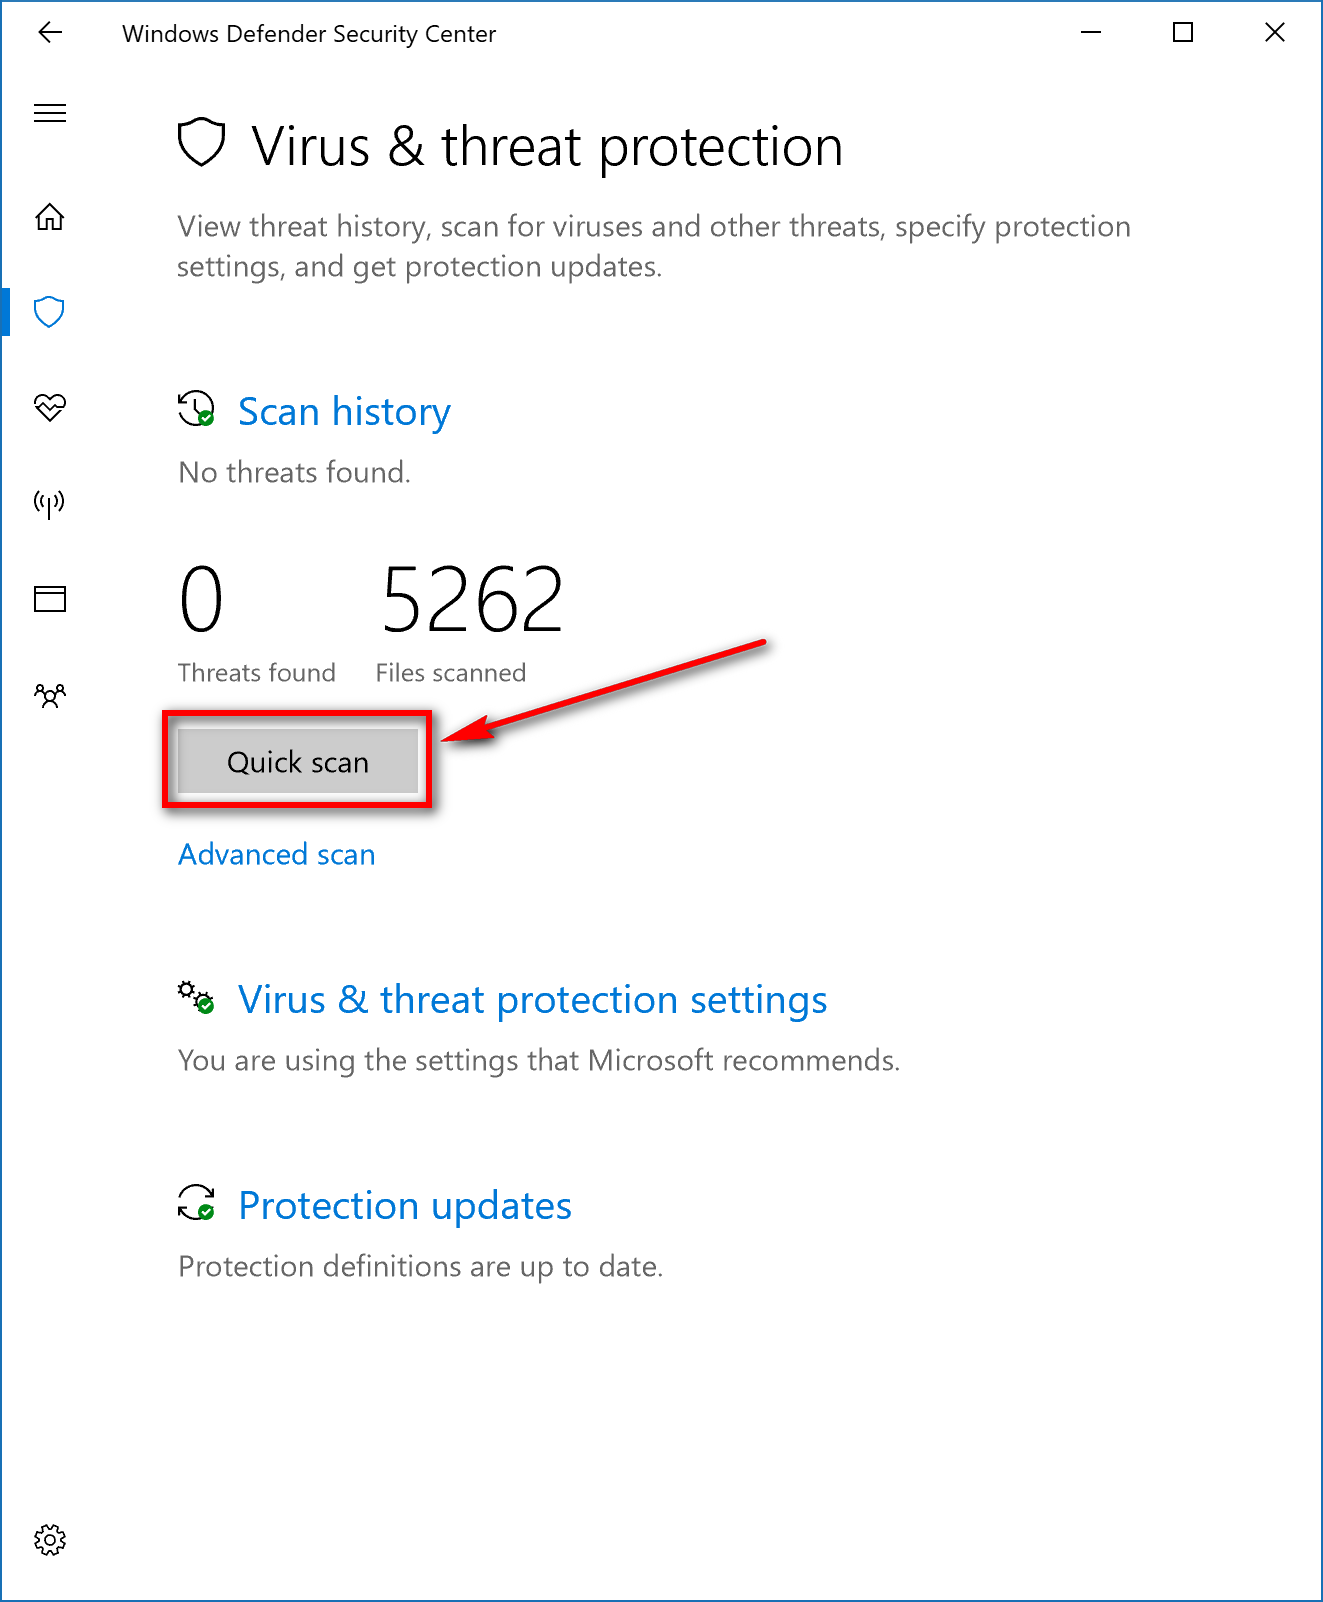
It shows you the scan history from the Virus and protection section. Beneath the results of the scans is a button for a Quick scan and a link available for an Advanced scan. Most people just choose to do the quick scan option when they manually run the Windows Defender anti-virus, but the advanced scan gives you quite a few additional options.
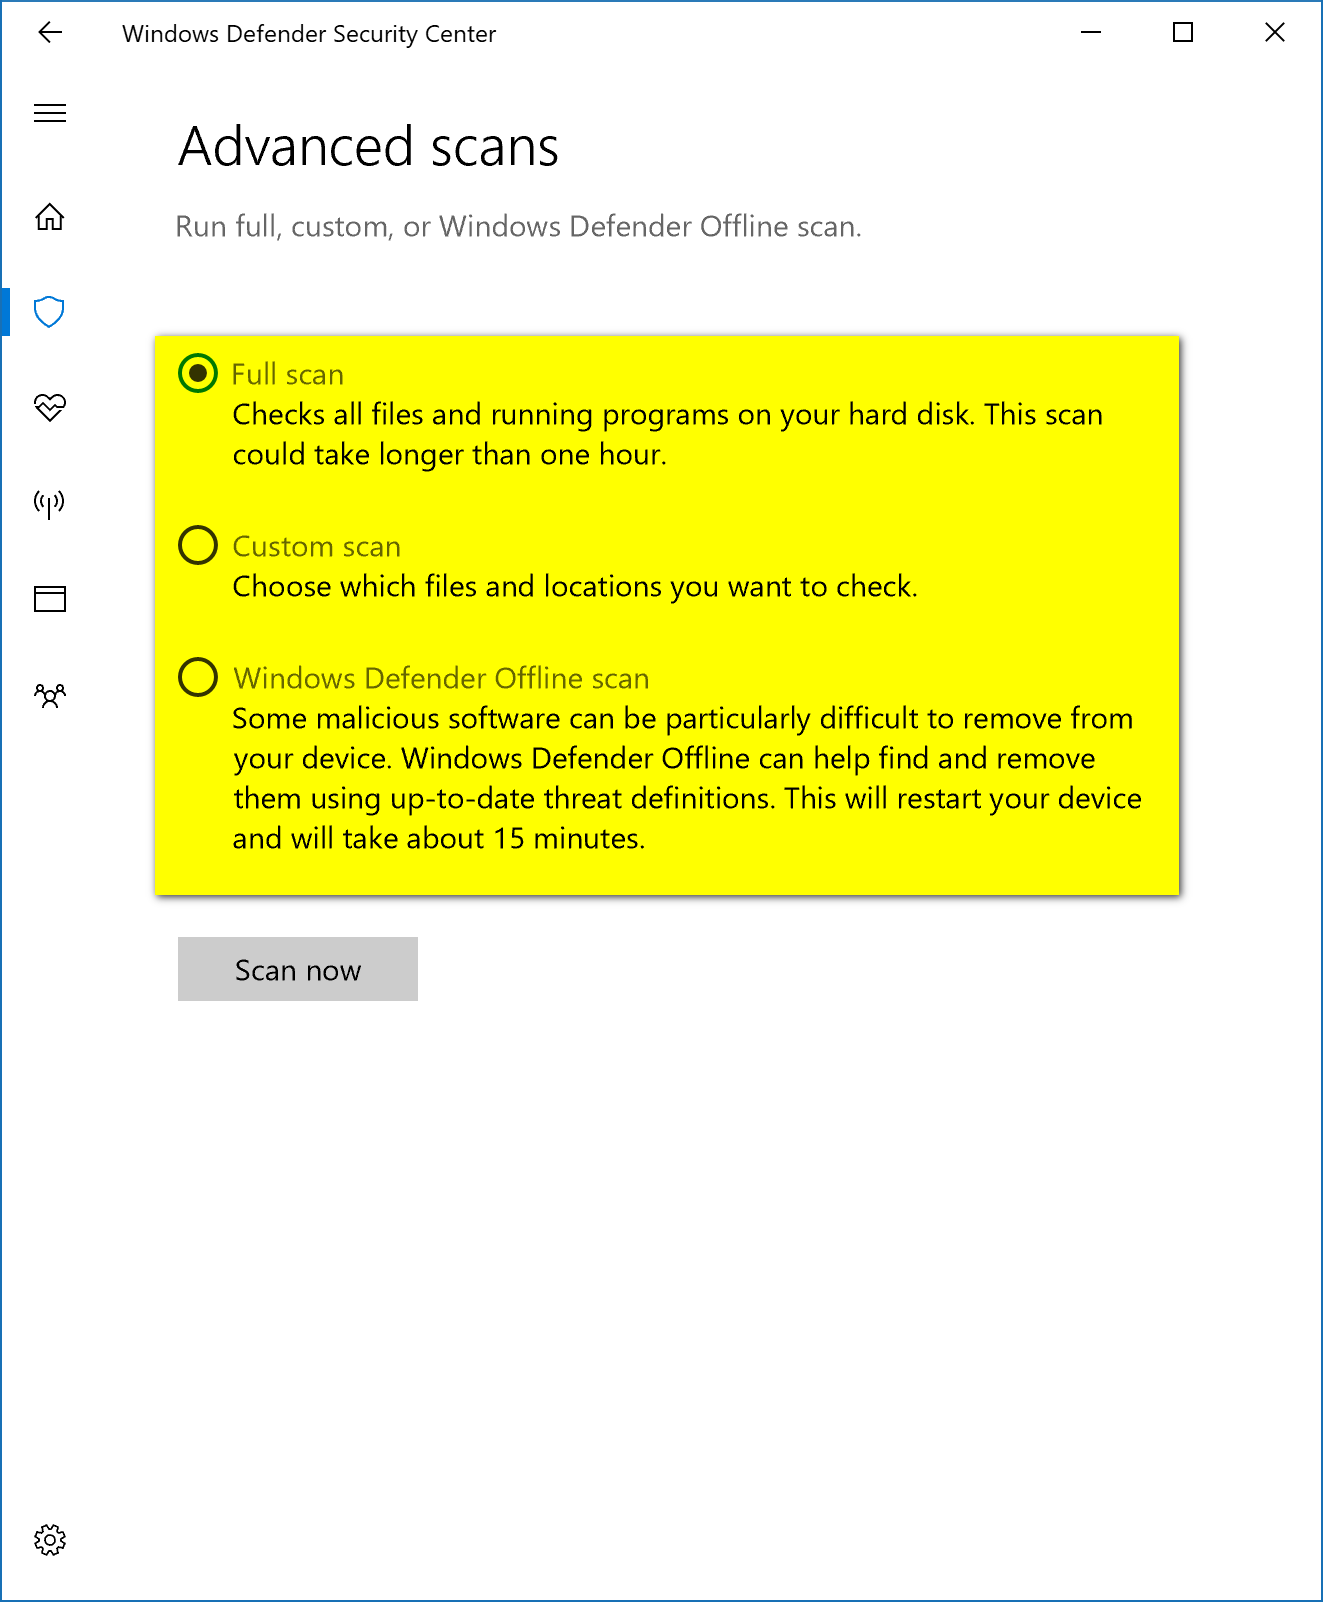
Click on the Advanced scan link if you have more interest in doing a full scan of the computer, or want to do a custom scan or even an offline scan of the computer.
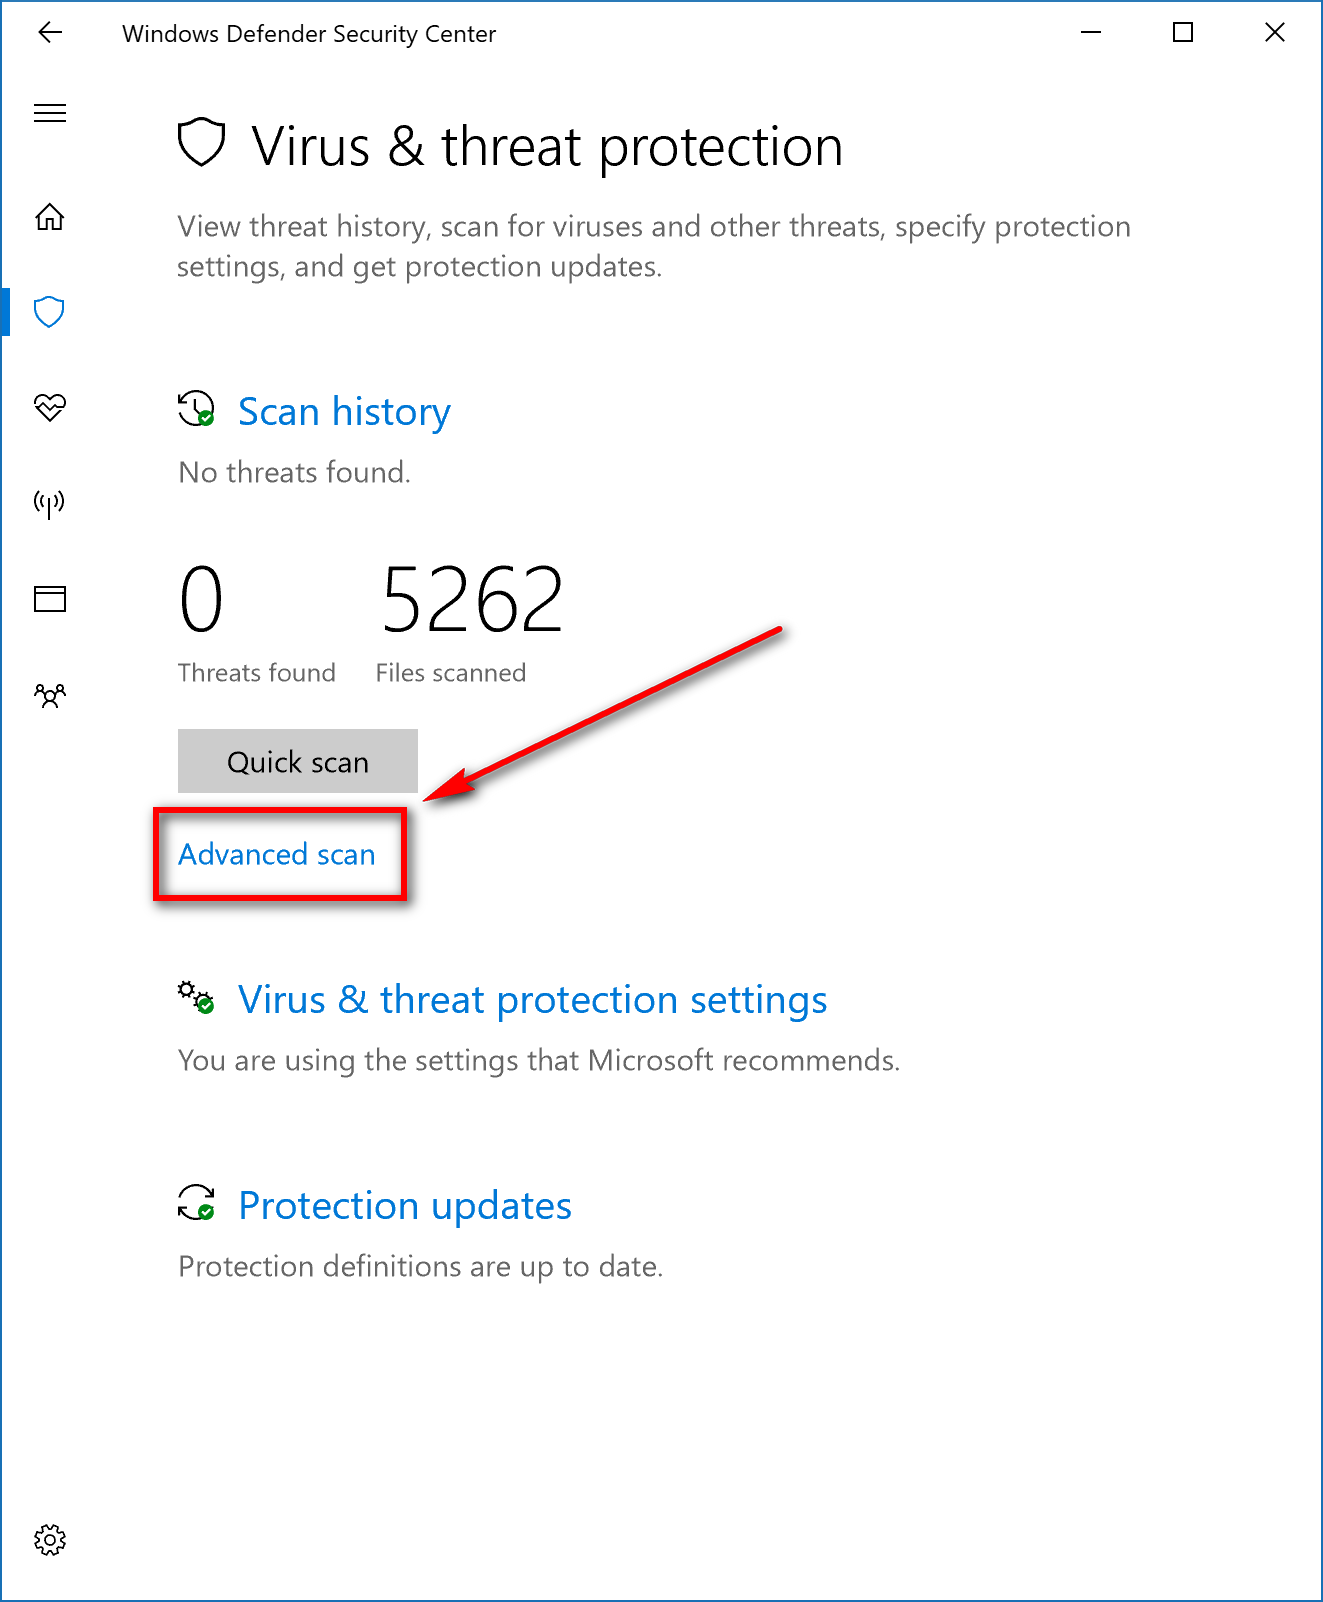
The full scan takes the longest time from start to finish, and it’s pleasant if you ever have to sit through one. Most people run the quick scan, and if the problem is not resolved, then resort to having to wait around for the full scan to complete.
A custom scan is useful if you know a particular place on the computer that is most likely to have the problem on it. For example, you might have downloaded something recently and know the malware that is causing your computer programs is in a particular area. The custom scan is also useful if you have a vague idea where it is and a relatively good idea of where it is not. If you can eliminate at least a few areas here, then it can save a significant amount of time in comparison to the full scan.
Lastly, everyone should get to know the offline scan option that Windows Defender has. Sadly, the offline option is not there, so it will automatically run the scan when you are sleeping. It’s more about having to do additional tasks that cannot be done when online, so to get to those places and remove the malware adequately, it needs to do the offline scan.
How to Scan with Windows Defender in Windows Defender Antivirus User Interface
Microsoft has done a pretty good job of tucking away the usual Windows Defender user interface that the program has now had since Windows 8, but it is still around for you to use. In order to find it, you need to press the Windows logo key + R keys on your keyboard to open up the Run dialog box. Next, type %ProgramFiles%\Windows Defender\MSASCui.exe and click on the OK button. The Windows Defender user interface pictured below will now be on the computer’s screen.
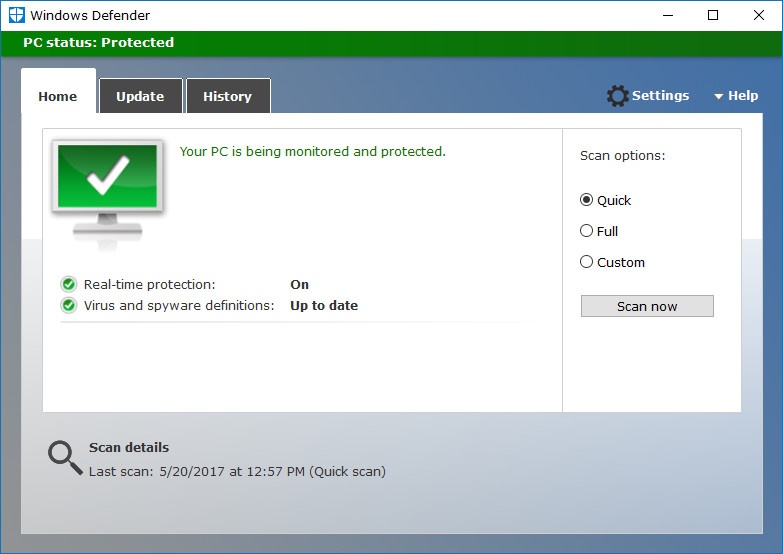
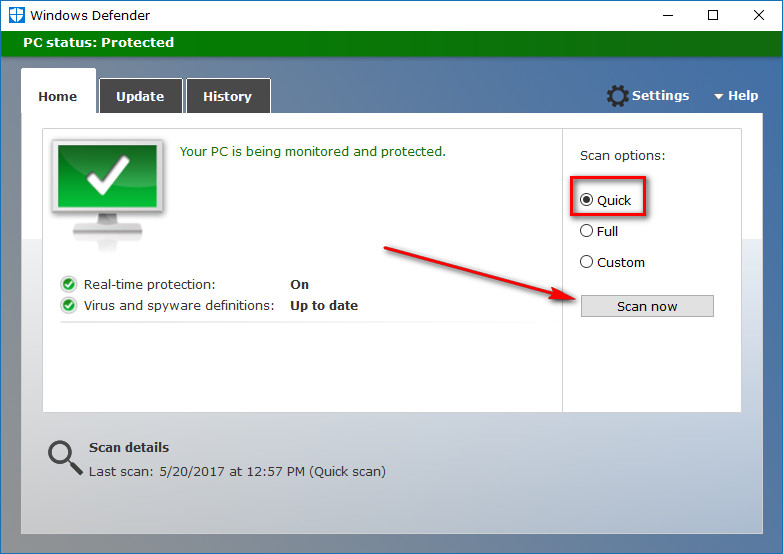
Here you have the same options to scan the computer. Look where it says the Scan options in the right side pane and then click on the Quick option whenever you want to do a quick scan of the computer. The scan begins as soon as you click on the Scan now button.
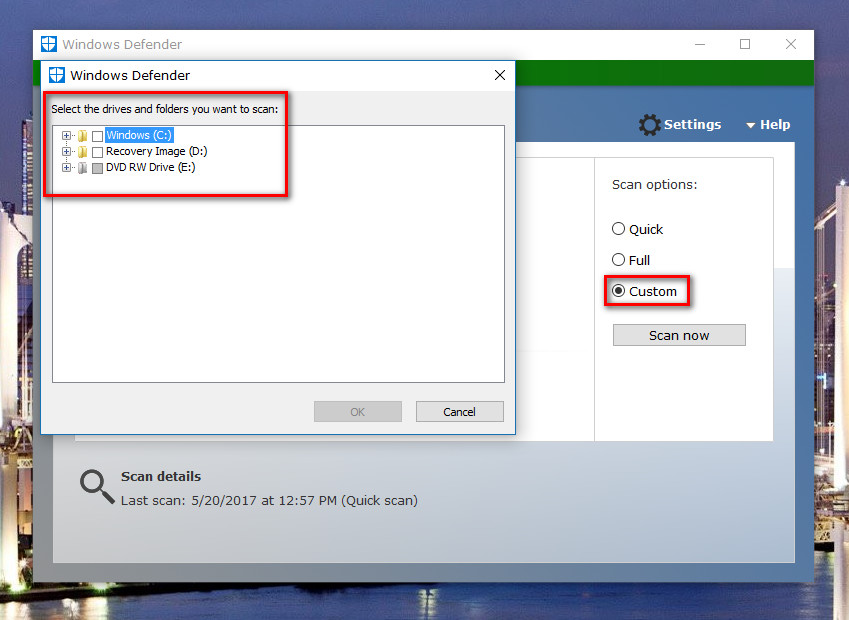
If you wanted to do the custom scan instead of the full scan or the quick scan, then you also have the option to do that here as well. After you select the custom option, it gives you the chance to choose between scanning the C:// drive, D:// drive or the E:// drive depending on your needs.
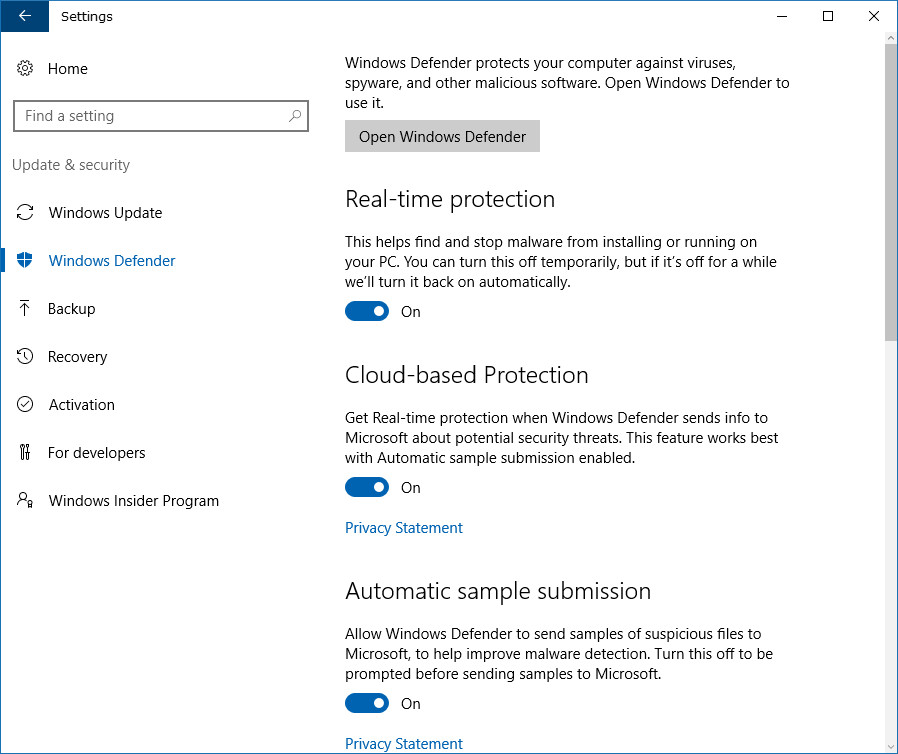
Microsoft has integrated the Windows Defender settings into the Settings app. You can navigate to that location by using the Start menu > Settings app > Update and security > Windows Defender. Additionally, it’s available from the Windows Defender user interface that you have open already by clicking on the Settings link in the top right corner.
If you want to have the Windows Defender program running in the background and doing automatic scans without you knowing anything, then you need to make sure you have the Real-time protection toggle switch turned on. It’s turned on by default, so if you haven’t changed anything from the Settings, you don’t need to worry. In an effort for Microsoft to get better at making PCs more secure by understanding malware as much as possible, they also have the Cloud-based protection, and automatic sample submission options turned on. Some people might not want Microsoft getting details about threats that are coming from their computers. If you are one of those people, then you can turn these off. There’s really no reason to turn these off; even if information is sent to Microsoft, it’s not going to reveal anything personal. Nonetheless, some people prefer privacy settings being set to their utmost maximum, so Microsoft has included the option to keep everyone happy.
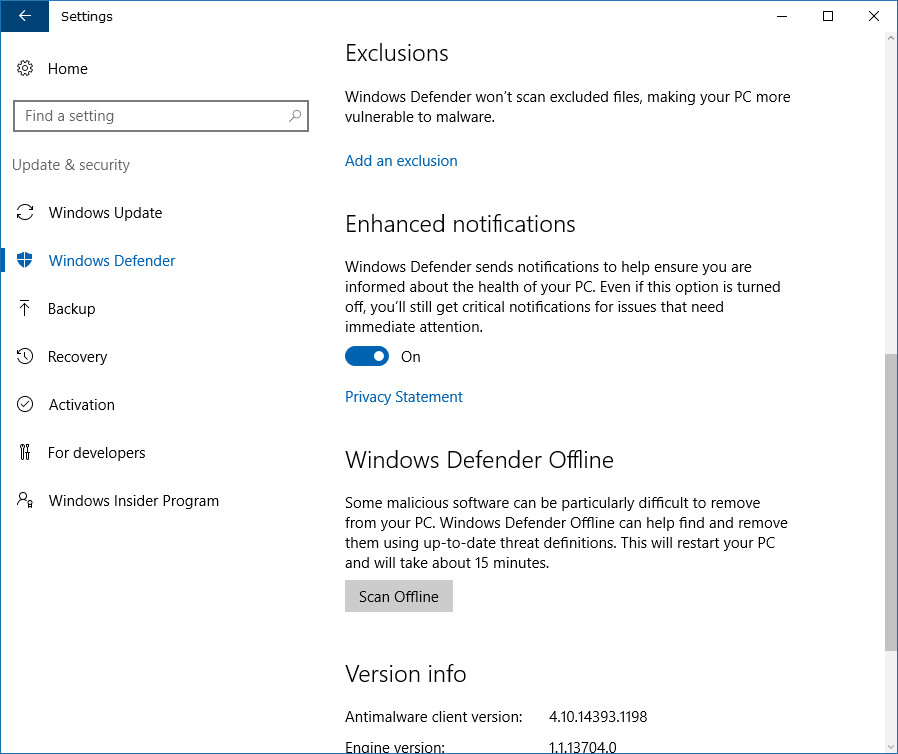
If you like the idea of a custom scan where Windows Defender only scans the areas of the computer that you want to be scanned, then you might be interested in using the Exclusions option from the Settings. Here you can set each scan to skip a particular area if you know it’s going to be a waste of time. Setting it from here will mean that each time the Windows Defend runs, it will automatically skip those places whereas if you run a custom scan, it is only skipping the areas of per your request for that one scan and will then scan the whole are the next scan unless you do the custom option again.
It’s not a must that you use Windows Defender, and many tech enthusiasts have their preference as to what works best for their PCs. If you’re interested in what I run on my computer, it is nothing but the Windows Defender set on its default settings. I’ve tried most free antivirus options over the years, and many of them were good. But none run scans as lightly as I find Windows Defender does. One potential cause for concern I have noticed, however, is that Windows Defender doesn’t pick up anywhere near as many potential threats as other antivirus software does. Whether that’s because the other programs are puffing up threats or Windows Defender isn’t as good at finding them is yet to be determined. What I am aware of, though, is that my browsing habits have hardly changed over the years and I’m yet to have an issue on my computer that Windows Defender couldn’t handle before it ever became a problem. No virus has ever created a problem for me yet with Windows 10’s Windows Defender running. If you do choose to go down the path of running something else, the Windows Defender will detect you are using another antivirus program and automatically disable itself from the computer. There is no way you can run Windows Defender and another antivirus program like Avast or AVG at the same time, although that would make things difficult for malware if it were possible.
Enable PUA (Potentially Unwanted Application) Protection for Windows Defender
If you need to prevent malware such as adware and browser hijackers, you should enable PUA protection for Windows Defender. While Windows Defender is great for general antivirus, it will not remove anywhere near as much malware as a third-party program such as Malwarebytes. The reason isn’t that Windows Defender isn’t as good but rather it chooses to allow what it considers to be a gray area of malware on computers.
Scan Your Files Online with the Google-owned VirusTotal
One of the tools that does allow you to check the results of multiple programs at once is VirusTotal. It doesn’t let the programs run on your computer simultaneously, but it does instead utilize the VirusTotal website for the scans and give you the results from most of the big-name reliable sources out there in existence. VirusTotal won’t run on your PC and protect it from threats, so it isn’t to be considered a replacement for Windows Defender, but it does allow you to scan individual files as you please and either before or after you download them onto your computer.
This article was last updated on May 1, 2019.
Related Tutorials