Last Updated on December 26, 2022 by Mat Diekhake
If you happen to find yourself with a big problem and Windows 10 won’t load, you want to create a recovery drive on another computer and then load it on the computer that has the trouble to get Windows 10 running again. Although that solution is great for being able to bypass a trip to the local computer tech shop, it isn’t technically anything to do with backing up data. If you aren’t backing up the data that is on your computer, then you are taking unnecessary risks to end up losing that data potentially. Computer technicians are pretty good at being able to solve problems and retain data at the same time, but you wouldn’t want to assume its possible, especially if your data is important to your life.
We are starting to see a lot more similarities between mobile operating systems and desktop operating systems. One that springs to mind is the option for resetting Windows 10 just like you could reset Android. The reset option in Windows 10 even lets you do a reset without deleting files if you prefer, so hopefully the problem you noticed with the OS is gone, and all of the same data is still there associated with your account. Mobile operating systems have been pretty handy with backing up data too. For example, when you use Android, Google is always automatically backing up your contacts, documents, emails, and calendars. Google’s Android Backup Service also backs up all data from the Google Chrome browser, Google Hangouts chat logs, applications and any other content that you’ve purchased, photos, smart lock passwords, and some other data from apps.
What Android, Windows, and all other common operating systems don’t do still, though, is offer an easy to use backup solution natively without the help from third-party apps or tools. Most people use the Helium application to backup with Android, and if they don’t mind having root access, then they’ll swap Helium for Titanium Backup. No solution comes close to using Titanium Backup due to the extra power that it has with root access. Although Windows does offer some solutions for backing up data, it is similar to Android in that no perfect solution is available natively.
Even though things aren’t great with backing up Windows using its native tools, there are plenty of options available that might be able to help you do what you need to do. We’ll go through everything that Microsoft offers for backing up data in Windows 10 and why you might want to use them.
How to Backup Windows 10 Using File History
Not many people know the name “File History” and assume that it has something to do with looking up the history of your files much like you can look up web browser history. That might be why there are rumors of Microsoft getting rid of this feature in the upcoming versions of Windows 10 — but for now, it remains the best way to backup your files on the computer.
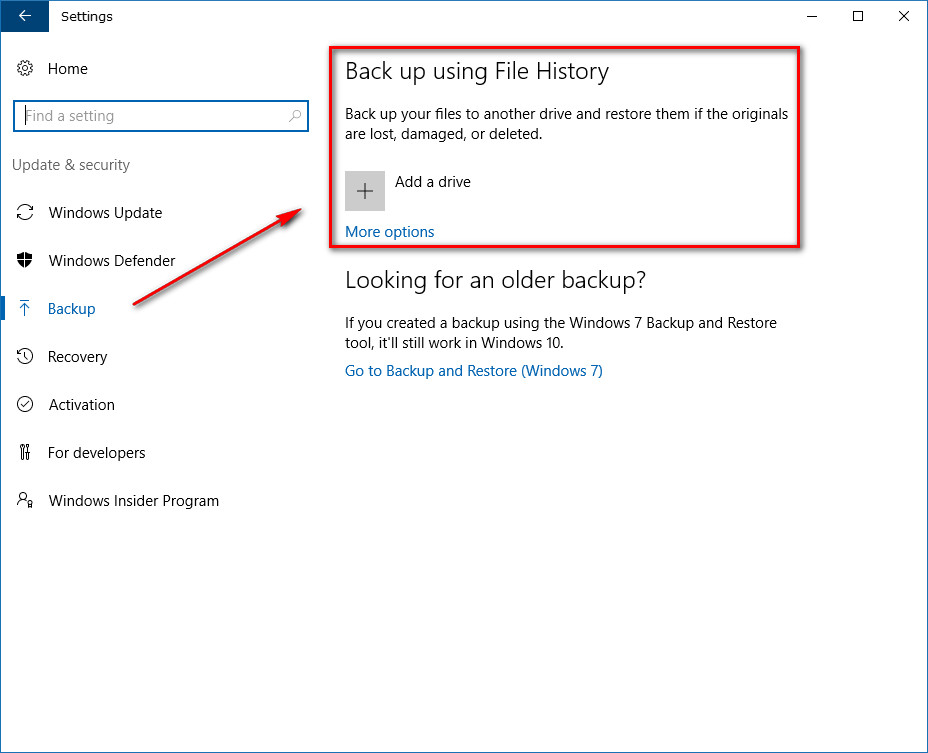
To use the File History, you need to head to the Start menu > Settings gear icon > Update and security > Backup and then look where it says “Back up using File History” in the right pane. You need to click on the “Add a drive” button to get it to the point where it is willing to back something up.
How to Backup Windows 10 Using Backup and Restore (Windows 7)
Most people enjoyed Windows 7 a lot. So much so that it is still the number one version of Windows available today, with more users than anything else, including Windows 10 still. One of the features that people took a liking to was the backup and restore feature. Microsoft has made the same backup and restore feature from Windows 7 available in Windows 10, so users don’t have to learn something entirely new this time.
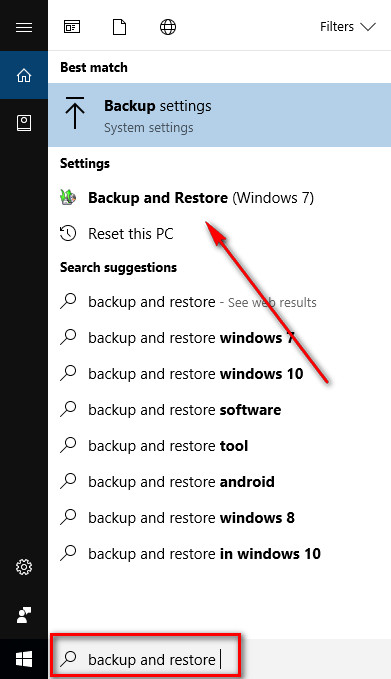
To find the tool, type “Backup and Restore (Windows 7)” into the search field in the taskbar and then click on the “Backup and Restore (Windows 7) option that becomes available either under the Best match section of beneath it in the Settings. In most versions of Windows 10, it will technically direct you through to the Control Panel now to set it up even though it says “Settings.” That’s because Windows now considers the new Settings app a direct replacement for the Control Panel but not all of the Control Panel features are available from the Settings app yet — this being one of them.
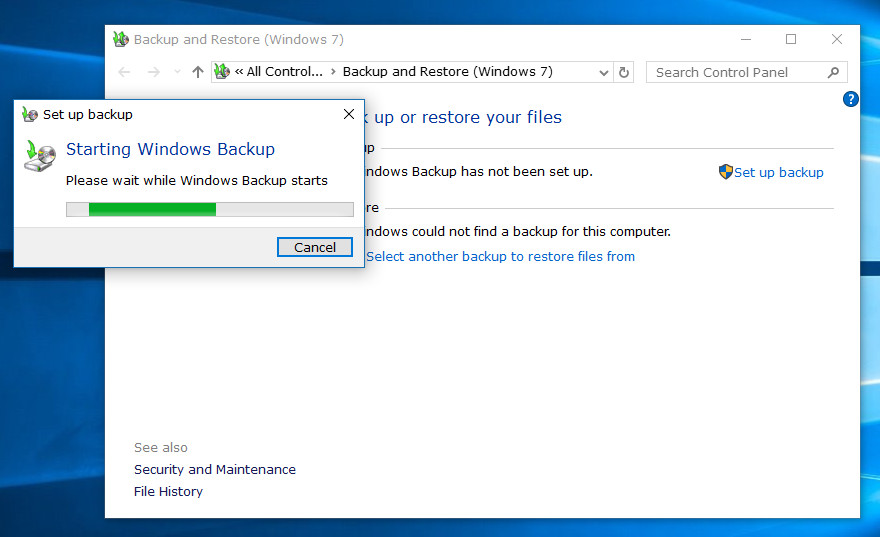
It shows up under the Settings for some people because it might not have been set up yet on that particular computer. To get it set up on yours so you can begin to use it, click on the “Set up backup” link available from the Control Panel page.
 Microsoft then starts the Windows backup for your computer.
How to Backup Windows 10 Using OneDrive
Out of all the choices on the list today for backing up, it is OneDrive that is the most intriguing. One of the reasons for that is because it’s still a Microsoft-owned solution, but the files are not stored on the computer or any kind of a hard drive. Instead, they are stored on a server that Microsoft owns somewhere else in the world.
If you are choosing to backup with a third-party backup solution, why not use something that you can trust the most? OneDrive is owned and operated by Microsoft, so you know they will look after your data. I’m predicting these third-party solutions to dominate for Windows customers in the future and for Windows to stop trying to offer Windows solutions. We are already seeing the rumors about File History being dropped from Windows, and my guess would be that it isn’t going to be replaced with anything better, but rather Windows are leaving the doors open for other companies to look after people’s data.
There are lots of great companies out there offering to store your data on their servers, and millions of businesses are choosing to go in that direction because having your data and backups stored offsite is the best way to secure your data just in case something happens to your house, i.e., a house fire or accident. But before you go looking around for the big names that want to charge you money to use their servers to store data, you should try to see if OneDrive can manage your valuable data for cheaper.
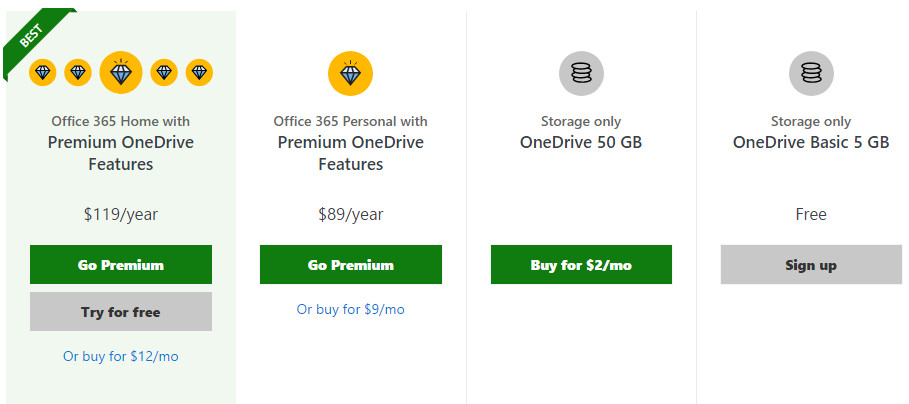
The downside with OneDrive is that if you need to use over 50 GB’s worth of storage space, the prices get jacked up because they include Windows Office 365. It’s actually a very good deal if your computer doesn’t yet have Microsoft office and you want it, but if you do already have it, then you will be paying considerably more a month for the storage than you would from other third-party companies. More ideal for backing up would be a price that is competitive with the existing competition from other cloud storage services. From my research, that’s around $60-$70 per year. Hopefully Microsoft does that in the future with OneDrive.
How to Backup Windows 10 Using System Restore
The Windows 10 operating system still offers a way for people to recover old data if something goes wrong. You can do that by using the System Restore feature. It’s the same System Restore feature that has been around with Windows for a long time, and it’s a great feature to have. However, it doesn’t work well for all solutions. One example of when it is of little use is if you only have the data that you need right now and you’ve only just started having the problem right now also. Rolling back the clock can get the computer working, but it doesn’t keep the data from your computer today.
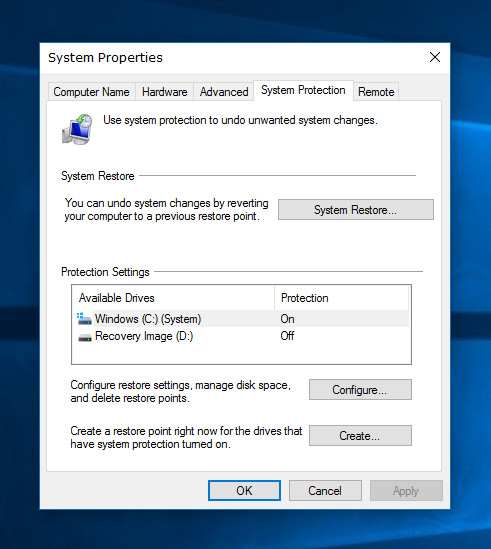
To start using the System Restore feature, you need to type “System Restore” into the search field in the taskbar and then click on the “Create a restore point” option that comes up under the Best match section. It will open up the System Properties dialog box where you can then click on the “System Restore” button.
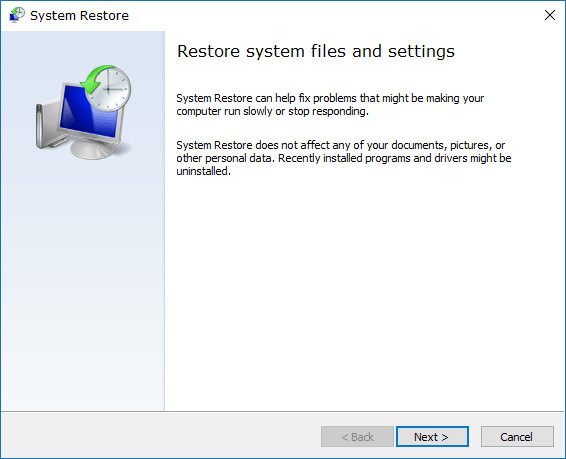
The rest is easy: just follow the step-by-step instructions to creating your restore point from the setup wizard. To get you started on your way, you need to read what it says on the screen and then click on the “Next” button at the bottom of the window.
How to Backup Windows 10 Using Advanced Startup Options
The Advanced startup options menu is available to help solve problems on your computer also. You don’t always see the advanced startup menu when your computer starts up, but if you go to the Settings and choose to restart the computer from the “Advanced startup” section, it will then reboot to this Advanced startup menu. Much like the system restore feature above, there is no option to backup from the advanced startup menu, but there is a way you can restore from a restore point instead. There are also many other buttons to help troubleshoot problems you might be having on the computer.
To find the Advanced startup options, navigate to the Start menu > Settings gear icon > Update and security > Recovery > Advanced Startup and then click on the “Restart now” button to get Windows to boot to the menu that you need.
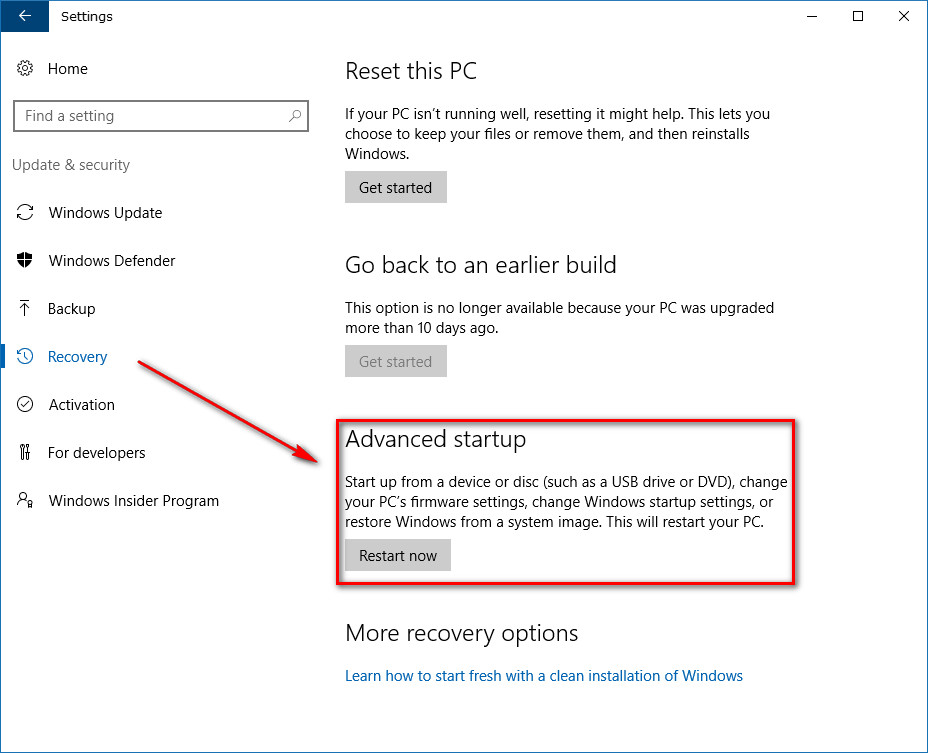
When the computer reboots, you’ll get to a screen that looks something like the one below. The option that you want from there is the “System Restore” button. Follow it to restore your computer. Alternatively, if you know a particular system image that you want restore instead, you can choose the “System Image Recovery” option from the menu.

How to Backup Windows 10 Using Recovery Drive Creator
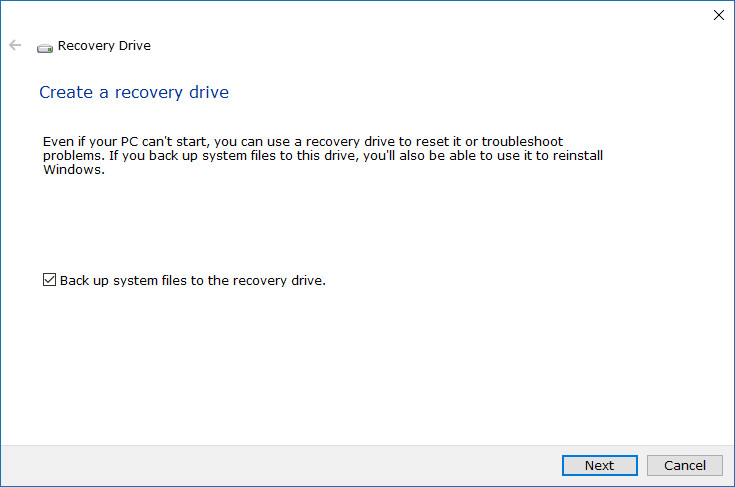
It’s also possible to create a recovery drive. You should consider the recovery drive as a get out of jail card but not anything to do with backing up. The Recovery Drive feature lets users boot to the Advanced startup menu where they can then do a System Restore. The beauty of the Recovery Drive is that you can have it on a USB stick and then just pull it out of the draw whenever you get a computer not letting you boot to the Advanced startup menu. Remember that you can only boot to the Advanced startup menu by the Settings app; there is no way to bring it up before the Windows 10 operating system boots. Since people can still find themselves with problems that don’t allow them to navigate around Windows at times, the Recovery Drive is imperative and can save you a lot of time and money.
How to Backup Windows 10 Using Reset this PC
Probably the most common feature used for recovering Windows 10, the “Reset this PC” option available from the Settings app can get most computers back to a working state if they had niggling issues or it can completely apply a factory reset just like you could do with a mobile phone. If you can’t seem to fix your problem, then a factory reset is always the way to go before you take it into a technician to get them to fix it for a significant amount of money. A word of warning about factory resets though: they always remove all of the data that was on the computer.
The “Reset this PC” option gives users a chance to remove all data or keep all files. When you choose the option to keep all files, it is only doing a refresh and not a complete reset. Try that option first, but if it doesn’t work, it still might be of use to try the full reset option.
To find the “Reset this PC” option, head to the Start menu > Settings gear icon > Update and security > Recovery > Reset This PC and then click on the “Get started” button.
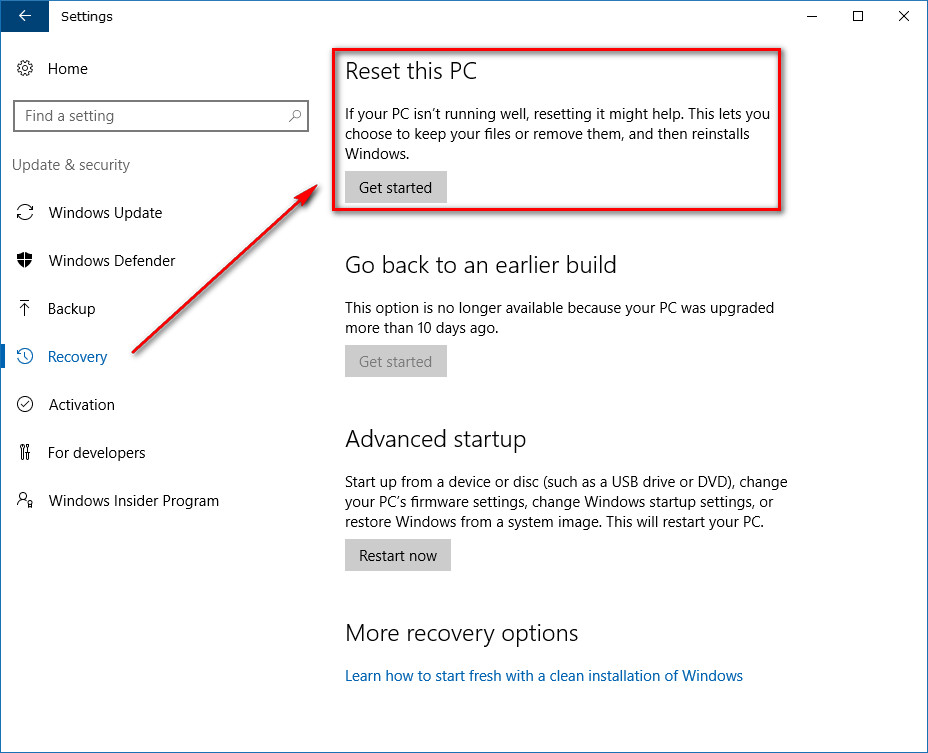
From there you get the “Choose an option” screen where you can make a choice between keeping the data or removing the data. Naturally, people want to keep the data here but, as we said before, doing so does not apply the full reset but rather just a refresh. Hopefully, that does manage to fix your problem, but if it doesn’t then, you should try the full reset option instead of by clicking or tapping on the “Remove everything” button.

Most people aren’t overjoyed with what Windows offers in a backup solution to date, but they are there if you look for them. While backing up might not be something that Windows operating systems are good at the offering, there are some great recovery tools out there these days like the option to reset the PC. Using them should help eliminate having to find a computer technician to solve your problems as much heading into the future.
You might also be interested in:
- How to Set Up Windows Backup in Windows 10
- How to Backup and Restore System Images in Windows 10
- How to Change Windows Backup Settings in Window 10
- How to Backup and Restore Microsoft Edge Favorites in Windows 10
- How to Backup and Export Passwords in Microsoft Edge Browser in Windows 10
- How to Change User Account Control (UAC) Settings in Windows 10
- How to Reset Windows 10 from Troubleshoot Menu
- How to Create Recovery Drive in Windows 10
- How to Get Classic Windows 7 Games in Windows 10
You can subscribe to our RSS, follow us on Twitter or like our Facebook page to keep on consuming more tech.