Last Updated on December 26, 2022 by Mat Diekhake
When you are using the Windows operating system, you will notice something called the UAC (User Account Control) take over the screen every so often. It gives you two buttons when it does. If you want to continue with what you are doing, then you’ll need to click on the Yes button to confirm the action.
The idea behind UAC is that it helps prevent malware from getting in control of the computer because it can’t get past the UAC screen, similar to how website passwords make you fill in a box to prove that you are human and not a robot.
When UAC is running, all applications and programs run in an environment that is not with administrative permissions on the system. Thus, the UAC can always block the installation of any app or program that is not authorized. By being able to do that, it helps keep your system in check and prevents any inadvertent changes to the system settings.
With UAC, a standard user account can be used to log in to a computer. The processes that a standard user token launches can perform any task that is granted to a standard user account. If you open up File Explorer from the Start menu, for example, the File Explorer is automatically inheriting the standard user account level permissions. Also, if you begin using an application from within File Explorer, it too is given a set of standard user permissions. It isn’t always that way with all applications though. Some applications require more permissions before they can run—that’s especially true for apps that were developed without much security in mind.
If you do find more applications out there that need to run with more than the standard user account permissions, the UAC has the power to restore more user groups to its token. Doing so would mean that the user then has full control over the app that are making system level changes on the computer.
The following tutorial demonstrates how to change the User Account Control (UAC) settings when you’re using a version of the Windows 10 operating system.
How to Change User Account Control (UAC) Settings in Windows 10
Here is how you can change the User Account Control settings from the User Accounts section of the Control Panel application in Windows 10:
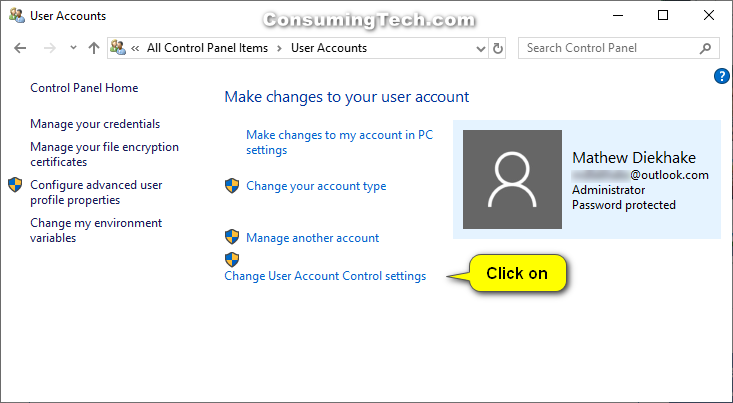
1. Open the Control Panel by typing Control Panel into the search field in the taskbar and then click on the View by drop-down menu and change it to show the Small icons view so you can see all of the links from the main page. When done, click on the User account link from the Control Panel page.
2. You’ll then see the same screenshot as featured below. Click on the Change User Account Control settings link at the bottom of the page.
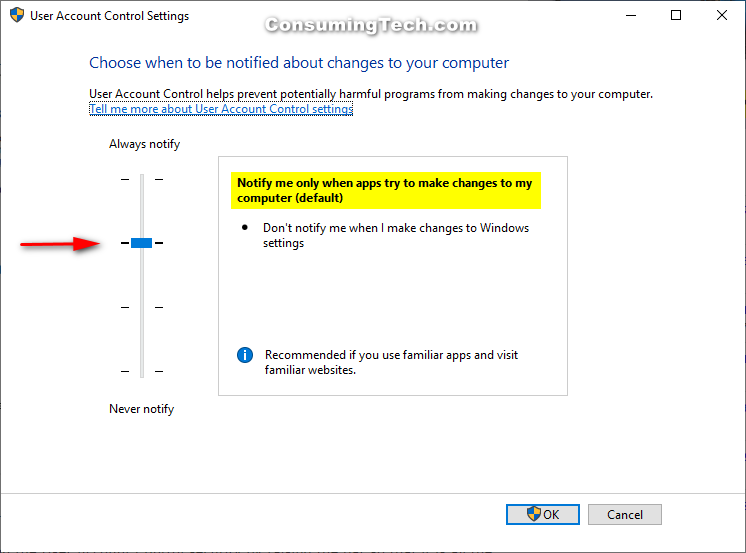
3. By default, Windows 10 is set to notify you when apps try to make changes to the computer. That’s the setting that is three-quarters up the scale.
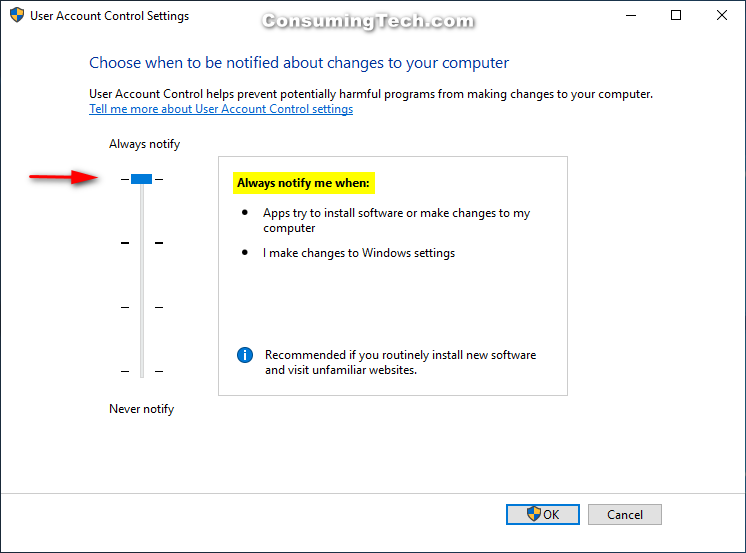
4. You can tighten the User Account Control security by raising the bar so that it is all the way up to the top. That setting means that you are notified when apps try to install software or make changes.
5. Taking it down a notch from the default setting means you will be notified only when apps try to make changes to your computer.

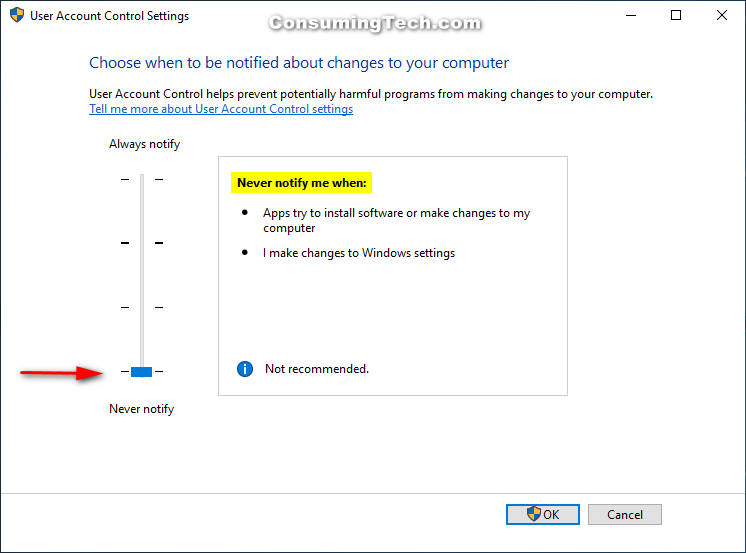
6. The setting at the very bottom means that you will never receive any notifications by User Account Control when apps try to install software or make changes to the system. You’ll see that this option also comes with a blue exclamation mark with the words “Not recommended” in the window because this setting leaves your computer very vulnerable and shouldn’t be used unless you know what you are doing.
The User Account Control might appear like an annoying pop-up that you could do without on the screen, but it is important in keeping your operating system malware-free. And starting with Windows 10 Insider Preview build 14328, there is a new window that opens and asks for you to confirm your credentials when signing up, along with a new UAC design also.
Related Tutorials