Last Updated on December 26, 2022 by Mat Diekhake
Windows 8 was a bit too drastic a change for some to get used to, and for others, it lacked certain features to make it a worthwhile operating system. Professionals didn’t appreciate the vast changes that were made when they had to relearn how to do tasks, and Windows 7 users didn’t enjoy not being able to restore backups.
The Windows Backup feature that comes with Windows 10, still named “Backup and Restore (Windows 7)” from the Settings application and Control Panel, does allow for people who are upgrading from Windows 7 to restore those backups now in Windows 10, which is great for anyone choosing to upgrade from what still is the second most used version of Windows to date.
There are plenty of third-party tools out there offering you an “easy way to backup Windows 10” but seldom are they necessary. They are just programs made by people who have nothing to do with Microsoft and are wanting to make a dollar. Often confusingly, it isn’t uncommon to find links from these third-party programs available when you are reading other websites reviews on Windows Backup resources, but those are usually affiliate links and not links that the writers are recommending you necessarily click. Perhaps one day we’ll also turn into a nuisance site that accepts those types of links when people have an interest displaying ads in our posts, but for now, you have nothing but our honest opinions.
In truth, there are many ways you could backup your files. When you see an affiliate link for a third-party tool, often this is going to create a backup over the internet which is a different thing altogether than if you were to use something like Backup and restore from the Windows 10 operating system. Backing up over the internet with tools such as Carbonite, Backblaze, MozyHome, so forth, will keep your files off-site and on someone else’s servers. For some businesses this is thoroughly recommended because it means you don’t have to worry about someone stealing your possessions or them getting burnt down in a fire—you have a professional on the other end with your files stored far away from wherever you currently are. The downside with these backups over the internet is that they cost money for the most part and not only that but they aren’t cheap. You might be looking at upward of $50 for a year of someone else holding on to your files for you, a lot of money for just people who want their daily data backed up just so there is a second copy somewhere.
Backups over the internet with third-party tools isn’t much different to just backing up to the cloud—that too will likely cost you a bit of money if you were to require a decent amount of space. You might already be familiar with cloud services such as Google Drive or OneDrive. These big players in the industry offer free space, but it’s only for a very limited amount of data—perfect if you just have a few important documents, but nowhere near enough if you wanted to take a complete backup of the operating system or anything like that. You’ll find that the cost difference between cloud storage backups with OneDrive or Google Drive won’t turn out to be much different than if you were to use other tools like Carbonite or Backblaze.
That’s why you might prefer skipping tools such as those and just sticking with what Windows 10 has on offer directly from the operating system itself. When you use Backup and Restore (Windows 7) from the Settings app or the Control Panel, you’ll need to have an external hard drive handy. You’ll then be backing up what’s on your computer to that external drive. That way you don’t run out of room on your hard drive, and you have a copy of the data not sitting on the same hard drive, which is often useless if something were to happen to the computer and you wanted to retrieve it.
How to Set Up Windows Backup in Settings App
You can change the Windows Backup settings by using the Settings application in Windows 10. Just click on the Start > Settings gear icon in the Start menu’s left pane and then click on the “Update and Security” link from the Windows Settings window. Next, click on the “Backup” link from the left pane and then you’ll see all the options for backing up in the right side pane.
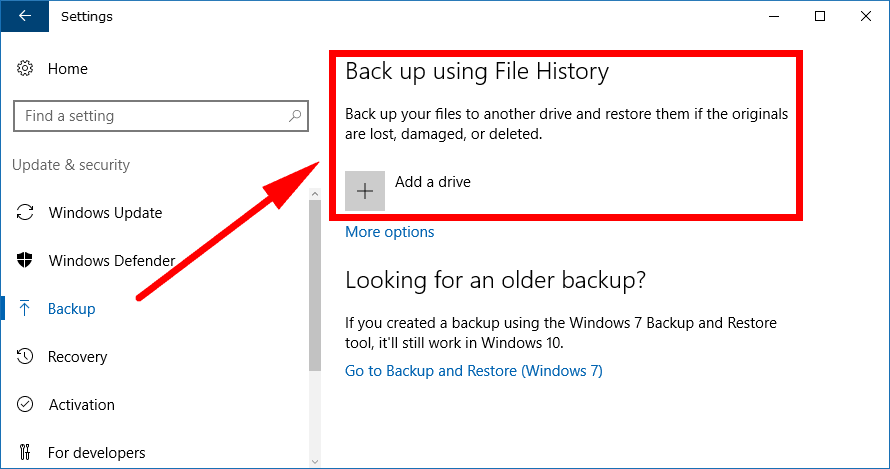
The top option is the “Backup using File History” heading with the option to add a drive for that. File History is the number one way to backup your data and has been there since Windows 8. There’s been some talk of File History disappearing from future versions of Windows, but for now, it’s still the option you want to use thanks to its feature-rich backing up capabilities. File History is more than just a tool for restoring older versions of Windows like System Restore. It gives you the same features you would expect from a dedicated third-party backup tool.
File History is already enabled and ready to go. All you need to do is click on where it says “Add a drive” and then add the drive that you want to use for the backup of your data. You’ll need to connect an external hard drive here because they are typically the only things that carry enough free space. As long as the external drive is currently connected to the computer with the USB cable, it’ll show up after you’ve clicked on the button to add the drive. Then all you need to do is select it and then follow the rest of the on-screen prompts to get the backup completed.
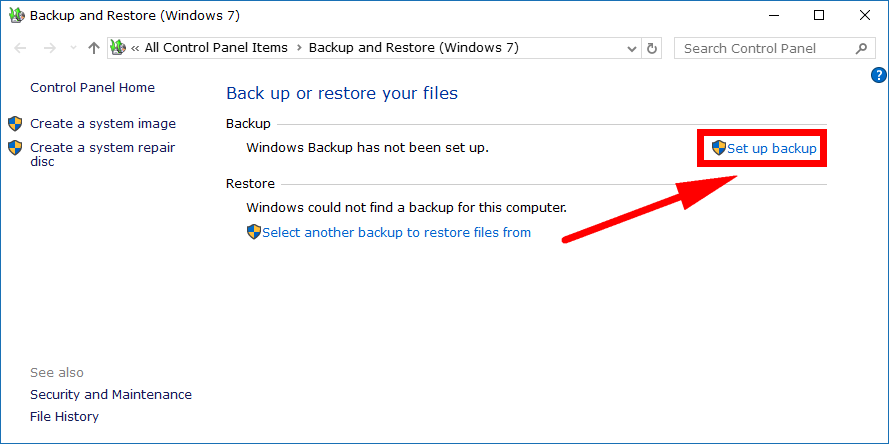
For everyone else who wants to take the Windows Backup, you need to look further down the same right side pane of the Backup section and then click on the “Go to Backup and Restore (Windows 7)” instead.

It then directs you through to the Control Panel area where you need to click on the “Set up backup” link in the right side of the window. (You could also navigate to this area from the Control Panel if you wanted, and we’ll show you how to do that later in the guide for everyone else who prefers the Control Panel. You can scroll down there now if you like and just look for the “Control Panel” heading).
It then gives you the chance to select the backup destination. You want to connect your external hard drive to the computer first, and then it’ll show up in this area for you to select.
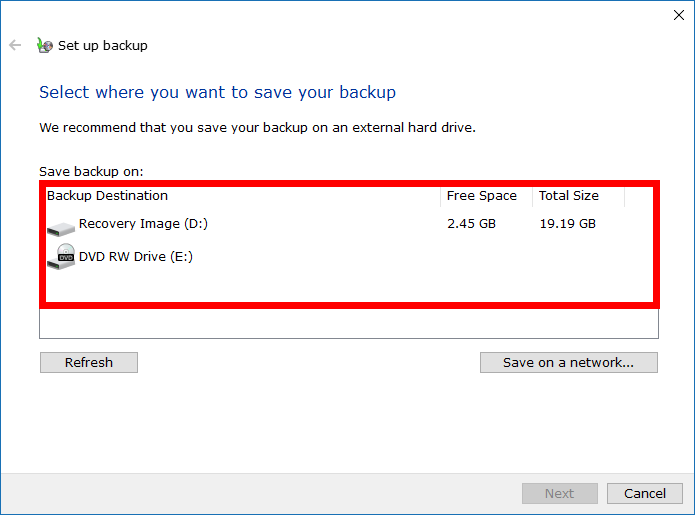
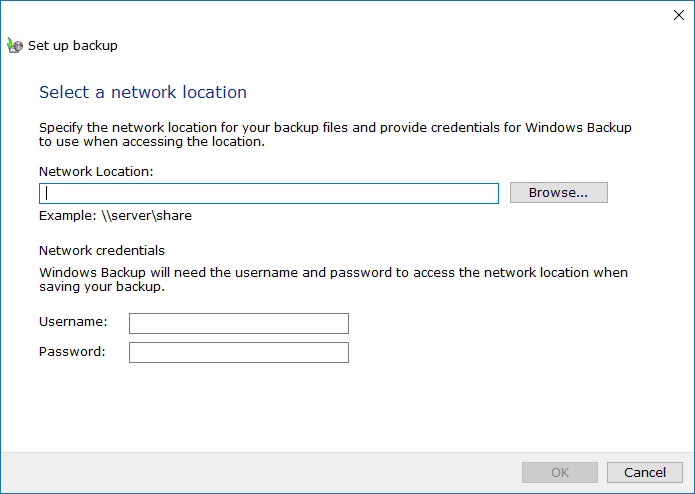
You can also choose to save the backup to a network instead of the external hard drive if you prefer. To do that, you’ll need to click on the “Save on a network” button and then give the network location in the available field.
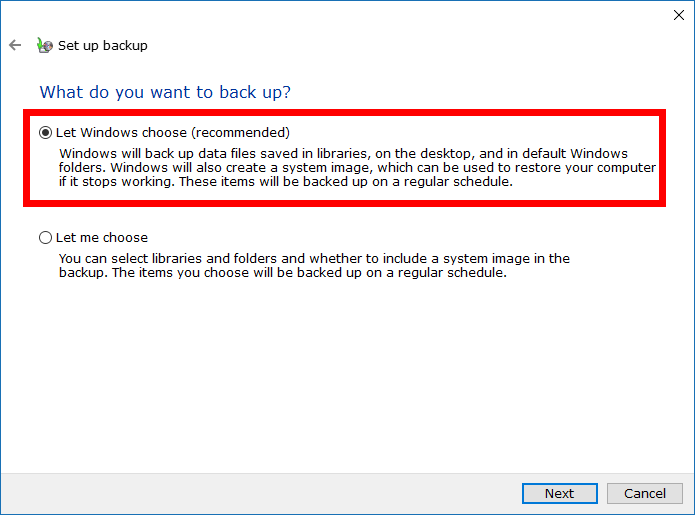
The next screen gives you the option of choosing to let Windows decide what needs backing up for you to tell Windows what you want it to back up. Click on the “Let Windows choose” if you want to let Windows decide what gets backed up. It is also worth noting that Windows recommends this method rather than you decide. We would agree with that unless you are an expert and know specifically what you want to backup.
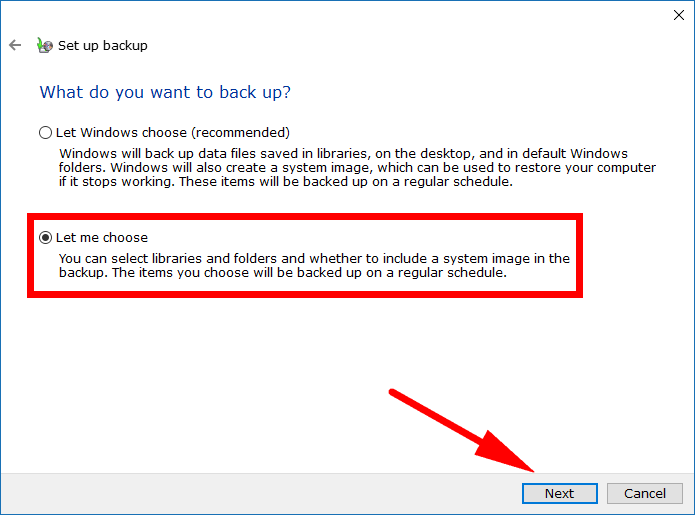
Being able to choose some locations to backup on the drive helps save space, but you’ll need to know what you’re doing if you choose this method. If you do want to be the one only selected certain places to be backed up, then just click on the “Let me choose” option instead, and it’ll let you select the files and folders manually.
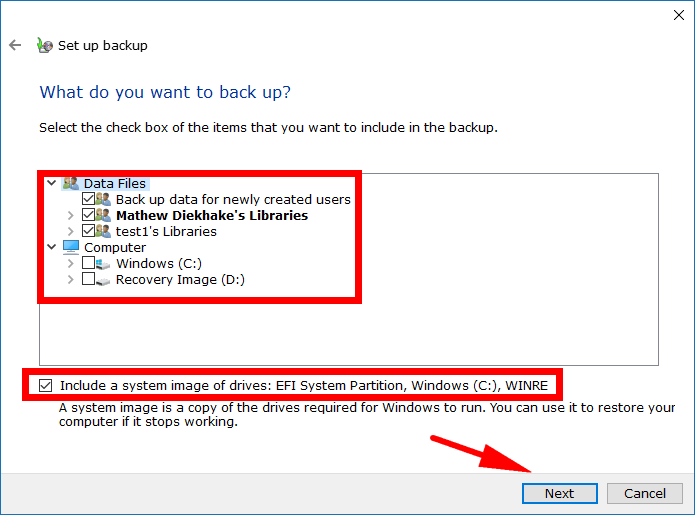
When you get to the screen that asks you what you want to backup, you can check the boxes that you need. Also look under the “Data files,” and “Computer” section for a little checkbox tucked away that says “Include a system image of drives” if you want to backup the system image as well.
Note: Many geeks prefer using third-party tools for backing up system images. Macrium Reflect is a popular choice out there today. There’s also a free version that offers enough features for you to do basic backups of the system images without you needing to pay anything.
How to Set Up Windows Backup in Control Panel
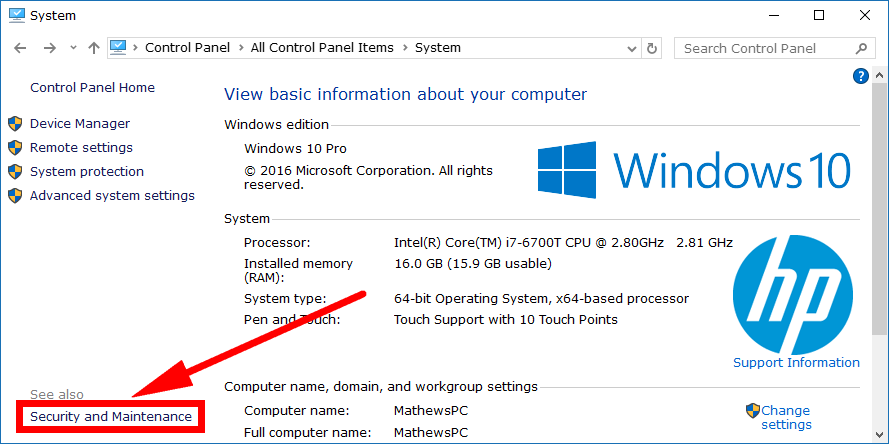
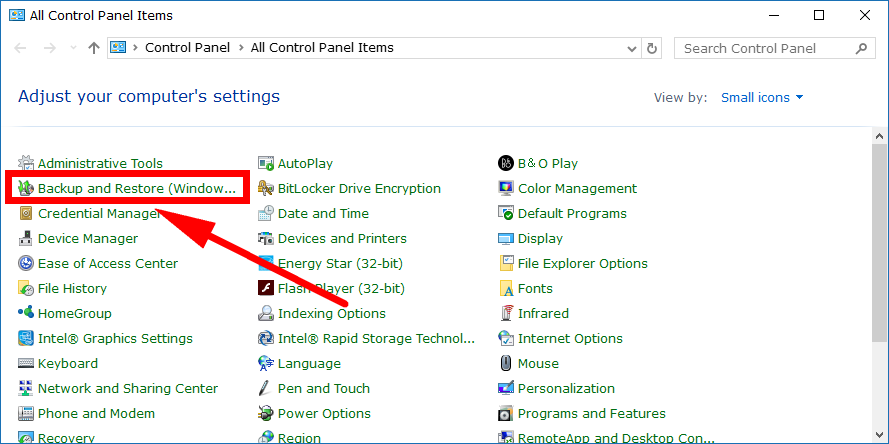
It’s also possible to get access to the File History for backups from the Control Panel in Windows 10 if you prefer the Control Panel over the Settings application. To do it this way, open the Control Panel so that it is showing the classic view with the smaller icons and then click on the “System” link from the all Control Panel items list. You’ll get see the “Security and maintenance” link you need to click on next available from the bottom left side of the window.
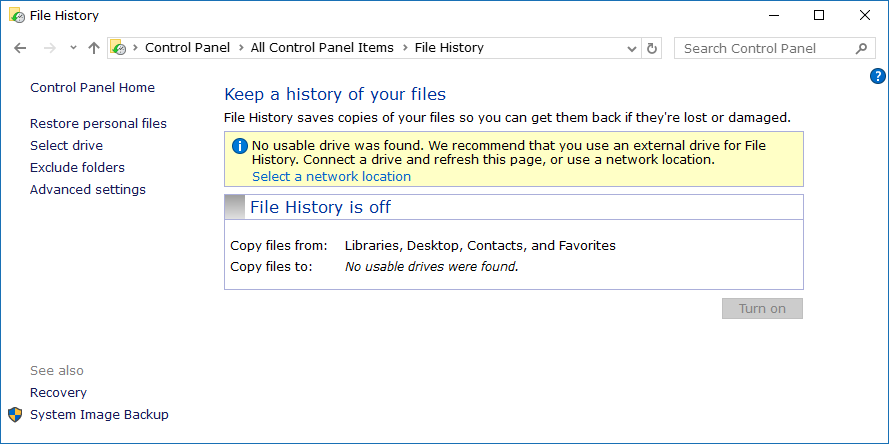
Look at the bottom left side again and click on the “File History” link.

You are now ready to start taking your File History backups. You’ll need to connect your external hard drive before you can start using File History’s features.
Otherwise you can click on the “Backup and Restore” link from the list of all Control Panel items to take the Windows backup instead of the File History backup.
Click on the “Set up backup” link from the right side of the window to start taking your backup. Again, you’ll need to connect the external hard drive to the computer before it works.

There are quite a few backup tools available within Windows 10 for you to use: File History, Backup and restore, system image backups, OneDrive, System Restore, all part of what makes Windows 10 so great.
You might also be interested in:
- Download Windows Calendar For Windows 10 and Windows 7
- How to Disable Quick Access in Windows 10
- How to Optimize and Defragment Drives in Windows 10
- How to Get Help with File Explorer in Windows 10
You can subscribe to our RSS, follow us on Twitter or like our Facebook page to keep on consuming more tech.