Last Updated on February 25, 2024 by Mat Diekhake
Windows PowerShell 5.0 is the version of PowerShell that you get when you start using any version of the Windows 10 operating system.
The PowerShell has some similarities with the Command Prompt in the sense that both offer a place where users can execute particularity commands to make things happen, but the PowerShell is a vastly superior and more powerful place than the Command Prompt. The PowerShell is designed purely for use by system administrators and nobody else, hence the word “power” in the PowerShell.
Tip: you can always tell that you have successfully managed to open an elevated Windows PowerShell window by observing the words “Administrator: Windows PowerShell” in the top left corner of the window after it is open. The standard Windows PowerShell window does not say that when you have it open. It isn’t possible to have the elevated version open without is telling you so in the top left corner when it’s open.
How to Open Elevated Windows PowerShell from All apps in Start Menu
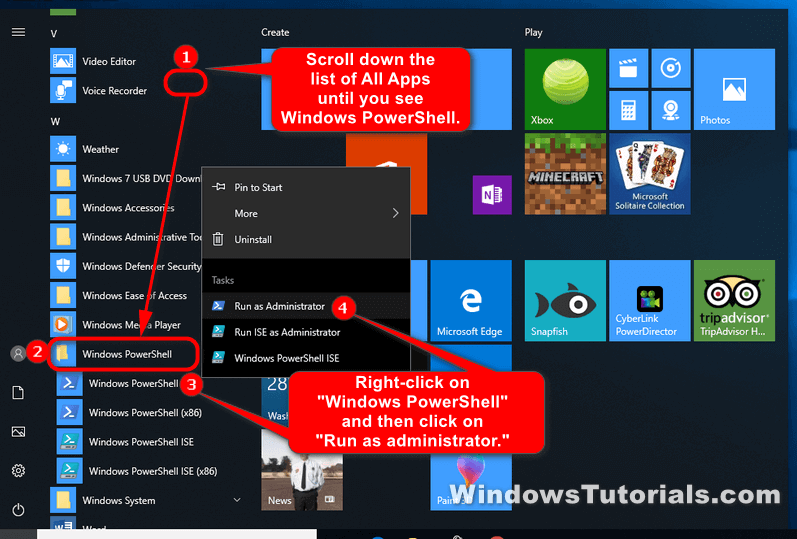
Scroll down the All Apps menu located in the Start menu (as pictured below) and then right-click on the “Windows PowerShell” entry. You’ll then see another menu where you can choose to run the PowerShell as the administrator.
You have now opened the elevated Windows PowerShell window.
How to Open Elevated Windows PowerShell in Search
Click or tap in the search field located in the taskbar and type “PowerShell” to reveal the Windows PowerShell Desktop application. Right-click on the desktop app and then choose to “Run as administrator” from the menu.

The elevated Windows PowerShell window is now open.
How to Open Elevated Windows PowerShell from Task Manager
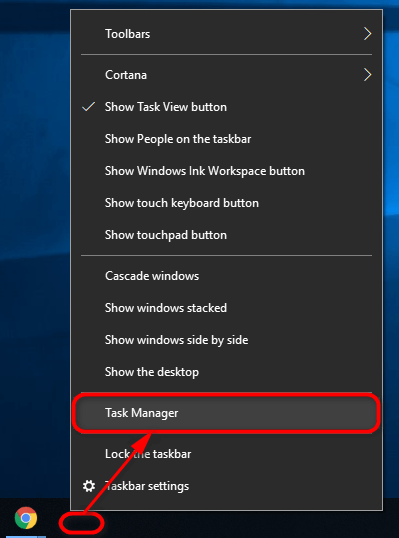
Right-click the mouse anywhere where there are no apps on the taskbar and then click on the “Task Manager” entry from the menu.
Click or tap on “File” and then click or tap on the “Run new task” option from the menu.

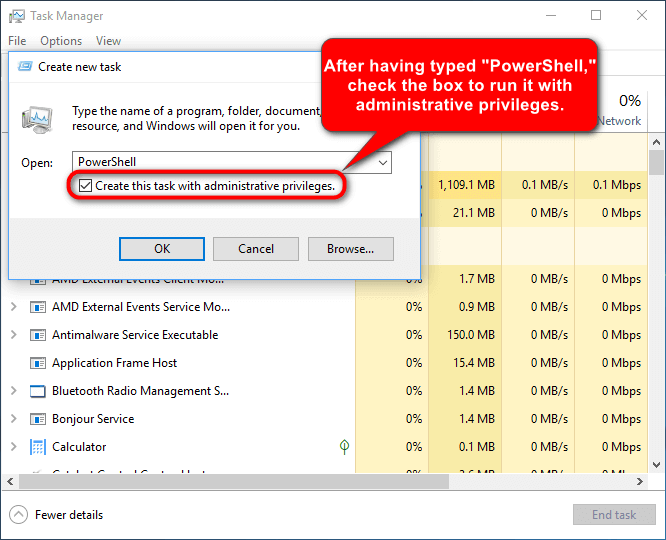
In the available field, type “PowerShell” and then make sure you check the box with a checkmark where it says “Create this task with administrative privileges.”
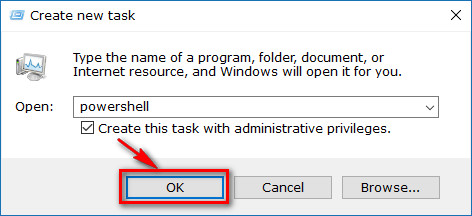
Click on the “OK” button when it is done, and the PowerShell window opens.
The elevated Windows PowerShell window is now open.
How to Open Elevated Windows PowerShell from Win+X Menu
The Quick Links menu is also known to others as the Win+X menu because that’s also the hotkey combination you can use to open up the menu in Windows 10. (The other way is by right-clicking on the Start menu.) By default, the Quick Links menu does not show the PowerShell; however, the Windows developers have made the Command Prompt option interchangeable with the Windows PowerShell if you want to swap it over. To do that, navigate to the Start menu > Settings gear icon > Personalization > Taskbar> and then toggle the option on for “Replace Command Prompt with Windows PowerShell in the menu when I right-click the Start button or press Windows key + X.”

Now you can bring up the Quick Links menu by clicking or tapping on the Start button or by pressing the Windows logo key + X on your keyboard and then choose the “Windows PowerShell (Admin)” option from the menu.

How to Open Elevated Windows PowerShell from File Explorer
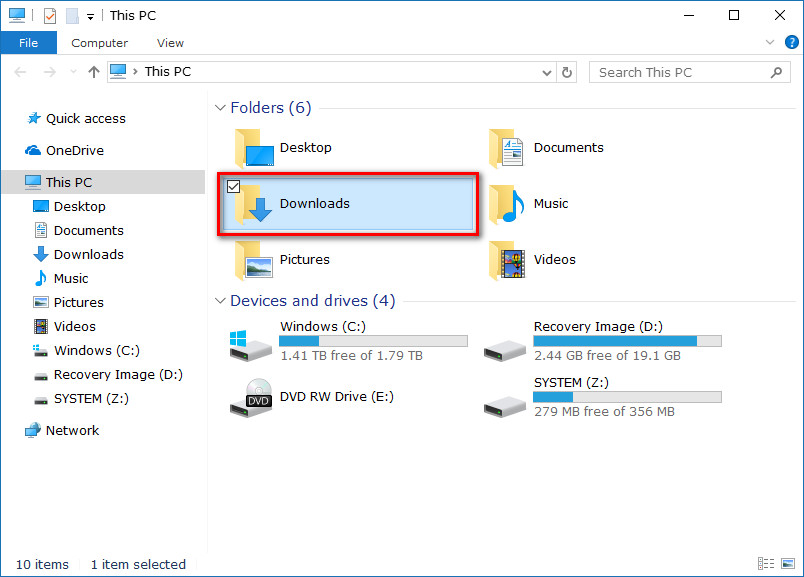
Open the File Explorer by navigating to the Start menu > File Explorer and then make sure you select something from File Explorer. For example, we have clicked on the “Downloads” folder. (If you don’t select anything at all from File Explorer, then the PowerShell is grayed out from the menu because it needs something selected before it can be of any use.)
Next, click on “File” from the menu and then hover the mouse on the “Open Windows PowerShell” to reveal another secondary menu that gives the “Open Windows PowerShell as administrator” option from the menu.
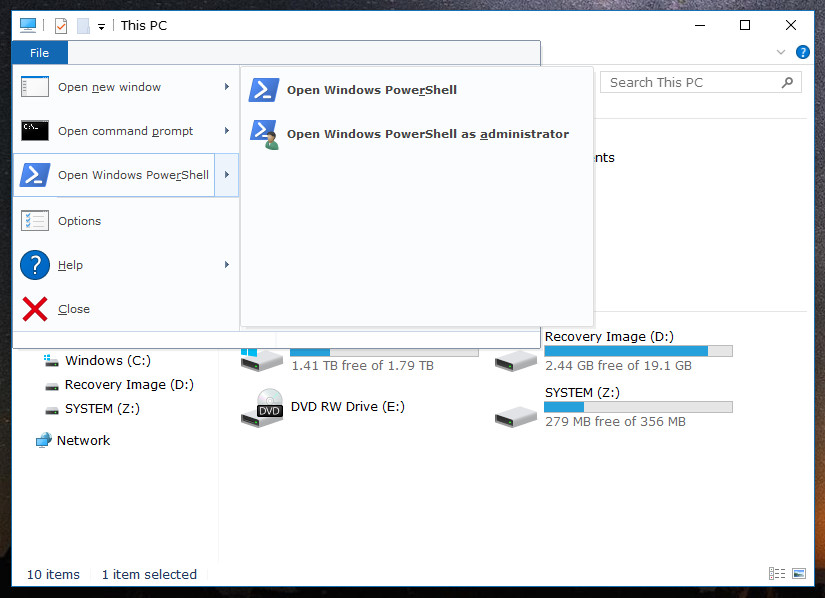
The elevated Windows PowerShell window is now open.
It’s also possible to navigate directly to the Windows PowerShell files themselves from the File Explorer. To do that, open the File Explorer again by heading to the Start menu > File Explorer and then browse the “C:\Windows\System32\WindowsPowerShell\v1.0” folder location. When you hit the Enter key on your keyboards, it then shows up as two different files: one of the standard PowerShell and the other being the one that is elevated.
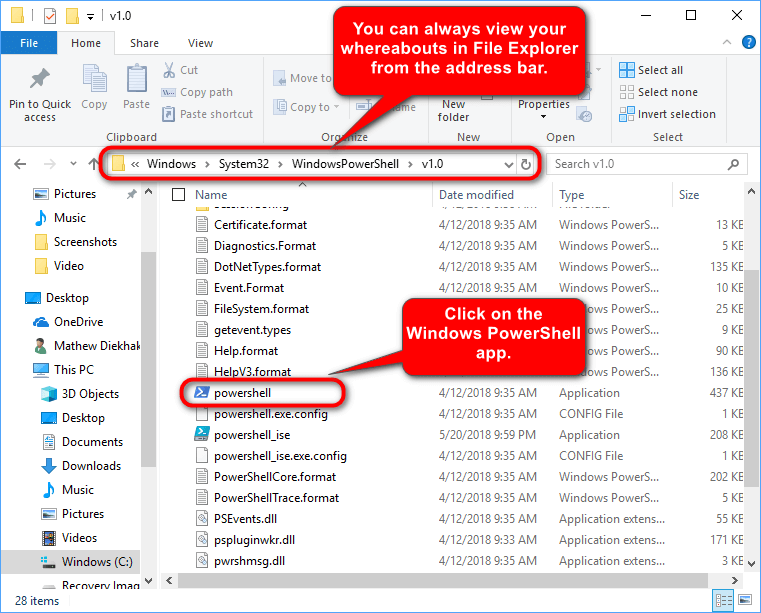
The elevated Windows PowerShell window is now open.
Writing powerful scripts is done from the elevated Windows PowerShell window. You can do heaps of things from an elevated PowerShell Windows, such as automate windows, use Cmdlets, use remoting, use objects, use jobs, work with collections and still heaps more.
You might also be interested in:
- How to Open Windows PowerShell in Windows 10
- How to Start, Stop, Disable and ReStart Services in Windows 10
- How to Link Microsoft Account to Digital License for Windows 10 Activation
- How to Open Task Manager in Windows 10
You can subscribe to our RSS, follow us on Twitter or like our Facebook page to keep on consuming more tech.