Last Updated on December 24, 2022 by Mat Diekhake
With Windows 10, the graphics diagnostic tools are now available from within Windows as an optional feature. To use the graphics diagnostic features provided in the runtime and Visual Studio to develop DirectX apps or games, install the optional Graphics Tools feature:
- Go to Settings, select Apps, and then click Manage optional features.
- Click Add a feature
- In the Optional features list, select Graphics Tools and then click Install.
Graphics diagnostics features include the ability to create Direct3D debug devices (via Direct3D SDK Layers) in the DirectX runtime, plus Graphics Debugging, Frame Analysis, and GPU Usage.
- Graphics Debugging lets you trace the Direct3D calls being made by your app. Then, you can replay those calls, inspect parameters, debug and experiment with shaders, and visualize graphics assets to diagnose rendering issues. Logs can be taken on Windows PCs, simulators, or devices, and be played back on different hardware.
- Graphics Frame Analysis in Visual Studio runs on a graphics debugging log and gathers baseline timing for the Direct3D draw calls. It then performs a set of experiments by modifying various graphics settings and produces a table of timing results. You can use this data to understand graphics performance issues in your app, and you can review results of the various experiments to identify opportunities for performance improvements.
- GPU Usage in Visual Studio allows you to monitor GPU use in real time. It collects and analyzes the timing data of the workloads being handled by the CPU and GPU, so you can determine where the bottlenecks are.
See also: Overview of Visual Studio Graphics Diagnostics
The following tutorial demonstrates how to install and uninstall the graphics tools when you’re using a version of the Windows 210 operating system.
How to Install and Uninstall Graphics Tools in Windows 10
To Install Graphics Tools
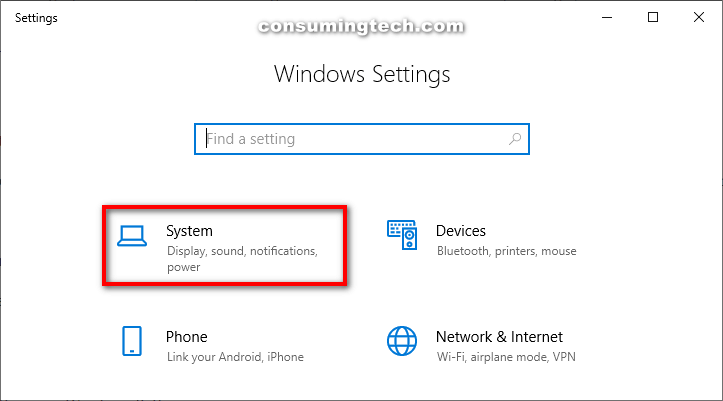
1. Open the Settings app, and click on the System icon from the main Windows Settings menu.
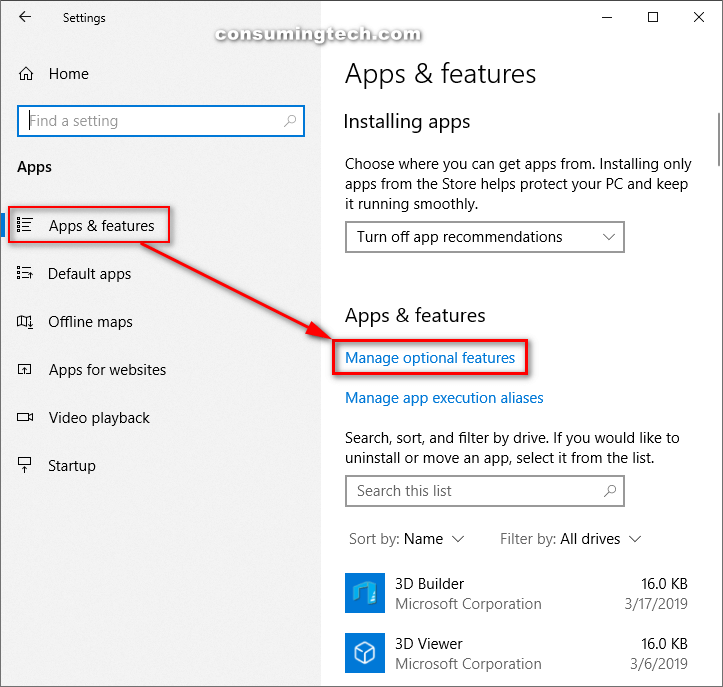
2. From the Display menu on the left-hand side, click on Apps & features, and then click on the Manage optional features link in the right side of the same window.
Note: Newer versions of Windows 10 have moved the Apps and features section into the Apps category from the main Windows Settings menu.
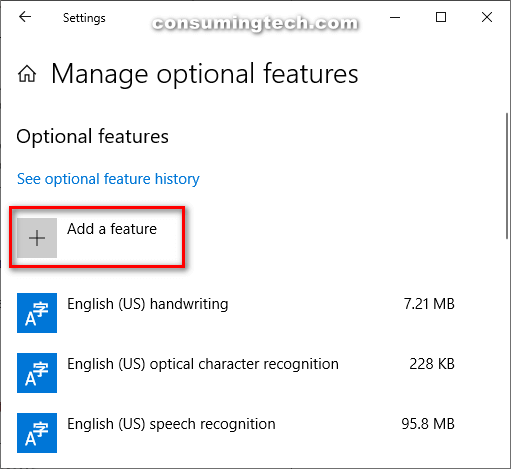
3. Click on the Add a feature icon.
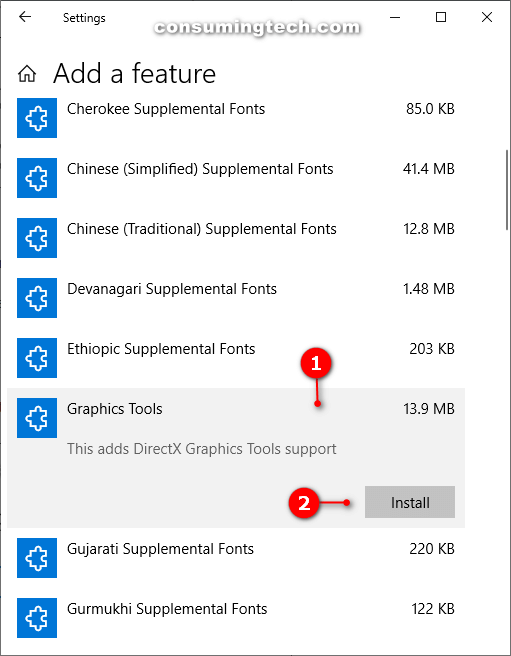
4. Click on Graphics Tools from the list so the feature expands, and then click on the Install button.
Graphics Tools is now installed on the computer. You can close the Settings app and continue using the computer if you like.
To Uninstall Graphics Tools
1. Open the Settings app, and click on the System icon from the main Windows Settings menu.
2. From the Display menu on the left-hand side, click on Apps & features, and then click on the Manage optional features link in the right side of the same window.
3. Click on Graphics Tools from the list so the feature expands, and then click on the Uninstall button.

Graphics Tools is now uninstalled on the computer. You can close the Settings app and continue using the computer if you like.
That’s all.