Last Updated on February 25, 2024 by Mat Diekhake
The Windows 10 login screen is different to any of the other Windows predecessors. Each time you turn on the computer running on Windows 10, you are greeted with a login screen for logging into your Microsoft account. You can type your password to enter, type your pin code—if you have one set—or even sign in with a face or finger recognition with Windows Hello (if your device allows it).
You’ll often be told that there is no way around this with Windows 10 unless you create a local user account instead of the Microsoft account. That’s not entirely accurate. It is true that you can’t use a Microsoft account without a password, but you can skip the login screen altogether with a Windows account, so you don’t see your username at all. There are in fact two ways people can automatically sign in to a user account at the Windows 10 startup: by using the Windows Registry and by using the User Accounts dialog box.
As soon as you change Windows to sign in to your user account automatically, it will continue to do so until you change it back or you change your password. By changing your password normally, it will then make you sign in to that password again, and you’ll need to follow this guide from the beginning and make it automatically sign in for that new password that you have set. Apart from that, there isn’t much else to remember.
Here’s what you need to sign in to a user account without having to fill in your login password and username when you’re using a version of the Windows 10 operating system.
How to Log in to User Account Automatically at Windows 10 Startup with Netplwiz
Press the Windows + R hotkey combination to bring up the Run dialog box and then type “netplwiz” and hit the “OK” button.

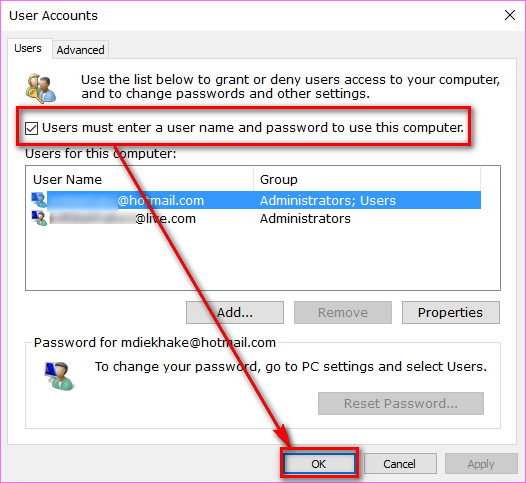
Under the Users tab, you will see an option for “Users must enter a username and password to use this computer.” By default, that option is checked, and it means that the user does have to enter a username and password. By deselecting this box, you are turning the option off.
Click on the “OK” button at the bottom of the dialog box.
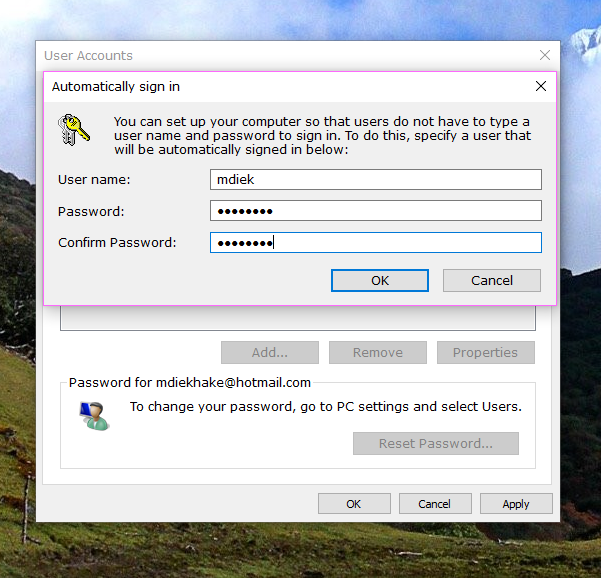
You now need to let Windows 10 know what username it is that you want to be signed in automatically. This username needs to match up with the real username of the account holder, so if you can’t remember what it is, you need to sign in again and check. If you don’t get it exactly right then, this does not work.
Once you’ve got the username sorted out, you then need to enter the password that is associated with that account. Once you have entered both the username and password, it then takes off those two things from the account.
Test your work by logging off and then back in again.
The Windows 10 operating system is now ready to sign your Microsoft user account in automatically without you needing to enter a username and password. Just remember that this means other people can get into your account on the computer you are using also, so that is a security issue for many people. Only do this if you are happy with other people roaming in your account or if you live alone and have nothing to worry about.
Turn On Automatically Sign-in User Account at Startup with Registry Editor
Open the Run dialog box once again by using the Windows + R hotkey combination and then type “Regedit” and click on the “OK” button to open the Registry Editor.

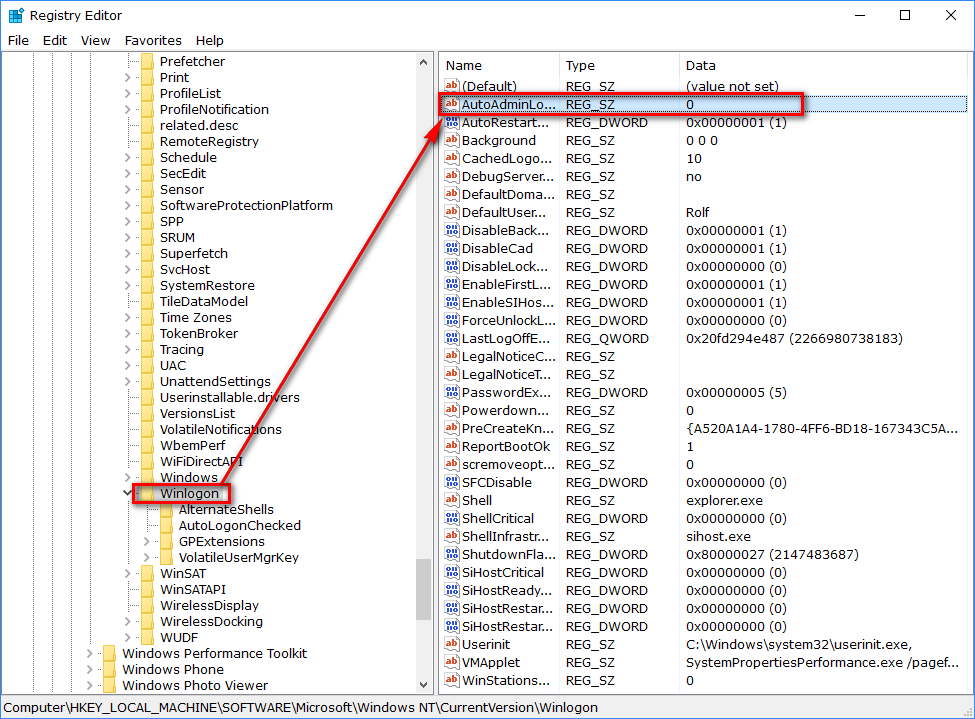
Open the HKEY_LOCAL_MACHINE\SOFTWARE\Microsoft\Windows NT\CurrentVersion\Winlogon folder and then double-click on the “AutoAdminLogon” entry.
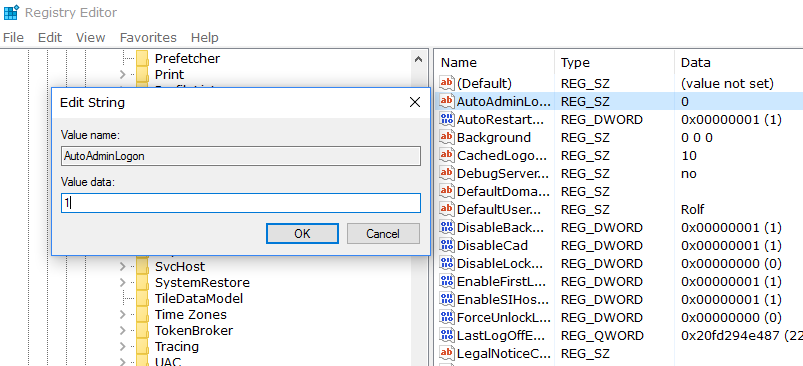
Change the Value Data to “1” and then click on the “OK” button.
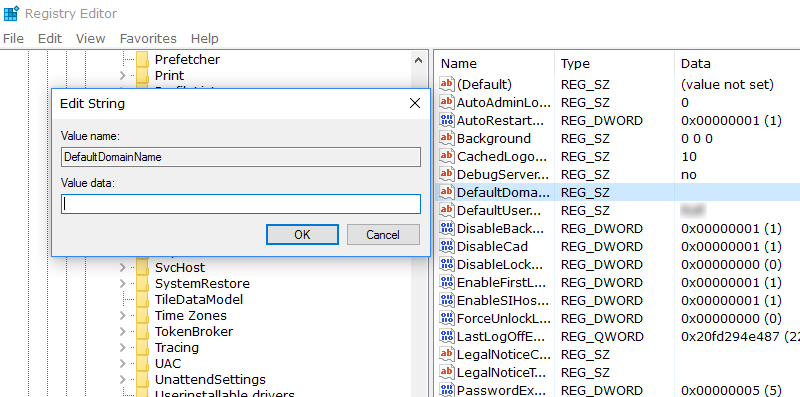
Double-click on the “DefaultDomainName” and then change the value data. Instead of typing a number here you need to enter the computer name if you are using a local account or the domain name and then click on the “OK” button.
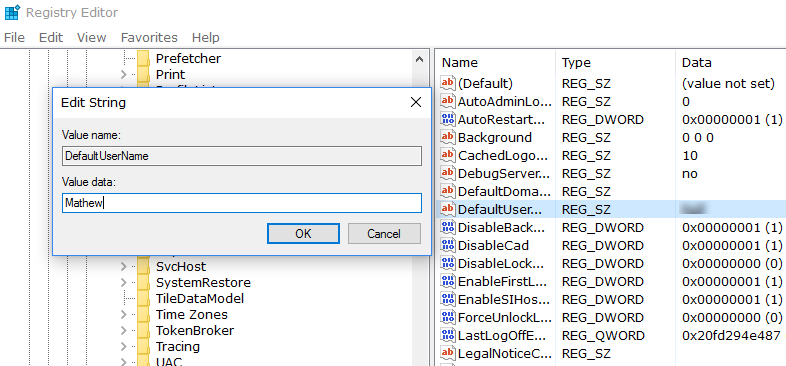
 Double-click on the “DefaultUserName” string and then type the name of the user account that you want to have a password no longer.
Most versions of Windows 10 operating systems don’t have an entry available for the DefaultPassword, so you need to create this one manually. To do that, scroll down to the bottom of the right pane, or expand the area so you can see some space at the bottom.
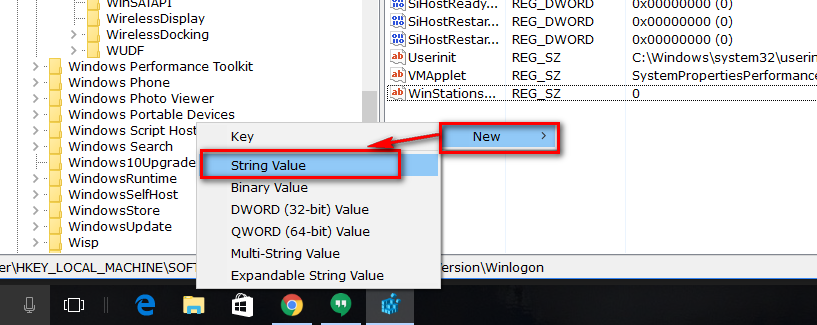
Once you have created the space, right-click and then select “New” and “String Value” from the secondary menu.
Next, double-click in the new string and change its name to “DefaultPassword.” and then click the background, so it is created.
Double-click, the mouse on the new “DefaultPassword” string that you just created and then enter your password for the user account in the Value data area.

The Microsoft account will now have a password on it again so you cannot automatically sign into your account when you turn on the computer. You can turn it off again so that it automatically does by using the Registry Editor by using the next part of the guide below.
Turn Off Automatically Sign-in User Account at Startup with Registry Editor
Double-click on the “AutoAdminLogon” string and change the value back to “0” and then click on the “OK” button to close the string.

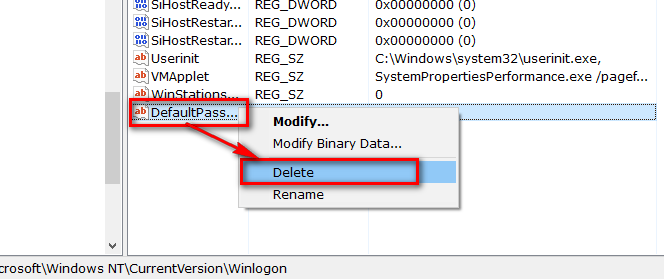
Right-click on the “DefaultPasssord” string that you created earlier and then click on the “Delete” button.
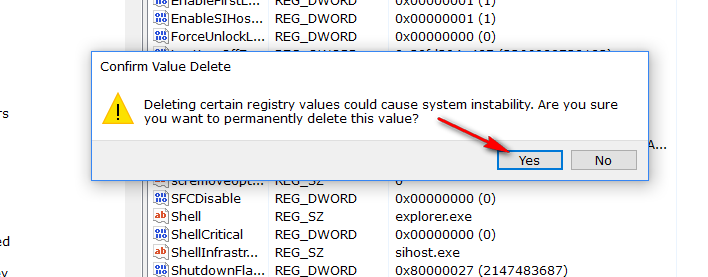
You have to confirm the deletion of the string that you want to delete just to make sure you are never deleting one by accident since it can create problems. In this case, you know it won’t because you created it in the part of the guide just above.
Click on the “Yes” button and the string is then deleted.
Now you can close the Registry Editor, and the user account will be signed in automatically when you start the computer once again.
You might also be interested in:
- How to Enable or Disable the Windows Ink Workspace Suggested Apps in Windows 10
- How to Turn Off the “Suggested Apps” Ads in the Share Flyout in Windows 10
- How to Disable the Advertising Ads in Windows 10
- How to Turn Off the Windows Spotlight Ads on the Lock Screen
- How to Turn On/Off Showing the App Suggestions on the Start menu in Windows 10
You can subscribe to our RSS, follow us on Twitter or like our Facebook page to keep on consuming more tech.