Last Updated on December 26, 2022 by Mat Diekhake
With Windows 10, there are still some things you need a disc in the disk drive for and one of them is when you want to boot to the advanced startup options menu. The advanced startup options is a place where you can begin your journey of trying to figure out how to successfully troubleshoot a computer issue you might be having with your operating system.
The way you can get to the advanced startup options menu is by creating a system repair disc in Windows 10. That way, you are then able to boot up the computer using the disc in any situation where there is an error stopping you from booting the computer the usual way.
As long as you keep the system repair disc handy after you have created it, there should be no time when you cannot at least boot your computer to the advanced startup options and then troubleshoot your way out of trouble.
How to Create System Repair Disc in Windows 10
Start off by signing into the Windows 10 computer using the administrator’s account. You need to be logged in as administrators before you can use the Control Panel to create the system repair disc.
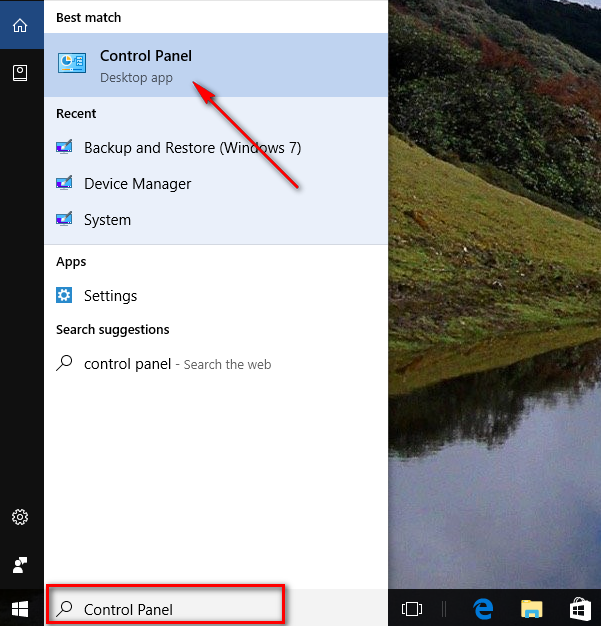
Once you are logged in as the admin, click in the search box and then type “Control Panel.”

Click on the “Control Panel” desktop application when you can see it under the Best match section.
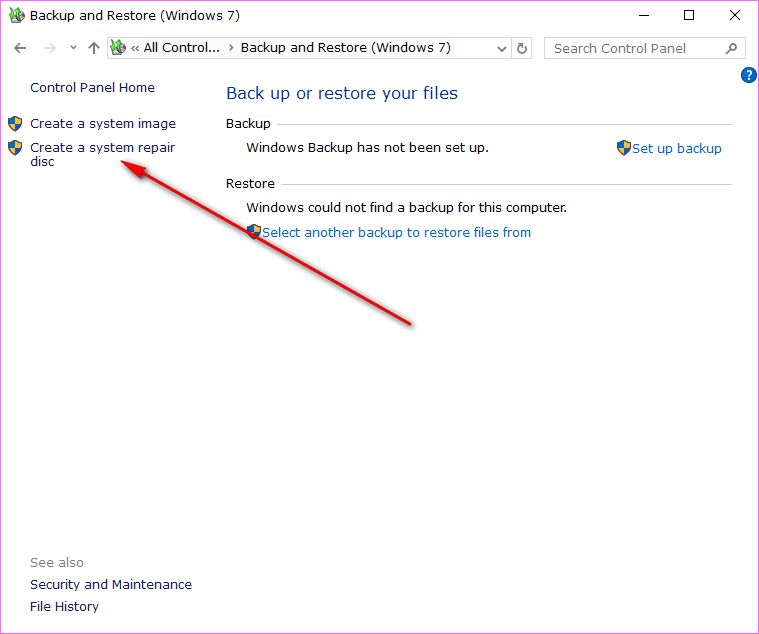
Click on the “Backup and Restore (Windows 7)” link from the Control Panel. It says Windows 7, but we are using Windows 10. Yours will say the same. (You need to change the view to small icons before you get all of the links available from the screen. You do that from the top right side of the page where it says “View by.”)

Click on the “Create a system repair disc” in the left pane to get started on creating your system repair disc.
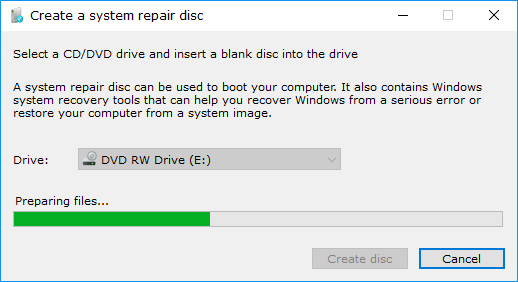
Select the drive you want to use. By default, it is set on the DVD-RW Drive because that is your disc drive. It is at this time that you need to insert the disc into that same disc drive that your computer has and then click on the “Create disc” button available at the bottom of the screen.

It then goes to prepare the files for your machine. You don’t need to do anything at this point. When it is done, it gives you another dialog box where it tells you to label your disk with some information. That information you need to put on your disc is “Repair disc Windows 10 64-bit.” Labeling it means you will know what the disc is in future when you go to use it.
After clicking on the “Close” button to close the dialog box, you then get one more dialog box when it gives you the “System repair disc complete” message. Click on the “OK” button and then it is complete, and you can go back to using your version of the Windows 10 operating system.
The system repair disc is now created, and you can slide it into your computer’s disc drive whenever you need to use it. Doing so will bring you to the advanced startup options menu where you can then begin to troubleshoot your computer. The advanced startup screen gives you plenty of options to recover the computer, including the startup repair, system image recovery, system restore, command prompt, UEFI firmware settings and the startup settings.
It only takes you to the advanced startup screen and will not boot up the Windows 10 operating system. Once you work how what is wrong with your computer and troubleshoot it successfully, you can then take the disc out of the disc drive and boot the computer normally again. Since the problem is now fixed, there is no reason why it will not continue to work as normal.
You might also be interested in:
- How to Sign in to a User Account Automatically at the Windows 10 Startup
- How to Enable or Disable the Windows Ink Workspace Suggested Apps in Windows 10
- How to Turn Off the “Suggested Apps” Ads in the Share Flyout in Windows 10
- How to Disable the Advertising Ads in Windows 10
- How to Turn Off the Windows Spotlight Ads on the Lock Screen
You can subscribe to our RSS, follow us on Twitter or like our Facebook page to keep on consuming more tech.