Last Updated on May 13, 2023 by Mat Diekhake
Rooting a Samsung device to install more apps or delete existing apps can be done a few ways—it just depends on what is out there for your device. You do not always get shown every way to root either because most sites only cover one way and then move on to another device. Eventually we hope to cover all the ways people can root Samsung smartphones and tablets, but for now, we are focusing on rooting with a one-click rooting tool made by Chainfire.
For those who know the name, Chainfire is the guy who makes the SuperSU app and the SuperSU all is also involved in the other main way people get root access too. The difference is that with this one-click rooting tool we just click the Start button from Odin and the CF-Auto-Root tool handles the installation for us. The other way—and the more popular way for experienced Android users when it is available—is to install a custom recovery and then install the SuperSU.
The SuperSU is now closing in on having a half a billion installs, and sadly a chunk of those will not have successfully installed it correctly. To confuse things a little bit, the SuperSU is an app that is available from the Google Play Store, but juts installing it from Google Play does not result in it being enabled. To enable the SuperSU, we need to install it from a custom recovery image or let a one-click rooting tool like CF-Auto-Root handle it for us.
Details We Should Know
- Chainfire was running on the LRX22G.P905MUBUABOJ1 firmware build numbers when he created the rooting file found in this guide. You do not have to run in the same firmware build number that he was running because there is much firmware based on the software update. All you need to be doing is running on the Android 5.0.2 and have the Samsung Galaxy Note Pro 12.2 that has the SM-P905M model number.
- Send a message to Chainfire on the CF-Auto-Root tool thread at the XDA-Developers web forum with the new recovery image if you flash the CF-Auto-Root tool, and the device does not boot after the flashing. It means the file needs updating, and he needs the new recovery image from the firmware creating the problems before he can update it.
Files We Need
- Download the CF-Auto-Root tool for the Samsung Galaxy Note Pro 12.2 running on the Android 5.0.2 Lollipop software updates.
- Download the Samsung USB Drivers for the Windows computer.
Rooting the Samsung Galaxy Note Pro 12.2 SM-P905M running on the Android 5.0.2 Lollipop software updates by flashing Chainfire’s CF-Auto-Root
- Log into the Windows computer using the administrator’s account so the flashing tool can run.
- Unlock the Developer Options menu on the Samsung Galaxy Note Pro if it is not unlocked already.
- Enable the USB Debugging Mode on the Samsung Galaxy Note Pro if it is not done already.
- Install the Samsung USB Drivers on the computer if the computer does not have them already so the device can connect to the flashing tool.
- Extract the rooting file to the Downloads folder so the Odin flashing tool and the rooting file are both available from the Downloads folder.
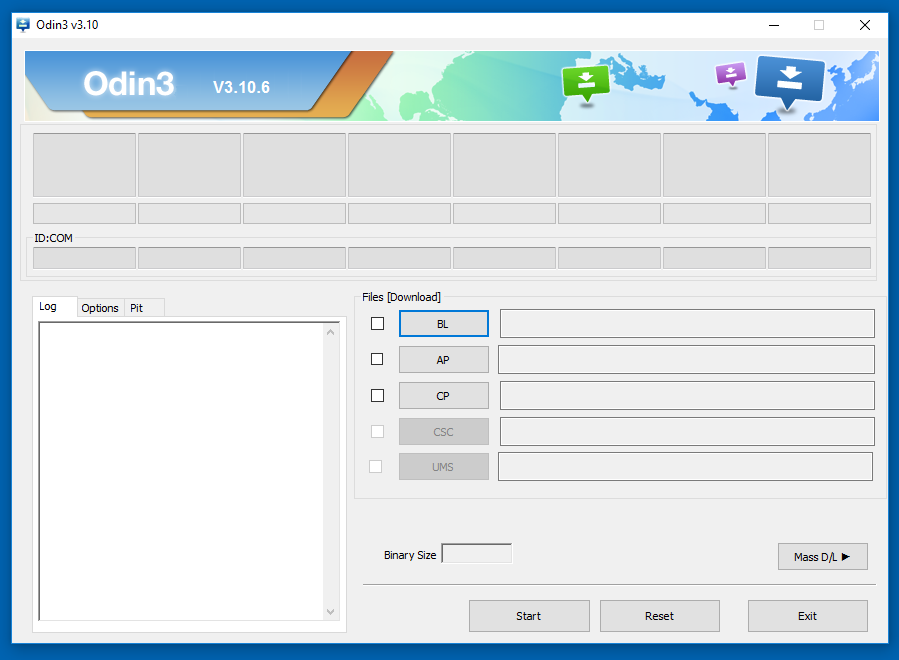
- Double-click on the Odin flashing tool executable file from the Downloads folder and the flashing tool opens.
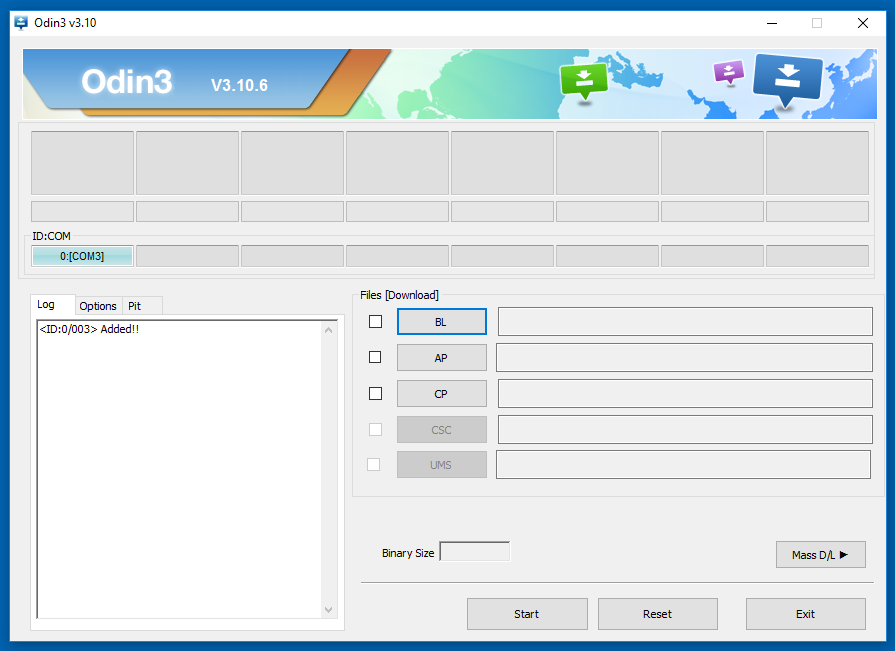
- Boot the Samsung Galaxy Note Pro 12.2 SM-P905M into the Download Mode and connect it to the computer with the USB cable.
- Check that the ID: COM port light up blue or yellow and the added message appears in the message box. (The drivers are likely the cause if your device does not connect).
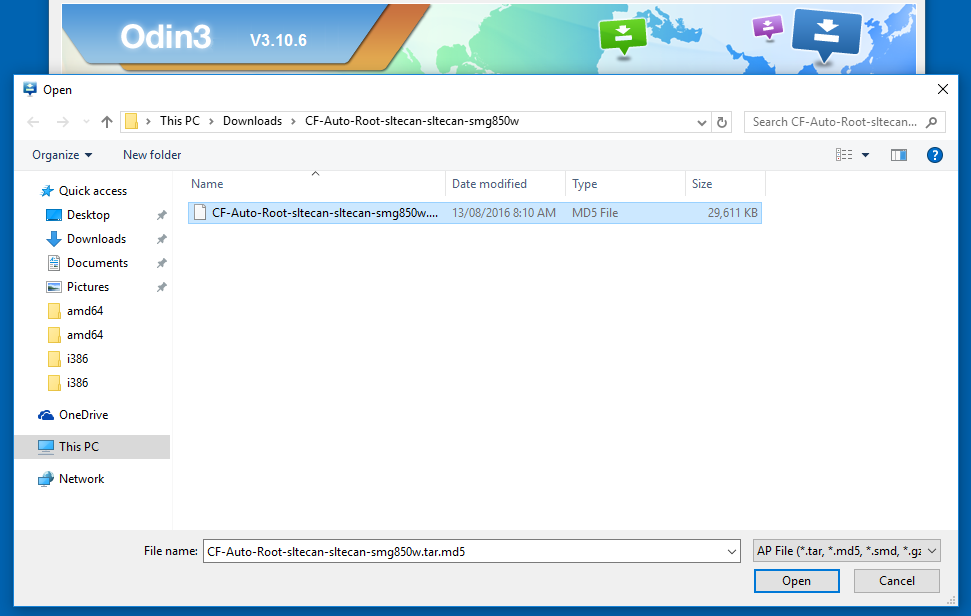
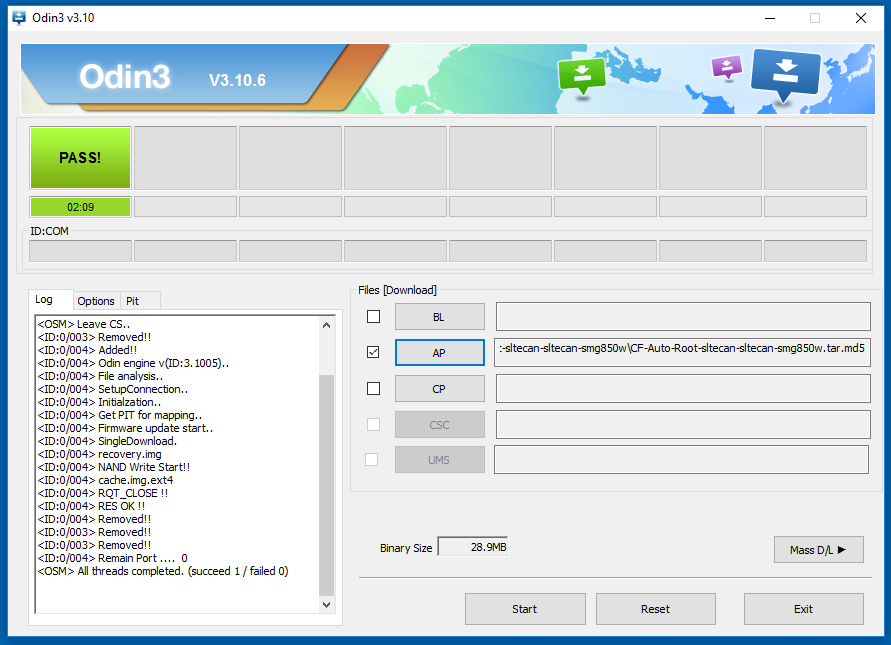
- Click the AP button without putting a tick in the box next to it and the browse the Downloads folder for the rooting MD 5 file.
- Click the Start button in Odin and the rooting begins.
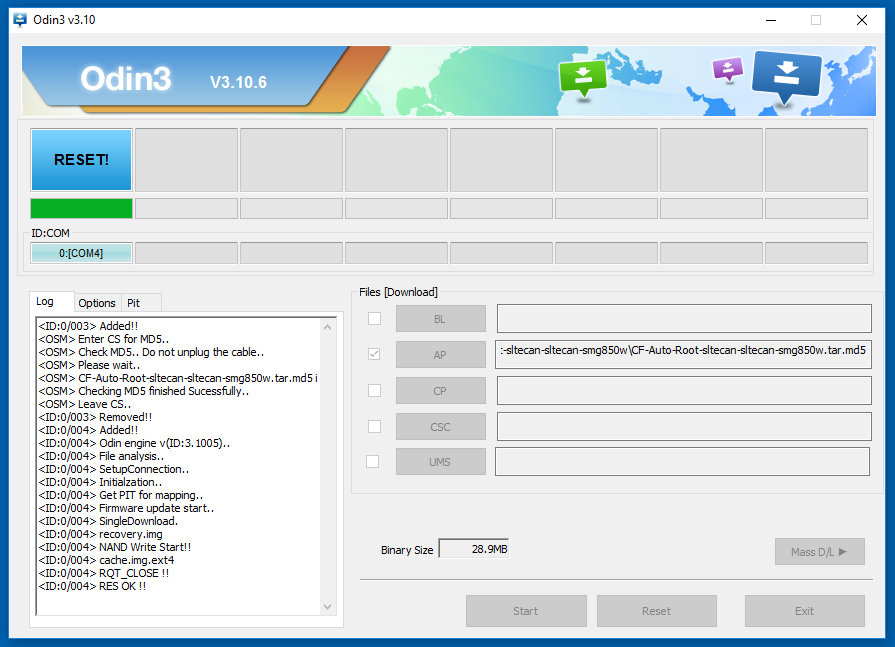
- Read the text that is rolling down the display of the Samsung Galaxy Note Pro tablet that is programmed by Chainfire to let you know what is happening. Wait for it to say it is about to reboot.
- Check the Odin app on the computer displays a pass message.
In conclusion, that is how to root the Samsung Galaxy Note Pro 12.2 SM-P905M when it is running on the Android 5.0.2 Lollipop software updates using CF-Auto-Root. The one-click rooting tool has just finished installing and enabled the SuperSU on the tablet. It did that by installing a modified cache partition and modified recovery partition which then allowed for the enabling of the SuperSU. It then removed everything in its tracks and left you with the same device as before it started. The only difference is that the SuperSU is now there to find from the app drawer. You do not need to do anything with the SuperSu app; it is already working. All you need to do is installing the root applications.
There are heaps of root applications out there that can run now—from the Titanium Backup app to the Xposed Installer. Some of the apps are available from the Google Play Store while others are only available directly from the developer websites. Anyone who needs some ideas for names of root apps that want to try can try checking out the post on the best root applications for Android and take a look around.
Related Tutorials
- How to Root Nexus 5 on Android 6.0 Marshmallow Developer Preview 3 (MPA44G)
- How to Root Nexus 9 on Android 6.0 Marshmallow Developer Preview 3 (MPA44G)
- How to Root Nexus 6 on Android M MPZ79M (Developer Preview 2)
- How to Root Nexus 6 on Android M Developer Preview with SuperSU and Despair Kernel
- How to Root Android N Developer Preview on Nexus Devices
- How to Root Google Nexus 6 on Android 6.0.1 MMB29X Marshmallow
- How to Root Google Nexus 6P on Android 7.1
- How to Root LG Nexus 5 on Android 6.0 Marshmallow
- How to Root LG Nexus 4 on Android 6.0 Marshmallow
- How to Root Google Nexus 5X with Encryption Disabled