Last Updated on May 13, 2023 by Mat Diekhake
The term rooting the Android operating system is not as well known as becoming the administrator on a PC because Android is not as well known as Microsoft’s Windows desktop environment, but they both essentially mean the same thing.
The root user on Android can do more. From installing thousands of additional apps—many of which people will find useful—to uninstalling existing apps that many people find not so useful. Being the root user puts you in control of what is installed and what is deleted. It is the only way to use your Android truly and have it the way you want to be.
We all know what can be uninstalled (the system apps) so let’s take a look at what can be installed. One of the root apps that is installed lots is the Xposed Installer. Frequently on people’s top ten best root apps of all time list, Xposed puts you in control of what features are going to be running on Android. It does this by using special modules that can help tweak the UI similar to what a custom ROM can produce.
Details We Should Know
- Chainfire was running on the LMY47X.P605XXU1EOI5 firmware build number on the Samsung Galaxy Note 10.1 SM-P605 when he developed the CF-Auto-Roto file in this guide. You do not have to be running the same firmware build number. All you need is the Samsung Galaxy Note 10.1 with the SM-P605 model number and for it to be running on the Android 5.1.1 Lollipop software updates.
- Leave a message with the new recovery image files from the new firmware you are running on the XDA-Developers forum page if you flash the CF-Auto-Root tool, and the device does not boot.
Files We Need
- Download the CF-Auto-Root tool for the Samsung Galaxy Note 10.1 SM-P605 running on the Android 5.1.1 Lollipop software updates.
- Download the Samsung USB Drivers for the Windows computer.
Rooting the Samsung Galaxy Note 10.1 SM-P605 running on Android 5.1.1 Lollipop software updates
- Log into the Windows computer with the administrator’s account so you can use Odin.
- Unlock the Developer Options menu on the Samsung Galaxy Note 10.1 tablet if it is not unlocked already.
- Enable the USB Debugging Mode on the Samsung Galaxy Note 10.1 if it is not enabled already.
- Install the Samsung USB Drivers on the computer so the flashing tool ca detect the tablet.
- Extract the rooting file to the desktop of the computer and the Odin and rooting file is available on the desktop.
- Boot the Samsung Galaxy Note 10.1 SM-P605 into the download mode and connect to the computer with the USB cable.
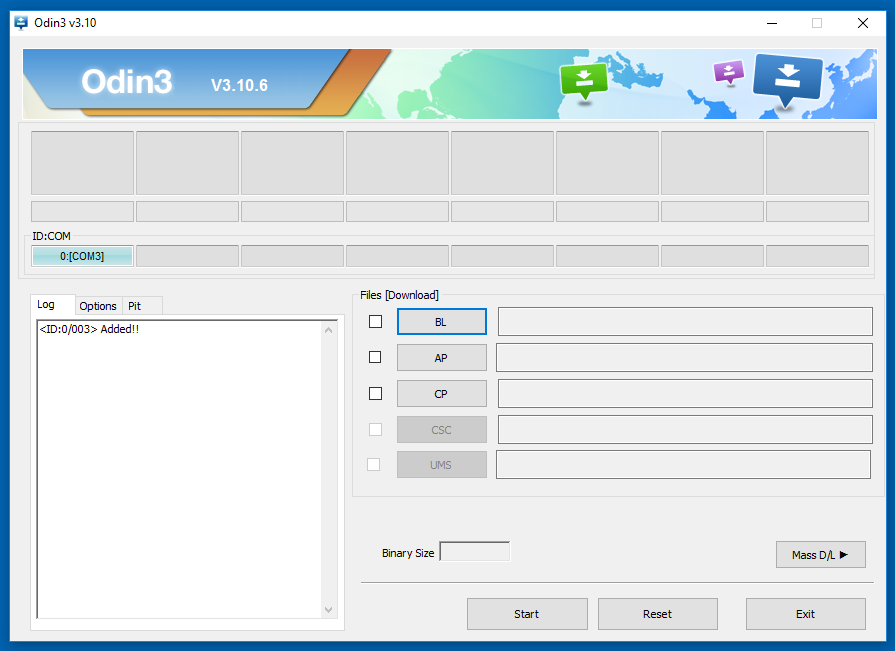
- Double-click the Odin file so it opens on the desktop and check that it gives a yellow or blue ID: COM port and the added message. (Those two things are there to let you know that the Galaxy Note 10.1 is connected, and the Samsung USB Drivers are working).
- Click the mouse on the AP button from Odin and browse through to the desktop and upload the MD 5 rooting file.

- Click the mouse on the Start button and the rooting of the Note 10.1 tablet computer begins.
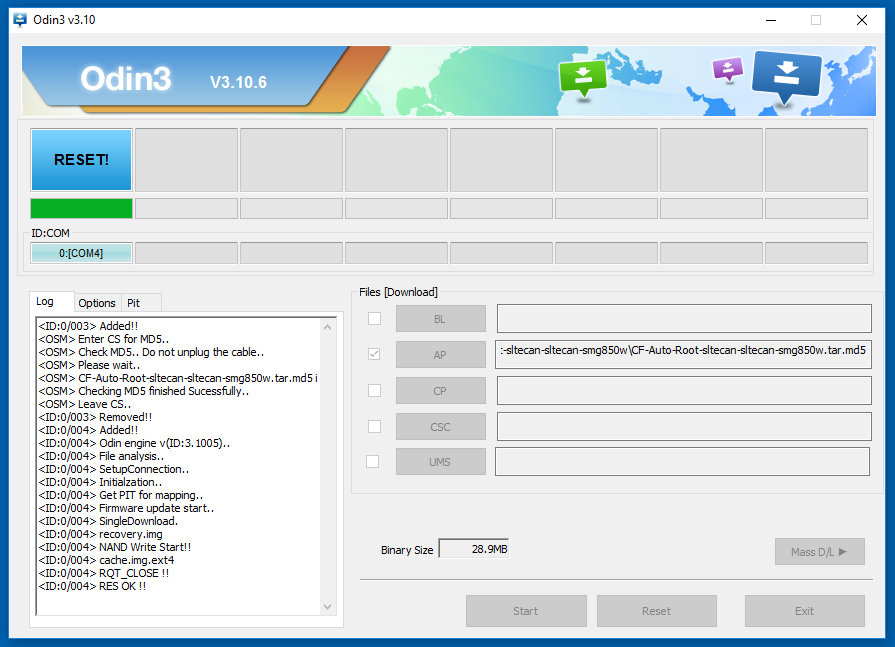
- Read the information that is rolling down the display letting you know everything that is happening with the rooting process and then wait until it says it is rebooting in ten seconds.
- Check that Odin on the computer is showing a green box with a pass message inside that box.
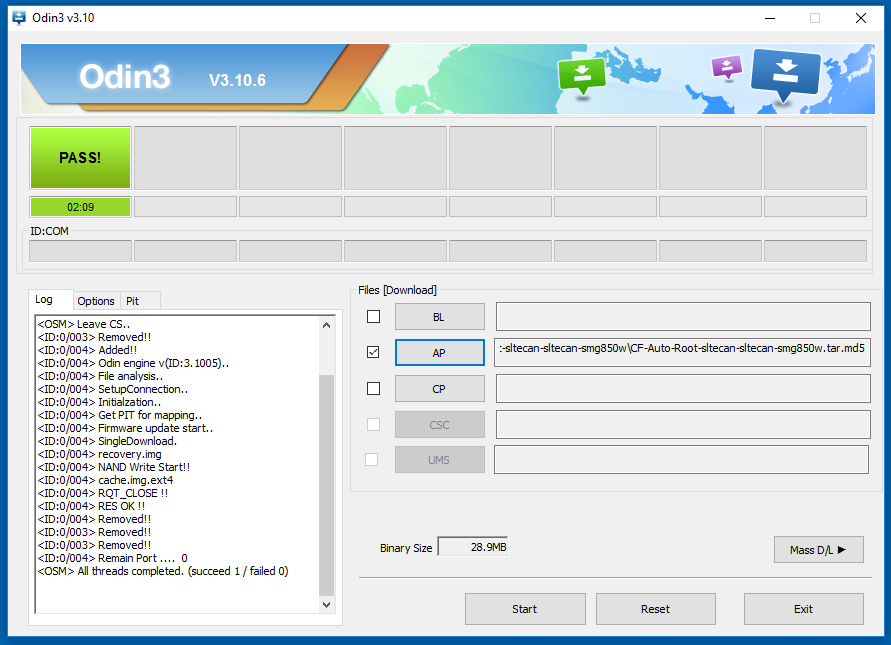
In conclusion, that is how to root the Samsung Galaxy Note 10.1 SM-P605 tablet computer running on the Android 5.1.1 Lollipop software updates by flashing Chainfire’s SuperSU via a one-click rooting tool also made by Chainfire called CF-Auto-Root. The SuperSU is now installed and enabled and as soon as the Samsung tablet reboots back into the normal mode you can see it there with the rest of your apps. You do not have to change any of the settings from within the SuperSU. It is already working and prompts your display when you download an app that requires root access before it can run.
Anyone who needs some ideas on what root apps to install can check out our list of the best root applications for Android and see what you think.
Related Tutorials
- How to Root Nexus 5 on Android 6.0 Marshmallow Developer Preview 3 (MPA44G)
- How to Root Nexus 9 on Android 6.0 Marshmallow Developer Preview 3 (MPA44G)
- How to Root Nexus 6 on Android M MPZ79M (Developer Preview 2)
- How to Root Nexus 6 on Android M Developer Preview with SuperSU and Despair Kernel
- How to Root Android N Developer Preview on Nexus Devices
- How to Root Google Nexus 6 on Android 6.0.1 MMB29X Marshmallow
- How to Root Google Nexus 6P on Android 7.1
- How to Root LG Nexus 5 on Android 6.0 Marshmallow
- How to Root LG Nexus 4 on Android 6.0 Marshmallow
- How to Root Google Nexus 5X with Encryption Disabled
December 11, 2016 @ 12:12
Super