Last Updated on May 13, 2023 by Mat Diekhake
Rooting the Samsung Galaxy A9 smartphone is going to make you in control of the root user account. The Linux root user account is the equivalent of the admin account for the Windows operating system, and it means you can now choose to install and uninstall the things that you want. Developers also find this type of root level access handy because, without it, they can’t make the changes they need to the operating system or software either.
There can be a variety of ways to root the Samsung Galaxy A9 smartphones in due time, and the way you choose to do it doesn’t impact what you can and cannot do. In other words, if you decide to get root access using a one-click rooting tool or flashing SuperSU from a custom recovery, they both give you the same root permissions that allow for the same amount of apps to be run and uninstalled.
Some Samsung device owners prefer choosing to root by flashing a custom recovery and then flashing the SuperSU from the custom recovery image because they want to have both the custom recovery and root access. Other people prefer getting root access with a one-click rooting tool such as Chainfire’s CF-Auto-Root because all they want to do is have root access and keep the stock recovery the same.
The following guide demonstrates how you can get root access on the Samsung Galaxy A9 SM-A9000 smartphone running on the Android 6.0.1 Marshmallow software updates using the one-click rooting method of flashing the CF-Auto-Root tool from the Odin flashing tool.
Notes:
- Chainfire was running on the MMB29M.A9000ZCU1BPE2 firmware build number when the CF-Auto-Root tool found in this guide was developed. However, that doesn’t mean you need the same firmware build number running like him. You can be on any firmware. There might be many firmware versions that are based on the Android 6.0.1 Marshmallow software update for the SM-A9000 model number, and they should all work fine.
- There are sometimes new bootloaders in new Android versions that stop the CF-Auto-Root tool from working until Chainfire updates the files. You know if you see this problem because your device won’t boot after the flashing or the flashing doesn’t work at all. You need to let Chainfire know about the problem so he can fix it. Leave a message that contains the recovery image from your firmware to the CF-Auto-Root tool thread made at the XDA-Developers website and Chainfire will get it and use the recovery image file to update the rooting file, so it starts working again.
Download Samsung Galaxy A9 SM-A9000 CF-Auto-Root and Drivers
- Download the CF-Auto-Root tool for the Samsung Galaxy A9 SM-A9000 smartphone running on the Android 6.0.1 Marshmallow software updates: CF-Auto-Root-a9xltechn-a9xltezc-sma9000.zip | CF-Auto-Root-a9xltechn-a9xltezh-sma9000.zip.
- Download the Samsung USB Drivers for the Windows computer.
How to Root Samsung Galaxy A9 SM-A900 on Android 6.0.1 Marshmallow Using CF-Auto-Root
1. Unlock the Developer Options menu on the Samsung Galaxy A9 SM-A9000 smartphone so you can use the menu.
2. Enable the USB Debugging Mode from the Developer Options menu, so the Android software allows you to make modifications to it which is what is needed if you are to root the device in the guide.
3. Run the Samsung USB Drivers on the computer so that when you do connect the Samsung Galaxy A9 smartphone to it and have the Odin flashing tool running that same flashing tool can detect your device which then allows for the rooting.
4. Extract the rooting file to the Downloads folder and the Odin flashing tool and the CF-Auto-Root files are then available from the Downloads folder.
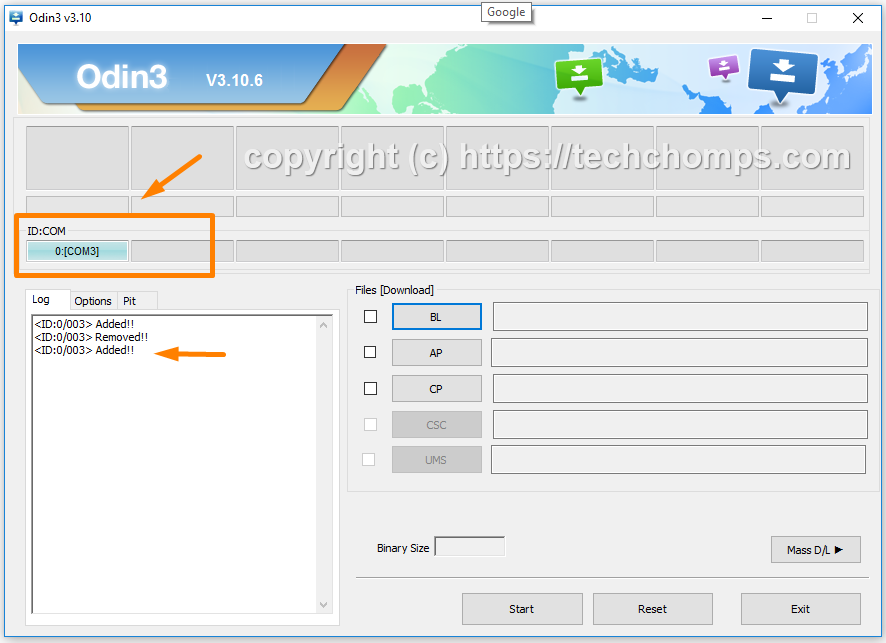
5. Boot the Samsung Galaxy A9 SM-A9000 smartphone into the Download Mode and connect it to the computer with the USB cable when that is done.
6. You get a blue or yellow color appearing from the ID: COM port and the added message appearing in the Log entry box. Both of those are there to let you know that Odin has detected your device thanks to your installation of the Samsung USB Drivers.
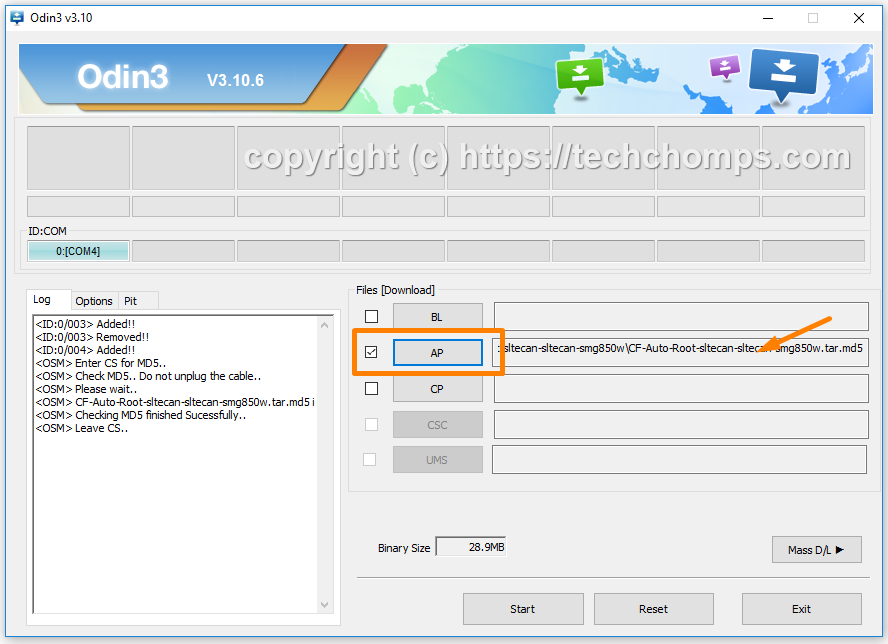
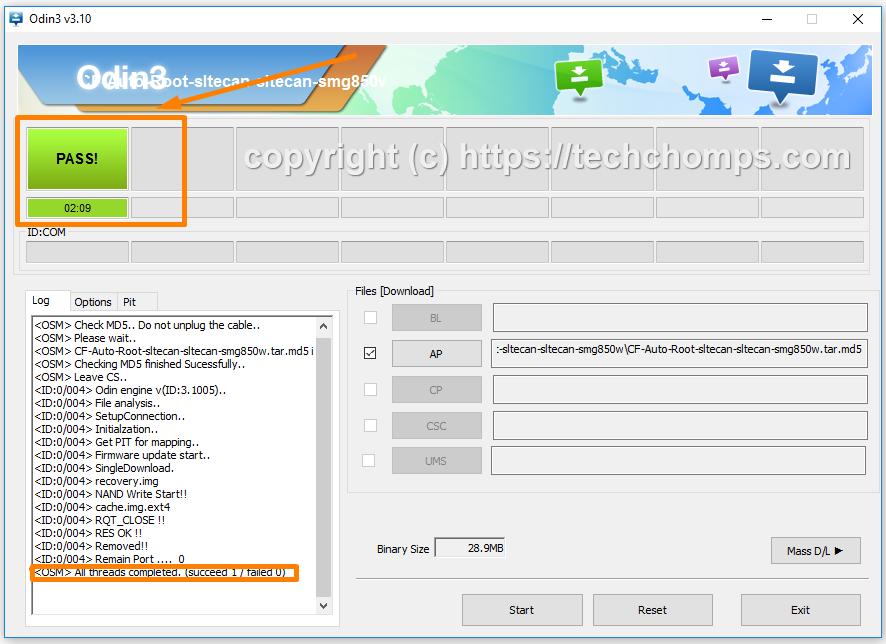
7. Click on the AP button from the Odin user interface and then browse through to the Downloads folder and select the MD5 rooting file that is there since you extracted the file earlier. You can see the file in the AP area when you have loaded it correctly like the screenshot shows below. (Note that the file extension for the Samsung Galaxy A9 will differ from the one in the example).
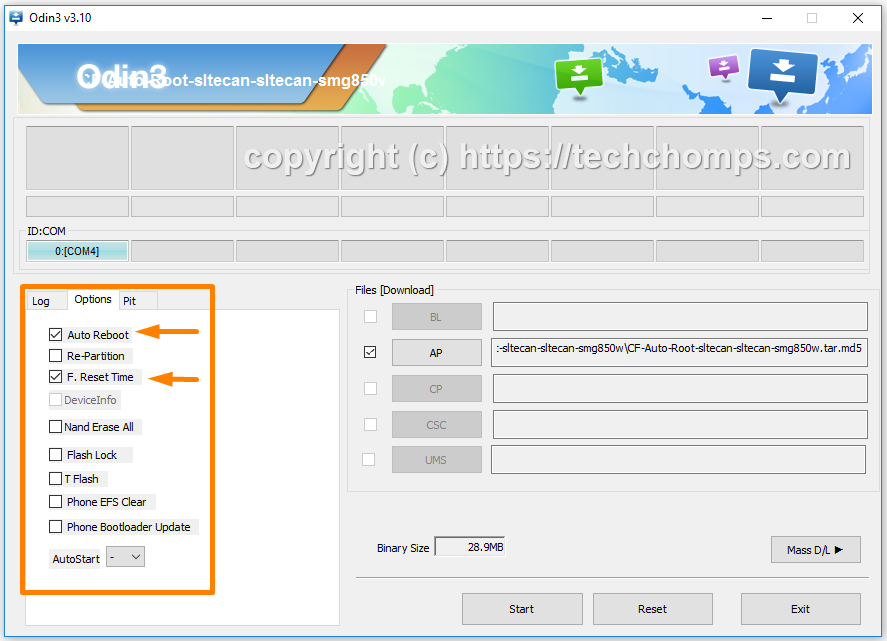
8. Check that your options are set the same as the default options that Odin gives, so you don’t end up with any data loss and so that your smartphone does reboot automatically once the flashing is complete.
9. Click on the Start button and then wait and watch as the rooting begins. The versions based on the Android 6.0.1 Marshmallow updates are systemless roots which mean they don’t pass through the system partition. The difference is that it can boot loop a few times while the rooting is happening. Don’t worry about it as it is normal. You can read the information that is rolling down the display of the Samsung Galaxy A9 smartphone for more details about what to expect.

10. The progress bar features in green will eventually make its way all the way across the display, and the box will show a Reset message in blue. Now you should find your Samsung Galaxy A9 smartphone rebooting. At this stage, the rooting is nearly complete.
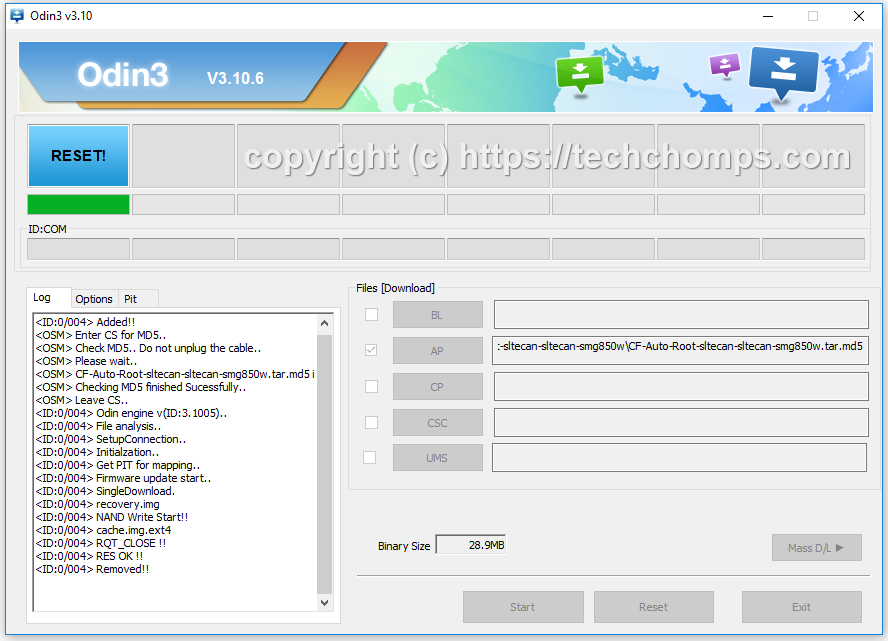
11. Next, you get a pass message lighting up the box that is now green. Now you know that the rooting is complete, and your smartphone passed.
In conclusion, that is how to root Samsung Galaxy A9 SM-A9000 smartphone running on the Android 6.0.1 Marshmallow software updates by flashing the systemless root versions of Chainfire’s CF-Auto-Root one-click rooting tool.
Related Tutorials
- How to Root Nexus 5 on Android 6.0 Marshmallow Developer Preview 3 (MPA44G)
- How to Root Nexus 9 on Android 6.0 Marshmallow Developer Preview 3 (MPA44G)
- How to Root Nexus 6 on Android M MPZ79M (Developer Preview 2)
- How to Root Nexus 6 on Android M Developer Preview with SuperSU and Despair Kernel
- How to Root Android N Developer Preview on Nexus Devices
- How to Root Google Nexus 6 on Android 6.0.1 MMB29X Marshmallow
- How to Root Google Nexus 6P on Android 7.1
- How to Root LG Nexus 5 on Android 6.0 Marshmallow
- How to Root LG Nexus 4 on Android 6.0 Marshmallow
- How to Root Google Nexus 5X with Encryption Disabled