Last Updated on May 13, 2023 by Mat Diekhake
If you are not enjoying the Samsung Galaxy A7 smartphone nearly as much as you think you should be then you might want to check out what rooting the device is all about. Getting root access to the internal Android system that runs on the Samsung Galaxy A7 smartphone is all about gaining more permissions which then allow you to do more things.
When we are rooting the Android operating system, we are gaining more permissions to install more apps. Apps are what drives the mobile operating system, and many people do not know this, but there are apps out there that can help you do just about anything — it is not just about playing games or checking the football scores. There are apps out there that can add more features to your device if you are using the device as the root user like the Tasker app. There are apps out there to help you with your battery, changing the CPU frequency and heaps more things that are often practical and not just fun and games. The Titanium backup app is another practical reason to become the root user on your Android operating system. You will not find another app like it — especially if you are not a root user — that can backup your apps and data in general as well as the Titanium Backup app can.
With that said, there are also plenty of reasons to root Android if it is fun you are after. Want to enhance the music that ou listens to so the sound sounds like it is coming from a million dollar HiFi system? Check out the Viper4QAndroid app. Want to enhance your gaming? You can do that too with the GL Tools app.
Notes:
- Chainfire was running on the MMB29M.A700FDXXU1CPH5 firmware build number when he rooted the Samsung Galaxy A7 SM-A700FD smartphone and created the version of the CF-Auto-Root tool found in this guide. You do not need to be running on the same firmware that he was running when he created the rooting file in this tutorial. You just need to have the right model numbered version of the Samsung Galaxy A7 smartphone and had it running on the Android 6.0.1 Marshmallow software update regardless of the firmware, and it works. He just gives that firmware build number so you can use it as an indicator later down the track if it ever becomes relevant information for you to use.
- We create our rooting guide for the CF-Auto-Root tool based on software versions because sometimes new versions of Android require unique rooting tool updates. For that reason, you should not run into trouble when you follow our guides as long as you stick to the recommendations in the post titles. However, if you do find that your Samsung Galaxy A7 smartphone is not flashing the file or it is not booting after the flashing, these are signs that the rooting file needs updating. You need to leave a message that contains the recovery image file of your firmware on the CF-Auto-Root tool thread made over at the XDA-Developers website for Chainfire to see, and he uses that recovery image file to update the files, so they start working again.
Download Samsung Galaxy A7 SM-A700FD CF-Auto-Root and Drivers
- Download the CF-Auto-Root tool for the Samsung Galaxy A7 SM-A700FD smartphone running on the Android 6.0.1 Marshmallow software updates.
- Download the Samsung USB Drivers for the Windows computer.
How to Root Samsung Galaxy A7 SM-A700FD on Android 6.0.1 Marshmallow Using CF-Auto-Root
1. Unlock the Developer Options menu on the Samsung Galaxy A7 SM-A700FD smartphone so you can turn on the USB Debugging option that is available inside it.
2. Enable the USB Debugging options from the Samsung Galaxy A7 SM-A700FD Developer Options menu that you just unlocked so you can make changes to the Android operating system which is a requirement for the rooting tool to be able to work.
3. Run the Samsung USB Drivers on the computer so the Odin flashing tool can detect the Samsung Galaxy A7 smartphone when you connect it to the computer with the USB cable.
4. Extract the rooting file to the Downloads folder so that you can see the flashing tool executable file and the rooting file that roots your device becomes available too.
5. Run the Odin flashing tool app that is now in the Downloads folder so that the flashing tool user interface is open.
6. Boot the Samsung Galaxy A7 SM-A700FD smartphone into the Download Mode and then connect it to the computer with the USB cable that is used for charging the battery.
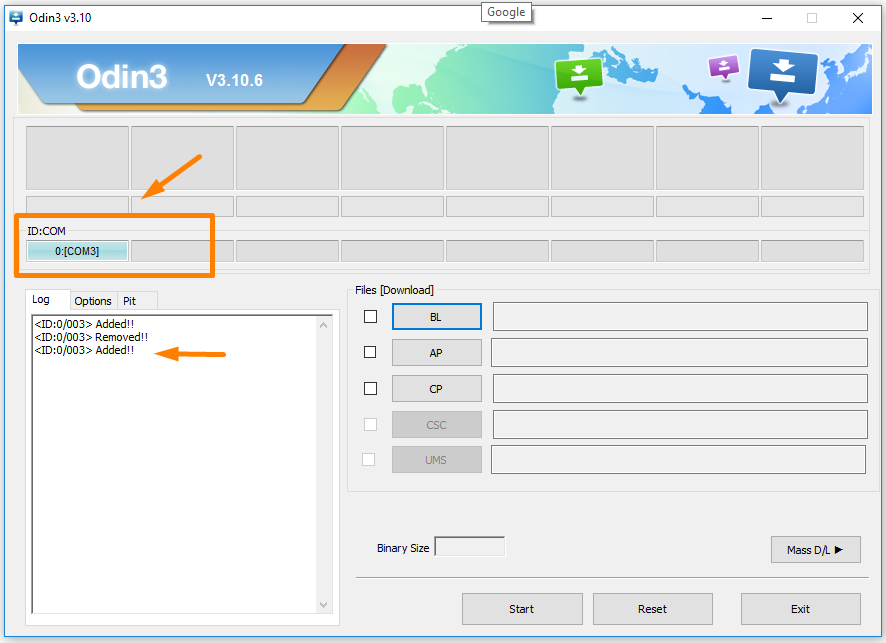
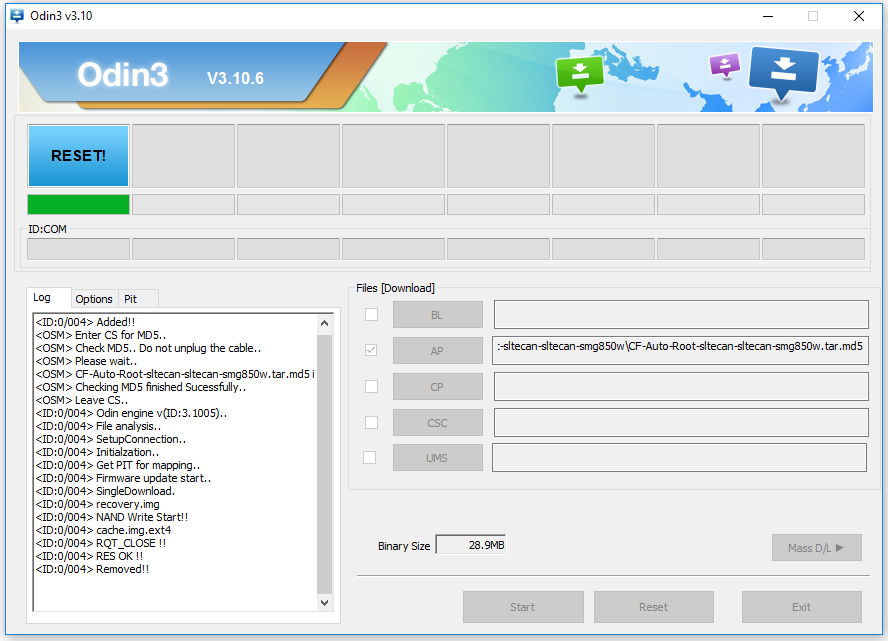
7. Check that Odin shows a blue or yellow color coming from the ID: COM port and the added message is appearing in the Log entry.
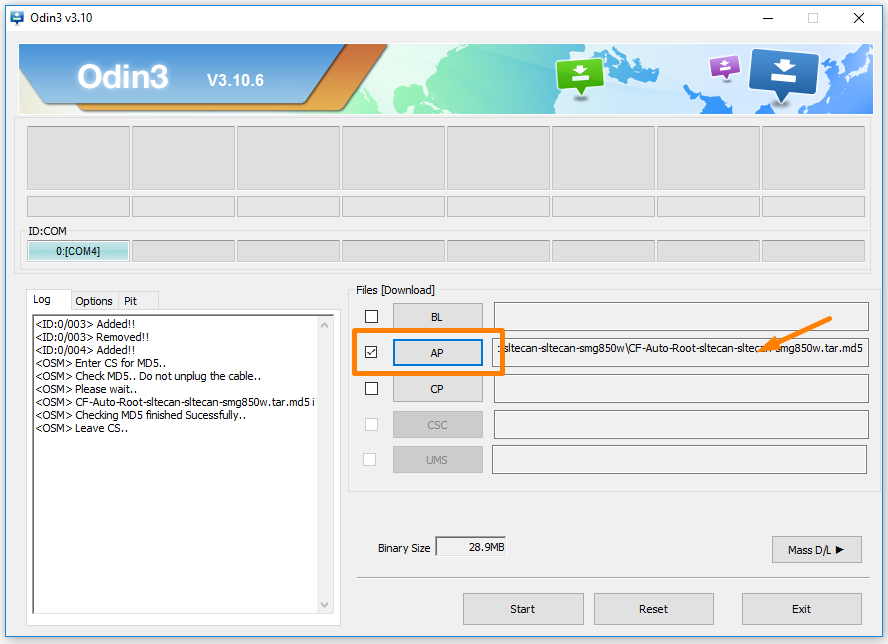
8. Click on the AP button and then click through to the Downloads folder where you extracted the rooting file and select the MD5 rooting file to upload to the Odin AP box. (Note that your file extension differs from ours because our sample screenshot uses a different device, but the process is the same).
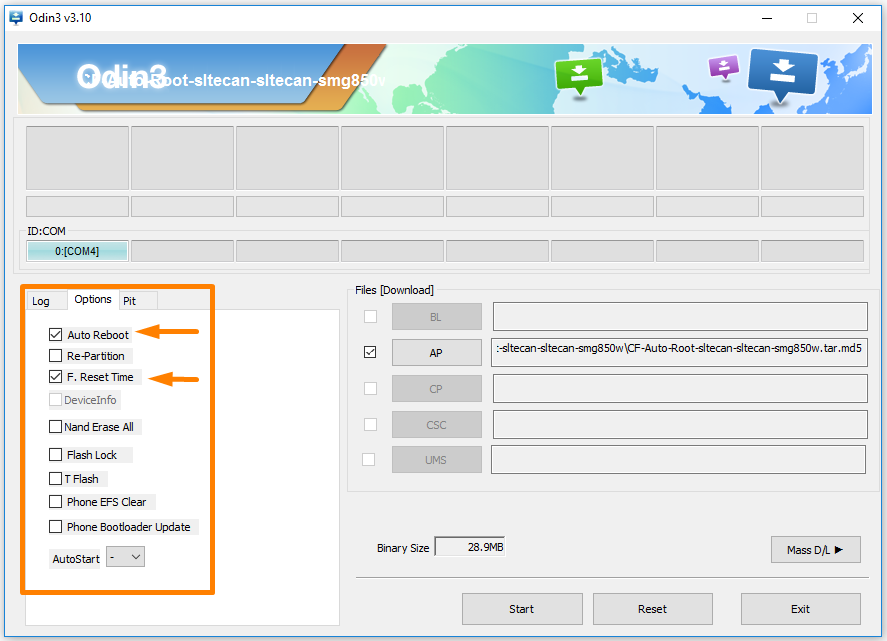
9. Check that the default options Odin gives still set by clicking on the Options tab and making sure yours match up with what ours shows in the screenshot below.
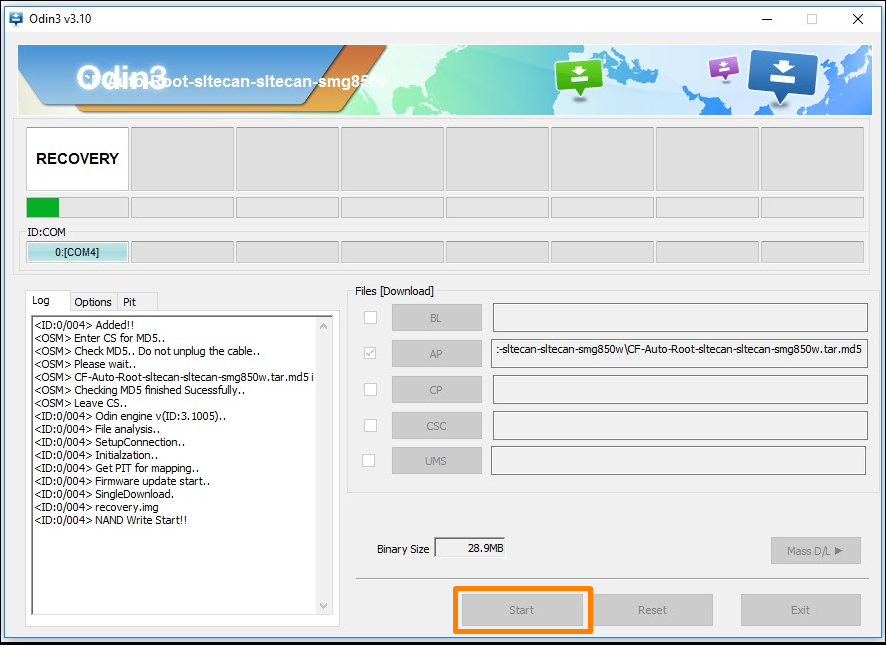
10. Click on the Start button and wait for the Odin user interface to cycle through the recovery and cache from the box. (Both a modified recovery and a modified cache are being installed by the CF-Auto-Root tool which will be deleted later by itself and before the rooting completes).
11. Next, up you get screens that change to the box to blue and shows the word reset inside because it is around this time that your Samsung Galaxy A7 smartphone reboots itself just before it completes the rooting process.
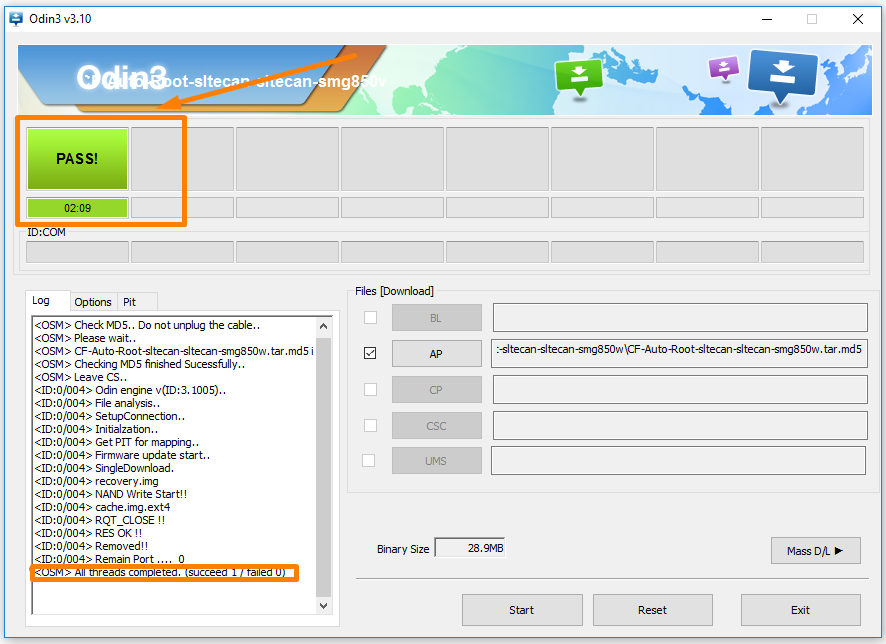
12. Next, up you get a green box with the pass message inside it which is there to let you know that your Samsung Galaxy A7 smartphone did pass and the rooting procedure was a complete success.
In conclusion, that is how to root the Samsung Galaxy A7 SM-A700FD smartphone when it is running the Android 6.0.1 Marshmallow software updates by flashing the CF_Auto-Root tool by Chainfire. The CF-Auto-Root tool has just installed and enabled the SuperSU, and you get to see it available from the A7’s app drawer as soon as your device reboots. You can begin installing any of the root apps that you wanted to try. Moreover, it is possible to install a custom recovery now over the top of the rooting work you just did if you wanted to have a custom recovery and root access but didn’t want to flash the SuperSU from the custom recovery image or you just changed your mind and realized that you wanted both.
Related Tutorials
- How to Root Nexus 5 on Android 6.0 Marshmallow Developer Preview 3 (MPA44G)
- How to Root Nexus 9 on Android 6.0 Marshmallow Developer Preview 3 (MPA44G)
- How to Root Nexus 6 on Android M MPZ79M (Developer Preview 2)
- How to Root Nexus 6 on Android M Developer Preview with SuperSU and Despair Kernel
- How to Root Android N Developer Preview on Nexus Devices
- How to Root Google Nexus 6 on Android 6.0.1 MMB29X Marshmallow
- How to Root Google Nexus 6P on Android 7.1
- How to Root LG Nexus 5 on Android 6.0 Marshmallow
- How to Root LG Nexus 4 on Android 6.0 Marshmallow
- How to Root Google Nexus 5X with Encryption Disabled