Last Updated on May 13, 2023 by Mat Diekhake
Android is a great operating system. Since it is a mobile operating system, for the most part, it doesn’t get compared to Windows operating systems very often. But if there were to be away in which Windows beats out Android, it would be with the permissions.
When you buy a new desktop computer that runs on a version of Windows OS and create the first account, that is the default master account that is called the administrator’s account. When you buy a mobile phone that comes with Android and set up the device for the first time you are not setting it up as the root user (the Linux term for administrator). You have to work out how to become the root user.
That is where our guides come into play. We help people become the root user on the Android operating system. Millions of people are becoming the root user, so they can use their devices with full root permissions which allow them to install and uninstall anything they want. When it comes to installing on the mobile operating system, that is almost always referring to applications. There are thousands of apps available out there that have been developed that will not run on your device that runs Android unless it knows you are the root user.
Notes:
- Chainfire had the MMB29K.A700FXXU2BPH2 firmware build number on his Samsung Galaxy A7 SM-A700F smartphone when he created the rooting tool that is available in this guide. He does not suggest that it means you need to be running on the same firmware build number that he was running when you follow this guide. All you need is to be running on the Android 6.0.1 Marshmallow software updates and to make sure you have the right SM-A700F model number, and the rooting should work.
- The only time the rooting will not work is if a new bootloader is present and the rooting file needs updating. Those typically only happens on new versions of Android, and that is why we only base our guides on one Android version. There shouldn’t ever be problems when using our guides for that reason. However, if you do see a problem, then you need to let Chainfire know about it by leaving a message that contains the recovery image file from the newer firmware you are running on the CF-Auto-Root tool thread over at the XDA-Developers web forum.
Download Samsung Galaxy A7 SM-A700F CF-Auto-Root and Drivers
- Download the CF-Auto-Root tool for the Samsung Galaxy A7 SM-A700F smartphone running on the Android 6.0.1 Marshmallow software updates.
- Download the Samsung USB Drivers you need for the computer running on a version of the Windows operating system.
Root Samsung Galaxy A7 SM-A700F on Android 6.0.1 Marshmallow Using CF-Auto-Root
1. Unlock the Developer Options menu on the Samsung Galaxy A7 smartphone so you can turn on the USB Debugging Mode inside.
2. Enable the USB Debugging Mode from the Developer Options menu so you can make changes to the Android software that is running on your device.
3. Run the Samsung USB Drivers on the computer so that the Samsung Galaxy A7 smartphone can be detected by the Odin flashing tool.
4. Extract the rooting tool to the Downloads folder and then double-click the mouse on the Odin flashing tool executable file in the Downloads folder, so the flashing tool user interface opens. (Note that the Odin file only becomes available after you extract the original CF-Auto-Root tool.
5. Boot the Samsung Galaxy A7 SM-A700F smartphone into the Download Mode and then connect it to the computer with the USB cable that is used for charging the battery.
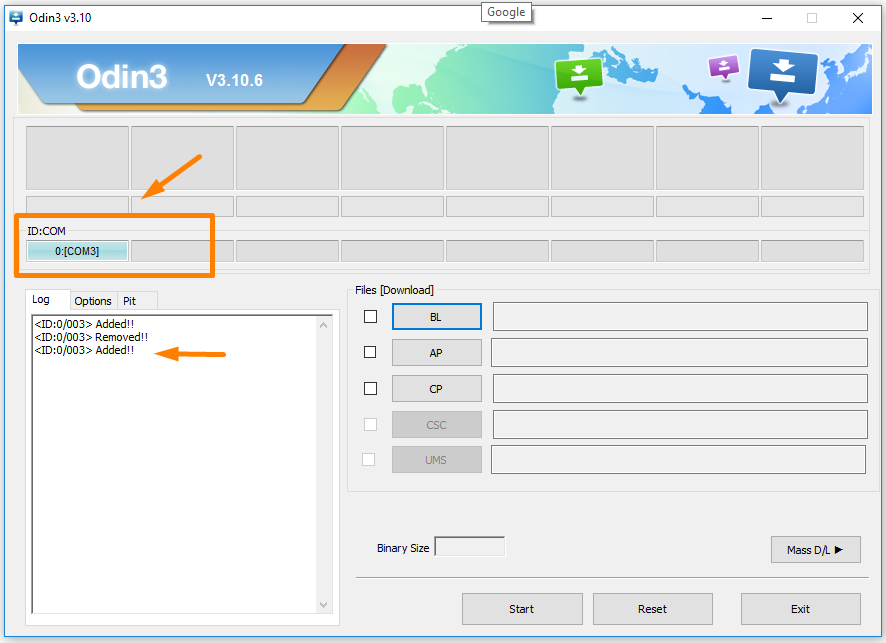
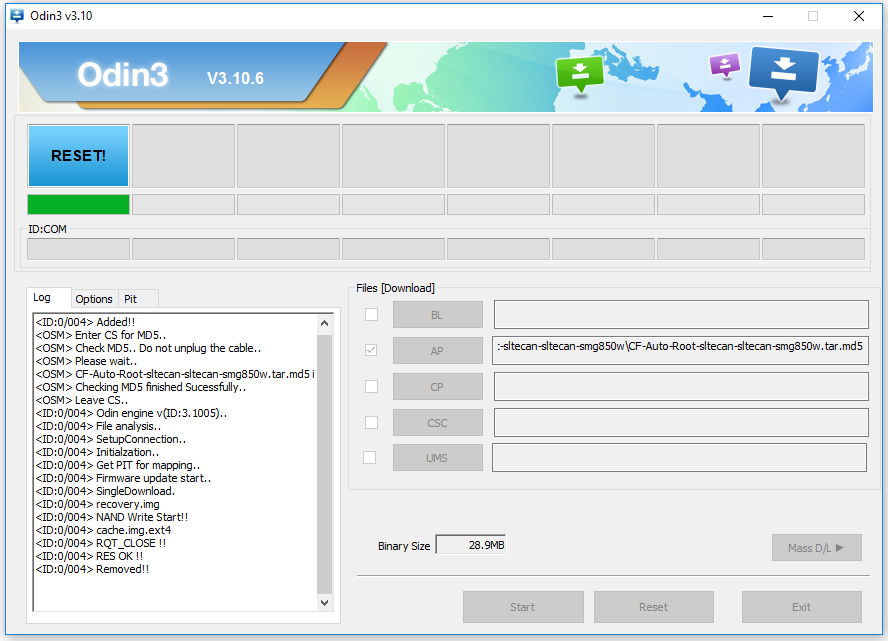
6. Check that Odin shows a blue or yellow color coming from the ID: COM port and the added message is displayed from the Log entry which are both there to let you know that the Samsung USB Drivers are installed correctly.
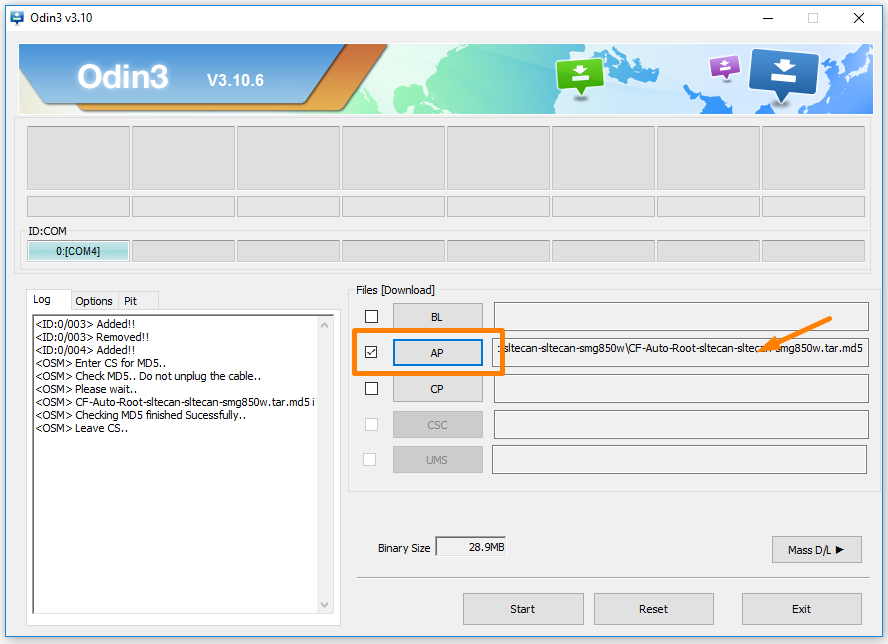
7. Click on the AP button that is found on Odin and browse through to the Downloads folder and find the MD5 file to upload to this location in Odin. (Note that your file extension has different letters and numbers to our because ours is just a sample using a different device).
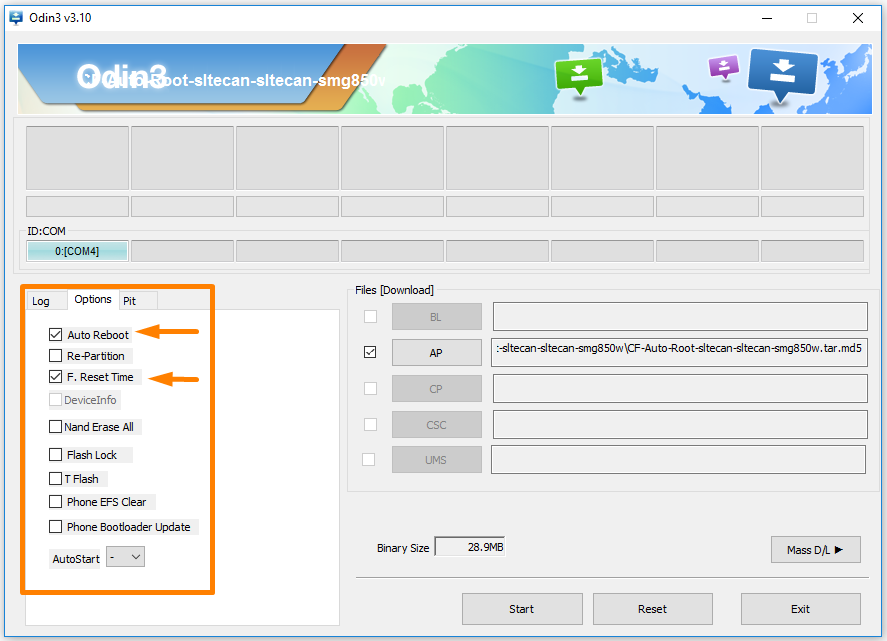
8. Look where it shows the Log entries and click on the Options tab and check that your version of Odin is showing the same default options as the screenshot below before you go ahead with the flashing.
9. Click on the Start button and the rooting of the Samsung Galaxy A7 SM-A700F smartphone begins. You see it cycle through showing the cache in the box and the recovery in the box when both of those two things are being installed. These modified caches and recoveries are uninstalled by the CF-Auto-Root tool, and nothing is left on your device when the rooting completes.
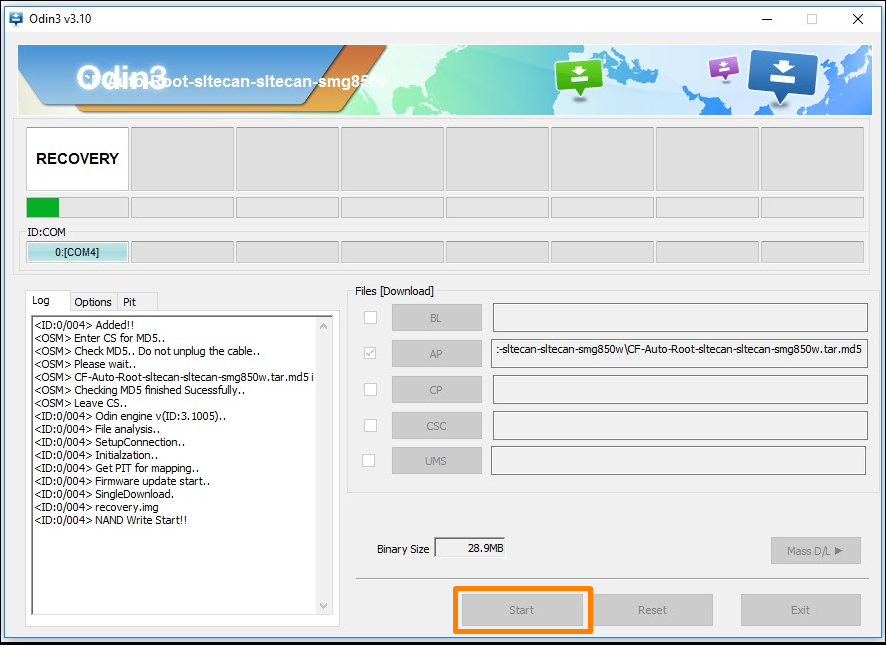
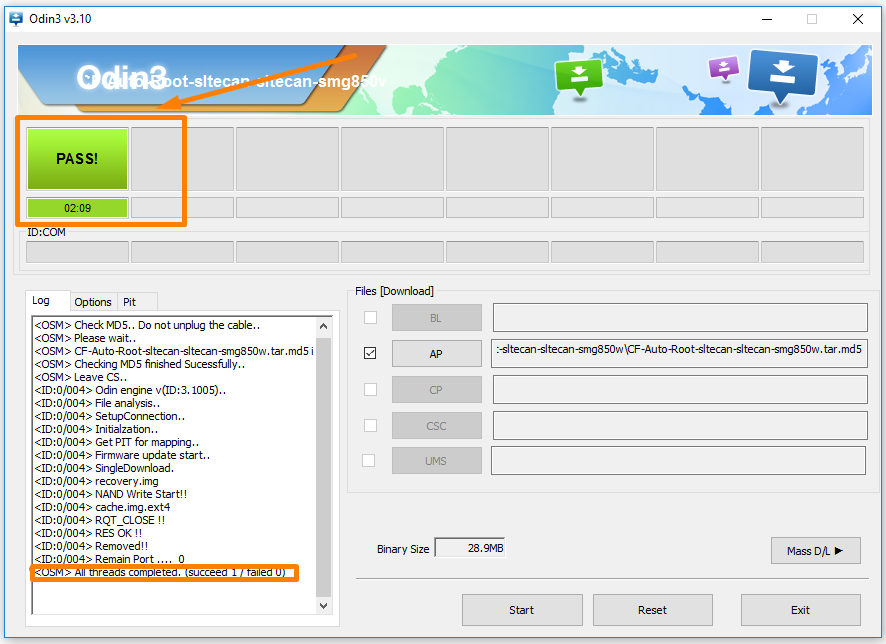
10. It then shows a reset box in blue, and the green progress bar is full when your device is going to reboot now. The rooting of Android 6.0.1 can boot loop a few times during the rooting, and that is normal. You can read the text rolling down your display to find out what to expect.
11. You then get a green pass message available from the box, and that is when you know the rooting is complete. At this time you can unplug your Samsung Galaxy A7 smartphone from the computer and the USB cable as soon as you can see that your device is back into the normal mode.
In conclusion, that is how to root the Samsung Galaxy A7 SM-A700F smartphone running on the Android 6.0.1 Marshmallow software updates by flashing Chainfire’s CF-Auto-Root tool that has been made for this device. You can see the SuperSU app available from the app drawer when your smartphone reboots. It is the same type of SuperSU that people flash from a custom recovery image when getting root access that way. It means you can install all of the same root applications that you could when rooting with the most traditional method of flashing the SuperSU from a custom recovery.
Related Tutorials
- How to Root Nexus 5 on Android 6.0 Marshmallow Developer Preview 3 (MPA44G)
- How to Root Nexus 9 on Android 6.0 Marshmallow Developer Preview 3 (MPA44G)
- How to Root Nexus 6 on Android M MPZ79M (Developer Preview 2)
- How to Root Nexus 6 on Android M Developer Preview with SuperSU and Despair Kernel
- How to Root Android N Developer Preview on Nexus Devices
- How to Root Google Nexus 6 on Android 6.0.1 MMB29X Marshmallow
- How to Root Google Nexus 6P on Android 7.1
- How to Root LG Nexus 5 on Android 6.0 Marshmallow
- How to Root LG Nexus 4 on Android 6.0 Marshmallow
- How to Root Google Nexus 5X with Encryption Disabled