Last Updated on May 13, 2023 by Mat Diekhake
There are lots of risks with the apps that rooted Android users can run. Rooting in itself comes with minimal risk these days with ultra-reliable developers doing great work and developing fantastic rooting tools that almost never fail. The risk today is with the apps that people run because of many of them are powerful. Since these apps can have access to the root file system, it changes what the apps can do. There are no rules when you have access to the root file system so with that kind of power you find apps that can change the design, change the CPU and general hardware performance and thankfully offers ways to remove the system apps.
Removing the system apps that are put on the Android operating system by the smartphone or tablet OEM or carrier network is one of the riskiest things to play with because if you remove the wrong app, it can create OS instability which is a codeword for a bricked device.
If you have the confidence of dabbling with system apps, and you have done due diligence with the research n knowing what apps can be removed, then you can install an app called the Root App Deleter to help get rid of the system apps that are currently residing on the system partition of the mobile device. I do not use this app because I use the Titanium Backup app which gives me the option of paying a small fee and freezing the apps instead of deleting them. That way I can test to see if my device is not bricked and then once I know the app I froze is not essential to my system I delete it then. I am not sure if the Root App Deleter has that option like the Titanium Backup app does, but if it does not then you need to be an experienced Android user to take the risks involved with this app. With that said it still does what the Titanium Backup does regarding removing the system apps. It gives you access to removing the same amount of root apps.
Details We Should Know
- Chainfire had the LRX22G.T532JVU1BOJ1 firmware build number running on the Samsung Galaxy Tab 4 10.1 SM-T532 tablets when he developed the rooting file available in this guide. That firmware rolled out to at least one region in the world and is part of the Android 5.0.1 Lollipop software update for this device. However, it does not matter if you are running the same firmware build number as him. All you need is to have the correct model number and be running on the Android 5.0.1 Lollipop software and the rooting file in this guide should work for you.
- You need to let Chainfire know if the rooting file is no longer working because it probably means a new bootloader is present which can sometimes prevent a rooting file from flashing or a device from booting after the flashing. You need to leave the new recovery image along with your message that you can find in the firmware you are running because he uses that to fix the problem with his rooting tool. All messages and recovery images are to be left on the official CF-Auto-Root tool thread that Chainfire has made over at the XDA-Developers web forum.
Files We Need
- Download the updated CF-Auto-Root file for the Samsung Galaxy Tab 4 10.1 SM-T532 tablet when it is running on the Android 5.0.2 Lollipop software updates.
- Download the Samsung USB Drivers on the Windows computer.
Rooting the Samsung Galaxy Tab 4 10.1 SM-T532 running on the Android 5.0.2 Lollipop software updates
1. Make sure that the USB Debugging Mode is enabled on the Samsung Galaxy Tab 10.1 so that you can make changes to the Android software.
2. Extract the CF-Auto-Root file to the Downloads folder or the desktop and you get the MD5 rooting file to flash as well as the Odin flashing tool that flashes the rooting file.
3. Install the Samsung USB Drivers on the computer before the flashing so that the flashing tool can detect your device when you plug it into the computer with the USB cable.
4. Double-click on the Odin executable file so that it opens on the computer and then connect your Samsung Galaxy Tab 4 10.1 SM-T532 to the computer with the USB cable when you have it in Download Mode.
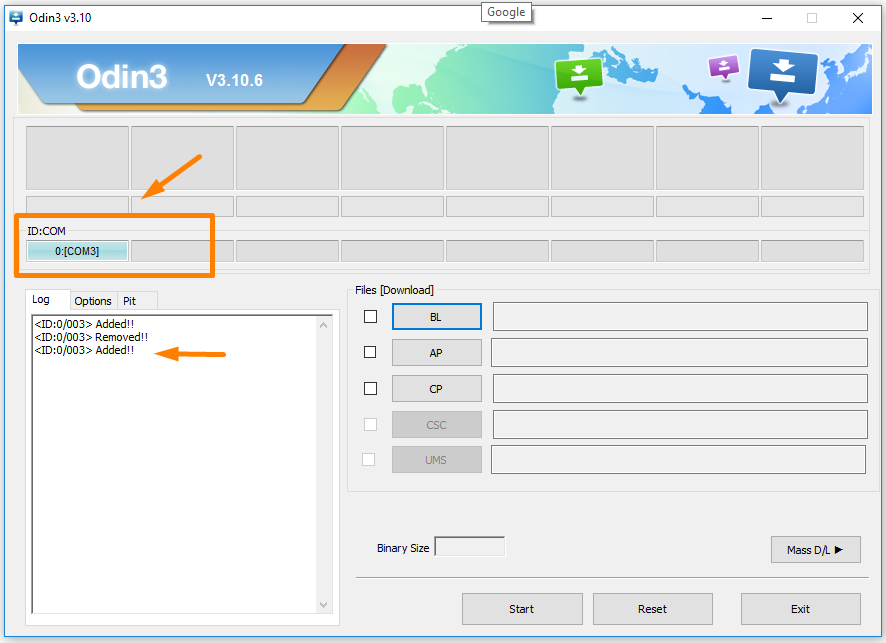
5. You get a blue or yellow ID: COM port and the added message when you connect if the Samsung USB Drivers are installed correctly on the computer.
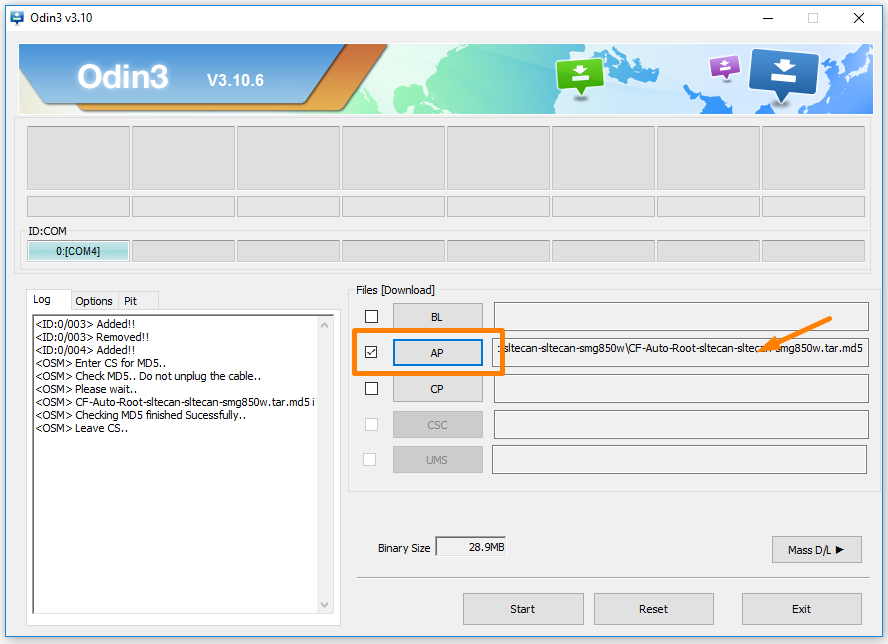
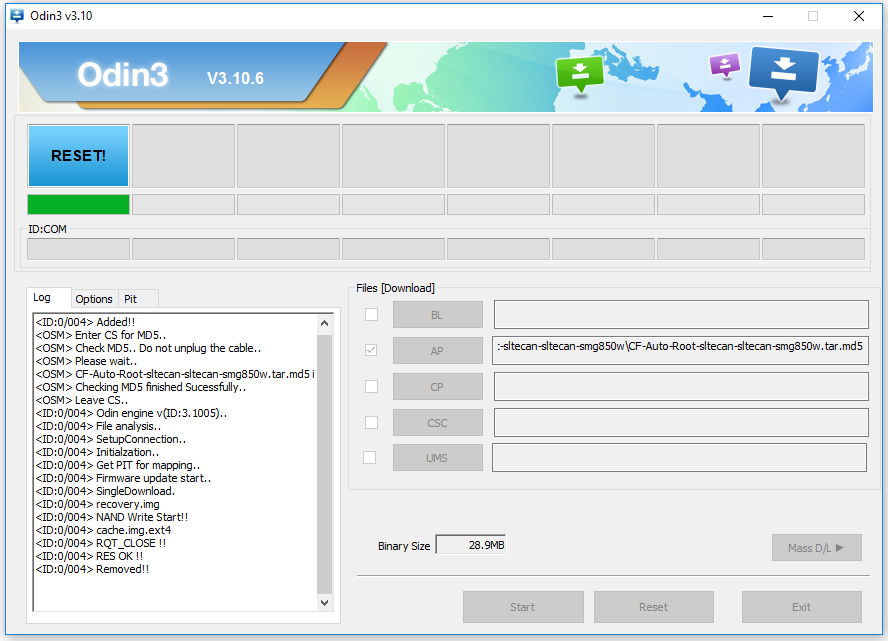
6. Click on the AP button and browse through to the location where you extracted the rooting file and then select the MD5 rooting file to upload to this box in Odin. You can see the file name in the box after it is done. (Note that your file name differs from the one in this image because this example was done using the Samsung Galaxy Alpha).
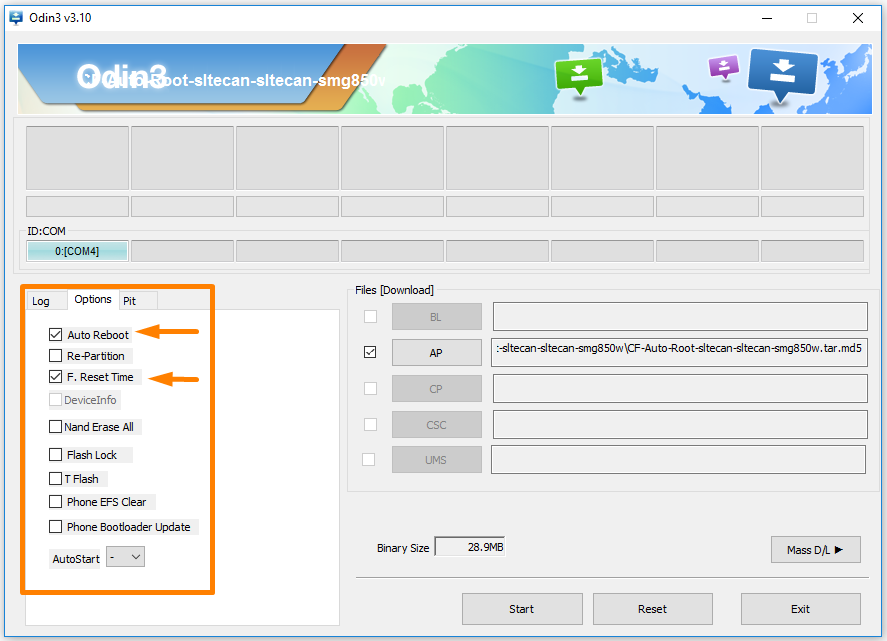
7. Click on the Odin Options box and make sure that the Auto Reboot and the F.Reset Time boxes are turned on, and the Re-Partition box is still empty. (These are the default settings in Odin and should not be changed when flashing the CF-Auto-Root tool).
8. Click on the Start button and then the flashing tool flashes the modified recovery and the modified cache on the smartphone which is helping to install the CF-Auto-Root tool.
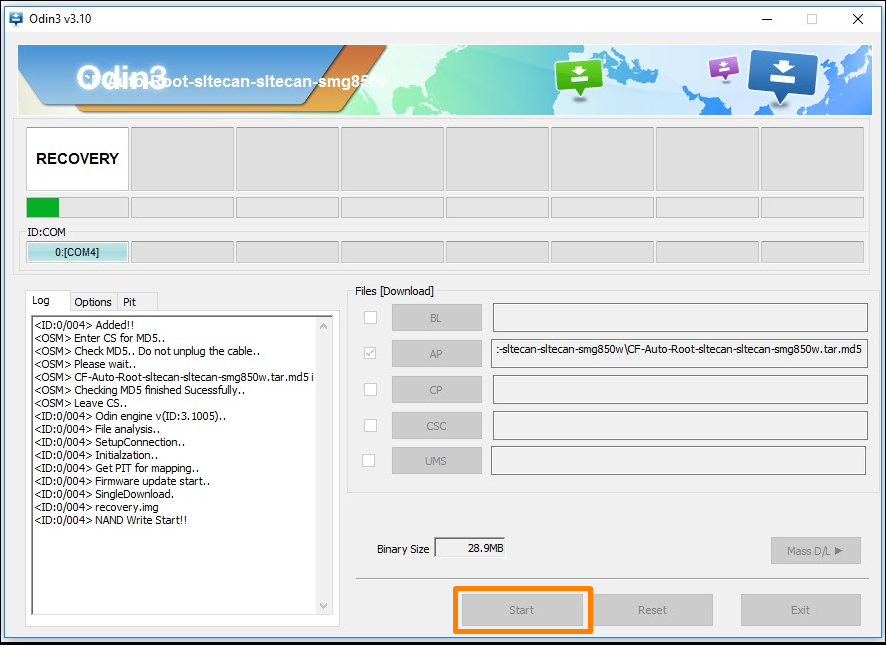
9. It then shows a reset box and the green progress bar making its way all the way across to the other side.
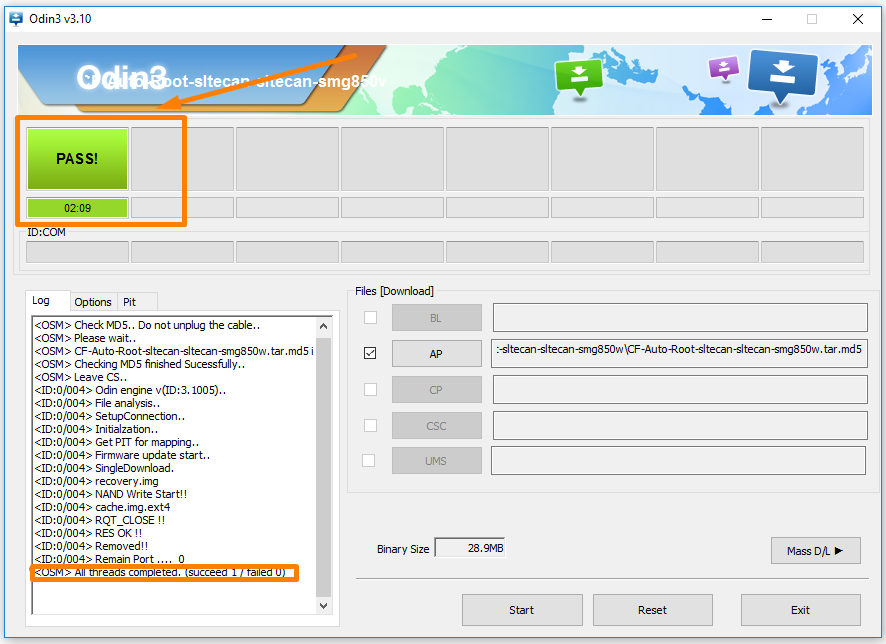
10. Odin then displays a Pass message and a green box lights up when it is done. You can also see the rooting was successful by reading the Log file.
In conclusion, that is how to root the Samsung Galaxy Tab 4 10.1 SM-T532 when it is running the Android 5.0.1 Lollipop software updates by using Chainfrie’s CF-Auto-Root one-click rooting tool. You can now open the Google Play Store after the tablet reboots back into the normal mode and then start installing the root applications. Some people enjoy installing the Root Checker app first, so they know how to troubleshoot if a root app does not work, and other just want to know what the best root apps for Android are so they can start downloading them.
Related Tutorials
- How to Root Nexus 5 on Android 6.0 Marshmallow Developer Preview 3 (MPA44G)
- How to Root Nexus 9 on Android 6.0 Marshmallow Developer Preview 3 (MPA44G)
- How to Root Nexus 6 on Android M MPZ79M (Developer Preview 2)
- How to Root Nexus 6 on Android M Developer Preview with SuperSU and Despair Kernel
- How to Root Android N Developer Preview on Nexus Devices
- How to Root Google Nexus 6 on Android 6.0.1 MMB29X Marshmallow
- How to Root Google Nexus 6P on Android 7.1
- How to Root LG Nexus 5 on Android 6.0 Marshmallow
- How to Root LG Nexus 4 on Android 6.0 Marshmallow
- How to Root Google Nexus 5X with Encryption Disabled