Last Updated on May 13, 2023 by Mathew Diekhake
Rooting Android is often done for practical reasons like increasing the length of the battery or improving the performance or giving yourself a better way to backup the data that is currently on the device. However, there are nearly as many fun reasons and ways to tweak your Android operating system with root access as there are ways to tweak the performance.
Arguably the most infamous of ways to customize the software with root access is by installing the Xposed Framework. Dubbed the closest thing to installing a custom ROM without having to go to the trouble of unlocking the bootloader and installing a custom ROM, Xposed comes with heaps of ways to customize and they call these forms as “modules.”
One of the best Xposed modules for people to install is the XuiMod. Don’t get this confused with anything to do with Xiaomi phones; the XuiMod is for everyone, and it is one of the most popular modules out there that people are running the Xposed Framework use. The XuiMod is the module that makes it possible to change the design of the app drawer, navigation bar, status bar, and the home screen—basically all the important parts that you want to change the most.
Notes:
- Chainfire has the KOT49H.T531XXU1AND8 firmware build number running on the Samsung Galaxy Tab 4 10.1 SM-T531 tablets when he came up with the rooting tool found in this guide. That firmware build number rolled out to at least one region around the world, and it is part of an Android 4.4.2 KitKat software update. It doesn’t mean you need to flash that same KOT49H.T531XXU1AND8 firmware on your tablet before starting the guide. As long as you do have the right model number and it is running on Android 4.4.2 KitKat, then the guide should work for your device.
- Some software updates can stop the CF-Auto-Root from working until Chainfire updates the files. Since there are so many firmware updates that roll out he relies on people who use the guides to keep him informed if one of them is no longer working. You know it has stopped working if your device does not boot after flashing or the flashing doesn’t work. We try to prevent these issues from ever happening on our guides because we only base our rooting guides on new versions of Android and the new bootloaders that stop the CF-Auto-Root tool from usually working only arrive with new releases of Android.
Download Samsung Galaxy Tab 4 10.1 SM-T531 CF-Auto-Root and Drivers
- Download the CF-Auto-Root tool that works for the Samsung Galaxy Tab 4 10.1 SM-T531 running on Android 4.4.2 KitKatsoftware updates.
- Download the Samsung USB Drivers on the computer.
How to Root Samsung Galaxy Tab 4 10.1 SM-T531 on Android 4.4.2 KitKat Using CF-Auto-Root
1. Unlock the Developer options menu on the Samsung Galaxy Tab 4 10.1 SM-T531 so you can use the options available for developers inside the menu.
2. Turn on the USB Debugging Mode from the Developer options menu, so the Android software allows you to make developmental changes to it.
3. Install the Samsung USB Drivers on the computer so that when you connect the Samsung Galaxy Tab 4 10.1 to the computer with the USB cable and start using the flashing tool it can detect your device and allow for that to happen.
4. Extract the CF-Auto-Root tool to the desktop of the computer so you can use the rooting file inside and the Odin flashing tool that flashes the rooting file on your device.
5. Double-click on the Odin executable file and the flashing tool user interface opens on the computer. Leave it open.
6. Boot the Samsung Galaxy Tab 4 10.1 SM-T531 into the Download Mode and then connect it to the computer with the USB cable.
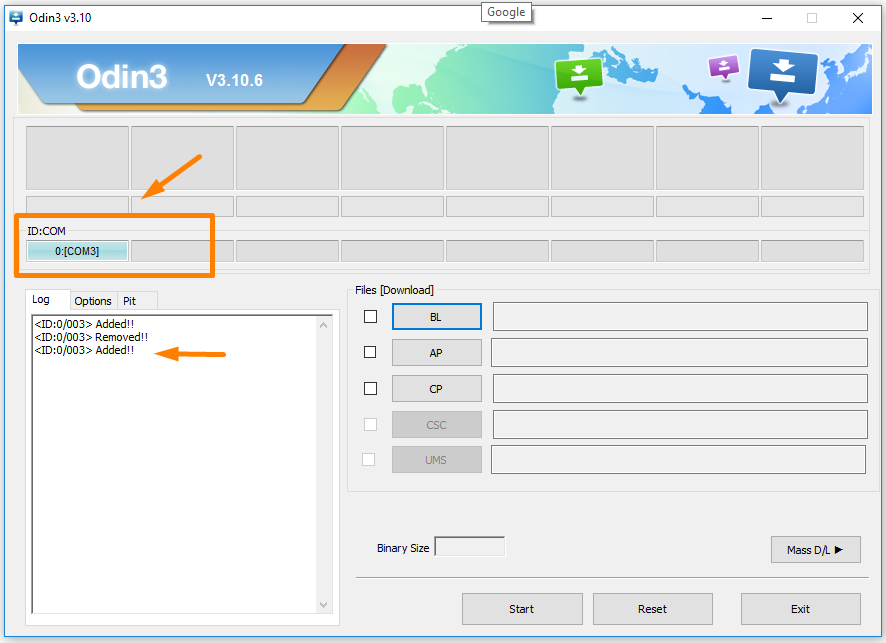
7. A blue or yellow ID: COM port box now lights up, and the log shows the added message if the Samsung USB Drivers are installed on the computer correctly.
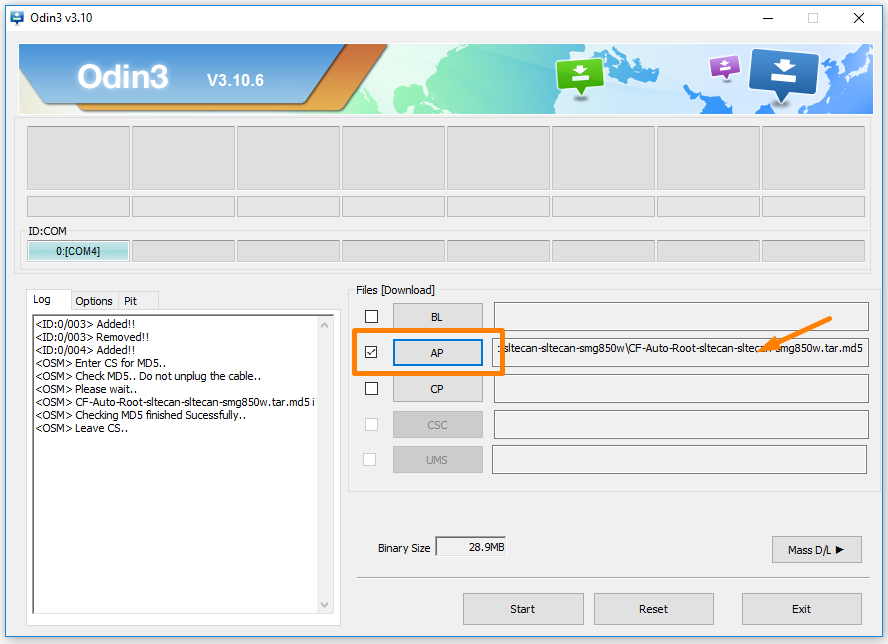
8. Click on the AP button and then browse through to the location where you extracted the CF-Auto-Root file and select the MD5 rooting file to upload to this location on Odin. You know it has upload correctly when you can see the file extension next to the AP box. (Note that your file extension differs from the example because the example is using the Samsung Galaxy Alpha smartphone and not the Samsung Galaxy Tab 4 10.1 SM-T531 tablets).
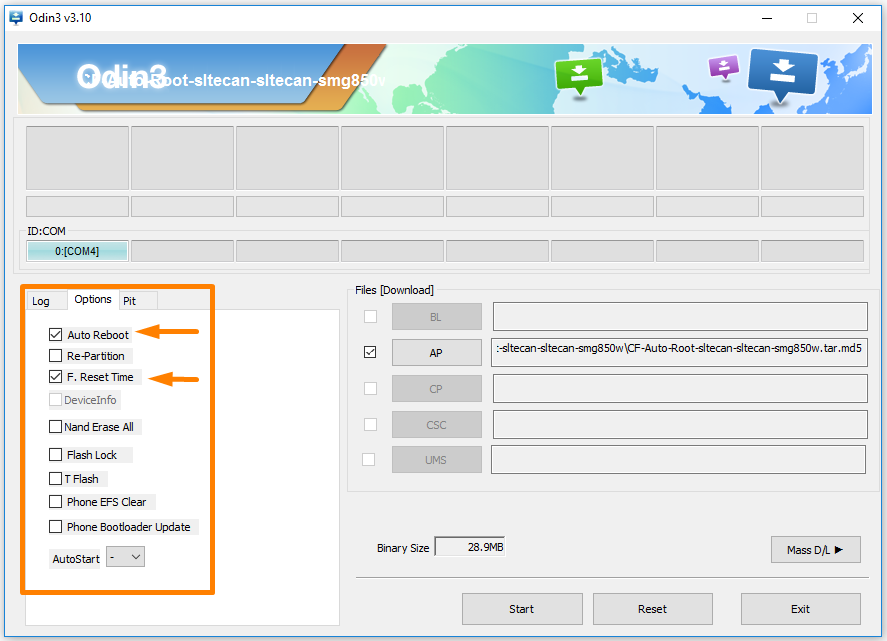
9. Click on the Options tab next to the Log and make sure you have the same options available as the screenshot below which includes checkmarks in the Auto Reboot and R. Reset Time but no others.
10. Click on the Start button and the rooting of the Samsung Galaxy Tab 4 10.1 SM-T531 begins. It goes through a few phases including the installation of a modified recovery and a modified cache before it installing and then enabled the SuperSU via the CF-Auto-Root tool.
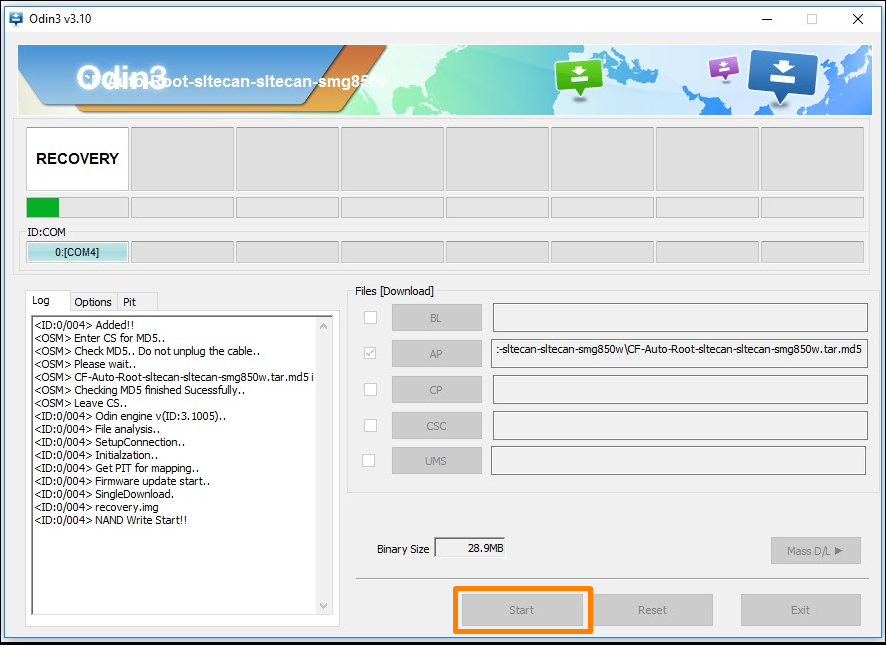
11. It then shows the reset message when your Samsung tablet is about to reboot, and the rooting is complete.
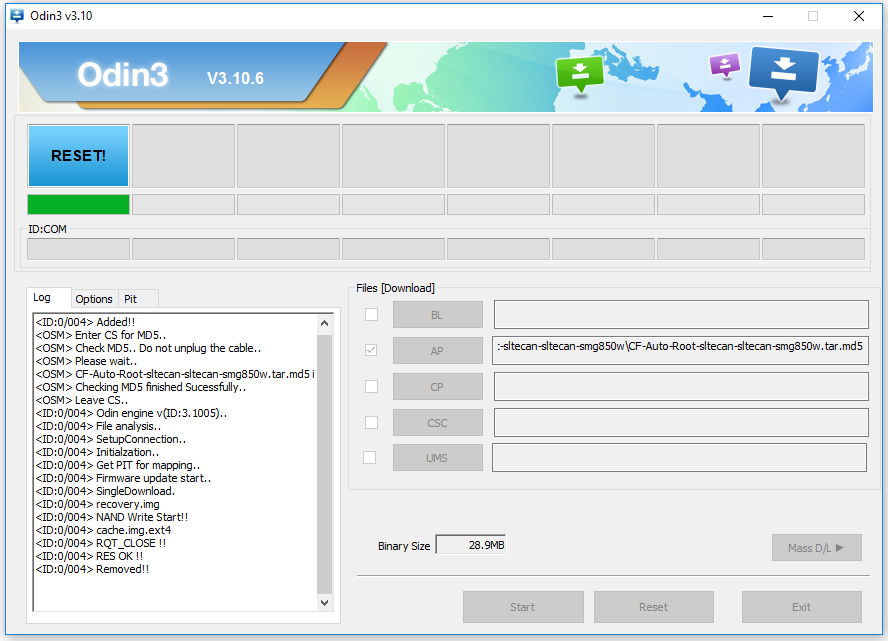
12. Once the reset is done you then get a green box lighting up with a pass message inside which is letting you know that Odin is all done with the flashing of the rooting file and your device now has the SuperSU installed and enabled correctly.
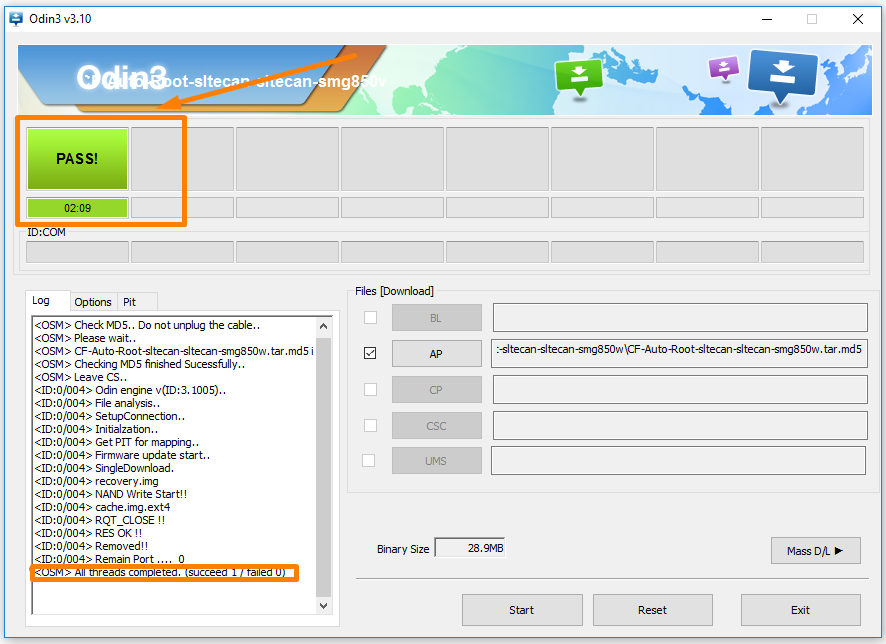
In conclusion, that is how to root Samsung Galaxy Tab 4 10.1 SM-T531 tablets running on the Android 4.4.2 KitKat software updates by flashing the CF-Auto-Root tool by Chainfire from the Odin flashing tool on a computer that runs on a version of the Windows operating system.
As soon as the table reboots back into the normal mode which CF-Auto-Root is programmed to do automatically, you can open up the Google Play Store app and start installing any of the apps that you didn’t have access to before because they would not run without root access.
Heaps of people enjoy starting off by installing the root checker app just to make sure that things did work. The root checker app is also handy for later when you want to unroot the device just to make sure that it is, in fact, unrooted also.
Everyone else usually enjoys running to the articles that show what the best root apps for Android are so they know what names to search for on their next visit to Google Play. Some of the root apps that are now available to you are also not available from Google Play. All those can be found from a Google search for the names instead.
A couple of excellent examples of root apps not on the Google Play Store are the Viper4Android and Xposed Framework, but there are also about five to ten others that are commonly used and not available from the App Store itself. Be careful that you are installing the official apps when installing from outside Google Play, so you don’t end up installing malware instead of the app you wanted.
Related Tutorials
- How to Root Nexus 5 on Android 6.0 Marshmallow Developer Preview 3 (MPA44G)
- How to Root Nexus 9 on Android 6.0 Marshmallow Developer Preview 3 (MPA44G)
- How to Root Nexus 6 on Android M MPZ79M (Developer Preview 2)
- How to Root Nexus 6 on Android M Developer Preview with SuperSU and Despair Kernel
- How to Root Android N Developer Preview on Nexus Devices
- How to Root Google Nexus 6 on Android 6.0.1 MMB29X Marshmallow
- How to Root Google Nexus 6P on Android 7.1
- How to Root LG Nexus 5 on Android 6.0 Marshmallow
- How to Root LG Nexus 4 on Android 6.0 Marshmallow
- How to Root Google Nexus 5X with Encryption Disabled
