If you want to do things that alter the Android software or operating system or require you to have full read permissions, then you need to install root apps.
The Google Play Store plays host to two varieties of applications. One of them is the kind of apps that everyone can install, and the other are called root applications. The root apps are the apps that are restricted to the people who have root access on the device—and that is what people do when they follow a guide like this one below.
A root app requires rooting permissions before it can run. It doesn’t matter what rooting tools you use to get the job done. As long as you end up with the mobile device rooted then it can run all of the same root apps.
There are thousands of reasons why people choose to have a device with root access and chances are your reason is different to the following individuals who use the same guide after you use it. However, there are also many common reasons and root apps that people have in common that they always love to install.
If you are choosing to root the Android operating system for practical purposes, then you might want to look for an app that can backup all of your apps easily since that was something that was impossible to do without root access. The Titanium Backup app is perfect for that. If you are a gamer and want to know how to enhance your gaming, then you should check out something like the Chainfire 3D app or the GLTools app instead. No matter what you are interested in doing with your rooted Android, there are plenty if apps out there to help you enjoy Android more than you were before.
Notes:
- Chainfire had the MMB29K.A800FXXU1BPF5 firmware build number on his Samsung Galaxy A8 SM-A800F smartphone running when he developed the version of the rooting tool that is available in this guide. It doesn’t mean that is the same version that you need to be running. The fact of the matter is that there might be many different firmware versions that are part of the Android 6.0.1 update. As long as you are running the Android 6.0.1 Marshmallow software updates, then it shouldn’t matter when firmware build number as running.
- Some software updates bring new bootloaders with them, and the new bootloaders are what can cause the CF-Auto-Root tool to stop working until Chainfire updates the files, so they start working again. If your device does not boot after the flashing or the flashing just doesn’t work you can let Chainfire know about it by leaving a message with the recovery image file from the problematic firmware to the CF-Auto-Root tool thread that is made over at the XDA-Developers web forum.
Download Samsung Galaxy A8 SM-A800F CF-Auto-Root and Drivers
- Download the CF-Auto-Root tool for the Samsung Galaxy A8 SM-A800F smartphone running on the Android 6.0.1 Marshmallow software updates.
- Download the Samsung USB Drivers for the Windows computer.
How to Root Samsung Galaxy A8 SM-A800F on Android 6.0.1 Marshmallow Using CF-Auto-Root
1. Unlock the Developer Options menu on the Samsung Galaxy A8 SM-A800F smartphone so you can turn the USB Debugging Mode on from the menu.
2. Enable the USB Debugging Mode on the Samsung Galaxy A8 SM-A800F smartphone, so the Android software that is running on your device allows you to make changes to it.
3. Run the Samsung USB Drivers on the computer so that they are installed correctly before you get started with the flashing tool. That way your Samsung Galaxy A8 smartphone can be detected by the flashing tool which then allows for the flashing to happen.
4. Extract the rooting file to the Downloads folder and then you can see the flashing tool that you will be suing and the rooting file both available from the Downloads folder.
5. Run the Odin flashing tool executable file so that the flashing tool user interface opens on the computer and is ready for you to connect to it.
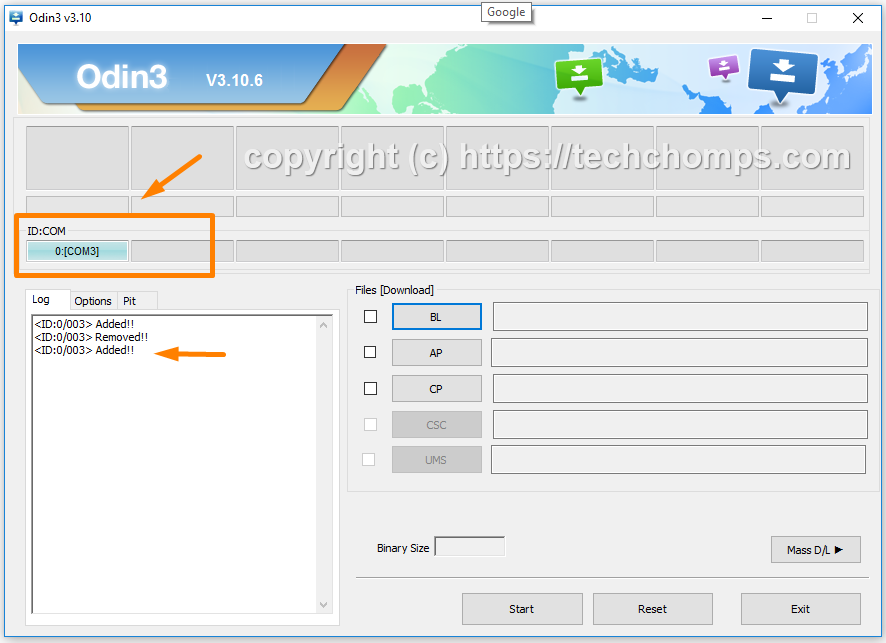
6. Boot the Samsung Galaxy A8 SM-A800F smartphone into the Download Mode and then connect it to the computer with the USB cable that is used for charging the battery.
7. When you do that, the Odin flashing tool should show the added message from the Log and the ID: COM port lights up with a blue or yellow color which is there to let you know that the Samsung USB Drivers at hat you installed earlier and working correctly.
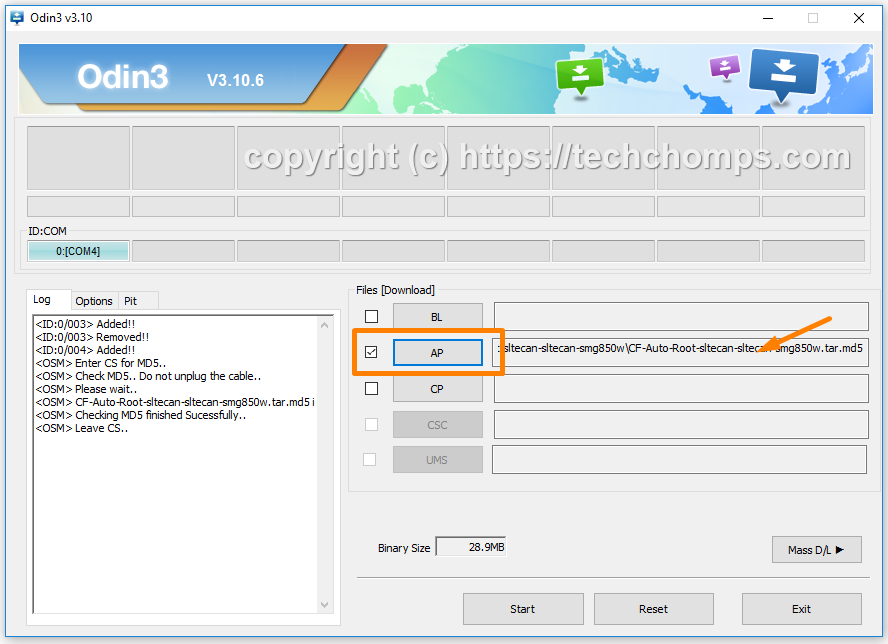
8. Click on the AP button that is available from the user interface and then chooses to browse through to the Downloads folder where you extracted the rooting file earlier. You know it is loaded correctly when you see the file extension show up in Odin next to the AP box. (Note that your file extension differs from ours because we are using a different device in the sample).
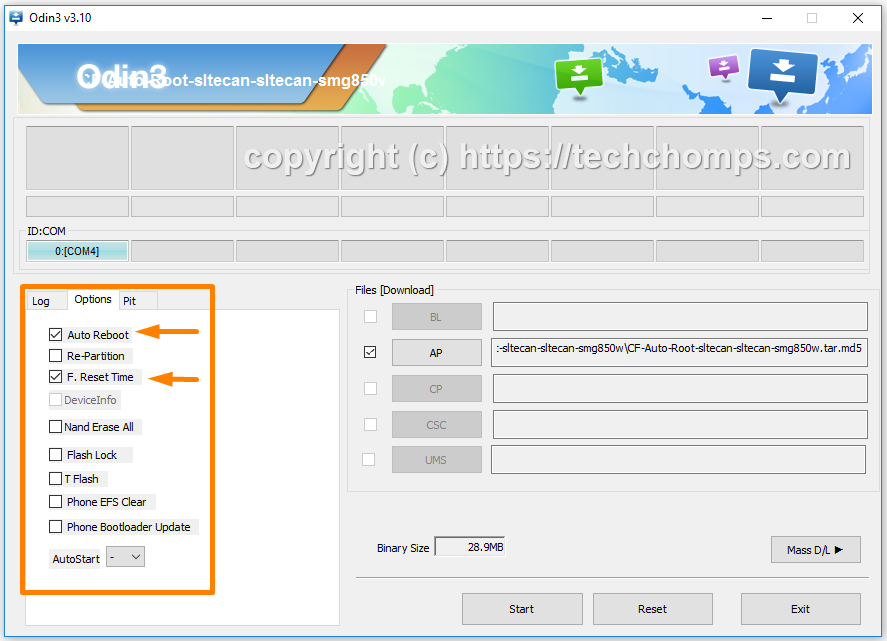
9. Click on the Options next to the Log entry box and then check that your options match up the same as in the screenshot below which are the same as the default Odin settings. Having them set up that way means that your device will automatically reboot after the flashing is complete but you won’t notice anything else.
10. Click on the Start button and the rooting of the Samsung Galaxy A8 SM-A800F smartphone begins. Since this is the systemless root version based on Android 6.0.1 marshmallow, it can take a few minutes longer than the older versions to complete. Read the text that is rolling down the display of the smartphone for more information on what to expect.
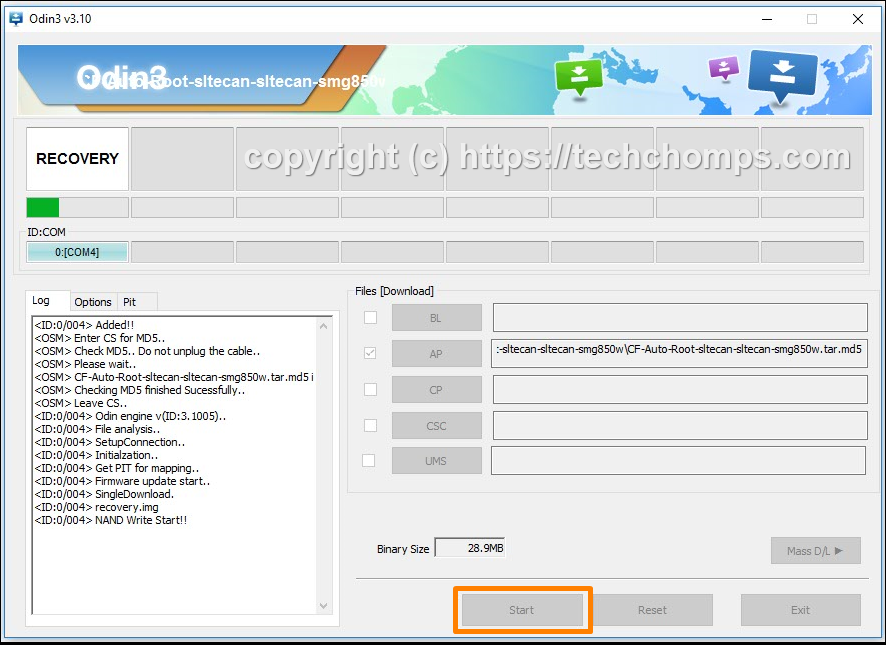
11. Wait for the green progress bar to reach the other side of the box and then your Samsung Galaxy A8 smartphone will reset. Do not disconnect it from the computer yet.
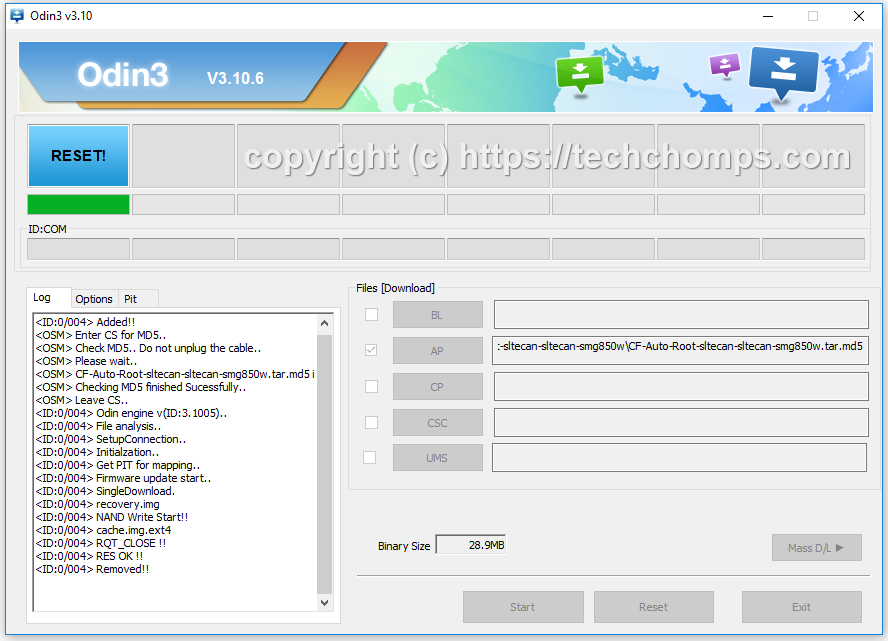
12. The Odin flashing tool then shows a green pass message in the box when the rooting is complete. You can unplug the Samsung Galaxy A8 smartphone from the computer once you see the green box, and your phone is rebooted back into the normal mode.
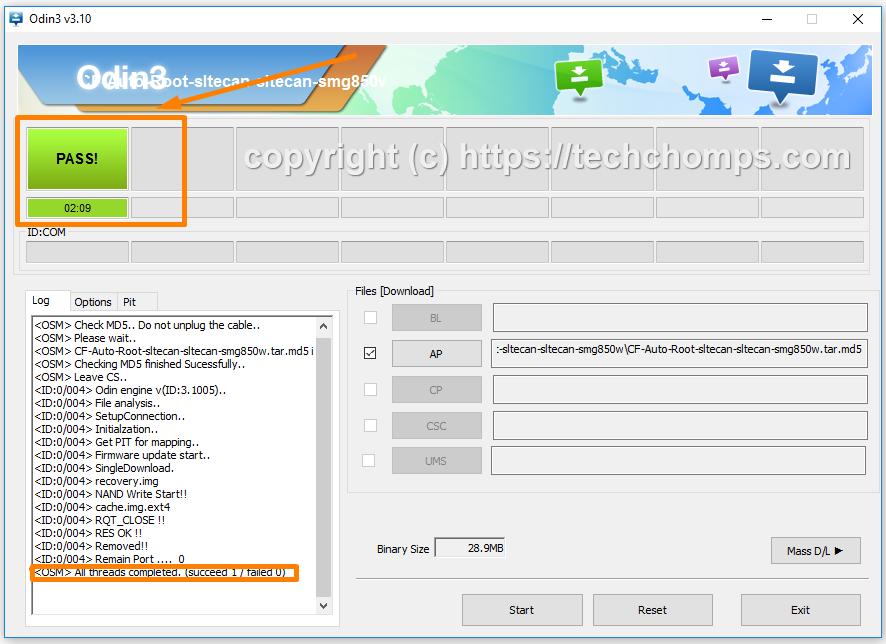
In conclusion, that is how to root the Samsung Galaxy A8 SM-A800F smartphones running on the Android 6.0.1 Marshmallow software updates by installing the systemless root version of the CF-Auto-Root tool by Chainfire. When the device reboots back into the normal mode, the SuperSU app is available from the app drawer. That is what the CF-Auto-Root just managed to install and enable, and it must remain the device for as long as you wanted it rooted.
Related Tutorials
- How to Root Nexus 5 on Android 6.0 Marshmallow Developer Preview 3 (MPA44G)
- How to Root Nexus 9 on Android 6.0 Marshmallow Developer Preview 3 (MPA44G)
- How to Root Nexus 6 on Android M MPZ79M (Developer Preview 2)
- How to Root Nexus 6 on Android M Developer Preview with SuperSU and Despair Kernel
- How to Root Android N Developer Preview on Nexus Devices
- How to Root Google Nexus 6 on Android 6.0.1 MMB29X Marshmallow
- How to Root Google Nexus 6P on Android 7.1
- How to Root LG Nexus 5 on Android 6.0 Marshmallow
- How to Root LG Nexus 4 on Android 6.0 Marshmallow
- How to Root Google Nexus 5X with Encryption Disabled