Last Updated on December 26, 2022 by Mat Diekhake
The Windows 10 operating system always starts off with one partition, also known as a volume. You can then shrink that existing partition, so there is some room to have multiple partitions that take up the hard drives full capacity instead.
Microsoft also allows for the extending of a partition as well, which has the opposite effect from shrinking. Things can start to get a little bit complicated though when you start using extended volumes because now there is some mathematics involved. You can always delete a partition when you have created more than one to free up space that way. But if you want to have one particular partition bigger than it’s current size and a different size than all the others then you can use this option to extend it.
The volume or partition that you wish to extend must be in its raw form or formatted with the NTFS file system or else it won’t work.
It’s possible to extend a logical drive as well as the contiguous free space of the extended partition. If you try extending the logical drive beyond the amount of space that’s left in the extended partition, the partition will grow in size to accommodate it.
The basic disk needs to be upgradable to a dynamic one if you are to extend the volume into contiguous space for a system or boot volume, or logical drive.
How to Extend Volume or Partition on Disk in Disk Management
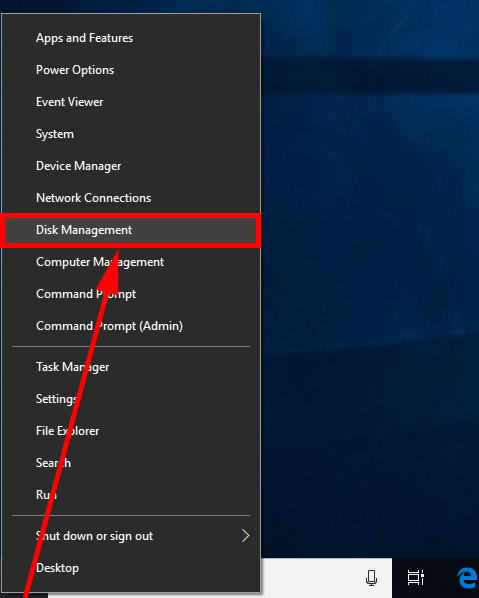
You can extend a partition or volume on a disk by using Disk Management. To get there, right-click on the “Start” button and then click on the “Disk Management” link from the Win+X Quick Links menu.
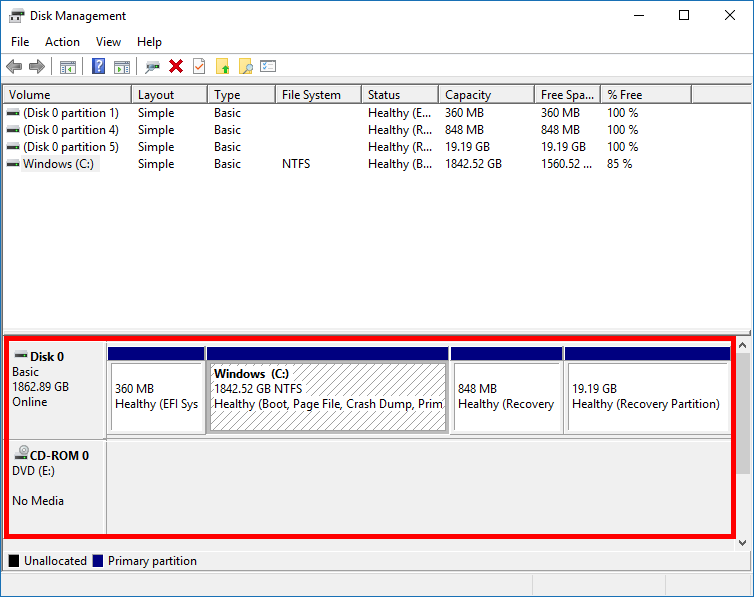
You’ll then see your disks listed at the bottom of Disk Management. Right-click on the one that you want to extend and then select the “Extend Volume . . .” option from the menu.
Rather than just automatically extending the volume for you, it’ll start running through the Extend Volume Wizard where you’ll then be able to choose how many megabytes you would like the volume to be extended. You can’t miss it, and it won’t let you advanced until you make your selections anyway. It’ll also give you the details you’ve chosen before the Finish screen so you can double check that the information you entered is, in fact, correct and the way you want it.
How to Extend Volume or Partition on Disk in Command Prompt
1. You can also extend a volume or partition on the disk by using the Command Prompt if you like. To do it this way you’ll need to first open the elevated Command Prompt or the Command Prompt at boot.
2. Now with the Command Prompt window open, type the diskpart command followed by the list disk command.
3. You’ll now see all the disks that you have available on your computer and a number for each. Now type the select disk (number) command into the command line but changed the “(number)” for the actual number, i.e., select disk 4.
4. Now type the detail disk command to find out the volumes on the computer.
5. Next, type the select volume (number) command and replace where it says “(number)” with the actual number of the volume that you want to extend.
6. You now have a couple of choices: to extend it so that it used up all unallocated space or to extend it a specific amount of megabytes, which you are able to manually select yourself.
7. Those of you who want to extent it to use all unallocated space should type the extend command while those wanting to choose a number of megabytes should type the extend size=(size in megabytes) command, making sure to change where it says “(size in megabytes)” to the actual number of megabytes you want, i.e., extend size=500.
How to Extend Volume or Partition on Disk in PowerShell
1. You can also extend a volume or partition that’s on a disk by using the Windows PowerShell instead if you want. To use PowerShell, you’ll need to start by opening up the elevated version of Windows PowerShell so that you are running it with the administrative permissions.
2. Now type the Get-Partition command and PowerShell will then give you some information that will include the drive letter that you need to make a note of for your next command.
3. Next type the Get-PartitionSupportedSize -DriveLetter (drive letter) command, being sure to change the “(drive letter)” for the actual letter of the drive that PowerShell gave you in its information after you executed the step above, i.e., Get-PartitionSupportedSize -DriveLetter E.
4. You’ll now see the minimum size and the maximum size it can be extended. Make a note if it and make sure you select a size that is between the two numbers.
5. Now type the Resize-Partition -DriveLetter "(drive letter)" -Size (size in numbers) command and replace where it says the (drive letter) with the actual letter and the “(size in numbers)” with the actual number, i.e., Resize-Partition -DriveLetter "E" -Size 500.
6. Note that the PowerShell command allows you to choose KBs, MBs, GBs, and TBs as your numbers. If you want to specify which one you’re using, your new command would be this: Resize-Partition -DriveLetter "E" -Size 500 MB.
The Windows PowerShell is a pretty powerful place, and it offers you a bunch of more commands relating to the resizing of the partition. You can check them out from the Resize Partition Microsoft document that’s posted on the official Microsoft website.
You might also be interested in:
- How to Set Up on Out of Office Reply in Windows 10 Mail
- How to Verify if System Files and Drivers are Digitally Signed in Windows
- How to Turn On/Off Startup Sound in Windows 10
- Download Windows Repair (All In One) 4.0.12
You can subscribe to our RSS, follow us on Twitter or like our Facebook page to keep on consuming more tech.