Last Updated on December 18, 2024 by Mat Diekhake
The Action Center is new to Windows 10 and controls most of the notifications that you see. The notifications are what is called “toast notifications, ” and they can alert you to things that are on your Calendar, other applications, and just general system notifications.
The Action Center is designed to store the notification until you choose to dismiss it. The notification first pops up in the bottom corner of the computer’s display for a limited amount of seconds. Often people don’t get the chance to click on the notification before it goes away which is why having it there in the Action Center is a good thing. All you need to do is click on the Action Center icon in the system tray, and then you’ll see that notification.
The Action Center icon looks a bit like a speech bubble with nothing in it when no notifications are waiting for you to see from it. But when an announcement comes in that you have missed, it starts you a symbol of a page with writing on it and the number of notifications that are waiting.
When you want to dismiss a notification, you just need to have viewed it from the Action Center window. You can hover the mouse over the notification, and a little “X” appears that you can click on in the top right corner for you to dismiss the notification, so it no longer is viewable from the Action Center.

Features That Could Be Improved Within Action Center
We like the Action Center in general, but some strange things occured within the Action Center tab from time to time during our experience with it and some things inside it we just don’t agree with. To give you an example, sometimes the tile to adjust the brightness reads the percentages: 0%, 25%, 50%, 75%, 100%—always going up by quarters—and other times it drops the percentages and just says “darkest, darker, suggested, brighter, and brightest. We haven’t been able to gather how Windows expects us to choose between either option. Some days we use our computers, and it is showing the percentages while other days it seems to switch over to showing the wording instead. Are we pressing buttons without realizing it? Probably, but if we can’t work out how we are doing it then it’s probably too difficult to understand and needs changing.
The other issue we have is with the wording. You’d expect “Darker” to provider something darker than what it was just on but darker is given when the screen is becoming brighter from the “darkest” setting.
Difference with Action Center Disabled
Disabling the Action Center does not mean that you stop getting the notifications entirely. You’ll still get the quick notification that is similar to a push notification coming from the right side of the display of the computer, it sitting there for a few seconds and then disappearing all by itself. The difference is you don’t have the Action Center icon to click on from the system tray to open them up once they’ve disappeared, which also means no more notifications from within the Action Center window—hence why they say it’s disabling the Action Center and its notifications from the policy setting.
If you know there is nothing on offer from the Action Center that you are interested in, then you can choose to remove it completely, so it no longer works if you have a version of Windows 10 Professional, Enterprise or Education. Everyone else who is using the Windows 10 Home needs to keep it or upgrade to Windows 10 Pro. The upgrade process is relatively straightforward but a costly one just for removing the Action Center, so you should probably learn to live with it if you have Windows 10 Home.
How to Enable or Disable the Action Center in Windows 10
You can disable the Action Center and enable it again by using the Local Group Policy Editors in Windows 10. To do that, open the Local Group Policy Editor. It should show up on your computer’s display immediately, but it might be hiding behind your web browser if you can’t see it. Click on its icon that becomes available from the taskbar if you don’t see it open on your computer’s display already.
Note: You’ll need to be using a Windows 10 Pro, Education or Enterprise edition of Windows 10 for this guide to work. You can’t make policy changes in the Local Group Policy Editor using the Windows 10 Home. You can upgrade from Windows 10 Home to Windows 10 Pro by heading to the Settings application if you want to be able to make changes to group policies.
![]()
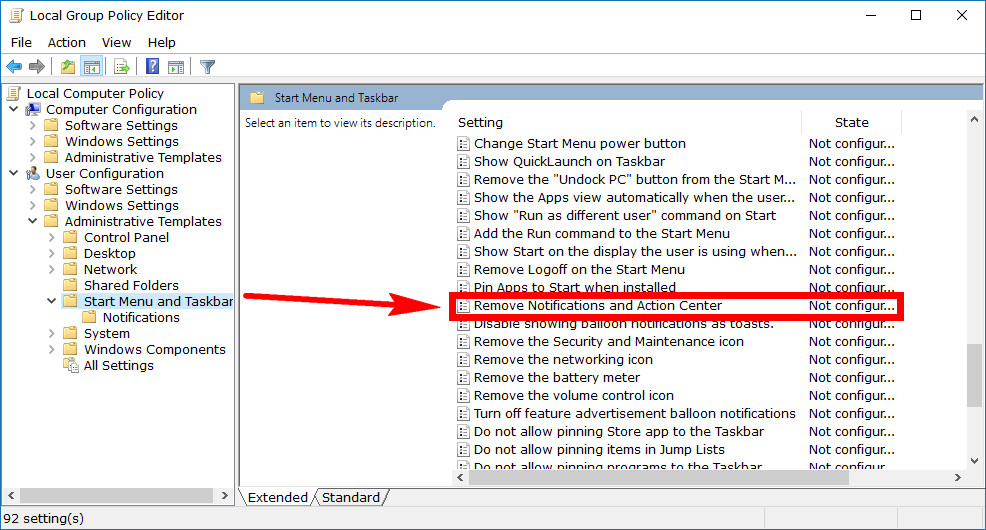
Open up the User Configuration > Administrative Templates > Start Menu and Taskbar path from the left-hand side pane. Next, scroll down the right side pane until you get to the “Remove Notifications and Action Center” option and highlight it by clicking on it once.
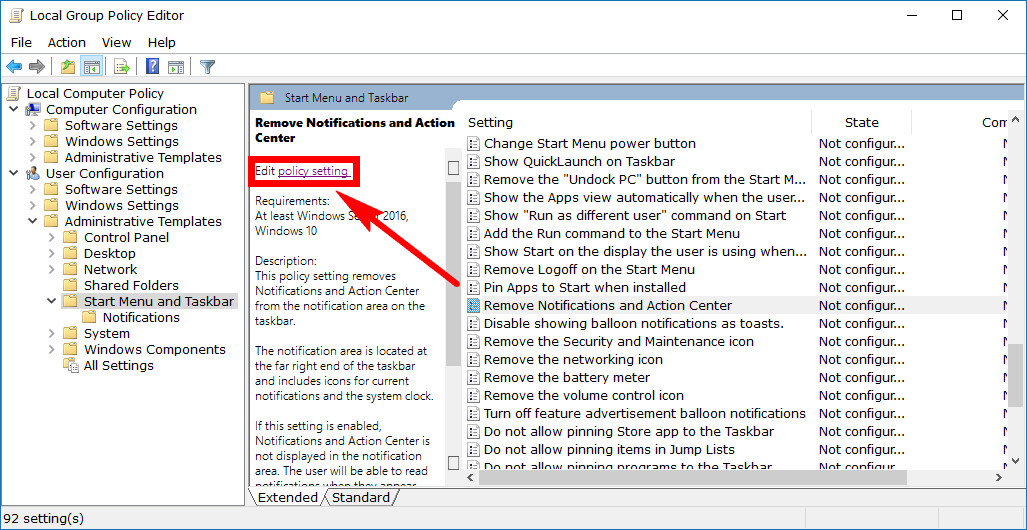
You’ll then see a description of what that policy is all about in the middle column. At the top of the column is a link for you to click if you want to edit it. Click on the “Policy setting” link now. (You can also open up the policy setting by double-clicking on the entry in the right side pane if you prefer, but this way you get to read the description as well).
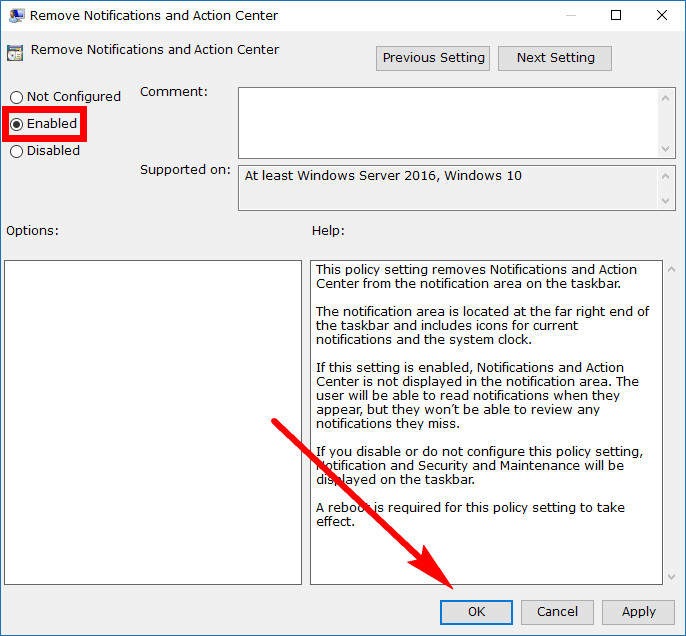
By default, the “Remove Notifications and Action center” setting is set to the “Not Configured” option. This configuration always relates to how the title of the policy is read. So if you wanted to remove the notifications and Action Center, you would need to enable this policy by changing it from the “Not Configured” over to the “Enabled” checkmark. When done click on the “OK” button at the bottom of the policy window as it is all you need to apply the changes and close the window at the same time.
The Action Center is there to collect and display notifications from applications and the Windows 10 operating system, as well as give you quick access to the Settings application and a few other icons like the WiFi. None of the icons are needed to get access to what is there from the Action Center—the Settings app is also accessible from the Start menu for example—so if you know you don’t want any notifications from the Action Center, then it’s safe to disable for now.
Related Tutorials