Last Updated on June 18, 2022 by Mat Diekhake
I want to be able to better order my Microsoft Edge tabs because when I use my computer I often have many tabs open and it becomes cluttered and causes confusion. I want Edge to be able to allow me to categorize my tabs so each website remains grouped together, which will help with my sorting. Resolution:
Microsoft Edge is a web browser that is developed by Microsoft and comes preinstalled as the default web browser to use in all versions of the Windows 10 operating system. It was originally built on Microsoft’s EdgeHTML but has since changed to use Chromium in an attempt to help improve compatibility around the Web. This also means you will be able to use the same browser extensions as Google Chrome.
The Chromium version of Microsoft Edge is compatible with all versions of Windows 10, Windows 8, Windows 7, Windows Server (2016 and above), Windows Server (2008 R2 to 2012 R2), and macOS.
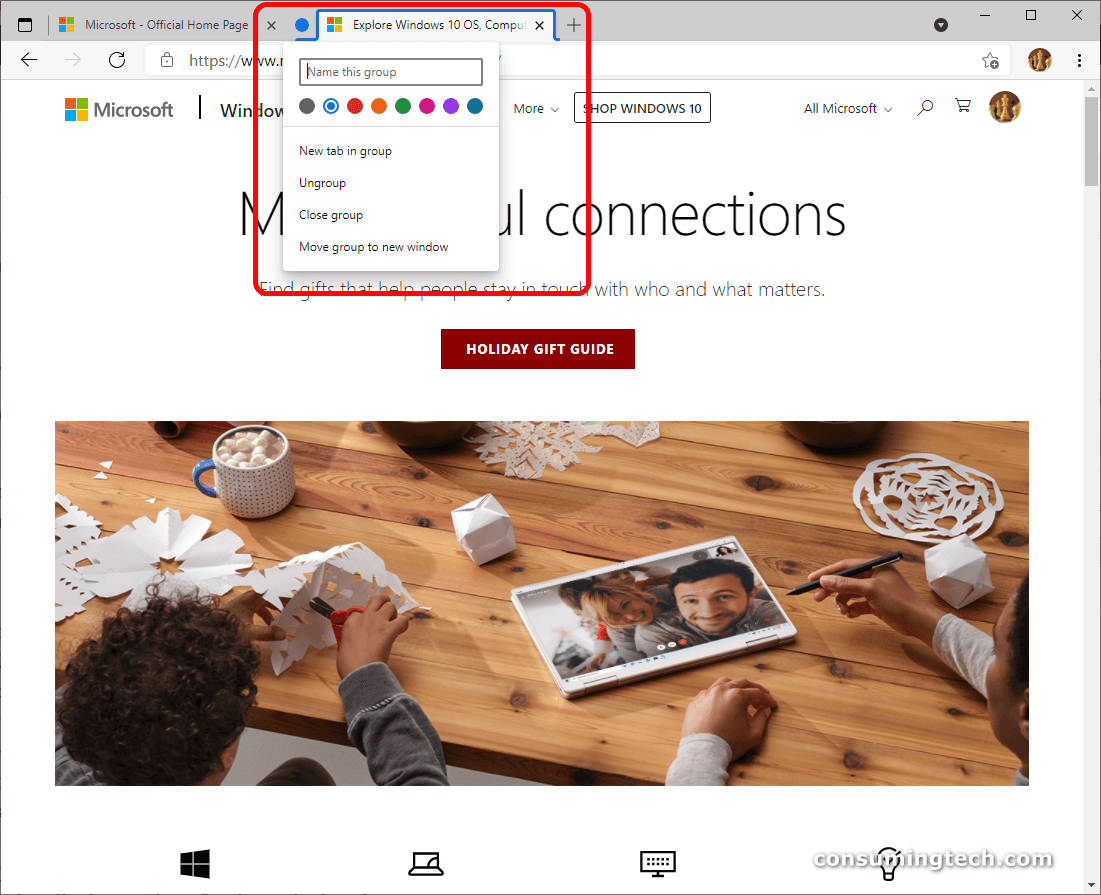
An example of Tab Groups in Microsoft Edge Chromium:

The following tutorial demonstrates how to enable and disable Tab Groups when using the Chromium-powered Microsoft Edge web browser.
How to Enable/Disable Tab Groups in Microsoft Edge
You can enable the new Tab Groups feature from the Edge flags page. Here are all the ways in which you can do that:
1. Open the Microsoft Edge web browser.
2. Do step 3 or step 4 depending on which way you want to bring up the Tab Groups flag.
3. If you are using a Microsoft Edge Insider channel, type edge://flags/#edge-tab-groups into the Edge address bar and press the Enter key on your keyboard. Alternatively, if you are using a stable build of Edge, type edge://flags/#tab-groups into the Edge address bar and then press the Enter key on your keyboard. (Click to enlarge the screenshot below.)
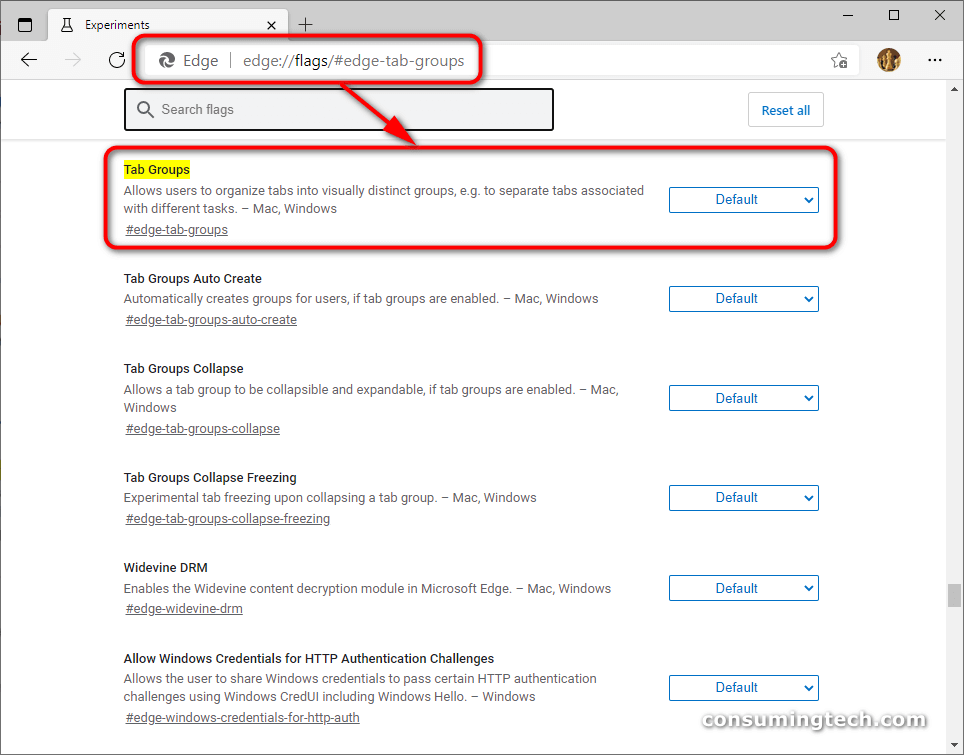
4. Type edge://flags into the Edge address bar so you bring up the flags page and then in the search field at the top of the window but beneath the address bar type Tab Groups. (Click to enlarge the screenshot below.)

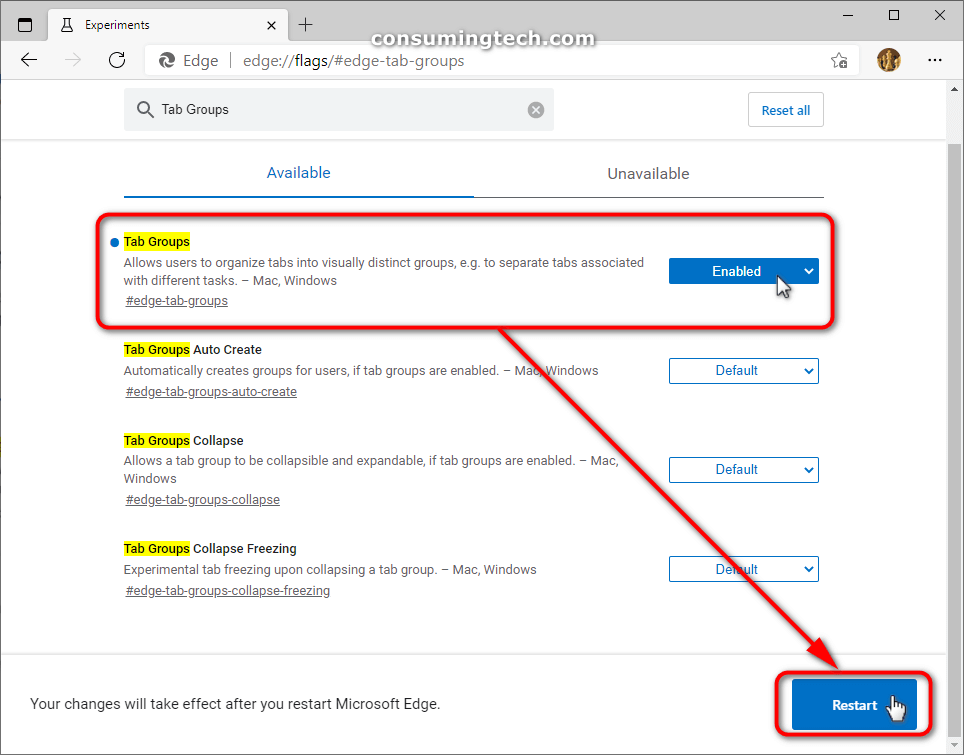
5. Select either Default (which is currently the same as disabled), Enabled, or Disabled, and then click on the Restart button at the bottom of the browser window to save the changes and relaunch the browser window. (Click to enlarge the screenshot below.)
That’s all.
Related Tutorials
- How to Choose What New Tabs Show by Default in Microsoft Edge in Windows 10
- How to Turn On/Off Cortana Assist in Microsoft Edge in Windows 10
- How to Pin Your Email Account to Start Menu in Windows 10
- How to Enable/Disable Microsoft Edge Pre-launching in Windows 10
- How to Turn On/Off Potentially Unwanted App Protection in Microsoft Edge
- How to Control Audio and Video Playing Automatically in Microsoft Edge in Windows 10
- How to Pin Email Folder or Full Email Account to Start Menu in Windows 10
- How to Load Blank Page as New Tab Page and Prevent Web Content Loading in Microsoft Edge in Windows 10
- How to Show Cortana Web Search Results in Microsoft Edge or Internet Explorer
- How to Preload Start and New Tab Pages in Microsoft Edge Every Time You Sign in to Windows and Close Microsoft Edge