Last Updated on February 25, 2024 by Mat Diekhake
Networking is something that is constantly at the forefront of a Windows operating system of late to help make it easier to share files between devices and people. There’s another time when the word network is regularly used, and that is whenever you are using WiFi.
WiFi is what is going to help get you connected to the internet, whether you connect a device via a WiFi hotspot and start using the net that way or directly from the WiFi connection coming from the router to the same computer. But before it can help you with either of those two things, it needs to create a WiFi network for your computer if it’s the first time you are settings it up. You automatically get given a wireless network profile name when you set up a network. The name you are given typically originates from the SSID that your router has; i.e., Windows uses the name that is provided by your wireless provider and not one that Windows makes up themselves.
If you don’t like the name that the SSID has given, or you just know a name that you’d rather have, the Windows 10 operating system does offer a way you can change it so that it displays what you had in mind instead. You can use this trick for both a wired and wireless connection, so it doesn’t matter if you are using Ethernet cables or WiFi.
Note: The guide below is for changing the network profile and shouldn’t be confused with changing a WiFi network name. The network profile is more what you see from the Control Panel. Most people will typically see it see “Network 1” or “Network 2” and those are what gets changed in the guide below. If you want your WiFi network name change so that other people trying to connect to WiFi networks can’t see your current WiFi network name, you can follow another article I’ve written that goes into detail about how to change your WiFi network’s name and password instead.
How to Change a Network Profile Name in Registry Editor
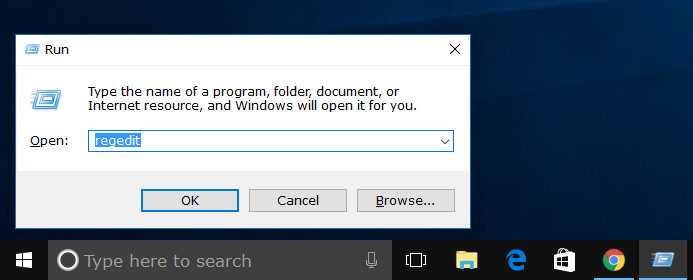
You can make changes to your Windows 10 network profile name from within the Registry Editor. To get started, open the Run dialog box by pressing the Windows logo + R keys at the same time and then type “Regedit” into the available field and click on the “OK” button. The Registry Editor is now open.
You’ll need to close any existing keys that are open in the left pane and then follow this new path: HKEY_LOCAL_MACHINE\SOFTWARE\Microsoft\Windows NT\CurrentVersion\NetworkList\Profiles by clicking each one of those keys instead.
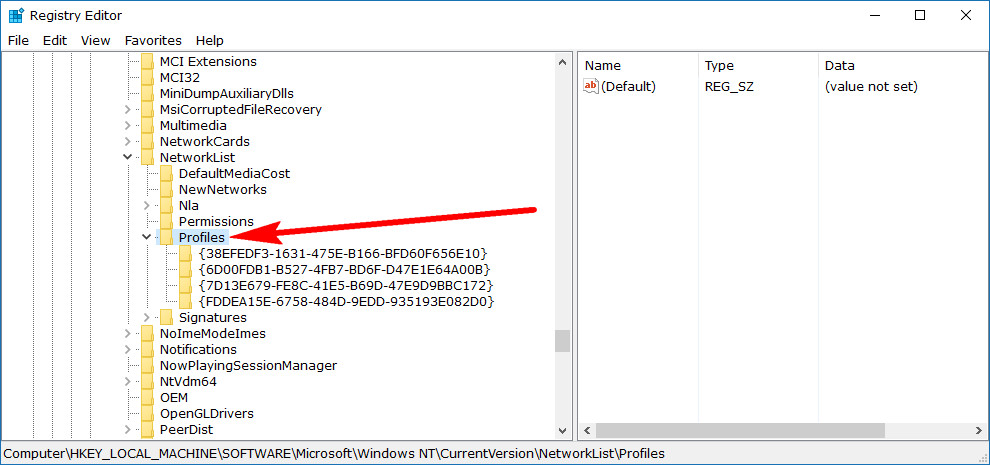
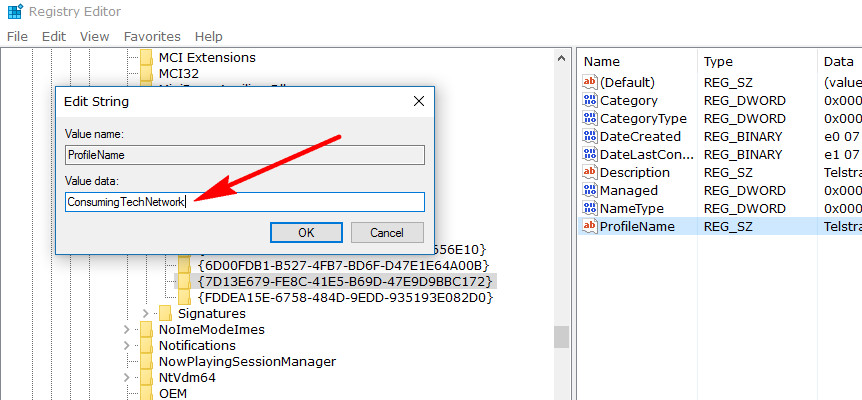
Once you have the Profile key open, you’ll have a bunch of digits beneath it. Each one of those keys with the digits is representing an available profile. Click on each of them until you find the one that has your profile name in the right side pane.
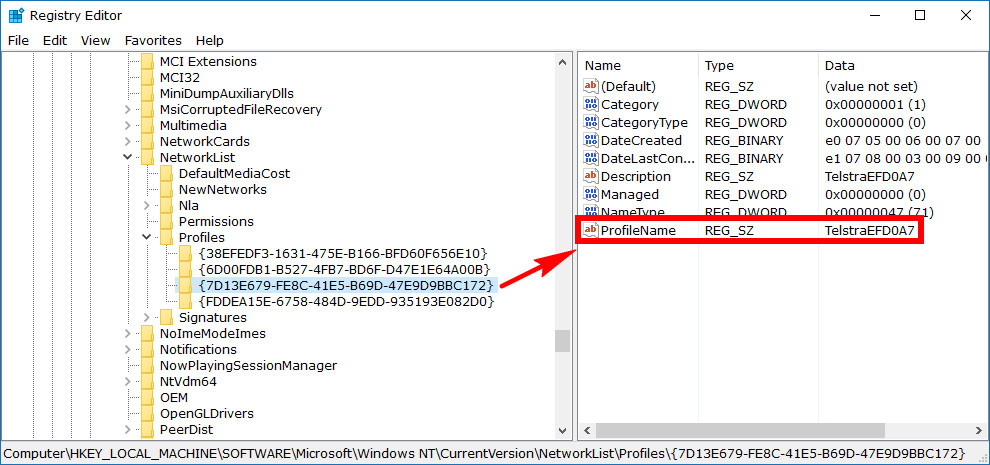
Double-click the mouse on that entry to edit the strong and then type the new network name choice in the “Value data” field. Click on the “OK” button to close the box.
How to Change a Network Profile Name in Local Security Policy
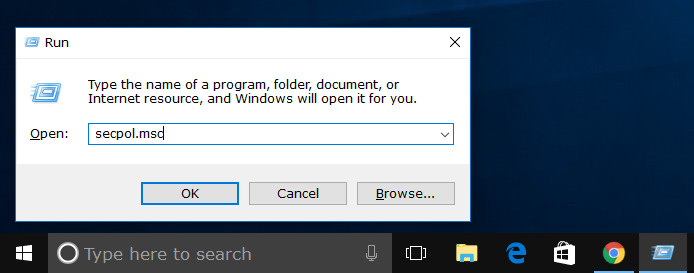
It’s also possible to change the network profile name by using the Local Security Policy if you like. Just remember that in order to use a Local Security Policy you need to have either a Windows 10 Professional or Windows 10 Enterprise edition of the operating system. To get started with this method, type “secpol.msc” into the Run dialog box, which you can get open up pressing the Windows logo + R keys.
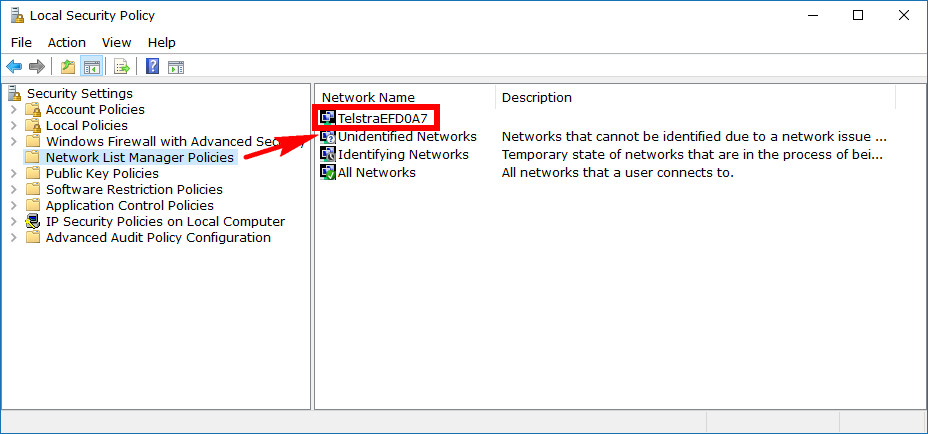
When the Local Security Policy window is open, click on the “Network List Manager Policies” from the left side pane and then click on your network name that is now available in the right side pane.
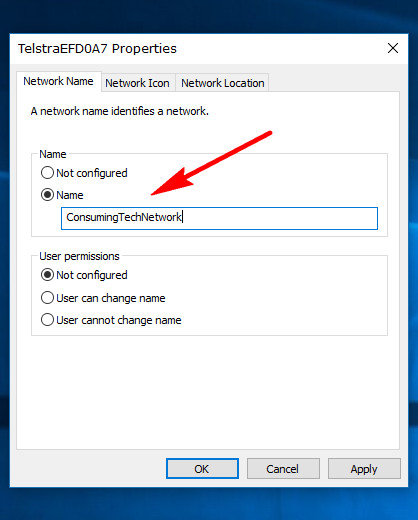
Select the “Network Name” tab from the top of the network Properties dialog box and then switch it over from the “Not Configured” to “Name” under where it gives the Name heading. Type the network name that you wanted in the field beneath it and then click on the “OK” button when you are happy with the name you’ve chosen to have the changes applied.
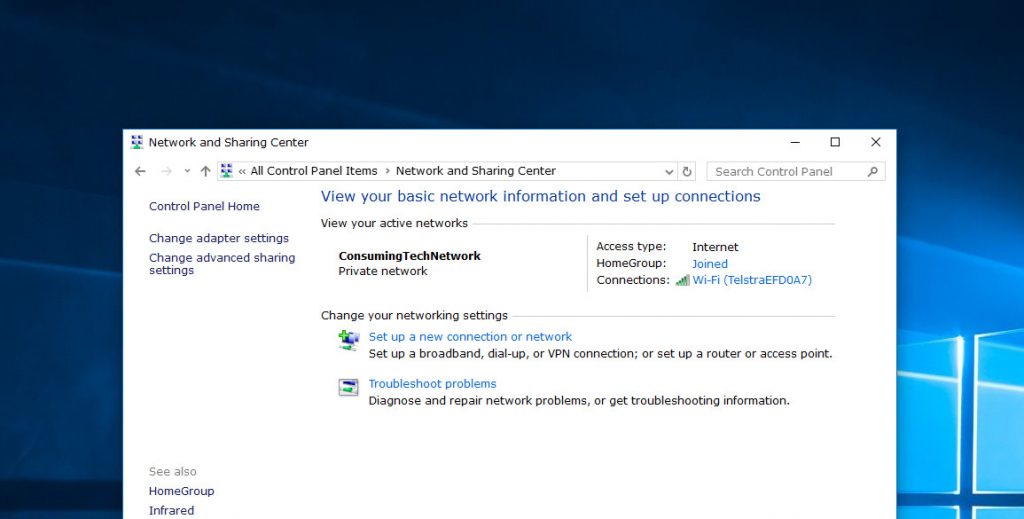
Those were the two ways you can change the network profile name in Windows 10. You can check how the new name looks from Control panel by opening up Control panel so that it is showing the classic views with its smaller icons and then clicking on the “Network and Sharing Center” link.
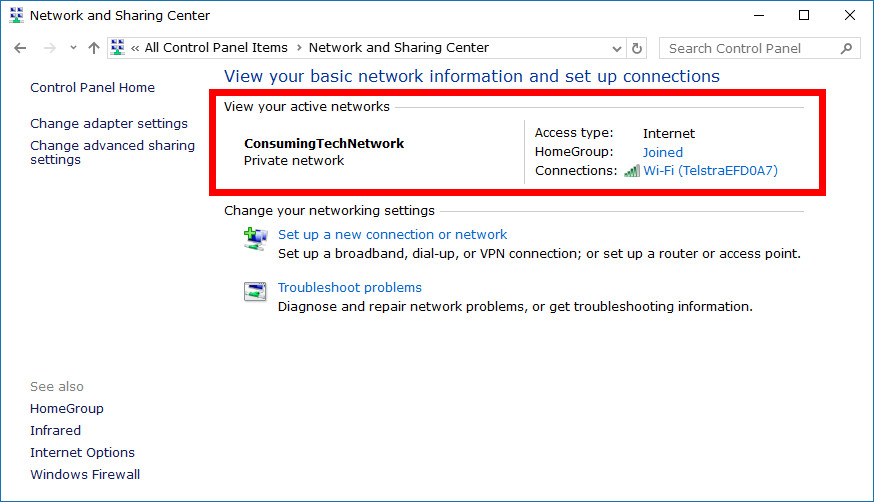
Older versions of the Windows operating system like Windows 7 made it an option to be able to change the network name from the Network and Sharing Center in Control panel. Those days are now gone in Windows 10 and you’ll need to do it from the Registry Editor now if you have a Home edition or the Local Security Policy becomes an option for those of you running with a pro or Enterprise edition. You can still view the results of your name change from the same Network and Sharing center on Control panel once you have changed the name, though.
You might also be interested in:
- How to Hide or Show File Explorer Ribbon in Windows 10
- How to Change Screen Resolution of Display in Windows 10
- How to Uninstall and Block Updates and Drivers on Windows 10
- How to Upgrade from Windows 10 Home to Windows 10 Professional
You can subscribe to our RSS, follow us on Twitter or like our Facebook page to keep on consuming more tech.