Last Updated on December 26, 2022 by Mat Diekhake
The Windows operating system doesn’t look very intimidating when you first start using it—the web browser icon is there for you to click on from the taskbar for when you need it and the Start menu is back so you can get quick access to things like the default Email application to check your email. That’s what the average user does when using Windows.
Most of the people out there haven’t a clue what Windows can do for businesses, and there are natural jobs out there like system administration work that needs to learn so much behind the scenes stuff that Windows has that it can take years before you’ll get to know how to use it all.
Forgetting that professional side of Windows, there’s also another side: one where people spend quite a bit of time in front of the computer and need to start using some of those other features that aren’t what you would call everyday features but also aren’t anything to do with the professional side of things either.
Microsoft offers a simple way to you can get to and use the Windows Features dialog box for managing the Windows 10 optional features, but there is also another way that you can do it if you want and that is by using the Windows PowerShell. The Windows Features dialog box offers a mixed bag of features—many are useful for everyone, but be careful of some others that are there for servers and networks as well. You won’t want to play with those unless you know what you are doing.
How to Turn On/Off Windows Optional Features in Windows Features
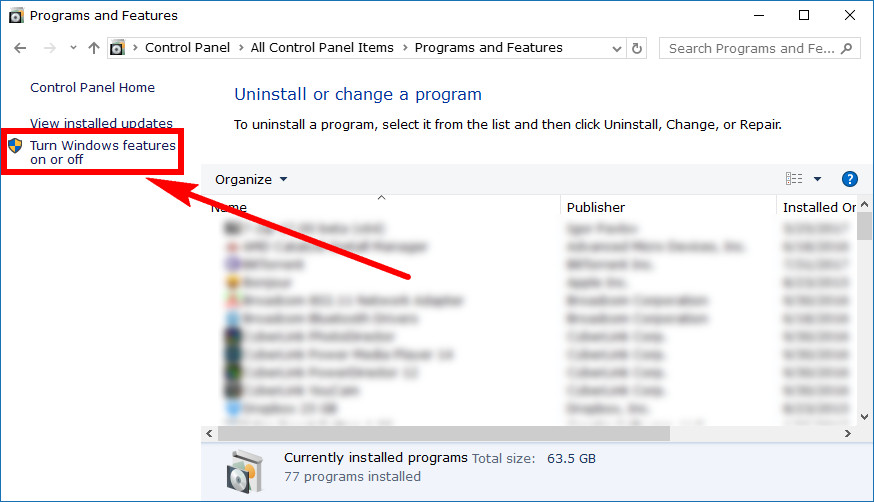
You can turn the Windows Features on and off from the Windows Features window directly that is available from the Control Panel. To get started with this method, open the Control Panel so that it is showing its classic view with the smaller icons from the main page and then click on the Programs and Features link. When you can see the list of programs installed, look to the left pane and then click on the Turn Windows features on or off link that’s there.
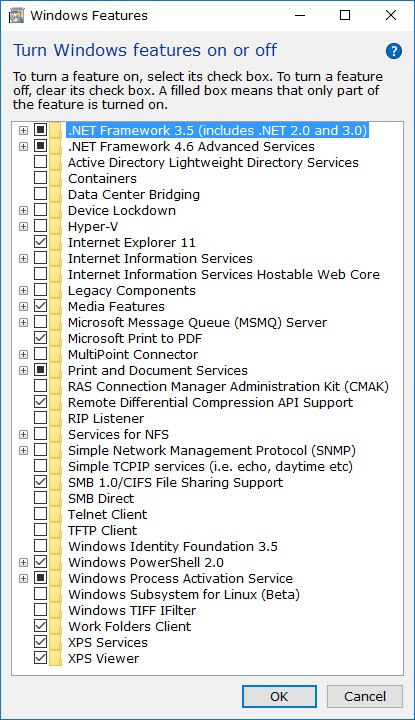
You now have the complete list of Windows optional features at your disposal to play with. You can see the checkboxes to the left of each of the names there for you to either enable or disable the features that you want.
How to Turn On/Off Windows Optional Features in PowerShell
You can also turn Windows features on or off by using the Windows PowerShell. To get started, open up the elevated version of the Windows PowerShell window. (click to expand screenshot below)
Enter the Get-WindowsOptionalFeature -FeatureName * –Online | Where-Object {$_.State –eq “Disabled”} command and you’ll be given the full list of optional features that are currently disabled.
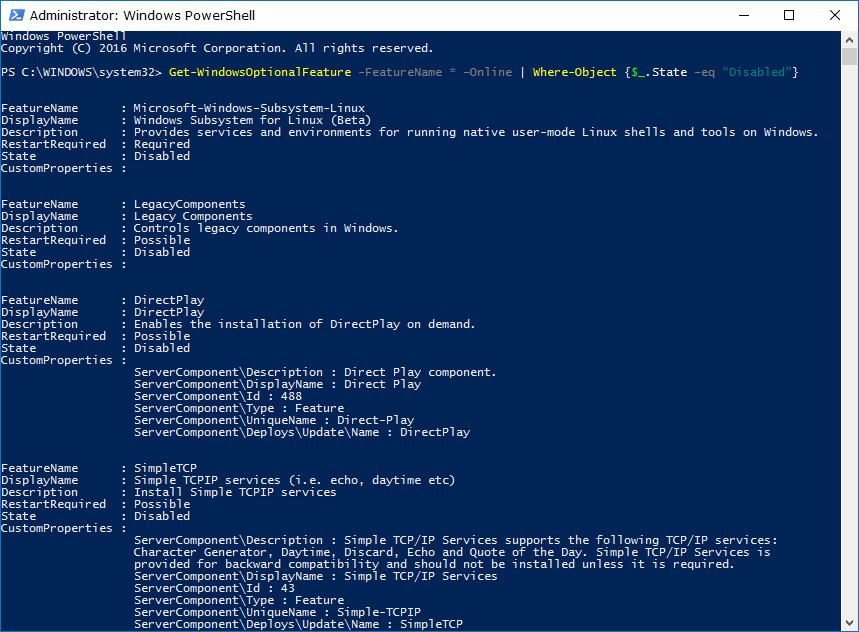
Now that you’ve seen that list and the feature names, you need to enter the Enable-WindowsOptionalFeature –FeatureName "Feature'sName" -All -Online command and replace where it says Feature’sName with the real name of the feature you want to get enabled. (click to expand screenshot below)
If you want to turn one of the optional features on instead, then you need to first enter the Get-WindowsOptionalFeature -FeatureName * –Online | Where-Object {$_.State –eq “Enabled”} command and then it brings up all the features that are currently disabled.
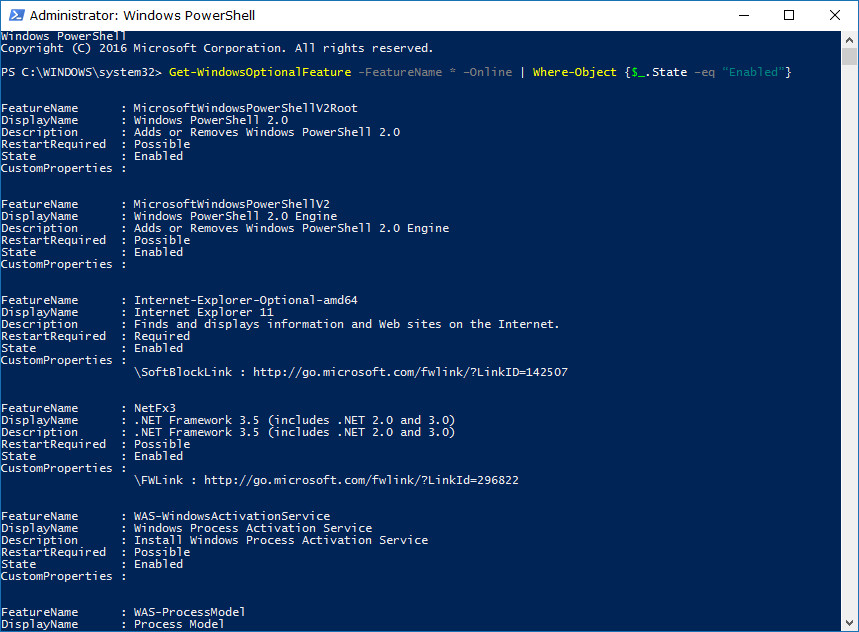
Once you know the name of the feature you want to be enabled, enter the Disable-WindowsOptionalFeature –FeatureName FeatureName -Online command and replace where it says Feature’sName with the real name of the feature you want turned on.
Related Tutorials
- Consumer Report Might Have Dropped It’s Recommendation for Microsoft Surface Devices But We Have Not
- How to Add/Remove Windows Defender Exclusions in Windows 10
- How to Turn On/Off Windows Defender Real-Time Protection in Windows 10
- How to Turn On/Off Sync Settings for Microsoft Account in Windows 10