Last Updated on February 25, 2024 by Mat Diekhake
If you use any services online that come with syncing—like Kindle for PC to sync your books across multiple devices—you’ll understand how convenient having something that can sync really is.
The Windows operating system can now sync across devices as well now that we have Microsoft accounts. It’s no surprise that you get the chance to have your settings synced if you understand how a Microsoft account works—it’s like logging in to the same account rather than logging in to the same device, kind of like when you log in to your Facebook account regardless of where you are and what device you are using.
That said, it wouldn’t have worked out for everybody if you have to automatically get everything synced across devices just because you are now using a Microsoft account, so Microsoft gives you the option of turning the sync feature on or off depending on what better suits your life. If you want to have all your setting synced, so it’s like logging inbto the same account across devices, then you can have it set up that way. Or if you prefer using your Microsoft as if it were still a local user account and nothing gets synced between devices, then you can set it up that way so you can have the same experience only available from a device if you prefer by having the sync option turned off.
Microsoft first introduced the sync settings in Windows 8 but back then you couldn’t just get access to them all in the one place from the Settings application, so it was far more challenging to understand how to use them. For example, just to sync most of the things within the Microsoft account meant taking a trip inside the OneDrive application because Microsoft used to use the OneDrive (also known as SkyDrive for part of the time) to store the data required to make the sync happen. That’s the kind of thing that seemed like it made sense at the time, but when you take a look at how it’s set up now, you can’t deny that Windows 10 has done it better.
Microsoft got away with how complicated the sync settings were because of not many people updated from Windows 7 to Windows 8 or Windows 8.1. Since Windows 10 was intended to get all of those Windows 7 users finally switching over to the latest Windows version, it was important to do a better job with the sync settings, and they did that by making it really simple to use with the settings application. If you don’t want to sync your stuff from the Settings app, you could opt to enter the Registry Editor instead if you like and changing your syncing options that way.
How to Turn On/Off Sync Settings for Microsoft Account in Settings App
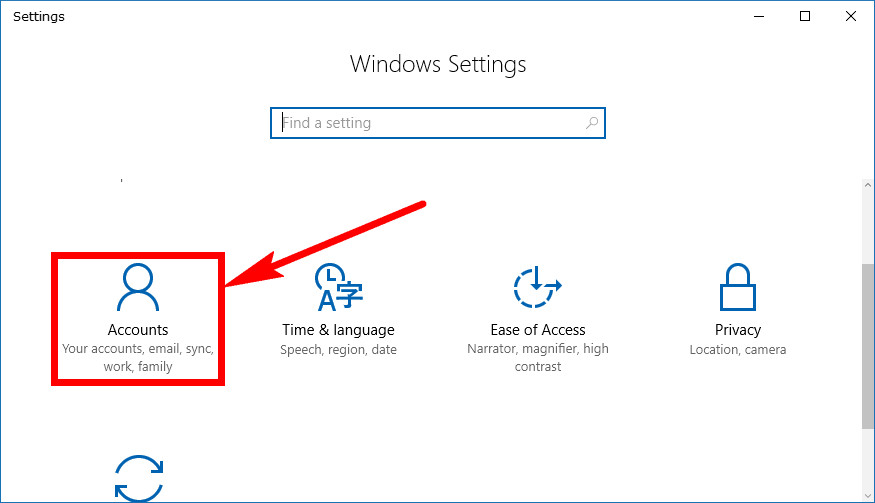
You can turn all of your sync settings either on or off from the Settings application in Windows 10 if you like. You can turn them all on or off at once by toggling the “Sync settings” switch off or on or turn them off or on individually by toggling each switch by scrolling down the page more. To get started, open the Settings app and then click on the “Accounts” link from the Windows Settings window.
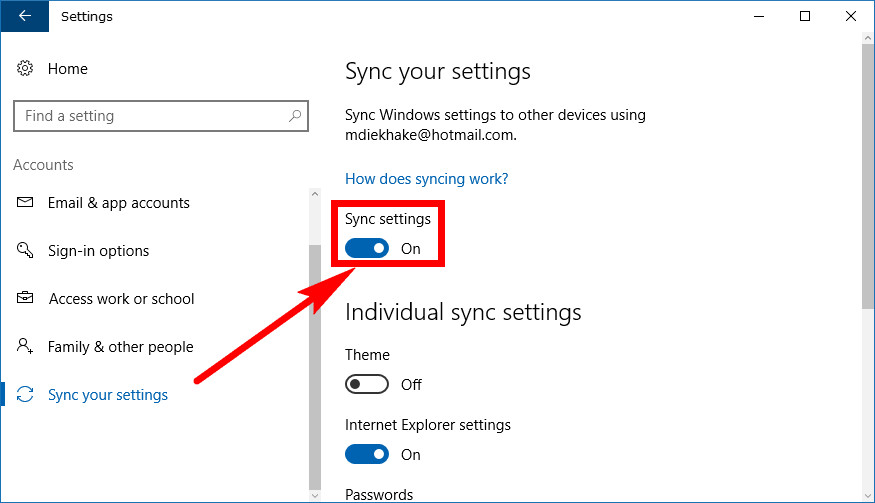
From inside the Accounts section, scroll down the left side pane until you get to the “Sync your settings” available at the bottom and click on it. The right side pane now gives you everything you need that related to the syncing. The top toggle called “Sync settings” is an important one because if you toggle it off, then every sync option is off. Turn it back on again by clicking on the toggle and all the sync settings that you had enabled will be enabled again. It only turns the ones on that you individually turned on. To find out how to turn on the individual options, read the next step below.
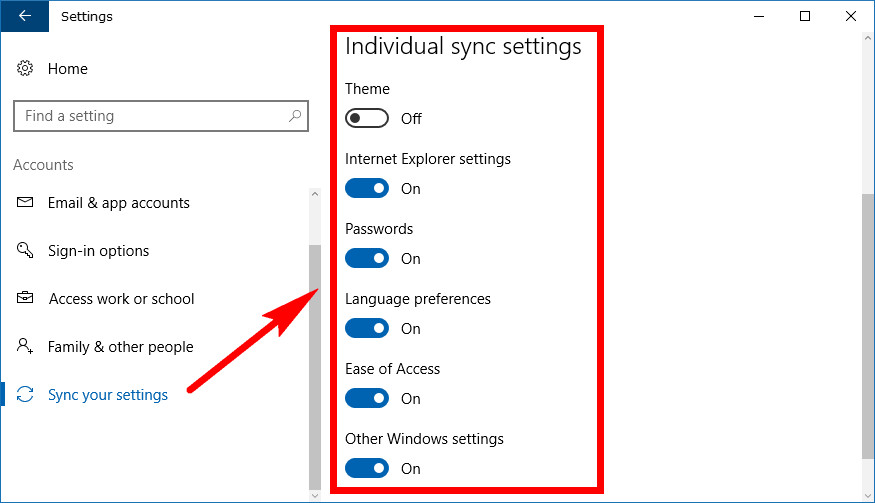
Scroll down past the first toggle that turns them on or off and in the same right pane is the individual toggles for turning each option on or off. These are all the sync settings available in Windows 10, so read the list carefully and choose the ones you think you need.
How to Turn on/off Sync Settings for Microsoft Account in Registry Editor
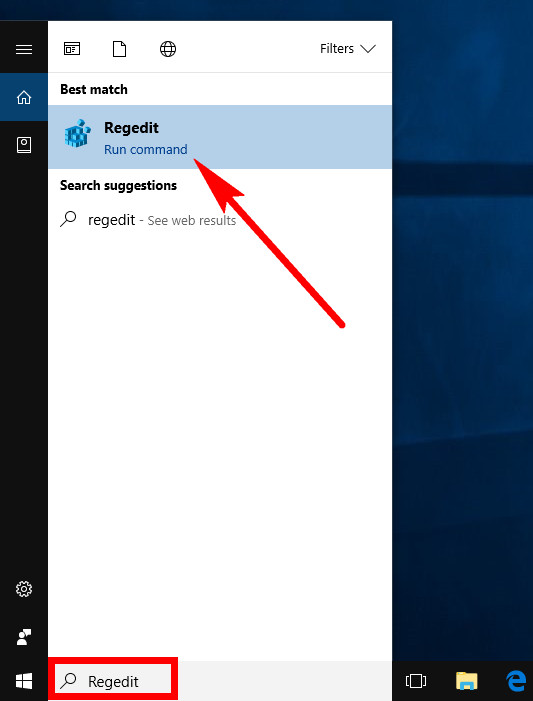
It’s also possible to turn some of the sync settings options on or off from the Registry Editor. Before you can see the sync settings available from the registry you’ll need to make sure that the toggle for it is turned on from the part of the guide above that shows you where the sync settings are in the Settings application. To get started, open the Registry Editor by typing “Regedit” into the search field in the taskbar and then clicking on the “Regedit Run command” entry under the Best match section.
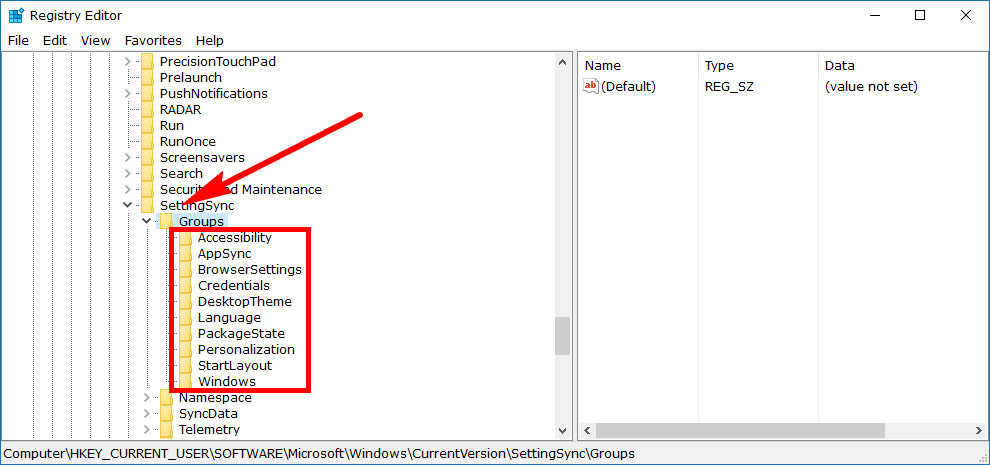
With the Registry Editor open, navigate to the HKEY_CURRENT_USER\Software\Microsoft\Windows\CurrentVersion\SettingSync\Groups key so the “Groups” key is expanded and you can see the options beneath it. Those additional keys beneath it are the ones you can change for the sync settings. For example, if you wanted to modify the sync settings for the Theme, then you’d click on the “Desktop Theme” key so that the enabled DWORD then becomes available in the right side pane. Double-click on that DWORD in the right pane to get the chance to change the DWORD value. Type the number “0” if you want to turn off the sync settings and type the number “1” if you want to turn it on. Click on the “OK” button when you are ready to close the “Edit DWORD Value” window.
Microsoft has given Windows operating system users the chance to change sync settings since Windows 8 was around but the new Windows 10 sync settings are given to you in a much simpler way that’s easy for everybody to understand. Before you needed to find them within the OneDrive settings which most people couldn’t remember because they weren’t naturally thinking of anything to do with OneDrive when they wanted to sync a lot of the individual settings. OneDrive isn’t centered around the syncing anymore, and you can now find your sync settings from the heavily revamped Settings application instead, and that’s something to be thankful for because it makes your Windows 10 experience that it would have been.
Related Tutorials
April 8, 2020 @ 12:47
Im trying to sync my device to my other devices and it wont let me. sync my device is all grayed out. and i also tried to change to another Microsoft account and it wont let me. Help???
April 6, 2020 @ 22:29
I tried to sync my windows 10 e mail account. Followed all the instructions and when I clicked on Sync your settings, everything below Individual sync settings is grayed out and I can not turn them on. Please advise.
April 7, 2020 @ 07:48
Hello Steve,
Are you using a Microsoft account? You will only be able to sync many of the settings from within a Microsoft account.
Try signing out and back in again and see what happens.
February 14, 2020 @ 14:27
I cannot turn my Hotmail account Stephen nave 3092827006