Last Updated on December 26, 2022 by Mat Diekhake
During your time with Windows 10, you can expect to find a lot of software updates coming in your direction, kind of like if you were to own a phone that runs on Android or iOS. The updates come over the air, and there’s not much you can do to stop them.
The Windows 10 updates technically are even stricter than that of a phone update because you can usually choose to put an update on hold from a phone whereas from Windows 10 the shutdown button just gets replaced with an “Update and shutdown” instead, leaving you no option but to take on the additional time for the update to complete when you choose to turn off the computer.
Microsoft routinely makes changes to the way the Windows operating system works, and that might be something that needs revising in the future. If you have an all-in-one computer that you like to move around the house with you depending on what time of day it is, being given a forced update when you go to shut down that you were none the wiser about before seeing it can get in your way. It means you won’t be able to use the computer again anytime soon, and the update will likely continue for at least a few minutes when you turn the computer back on again.
Windows 10 forces updates to your computer so you can have the new features, security updates, driver updates, and overall software upgrades and because it feels like it can deliver those to you without any problems. That’s no promise, and there are probably computers out there suffering from problems, even if the overall percentage is very low. There are some things you can do natively to try to uninstall a particular problematic update, but they aren’t always a viable solution and finding how to do them can be difficult to research.
How to Uninstall a Windows Update in Windows 10
For those wanting native solutions, it is possible to take a system restore still, but that isn’t going to stop the same update from rolling out to your computer again in the future, it just means it’ll turn back the time before the problematic update is installed, so that’s not a great road to travel for this purpose. The revamped settings application that Windows 10 offers does come with an option for uninstalling Windows Updates, the problem with this way though is it tends to be a bit random with what update it offers you to uninstall. You’ll get the full list of updates that have been installed from the settings, but only a selection of those will give the uninstall button for you to click on after you have highlighted an update and thus removing all of them isn’t possible this way.

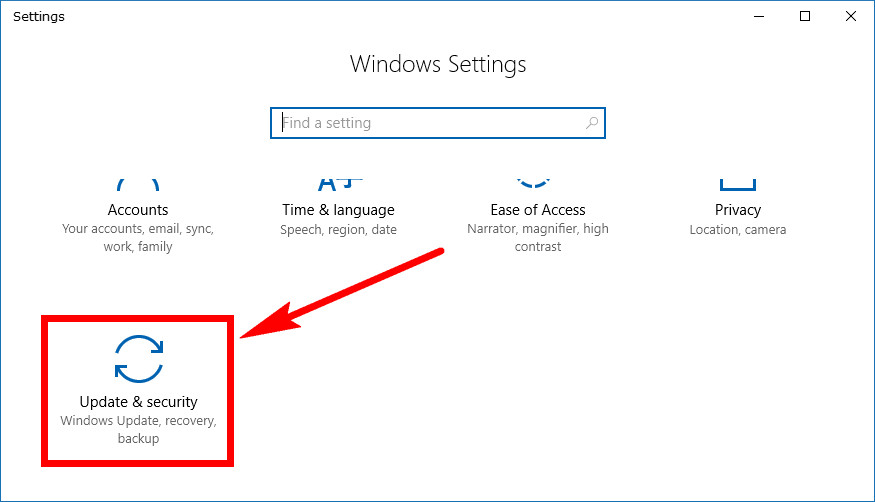
From Windows Settings click on the “Update and security” link.
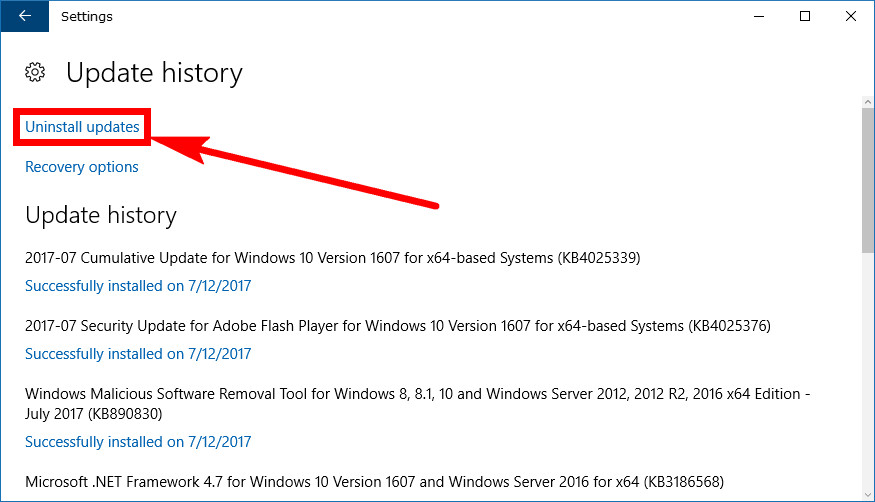
From Windows Update look in the right side pane and then click on the “Update history” link.

Next click on the “Uninstall updates” link under the Update history heading.
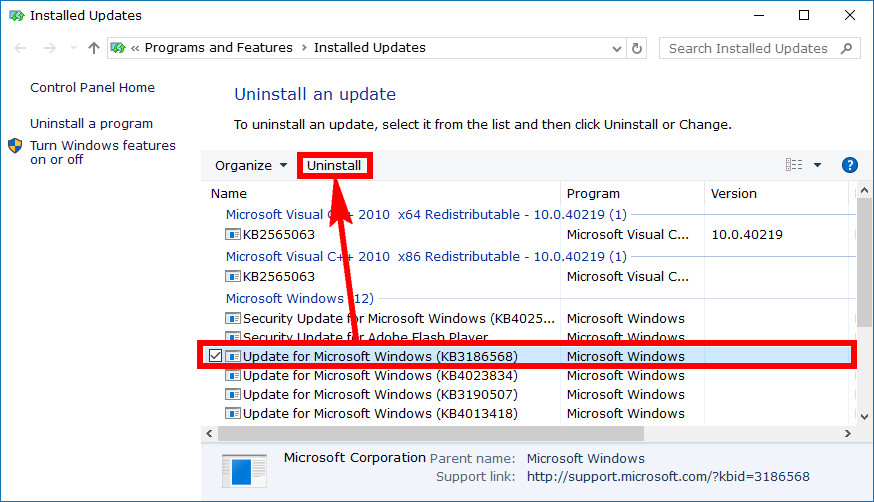
You won’t see an “Uninstall” button at the top of the window yet but if you click on one of the updates that can be removed, you will. Some of the updates can’t be uninstalled, so if you highlight an update and don’t see the uninstall option, try another one instead. You might need to keep going back in time until the first available update can be removed to help solve your problem.
The other problem with the method above for uninstalling a Windows Update is that it doesn’t offer the uninstallation of all builds that have been installed, meaning the lesser of the updates that are not as big but are still nonetheless updates that have been installed on your computer. I’ve written before about builds unlikely to be the cause of your issues since the updates are only small in comparison to the larger updates like the Anniversary or Creators Updates, and I still stand by that, but it doesn’t mean you won’t ever see issues coming from particular build numbers.
How to Roll Back Builds in Windows 10
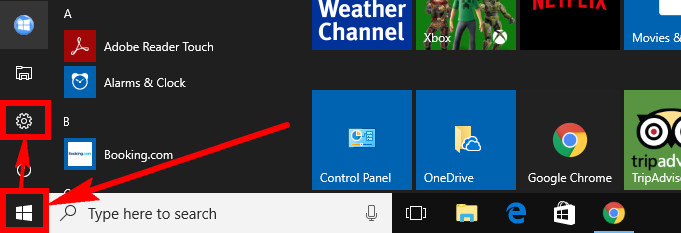
Another option you have is to roll back an update in Windows 10 instead. The chance to roll back builds in Windows 10 sounds great, but it’s only available for a ten day period starting from the day of the installation. If you leave it too long, then you will see the button is grayed out and unavailable to use. As long as you are within the 10 day period, click on the Start menu > Settings gear icon from the left side pane to get started on rolling back a problematic update.
Now click on the “Update and security” link from the Windows Settings window.

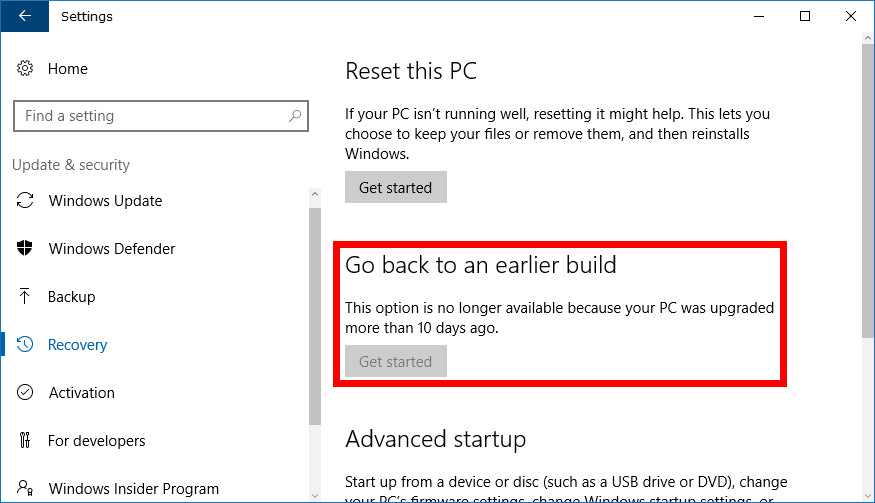
Next click on the “Recovery” link from the left side pane.

Now in the right side pane, you’ll see a heading that says “Go back to an earlier build” and a button beneath it that you can click on to do that action. In the example below, we aren’t within the ten days from a previous update which is why the button isn’t available.
How to Hide or Show Windows Updates in Windows 10
There’s also a tool called “Show or Hide Updates” that you can use to uninstall and stop the future installation of updates if you want. The tool made by Microsoft also lets you undo your changes and reinstall anything that you had previously chosen to uninstall or “hide” as the tool likes to put it. I’ve written in more detail about how the tool works in another article written specifically for the tool if you want to learn more.
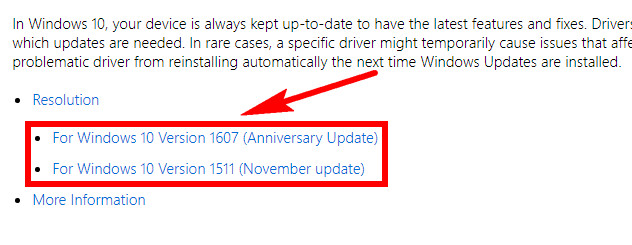
To get started installing the Show or Hide Updates tool, visit the Microsoft webpage that hosts the tool and then click on the link that suits the update you have installed. (It doesn’t matter if you are running on an update after 1607, just download that same file. But if you are running on something before the 1607 then you should probably install the other file instead). Don’t know what update you are running? You can read how to find the edition, version, and OS build you are running from the Settings application in Windows 10.
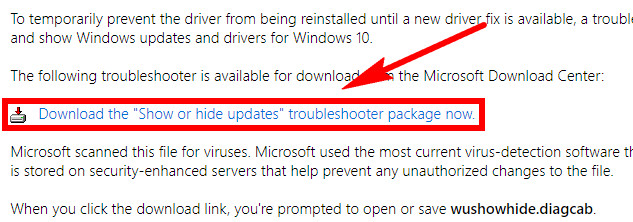
Once you click on the link from the step above, it then automatically directs you to the download link further down the page You’ll see it within the text.
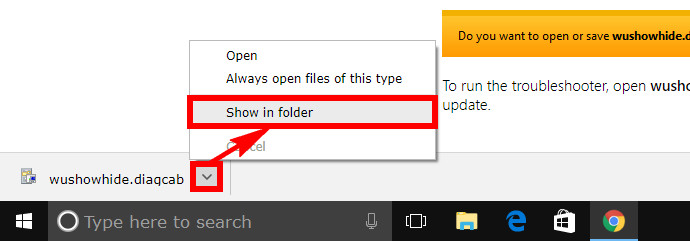
After downloading the file click on the small arrow from the right side of it and then click on the “Show in folder” option from the menu.
You’ll now see your downloaded file in the folder, already highlighted for you. Click and drag that file that is highlighted over to the desktop and then drop it there. Double-click on it once you see it there on your computer’s desktop.

You’ll now see the first page of the Show or Hide Updates tool. Click on the “Next” button to continue.

It’s here where you can now either choose to show or hide the update. You’ll probably want to hide the update so click on the top option to do that and then we’ll run through how to unhide the update later.

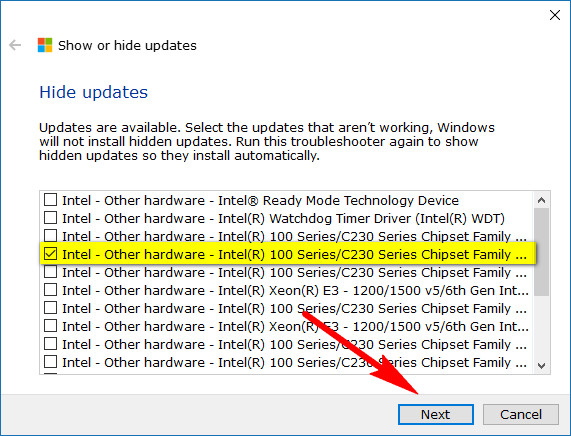
It then gives you the full list of all the updates you can hide (uninstall and stop them from reinstalling.) Click on the one that you want hidden and then click on the “Next” button at the bottom of the window.
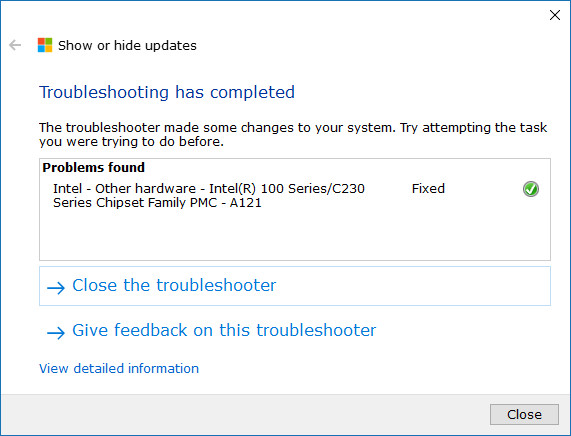
Give it a few seconds, and then you’ll get a green tick and a screen that lets you know that the update is now hidden. You can close the troubleshooter now and continue using the PC if you like.
Should you ever decide that you want the update back again on the computer, double-click on the tool icon from the desktop (or download it again if you need to) and then click on the “Next” button from the first page again.

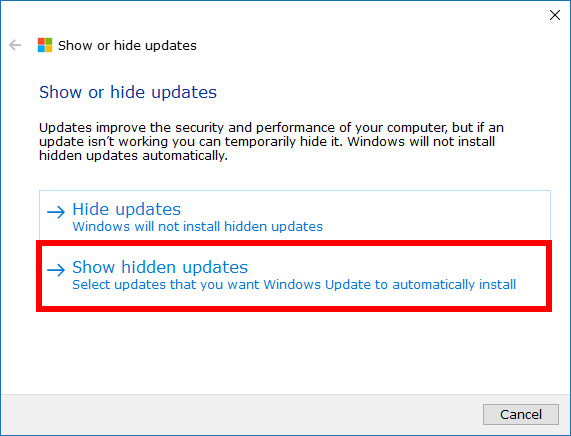
Now click on the “Show hidden updates” link this time.
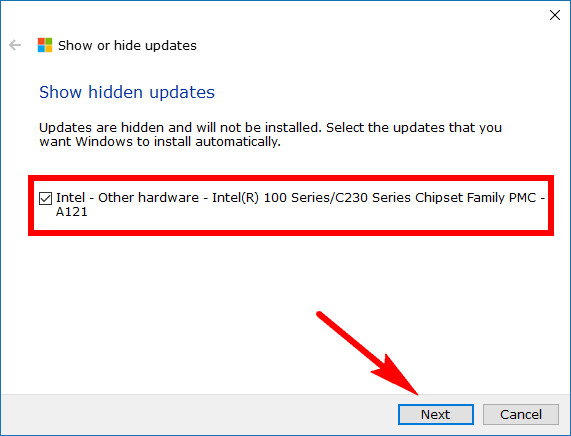
The specific update that you had previously hidden is there for you to see, along with any other updates if you happen to delete more than one. Click on it, so there is a checkmark in its box and then click on the “Next” button at the bottom of the window.
There are some tricks you can do to prevent Windows installing all updates like setting up a metered network connection. Windows doesn’t recommend that you do that unless you have a strict data limit that you want to adhere to because it’ll restrict your Windows 10 experience, but the option is there if you want to use it.
You might also be interested in:
- How to Change a Network Profile Name in Windows 10
- How to Hide or Show File Explorer Ribbon in Windows 10
- How to Change Screen Resolution of Display in Windows 10
- How to Upgrade from Windows 10 Home to Windows 10 Professional
You can subscribe to our RSS, follow us on Twitter or like our Facebook page to keep on consuming more tech.