Last Updated on December 18, 2024 by Mat Diekhake
The File Explorer that’s available in Windows 10 comes with a ribbon at the top of the window when you click on the “View” link from the toolbar. The ribbon is just like having another toolbar, only this time you have lots of stuff coming from it.
The Ribbon feature that File Explorer has was first introduced in Microsoft Office Suite 2007. After positive returns, Microsoft then extended its use out to the Windows 8 Developer Preview and it was officially made available for all versions of Windows 8 operating systems as well. It’s not known why Microsoft picked the name “Ribbon,” but it might have something to do with the fact that Office already had something they liked to ascribe to as a toolbar, so they needed a new name. Although not easy to find out about if you have never heard of mentioned as a Ribbon before, it still makes sense to not call it a toolbar in the File Explorer that Windows 10 has too because there is a Quick Access toolbar feature available from inside the File Explorer window also and the Quick Access toolbar gets lots of use as most toolbars tend to do.
There are two ways you can get a Ribbon to present itself at the top of the File Explorer window. One of the methods is just by opening the File Explorer and then you’ll always have the “View” link that you can click on to bring up the Ribbon. The other option is by clicking on the Contextual tab that becomes available after you have clicked on a file, folder or drive. The Ribbon you get varies depending on what you are doing. For example, the Ribbon you get after highlighting a drive from the “This PC” has different options available for you to choose in comparison to if you were to click on a file and bring up the Ribbon that way.
By needing to click on something all the time from File Explorer before you can notice a Ribbon of any sort, it means that Windows 10 has the Ribbon hidden from File Explorer by default. The File Explorer window is relatively small in contrast to other windows, like say if you were to open up a web browser, and when the Ribbon is showing it doesn’t expand the window. It means the window would be a bit small if the Ribbon was revealed all the time and that might be at least part of the logic behind why Microsoft opted to have it hidden by default.
Here are all the different ways you can show or hide the File Explorer ribbon once you’ve got the File Explorer window open when you’re using a version of the Windows 10 operating system.
How to Hide or Show File Explorer Ribbon with Ribbon Tab Bar
You can hide or show the File Explorer Ribbon by using the Ribbon bar itself.
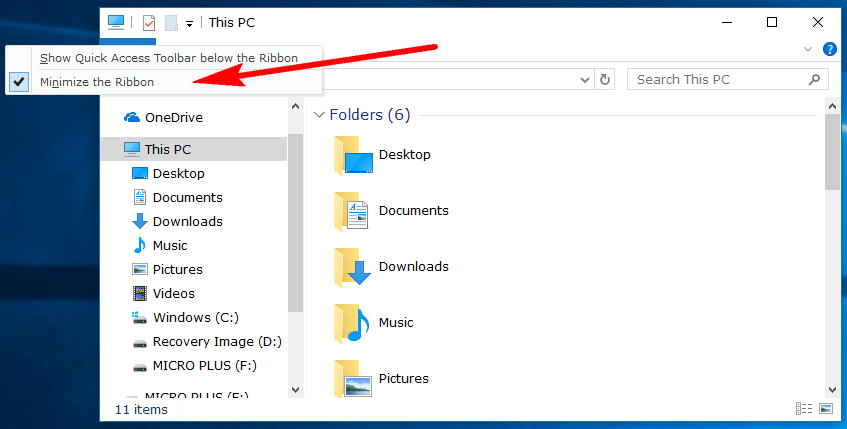
To get started doing it this way, head to the Start menu > File Explorer, so the File Explorer window is open and then right-click on the top of the tab. You’ll see a small menu then, and one of the options is the “Minimize the Ribbon” on it. Click on that, and it shows the Ribbon.
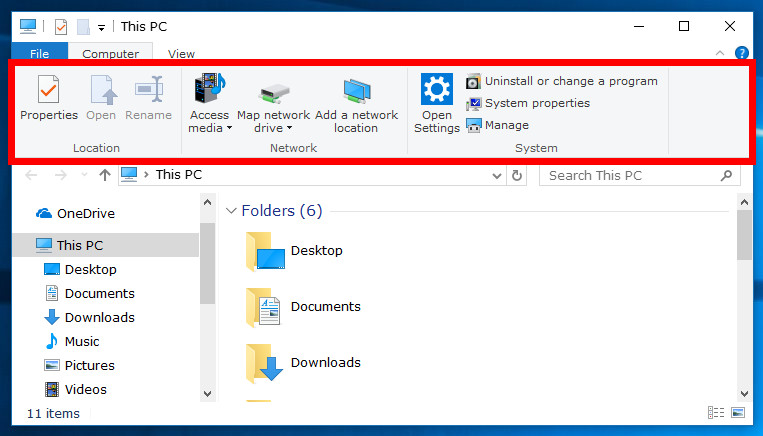
You’ll now see the Ribbon and all of its options available at the top of the File Explorer window.
Right-click the mouse on the same tab bar and then click on the “Minimize the Ribbon” link from the small menu once again and this time the Ribbon is gone.
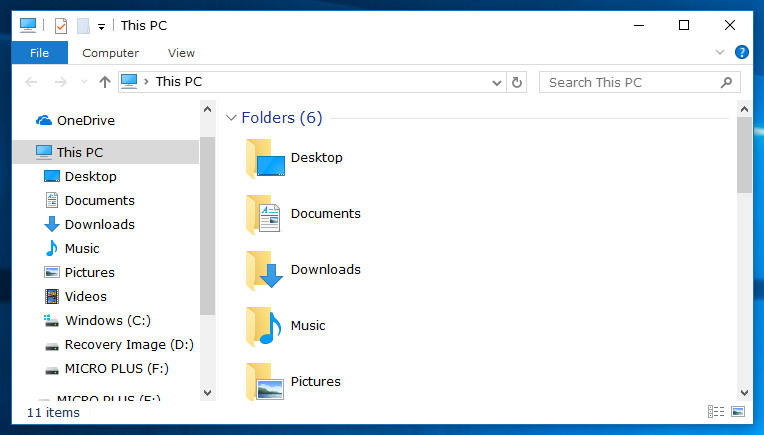
The File Explorer window is now back to normal without the Ribbon showing.
How to Hide or Show File Explorer Ribbon with Ribbon Arrow
You can also choose to show or hide the File Explorer Ribbon directly from the Ribbon arrow.
To do that, open the File Explorer again by navigating to the Start menu > File Explorer and then click on the small arrow that is available on the top right side of the File Explorer window, just below the “X” you would typically click on to close the window.
![]()
The Ribbon is now showing in the File Explorer window without you needing to do anything else. You can click on that same arrow again to remove the Ribbon as well.
![]()
How to Hide or Show File Explorer Ribbon Using Quick Access Toolbar (QAT)
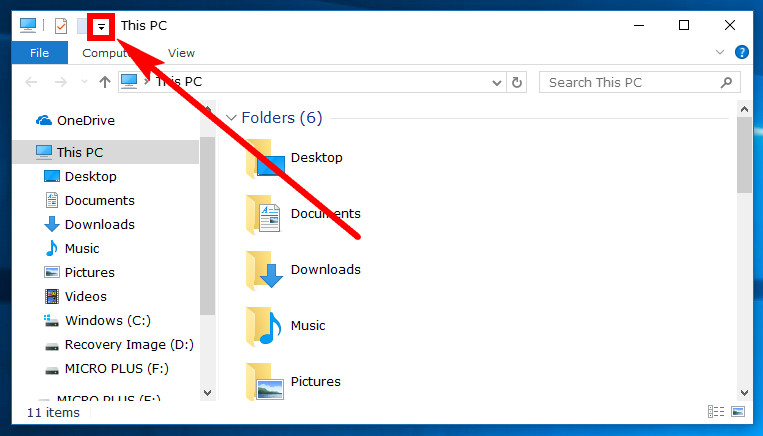
There’s another small arrow available from the File Explorer window that’s part of the Quick Access Toolbar, this time located on the top left side of the window.
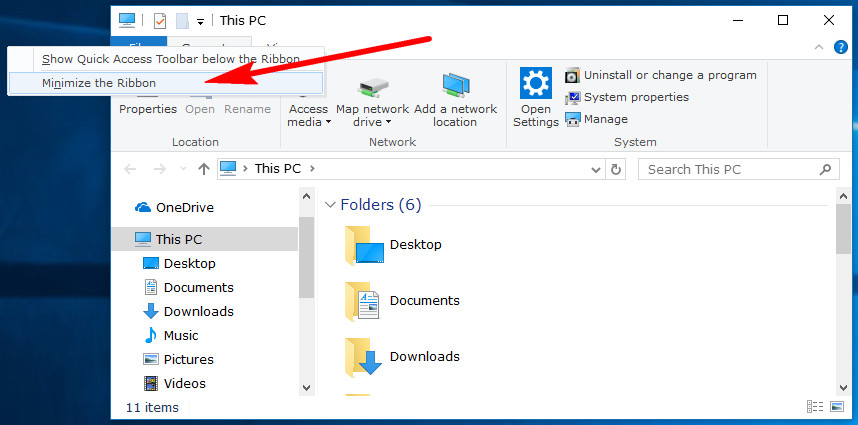
Click on that arrow next to where it lets you know what part of the File Explorer you are currently browsing, in my case the “This PC” area.
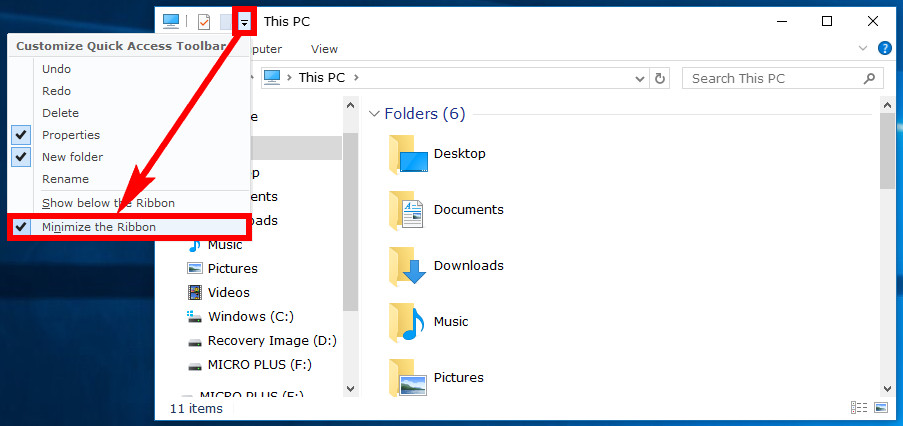
Now you can click on the “Minimize the Ribbon” link at the bottom of the menu to begin displaying the ribbon from your File Explorer window.
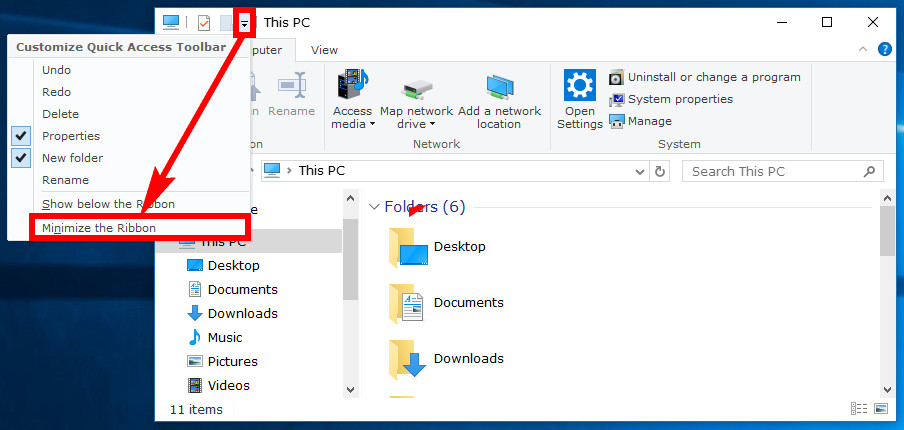
Click on the same small arrow again from the Quick Access Toolbar and then click on the same “minimize the Ribbon” link if you want to remove the Ribbon from showing up in the File Explorer window.
How to Hide or Show File Explorer Ribbon in Group Policy
The Local Group Policy editor also makes it possible for administrators to force the Ribbon being shown by default if they want that to happen on a particular computer. Doing it this way means that the person using the computer has no say in whether the ribbon gets shown or not. Even if they were to follow one of the options above, it wouldn’t work because the Local Group Policy Editor rules override them.
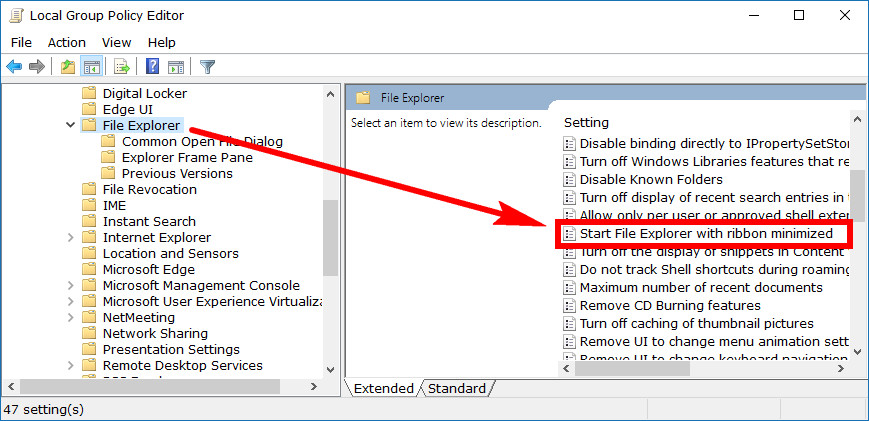
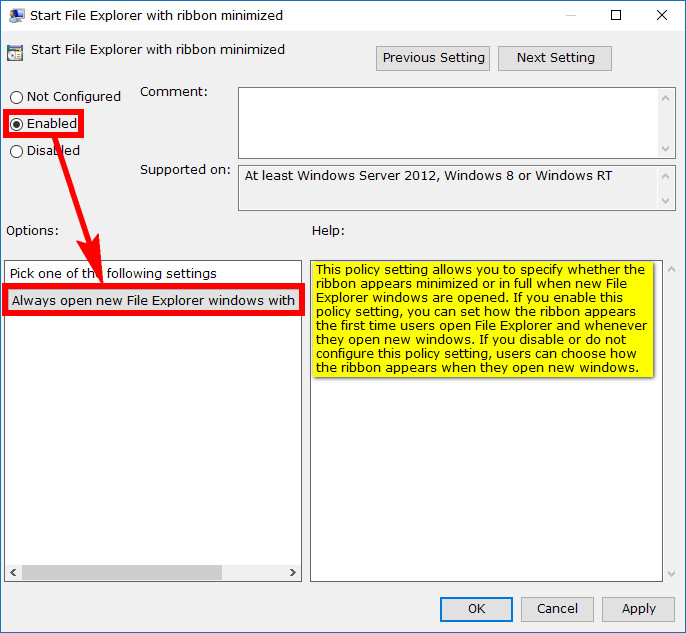
Start by opening the Local Group Policy Editor and then head to the following path: Computer Configuration\Administrative Templates\Windows Components\File Explorer. Now look in the right side pane and scroll down until you find the “Start File Explorer with ribbon minimized” link and double-click on it.
By default the option to start the File Explorer with the Ribbon minimized is not configured which does the same thing as if it were to be disabled, according to the “help” text you can see in the right window. To make it so that the Ribbon is showing all the time, swap it over to the “Enabled” position. Click on the “OK” button at the bottom of the windows when you want to leave.
Having the File Explorer Ribbon showing or not showing is going to come down to personal preference. Some administrators will want computers on their network to see the Ribbon because they might need to use it often. For others, the Ribbon might not get used at all. Microsoft decided it was best to have it not displayed by default but to give several options to have it presented, including options that allow it always to be displayed and options that only have it open for the duration of your time inside the current file folder or drive. With the number of different options Microsoft has given, it’s hard to argue they made the wrong choice by having it not shown by default, but you always have the opportunity of using one of the methods above for changing that whenever you want to.
You might also be interested in:
- How to Get Help with File Explorer in Windows 10
- How to Open File Explorer in Windows 10
- How to Start Picture Slideshows from File Explorer in Windows 10
- How to Disable Ads in File Explorer in Windows 10
- How to Fix File Explorer Opening Slowly in Windows 10
- How to Enable/Disable Thumbnail Previews in File Explorer in Windows 10
- How to Add/Remove Network in Navigation Pane of File Explorer in Windows 10
- How to Add/Remove “This PC” in Navigation Pane of File Explorer in Windows 10
- How to Add/Remove File Explorer Default Context Menu in Windows 10
- How to Add/Remove Libraries in Navigation Pane of File Explorer in Windows 10
You can subscribe to our RSS, follow us on Twitter or like our Facebook page to keep on consuming more tech.