Last Updated on December 26, 2022 by Mat Diekhake
Macrium Reflect, one of the best solutions for backing up system images for Windows, has been downloaded more than seven million times and the premium version has been sold on more than 60 countries around the world. It’s gained its popularity for being a quick and easy solution for backing up Windows operating system, something that Microsoft hasn’t spent a lot of time focusing on in the past, preferring to leave it up to third-parties to offer viable solutions. Windows 10 does provide an option of taking system image backups, but since the Fall Creator’s Update, Microsoft has stopped developing it, and have announced that it is deprecated and recommends you use third-party software for that, too.
System image backups aren’t for everyone. While being extremely convenient to use, they also take up a lot of hard drive space, which is something that many people don’t have to give to backup solutions. To understand why backing up system images takes up so much space would require you to understand what a system image is: you’re backing up the entire operating system, as though you were cloning the disk of your computer at the time so that you can restore it all later. Most other backup solutions (particularly that are offered by Microsoft) aren’t taking system images backup but rather emphasize backing up files on the operating system itself so you could restore them later–say your pictures, documents, so forth.
But Macrium Reflect is more than just system image backups. Reflect lets you choose from many different backing up options as well (you can backup full partitions, folders, and files); you don’t have to backup up the operating system in its entirety if you don’t want to, which also makes it a great solution for people who may just want to backup up the occasional system image and spend more time backing up folders or files.
Maciurm Reflect comes in a free edition (with limited features) and a full edition that unlocks far more features. The paid version includes being able to take incremental backups by itself, so you let the software do the work while you sit back and know that your files, folders, and partitions are being looked after and won’t ever be lost.
The following guide is going to run through the basics of Macrium Reflect and how to use its most well-known feature: taking system images backups, and then restoring them as well.
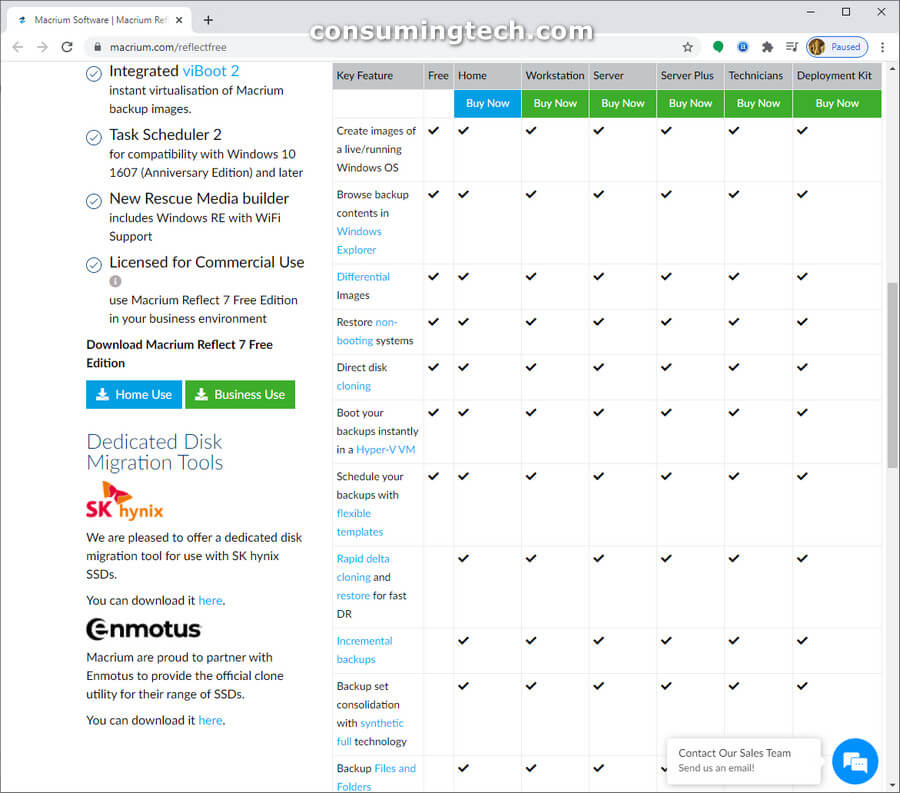
Macrium Reflect Versions
Macrium Reflect now comes in home, workstation, server and server plus editions. The feature differences are shown in the table below:

Part One: Installing Macrium Reflect
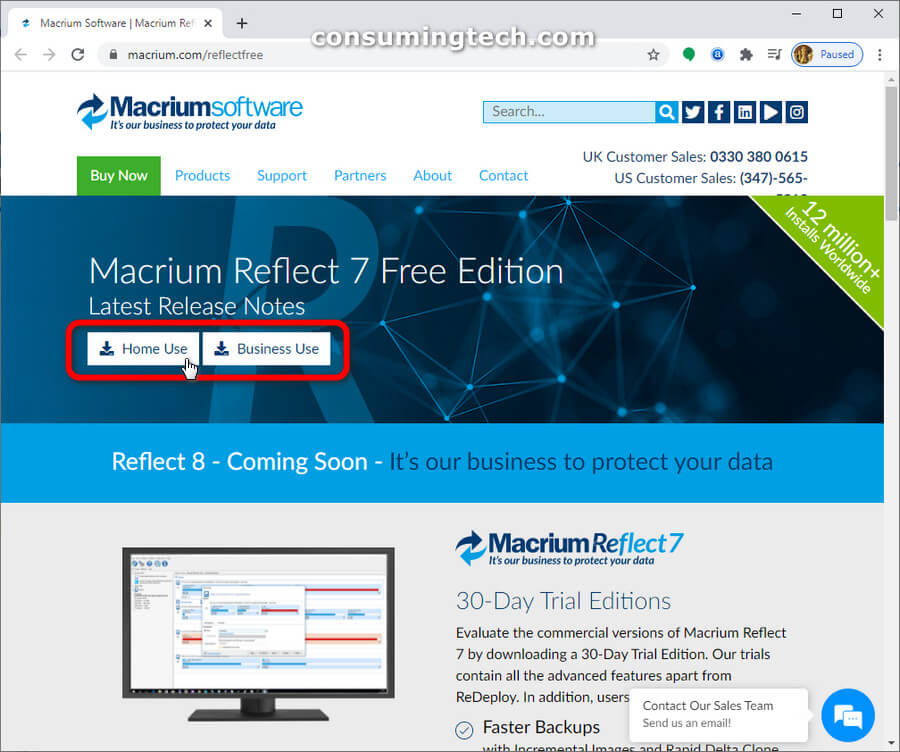
1. Download Macrium Reflect Free (30 day trial) from the Macrium website.
You can jump straight into the paid version if you don’t want to waste any time with the trial version. The paid versions are available from the same page. But for arguments sake, everything you will find in this guide, is available in the free edition of Reflect. (click to enlarge screenshot below)
Note: Where the link is located exactly may vary over time; it used to be to the right side of the page as a single green button bit today is to the left side of the page and separated between Home and Business use. If you are installing Macrium reflect on a home computer, then install the Home version; similarly if you are installing it at work, install the Business version. You will be going against Macrium’s terms of use of you install the Home version on a work computer.
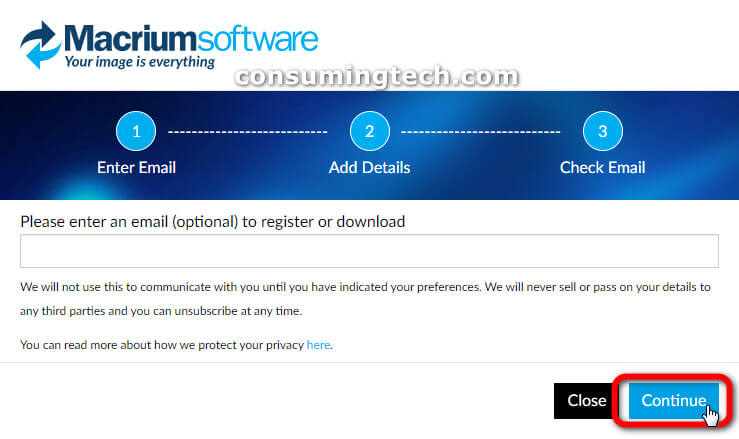
2. Click on the Continue button.
Note: You can enter your email if you would like but you do not have to enter it before you can download Macrium Reflect.
Click on the Close button after the than you message.

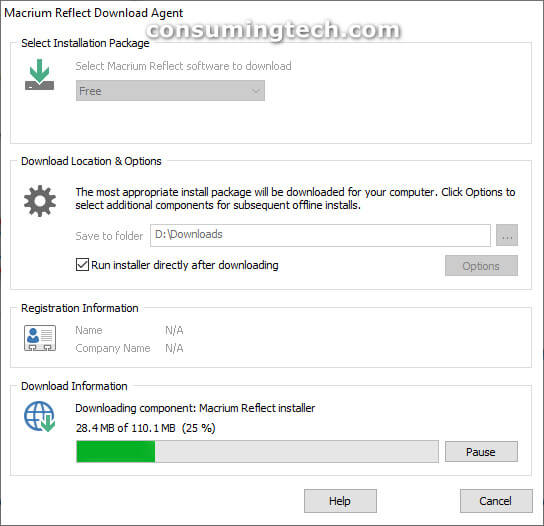
2. From the Macrium Reflect Download Agent, choose the edition that you want to install, where you want Reflect to be saved to on your computer (it takes up close to 100 GB’s in disk space), and then click Download to get the download underway.
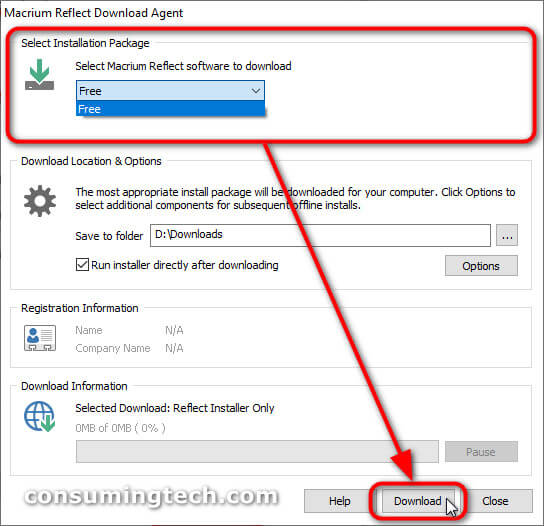
3. You can see the size of your download when it begins downloading so you know what you’re getting on your computer.
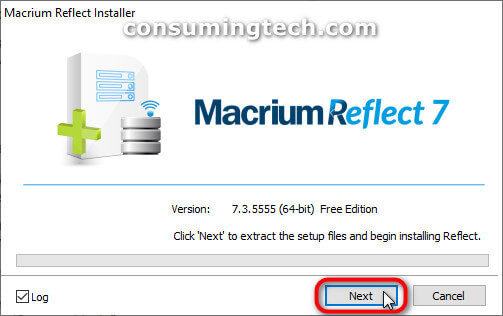
4. From the Macrium Reflect Installer, click Next.
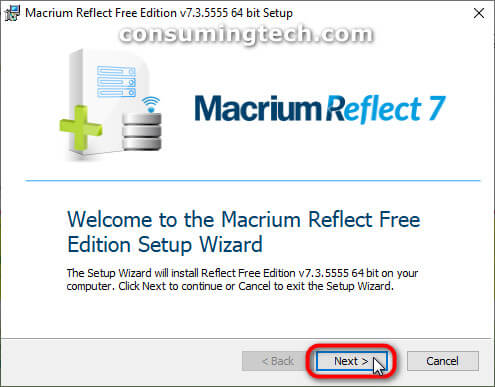
5. Click Next to begin the setup wizard for the edition of Reflect that you chose.
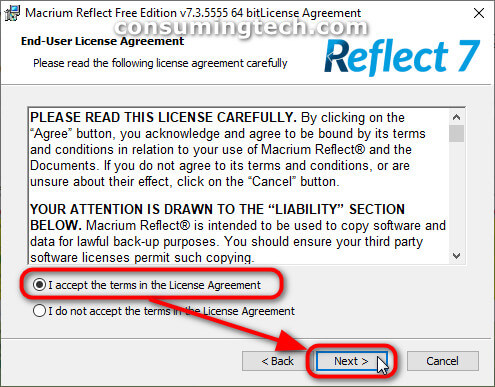
6. Check the box to accept the terms and conditions.
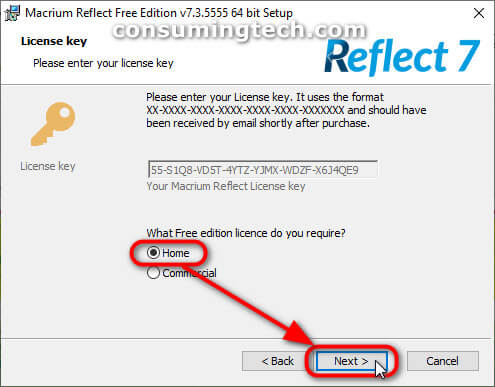
7. Open the email you received from Macrium after you signed up and then enter the license key in the available field.
Note: You may wish to take note of the date that your license will expire if you signed up for the free edition.
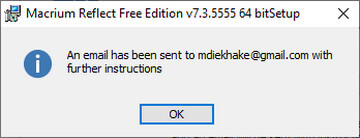
8. Head back to the email that you initially received from Macrium and in the second of the two emails will be a registration code already there and waiting. That is the code you need to enter into the Registration Code section, along with the same email that you used to sign up with.

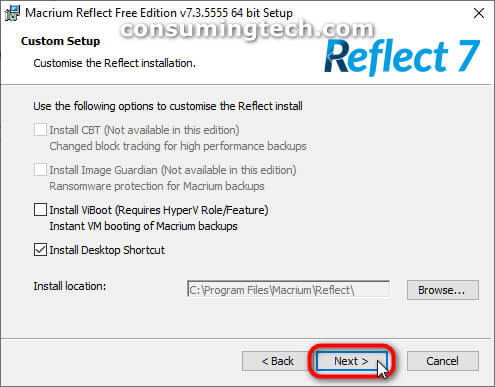
9. You get a few different options to customize the Reflect 7 setup. We left ours on the default settings.
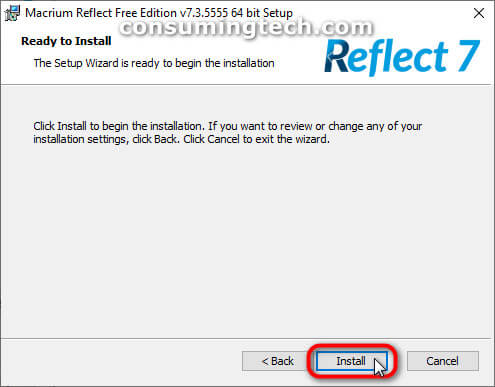
10. Click Install to complete the installation.
11. Click on the Finish button and the Macrium Reflect interface will launch if you keep the Launch now checkbox checked.

Part Two: Creating Rescue Media
Older versions of Macrium Reflect would prompt you to create rescue media before getting started with taking and restoring backups. That is no longer the case, but you still have the option to create rescue media from Macrium Reflect’s menu.
Should you wish to create rescue media so you can make sure that your computer can be booted up and the image be applied when necessary:
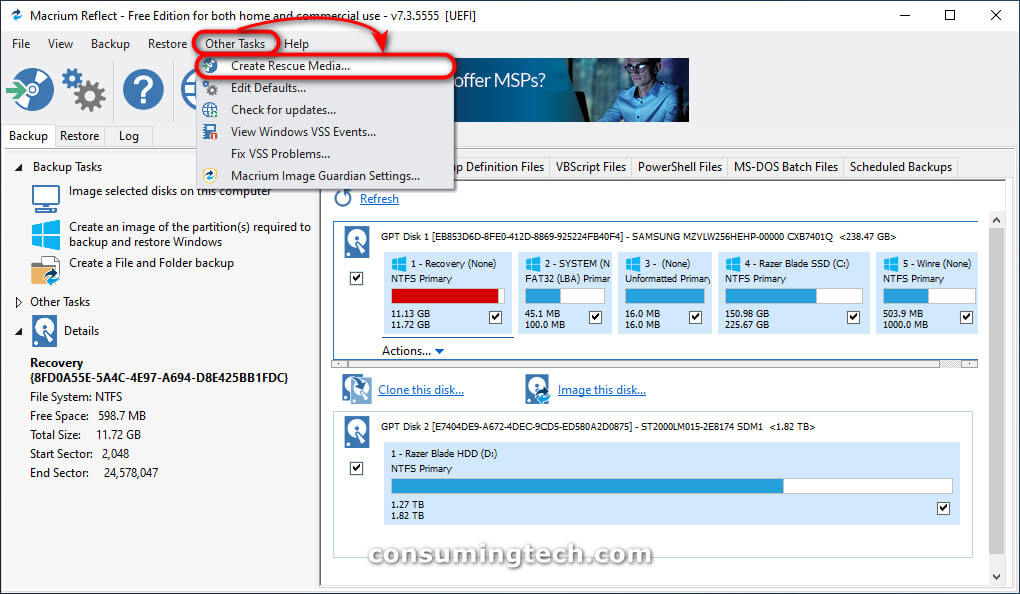
1. Open Macrium Reflect and click on Other Tasks in the menu and then Create Rescue Media….
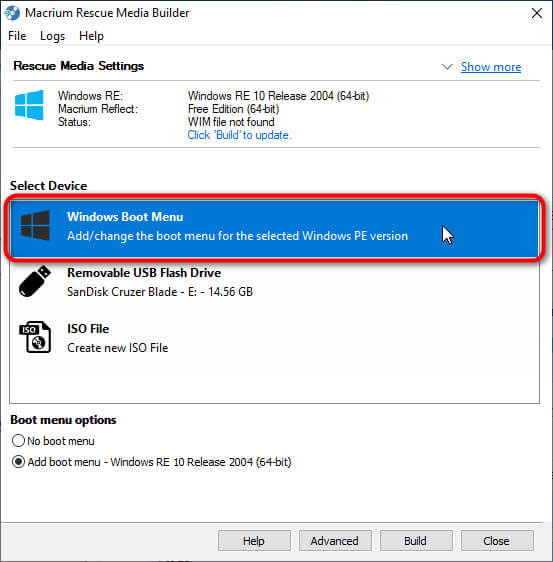
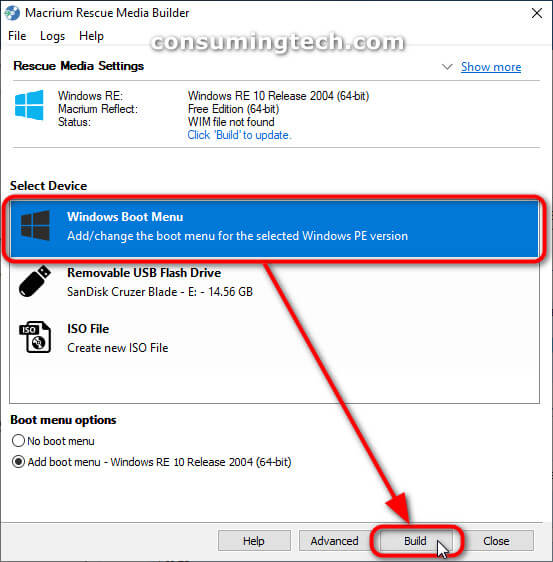
2. Select the device that you would like to use for the recovery media. You can choose between adding an option to the Windows boot menu, burning it to a CD or DVD, or having it on an ISO file. We recommend adding it to the boot menu because it’s the most convenient.
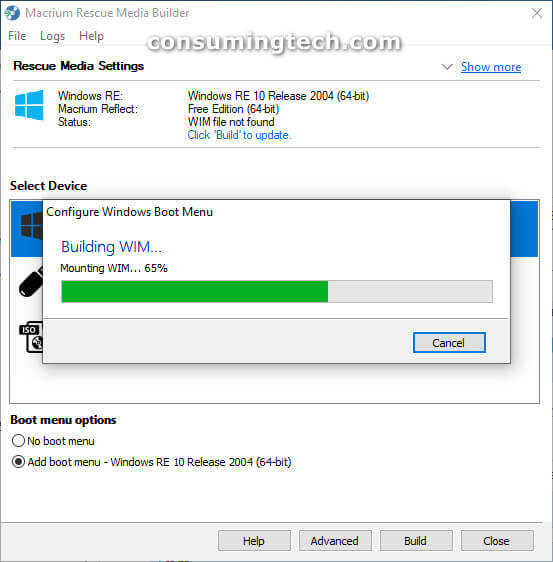
3. Reflect needs to then build the WIM.
Part Three: Creating a Full Backup Image
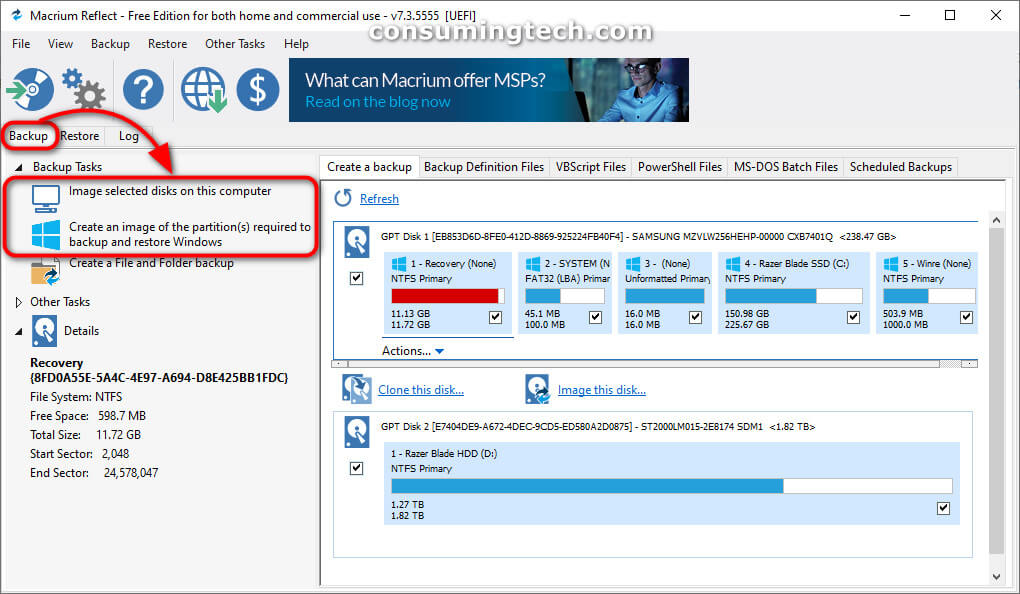
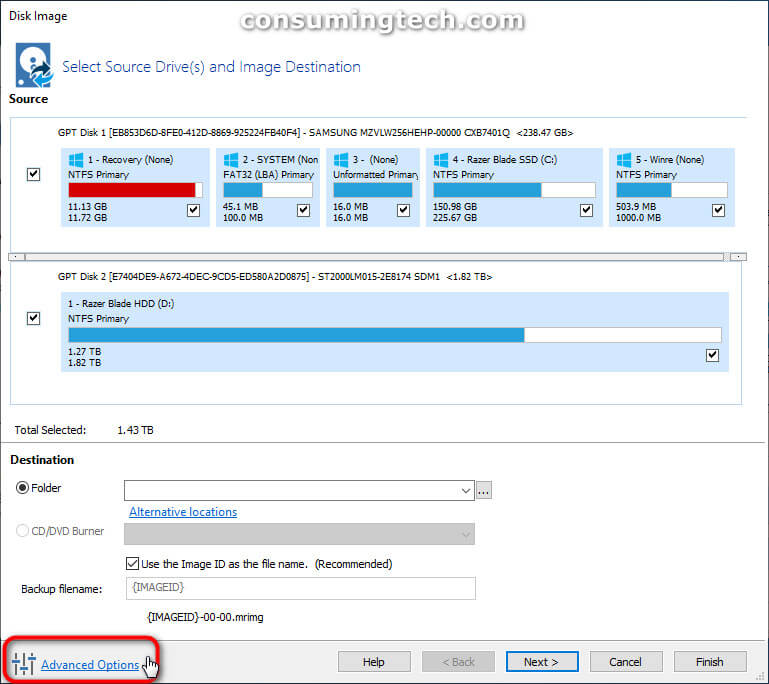
1. Select the Backup tab and then click on Image selected disks on this computer. (click to enlarge screenshot below)
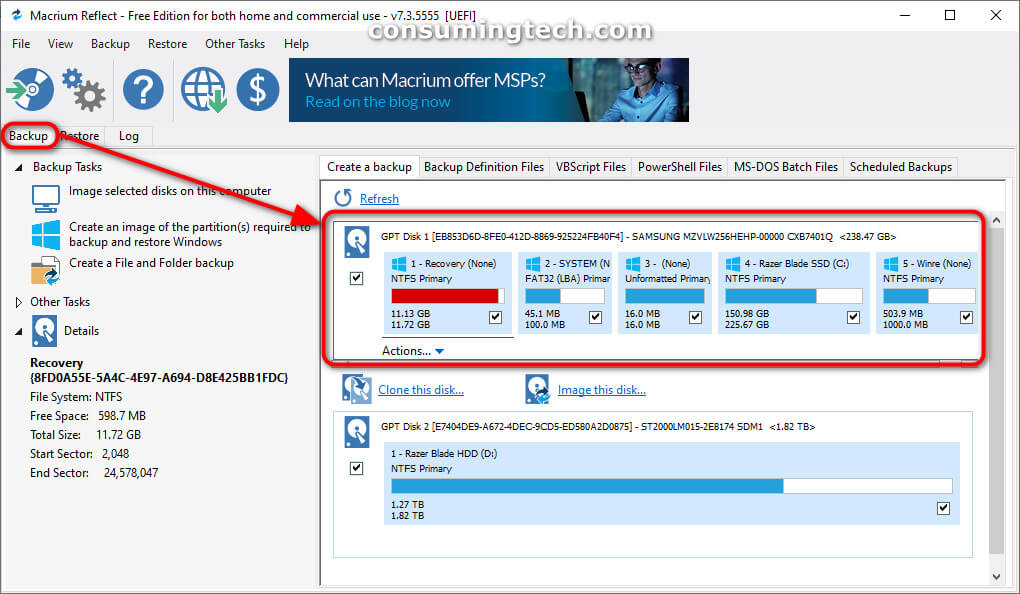
2. Alternatively you can image one of the disks instead of all disks by clicking on Image this disk. (click to enlarge screenshot below)
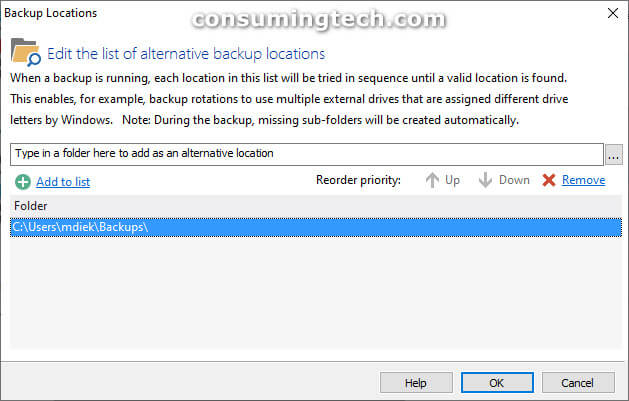
3. You need to choose a destination for the backup. Choose between a folder or a CD/DVD. (click to enlarge screenshot below)
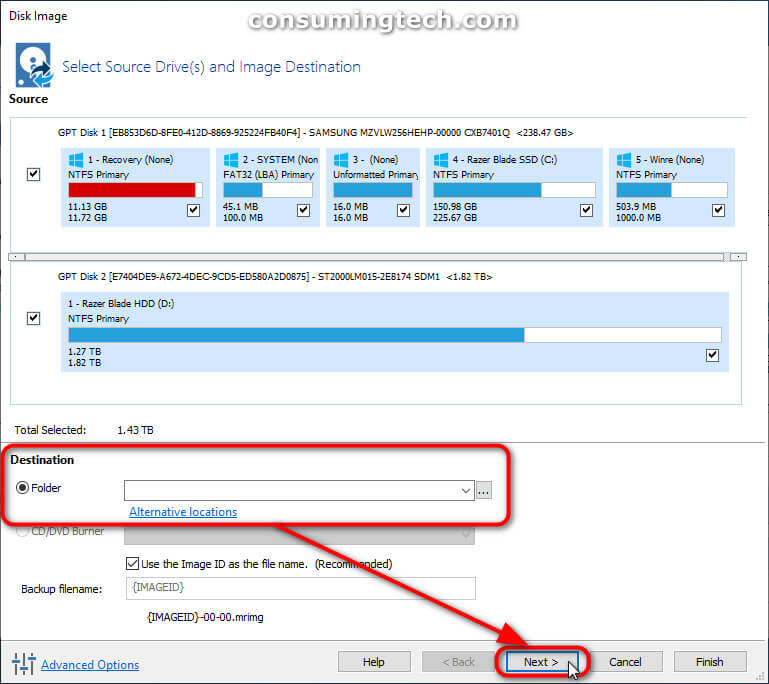
Note: Macrium makes it easy to choose your own folder where the backups will be contained if you need to add the folder manually. It even gives you the chance to create a new folder directly from this menu for those who need to create a new folder called Backups.
4. Click on the Advanced Options link at the bottom of the window to further customize your backup settings. Most people ought to at least check out these settings as they are rather important features that most will find useful.
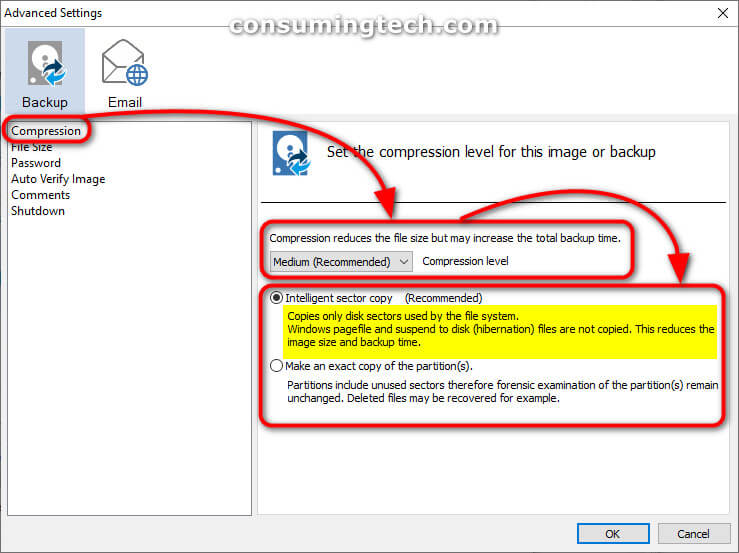
a. Click on Compression, and then from the drop-down menu choose the compression level you prefer. You can also choose between an intelligent sector copy or for Macrium to make an exact copy of the partitions.
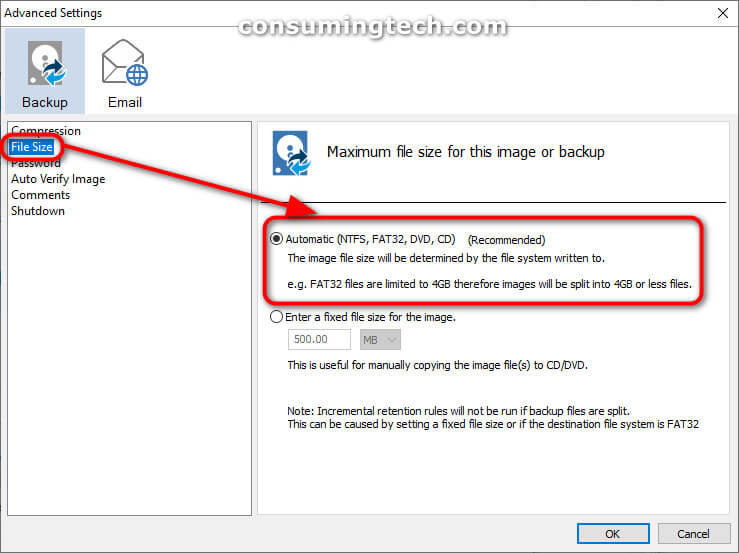
b. Click on File Size and then select either Automatic or Enter a fixed size chosen by yourself. It is recommended that you leave this on automatic unless you are an advanced user because Macrium can detect the file system on your computer and therefore also appropriately choose the right size for your file system.
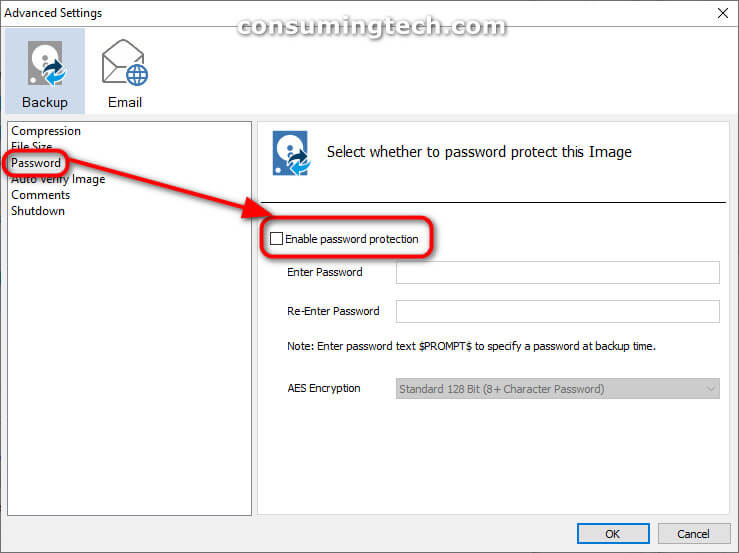
c. Click on Password and click check the box next to where it says Enable password protection if you would like your backups to be password protected. The rest is fairly self-explanatory: If you enable password protection, you then need to enter the password that will be used to unlock the backups after they have been created.
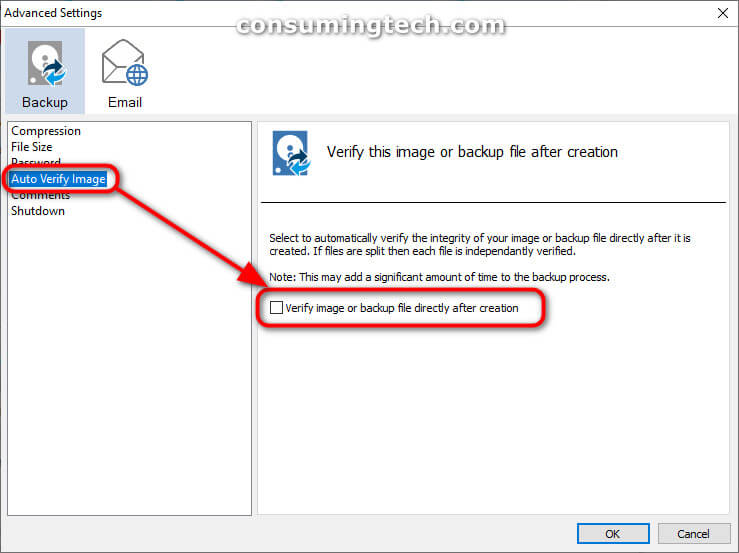
d. Click on Auto verify image if you would like Macrium to automatically verify the integrity of the backup as soon as it has been created. This means that the integrity of the data (corruption et cetera) will never be questioned by the Macrium software.
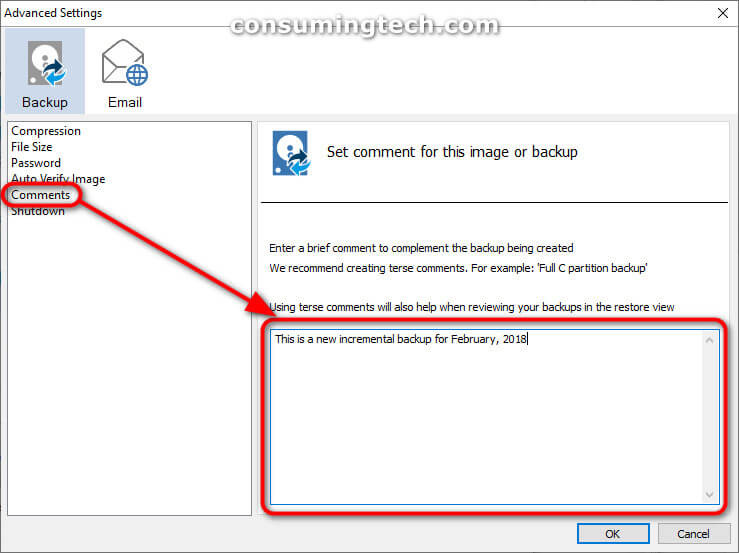
e. Click on Comments if you want to be able to add a note to you backup purely for identification purposes so you can identify the file later.
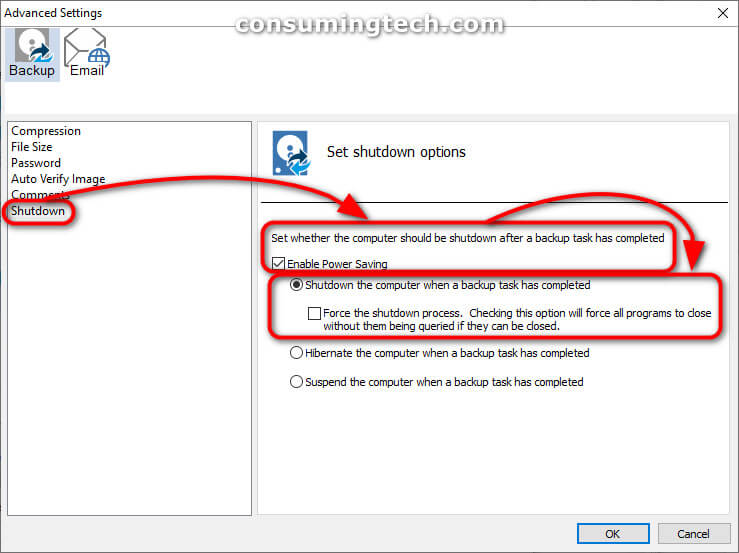
f. Click on the Shutdown link and then check the box next to where it says Enable power saving if you would like Macrium to automatically force the shutdown process, hibernate the computer, or suspend the computer when the backup has completed.
4: To Create New Volume/Partition
Note: You may need to create a new volume on your computer to store the backup. This is because storing the backup on the same drive as the files that you’re backing up is going to prove useless when something goes wrong with that drive, which is the reason you’re backing it up in the first place. You also have the option to burn it onto a disk, which allows for you to keep the backup off the computer entirely which might be more suitable to you if you’re on a single workstation.
a. Open Disk Management by typing Disk Management into the search box and clicking on Create and format hard disk partitions.
b. Right-click on the blue bar of the disk that you’re looking to shrink and then click Shrink volume.
You need to shrink the current volume before you can extend it and create a new volume on it.
c. Once shrunk, right-click on the unallocated disk space and choose to create new volume. During the wizard to set it up is when you can assign the new volume a drive letter.
5. Choose a backup template. These templates offer different backup solutions for just about anybody and to suit every need.
6. At the bottom of the same page is an option to choose when you want to purge. Purging, in this case, is how long Reflect will keep the backups stored on your computer, but instead of going by the time it goes by storage space. The default is storing 5 GB’s of backups before it starts deleting the old ones.
7. The image summary shows you when it’s getting backed up, how long the backups are being retained, and what you’ve chosen to get backed up. Click Finish if you’re happy with what is being shown here.
8. Name the backup so you can easily find it again later.
9. Macrium will first test your disk write speed.
10. Even when it’s your first time creating a backup, they happen relatively quickly, as can be seen by the length of the progress bar (about halfway through) and the time remaining (about 2 minutes) which can be seen from the screen while you’re downloading.
11. Our Macrium backup took just over 6 minutes to complete and was about 12 gigabytes. Differential backups that only backup the changes from previous backups will happen quicker.
Part Four: Restoring a System Backup
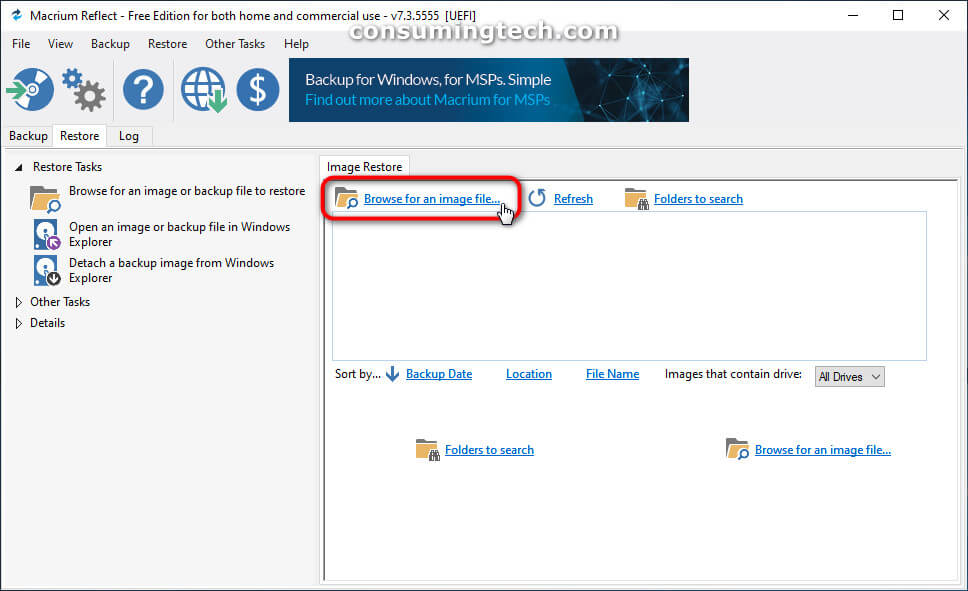
1. Select the Restore tab and then the Image Restore tab.

2. You will see the backup that you took along with the option to Restore Image on it.
3. You can also click Browse for an image or backup file to restore and select the File and Folder Restore tab where you can search for backup files.
That’s all.
Related Tutorials
- How to Enable/Disable File History in Windows 10 [Tutorial]
- How to Delete Older Versions of File History in Windows 10 [Tutorial]
- How to Change How Often to Save File History in Windows 10 [Tutorial]
- How to Restore Files/Folders from File History in Windows 10 [Tutorial]
- How to Backup/Restore Network Shares and Permissions in Windows 10 [Tutorial]
- How to Backup/Restore Sticky Notes App Settings in Windows 10 [Tutorial]
- How to Backup Files/Folders via File History in Windows 10 [Tutorial]
- How to Add/Remove Folders for File History in Windows 10 [Tutorial]
- How to Select Drive for File History in Windows 10 [Tutorial]
- How to See List of All Available System Restore Points in Windows 10 [Tutorial]
- How to Change How Long File History Stores Backups in Windows 10 [Tutorial]
- How to Turn On/Off File History in Windows 10 [Tutorial]
March 28, 2018 @ 12:54
I like the idea of breaking Macrium Reflect up into several different versions for people to install. While most people probably wish they had all the features of the more expensive versions of programs like this, I’m generally thinking about whether or not I want to install such a large program on my computer. having more options means I don’t have to install excess programs which take away from my computer’s performance, so unless I know I’m going to be using the features, I don’t want them on my computer anyway.
March 25, 2018 @ 15:11
There is now less than one year support remaining for Windows 7 which means that Macrium Reflect should still have some growth in it yet once the people who are still running Windows 7 upgrade to Windows 7 and then want to use Hyper-V to boot restored backups directly from Macrium Reflect.
March 25, 2019 @ 15:37
“While you could continue to use your PC running Windows 7, without continued software and security updates, it will be at greater risk for viruses and malware. Going forward, the best way for you to stay secure is on Windows 10. And the best way to experience Windows 10 is on a new PC. While it is possible to install Windows 10 on your older device, it is not recommended.”
I found this quote from Microsoft to be interesting. I certainly wouldn’t recommend using Hyper-V on a computer that isn’t made within the last five years or even if it weren’t a very good computer. The program is much too heavy. Open Task manager and most people will be bouncing on the limits, not to mention suffer from software lags when they try to use Hyper-V.
I think computers still have a lot of growth over the next decade thanks to the increasing hardware power that makes using the internet and computer programs much more enjoyable. We’re still lagging behind what software wants our hardware to do, and it’s getting pretty annoying. I no longer want to wait for the software to load, I no longer want to hear a fan kick in. I think people will be more included to install a program like Macrium over the next few years also, when we finally get most people using decent computers.