Last Updated on April 9, 2025 by Mat Diekhake
I know that it is possible to turn off File History from the Settings and Control Panel. However, as an administrator of my computer and its network, I would like to disable File History entirely in the hopes that it would become grayed out so that other users who are not admins would not be able to turn it on themselves. Resolution:
Before Windows 8 was released, the Windows operating system had Backup and Restore (formerly Windows Backup and Restore Center) for taking backups. Microsoft stated that due to its low use, it would be deprecating the way users since Windows Vista had been taking backups via the traditional Backup and Restore; however, those using Windows 7 still could find the Windows 7 File Recovery Control Panel applet which allowed them to take similar backups.
File History is an application, that when turned on, will continually back up the files it finds on your desktop, in your libraries, in your Favorites folder, and your Contacts folder. If you leave File History on its default settings, it will back up these locations every hour, though you can change the amount of time you wish to elapse between backups to be as long as only once per day if you prefer. The backups can only occur for as long as you have the external hard drive or USB thumb drive connected to the computer; File History will not back up to the existing locations on the computer; it perceives them as useless locations to store backups since the point of a backup is in case your existing drives fail. File History will not ever erase files and folders that were previously saved to the drive; everything File History saves is saved to its own unique folder called “FileHistory.”
The following tutorial demonstrates how to enable and disable File History backups when you are using a version of the Windows 10 operating system.
Method One: How to Enable/Disable File History Using Group Policy
You can enable and disable the File History backups by configuring a group policy in the Local Group Policy Editor when you are using a version of the Windows 10 operating system. Follow these guidelines for configuring the group policy that allows you to enable and disable File history:
Notes:
- By disabling File history in the Local Group Policy Editor, you are then unable to use File History from its regular locations around the operating system such as in the Settings application and Control Panel. This is a “hard” disable that will gray out the File History options so they cannot be used rather than simply turning off File History, which can always be done from the settings and without the group policy.
- There will be an automatic additional 26 characters added to the full path of the backup. The maximum full path that Windows 10 allows for is a total of 210 characters. This means any file with a path longer than 185 characters will not be backed up.
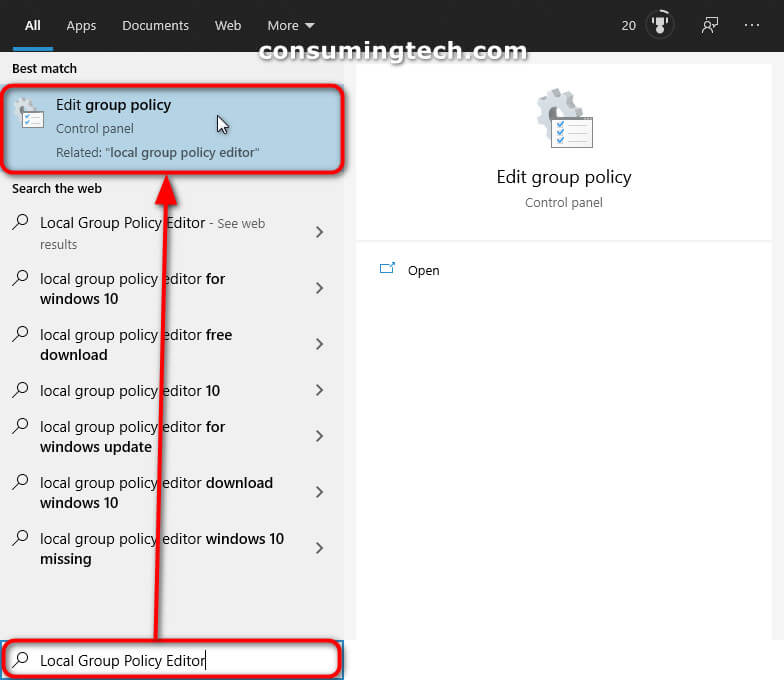
1. Open the Local Group Policy Editor. This tutorial shows you all the different ways in which you can open the Local Group Policy Editor: How to Open Local Group Policy Editor in Windows 10 [Tutorial]. (Click to enlarge the screenshot below.)
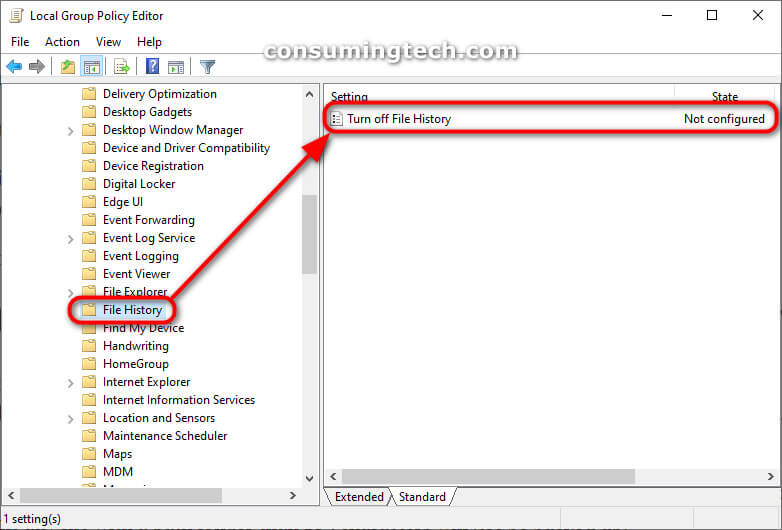
2. Using the Local Group Policy Editor’s left pane, navigate to the following folders:
Computer Configuration\Administrative Templates\Windows Components\File History
3. With the File History folder expanded, double-click on the Turn off File History group policy to open it. (Click to enlarge the screenshot below.)
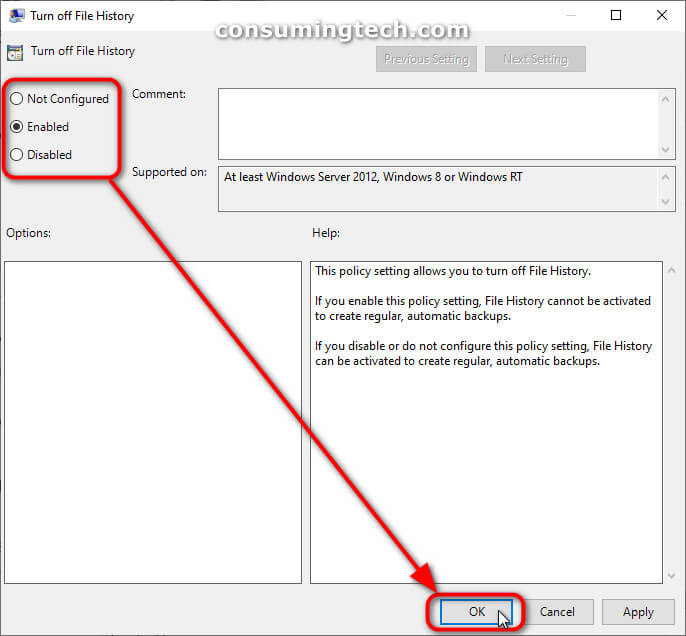
4. From the Turn off File History group policy, select either Not Configured (to enable), Enabled (to disable), and Disabled (to enable) to enable or disable the File History backups, and then click on the OK button to save the changes. (Click to enlarge the screenshot below.)
You can now close the Local Group Policy Editor window and continue using your computer.
Method Two: How to Enable/Disable File History Using a Windows Registry File
You can enable and disable the File History backups by downloading a Windows registry file which will automatically apply the changes for you without having to manually enter the Local Group Policy Editor. Follow these guidelines for enabling and disabling File History by using a Windows registry file:
Note: There will be an automatic additional 26 characters added to the full path of the backup. The maximum full path that Windows 10 allows for is a total of 210 characters. This means any file with a path longer than 185 characters will not be backed up.
1. Double-click on the Windows Registry file from the links below, and merge the file with your operating system.
Download: Enable_File_History.reg
Download: Disable_File_History.reg
2. Click on Run if Windows needs to run the file.
3. If you are prompted by User Account Control (UAC), click on the Yes button to continue.
4. Lastly, navigate to Start > Power menu > Shut down or Restart for the changes to be applied.
You can now open the File Explorer and delete the files you used from the Downloads folder if you would like.
That’s all.
Related Tutorials
- How to Add/Remove Folders for File History in Windows 10 [Tutorial]
- How to Automatically Create System Restore Point on Schedule in Windows 10 [Tutorial]
- How to Turn On/Off File History in Windows 10 [Tutorial]
- How to Change How Often to Save File History in Windows 10 [Tutorial]
- How to Exclude Folders from File History in Windows 10 [Tutorial]
- How to Select Drive for File History in Windows 10 [Tutorial]
- How to Backup/Restore Sticky Notes App Settings in Windows 10 [Tutorial]
- How to Delete Older Versions of File History in Windows 10 [Tutorial]
- How to Restore Files/Folders from File History in Windows 10 [Tutorial]
- How to See List of All Available System Restore Points in Windows 10 [Tutorial]
- How to Backup/Restore Network Shares and Permissions in Windows 10 [Tutorial]
- How to Backup and Restore with Macrium Reflect [Tutorial]
- How to Change How Long File History Stores Backups in Windows 10 [Tutorial]
- How to Backup Files/Folders via File History in Windows 10 [Tutorial]