Last Updated on December 24, 2022 by Mat Diekhake
Windows 10 offers you a choice of when and how you would like to receive your automatic updates. By default, the updates will download and install during the time given in automatic maintenance. But you can also choose to defer updates — up to 365 days for feature updates and 30 for quality updates — from the Settings app if you like.
Microsoft does not recommend for you to uninstall an update that has been installed—for most people, there shouldn’t be any need. However, should an occasion arise where you need to troubleshoot a particular problem, one of the ways you can go about doing that is by uninstalling an update that may prove troublesome.
Do note that uninstalling an update is not a substitute for Windows 10’s system restore. A system restore can remove any problem provided that the restore point is before the date you developed the problem, whereas the rolling back of a software update is only useful for when the problem was within the software itself.
The following tutorial demonstrates how to uninstall a Windows update when you are using a version of the Windows 10 operating system.
How to Uninstall a Windows Update in Settings
The Windows Update section of the Settings app allows you to uninstall one of the recent Windows updates by viewing the update history. Here is how you can do that:
1. Open the Settings app. See this tutorial for all the different ways in which you can open the Settings app when you are using a version of the Windows 10 operating system: How to Open Settings in Windows 10
2. From the main Windows Settings menu, click on Update & Security.
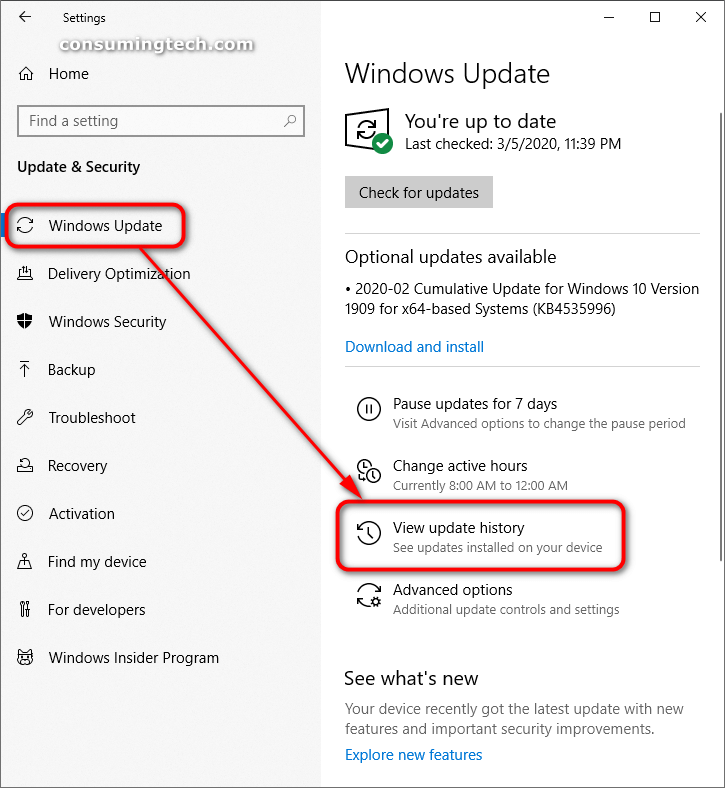
3. Click on Windows Update, and then from the right side of the same window click on View update history.
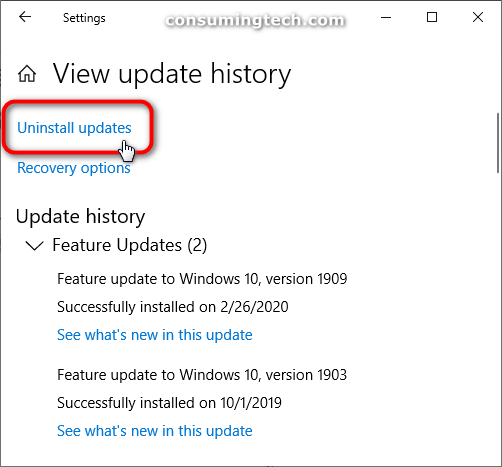
4. Click on Uninstall updates.
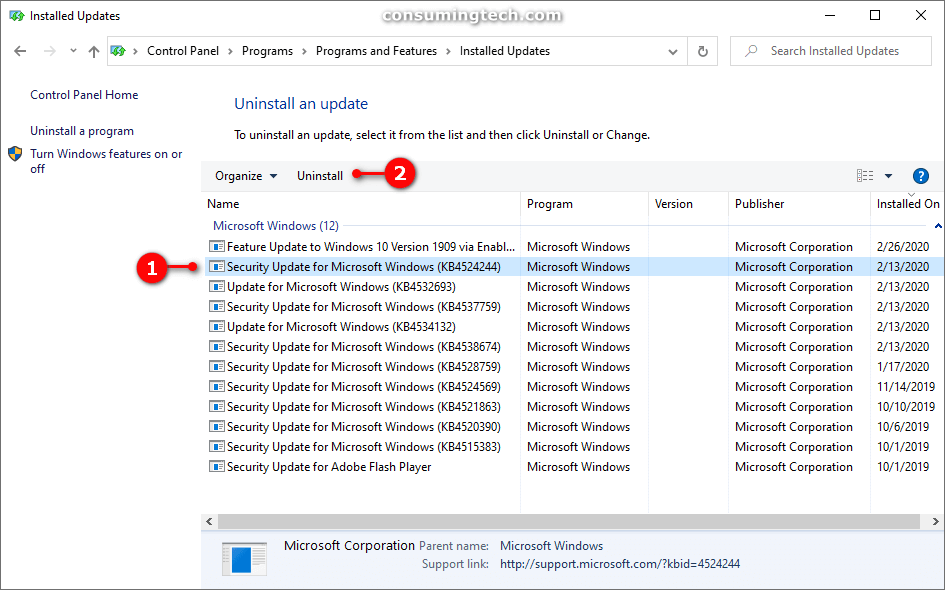
5. You will then be redirected to the Control Panel where it lists your different updates. Click on the update you wish to uninstall so that it is highlighted and then click on the Uninstall button above the list when it appears.

How to Uninstall a Windows Update in Control Panel Programs and Features
Since Microsoft’s Settings app has most people getting accustomed to it, it made sense for Microsoft to provide a way in which you can uninstall a Windows update from the Windows Update section of the Settings app. However, the process still redirects to the location in Control Panel that hosts the updates. As such, it is possible for you to navigate to the same area from the Control Panel also. Here is how you can do that:
1. Open the Control Panel in its icons view. See this tutorial for all the different ways in which you can open the Control Panel and how to show the icons view when you are using a version of the Windows 10 operating system: How to Open Control Panel in Windows 10
2. From the list of All Control Panel Items, click on Programs and Features.
3. From the left menu, click on View installed updates.

4. You will then be redirected to the Control Panel, where it lists your different updates. Click on the update you wish to uninstall so that it is highlighted and then click on the Uninstall button above the list when it appears.
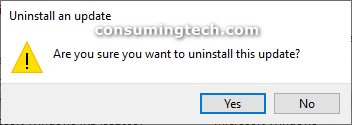
5. If Windows asks Are you sure you want to uninstall this update, click on the Yes button.
How to Uninstall a Windows Update in Command Prompt
You could also use the Command Prompt to uninstall an update if you prefer. Here is how you can do that:
1. Open an elevated Command Prompt. See this tutorial to read all the different ways in which you can open an elevated version of the Command Prompt window when you are using a version of the Windows 10 operating system.
2. Paste into the command line the following line of code, and then press the Enter key on your keyboard to execute the command:
wmic qfe list brief /format:table
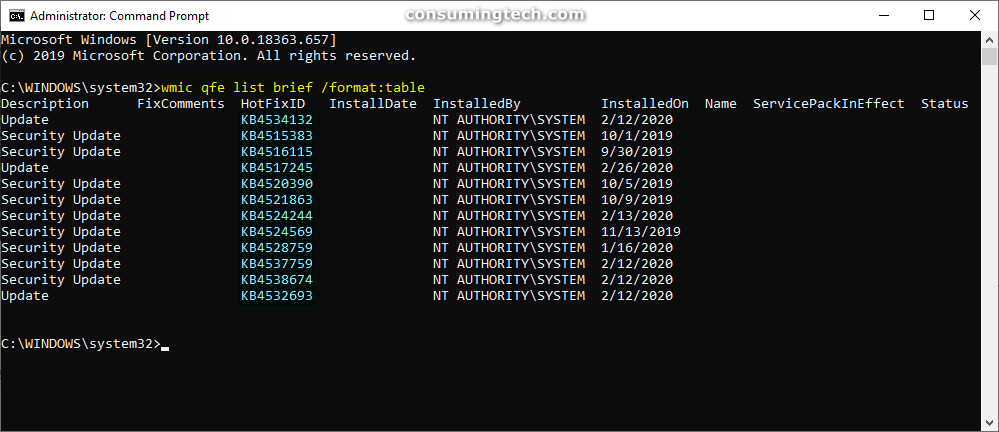
3. Using the same elevated Command Prompt window, type into the command line the command you want to execute and then press Enter on your keyboard to execute it.
- Uninstall update and prompt to confirm uninstall:
wusa /uninstall /kb:HotFixID
- Silently uninstall update without user interaction:
wusa /uninstall /kb:HotFixID /quiet
- Silently uninstall update without user interaction, and will not restart computer. Requires a manual reboot of the computer before the changes are completed:
wusa /uninstall /kb:HotFixID /quiet /norestart
- Silently uninstall update and warn user for so many specified seconds:
wusa /uninstall /kb:HotFixID /quiet /warnrestart:seconds
- Silently uninstall update and prompt to restart computer:
wusa /uninstall /kb:HotFixID /quiet /promptrestart
- Silently uninstall update without user interaction. This will force close all applications and force restart the computer:
wusa /uninstall /kb:HotFixID /quiet /forcerestart
Notes:
- Substitute where it says HotFixID for the KB number that is shown in the Command prompt window for the update you want to uninstall.
- If using the
warnrestart:secondscommand, substitute where it says seconds for the number of seconds you want to set for the time. - For example:
wusa /uninstall /kb:4515383 /quiet /warnrestart:45
If you are prompted by the Windows Update Standalone Installer, click on the Yes button to complete the uninstallation of the software update.
That’s all.
Related Tutorials
- How to Check for and Install Windows Updates in Windows 10
- How to Change Active Hours for Windows Update in Windows 10
- How to Turn On/Off Automatic Updates for Offline Maps in Windows 10
- How to Start/Stop Receiving Insider Preview Builds in Windows 10
- How to Schedule Restart Time for Windows Update in Windows 10
- How to Enable/Disable Windows Update Automatic Updates in Windows 10