Last Updated on December 26, 2022 by Mat Diekhake
The touch keyboard that the Windows 10 operating system has always had the handwriting input panel layout. From this panel, you can grab your stylus pen and write with it or just use your finger to write with instead. Both of which are what Microsoft is talking about when it refers to handwriting.
Over the years with Windows 10 to date, the handwriting was done from a separate panel when you wanted to use the stylus pen or your fingers. The other panel that was designed to handle text input was also separate, and hence you had to look at two different panels if you wanted to add text and add handwriting.
Now in Microsoft’s latest versions of the Windows 10 operating system, Windows 10 build 17074, things have changed, and you can now expect to find the two panels merged into the one, making it possible to use the handwriting gestures in the same place as the text field.
To start using handwriting gestures, you just tap your finger in the text input region, and then it expands and offers more area for you to do your handwriting in.
The new method for handwriting in the Windows 10 operating system is probably here to stay, but Microsoft also understands that many of you have already gotten to know the old way and might prefer it still. If that’s the case, you can go back to using the operating system the old way with separate text input areas for handwriting and text by turning off the embedded handwriting panel instead.
This is what you need to turn the embedded handwriting panel on or off when you’re using the Windows 10 operating system starting from build number 17074.
Windows Ink, Customizing Surface Pen Stylus, and Improving Handwriting Recognition in Windows 10
For those of who aren’t yet in the know, Microsoft is now in the market of manufacturing devices as well as offering up the world’s most used operating system. You can buy the Surface Pro range of hybrids (a combination of tablet meets laptop), a Surface Book (similar but more impressive), or even a Surface laptop. Most of those hardware devices come with a stylus pen that you can use to draw when you use Windows 10. Additionally, many other manufacturers who choose to run Windows on their devices—like some of the leading brands including Dell, HP, and Lenovo—also offer a stylus pen for some of their range of computers too. In short, there is no shortage of pens out there now capable of drawing on touch displays, and ever since the Windows 10 Anniversary update, Microsoft has been making the Windows Ink Workspace a better experience for everyone who can use it.
Once you’ve hooked up your stylus pens with Bluetooth, the Windows Ink Workspace will open up when it senses you’ve got the pen in your hand and would like to use it. There are plenty of good sources out there on the Internet if you want to learn how to use your Surface pen, or any other that you know is compatible with Windows.
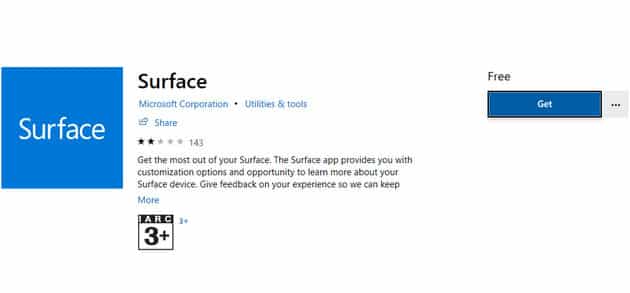
If you’d like to customize your Surface pen, you can install the Surface app from the Store. When you do you’ll find heaps of additional options, including the chance to adjust the sensitivity. Much like when using a mouse, the default setting isn’t always perfect for everyone. The Surface app is also handy for showing visual effects, choosing a preferred hand to write with, ignoring the touch input when the pen is in action, showing recommended app suggestions, and more.
There’s even a way in which you can improve the handwriting recognition from Windows 10 also, and it can be done without having to install any extra apps. You’ll find it under a feature called “Automatic learning.” This is usually a feature that many people might prefer to say no to, thinking that they might consider it a privacy breach. But n fact if you enable this feature, it will allow Microsoft to learn your personal handwriting style. Automatic learning is enabled by default, but if you’ve come across it in the past, you may have turned it off without realizing it. To find out, you can head to Control Panel > Advanced Settings > personalized data. Here you will see two options: one for using automatic learning and the other for turning it off and deleting all previously recorded data.
This is what you need to do to turn on or off the embedded handwriting panel from the Settings application when you’re using a version of the Windows 10 operating system.
How to Turn On/Off Embedded Handwriting Panel in Settings App
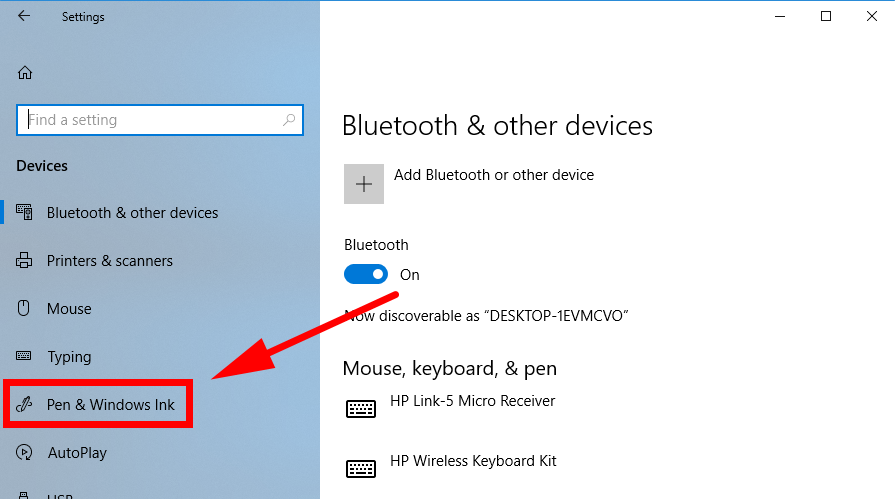
You can turn the embedded handwriting panel on or off from the Settings application in Windows 10. To find out how, head to the Start menu > Settings gear icon from the Start menu’s left side pane and then click on the “Devices” link from the Windows Settings screen.
From the Devices left side pane, click on the “Pen & Windows Ink” link.
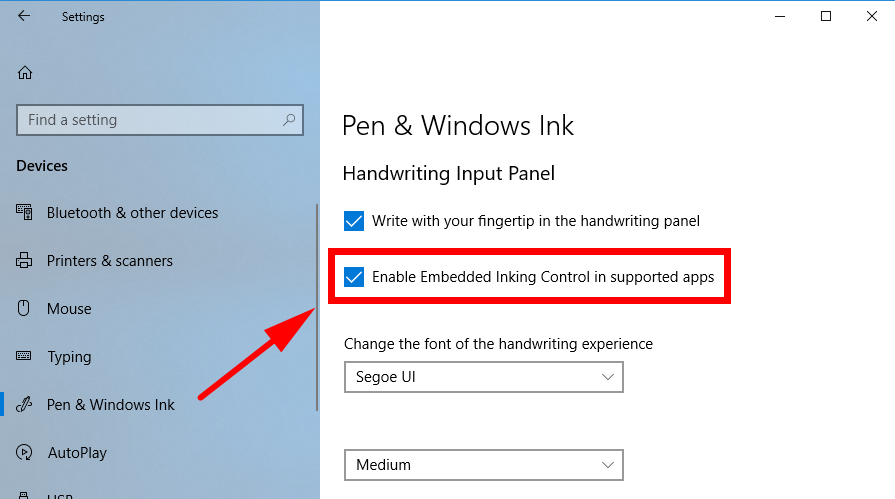
Now in the right side pane of the Run & Windows Ink section, you’ll see a checkbox available to check or uncheck next to where it says “Enable Embedded Inking Control in supported apps.”
That’s all you need to be turning the embedded handwriting panel on and off when you’re using the Windows 10 operating system from build number 17074 onward.
You might also be interested in:
- Enable/Disable Shutdown Event Tracker in Windows 10
- Change Default Audio Playback Device in Windows 10
- Change Size of Text in Menus in Windows 10
- Change Magnifier View in Windows 10
You can subscribe to our RSS, follow us on Twitter or like our Facebook page to keep on consuming more tech.