Last Updated on December 26, 2022 by Mat Diekhake
There is always one default audio playback device that Windows uses to play the sounds that go along with whatever you’re watching on the computer’s display. The Windows operating system will already know and choose what that is going to be.
If you have a secondary set of speakers, want to plug in headphones or have a nice new Bluetooth headset that you want to start using, you can tell Windows that you want to change the default audio playback to be that other device that you have instead.
From then on the Windows operating system will always have that new device st as the default audio playback device until you tell it you would prefer something else to take its place.
How to Change Default Audio Playback Device from Settings Application
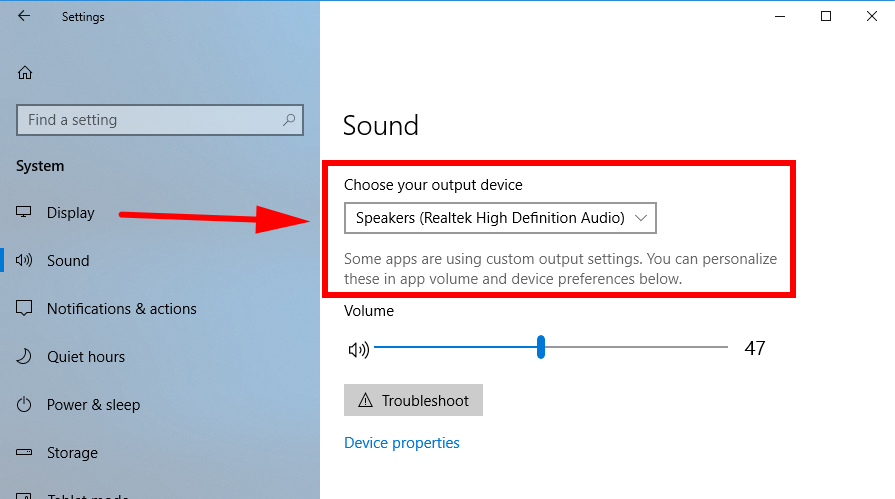
Starting from Windows 10 build 17035, you can change the default audio playback device from the Settings application in Windows 10. Head to the Settings by navigating to the Start menu > Settings gear icon in the Start menu’s left side pane and then click on the “Display” link from the Windows Settings screen.
It’s in here where you’ll find the Sound heading, and directly beneath it a drop-down menu where you can select your default audio playback device. Close the Settings application after you’ve selected your speakers of choice from the drop-down menu and it’ll remember your preferences.
How to Change Default Audio Playback Device from Sound icon in Taskbar
You can also change the default audio playback device directly from the Volume icon itself, found in the system tray of the taskbar, not too far away from your clock.
If you click on the Volume icon, it’ll open up and show the volume bar. To the top left side of the bar is a little arrow. Click on the arrow, and it’ll open up to all the speakers you can select. If you don’t see the arrow, then it means your computer only has the one speaker currently to choose from, so connect your other headsets first and then see how you go.
![]()
How to Change Default Audio Playback Device from Sound Control Panel
It’s also possible to bring up the Sound dialog from the Control Panel and change the default audio playback device that way.
Get started by opening the Control Panel and have the icons showing in its classic view so you can see them all by selecting “Small icons” from the View by drop-down menu in the top right corner of the Control Panel window.
Now look for the “Sound” link from the list of all Control Panel items and click on it when you see it. It’ll open up the Sound dialog box. Select the “Playback” tab, and then you’ll see all the speakers that the computer has picked up in the window. You can either right-click on the speaker of your choice and select the “Set as default” from the menu or click on the “Set Default” button at the bottom of the Sound dialog instead.

Understanding how to deal with default audio playback devices isn’t the easiest thing in the world, but it’s also difficult for Microsoft to know what you want to happen with your speakers. If you take a few minutes to get to know how it works, then you should benefit from it moving forward as it’s likely a feature that you’ll always need to control manually.
You might also be interested in:
- Enable/Disable Log Event when Disk Quota Warning Level Exceeded in Windows
- Change Magnifier View in Windows 10
- Change Size of Text in Menus in Windows 10
- Enable/Disable Shutdown Event Tracker in Windows 10
You can subscribe to our RSS, follow us on Twitter or like our Facebook page to keep on consuming more tech.