Last Updated on December 18, 2024 by Mat Diekhake
Microsoft has created Windows 10 in such a way that Windows Update automatically installs the drivers when they are ready to download, so you never have to worry about being out of date with anything technical that the average user doesn’t want to have to worry about when they sit down to use their PCs.
The flip side to that is it means Microsoft automatically installs the drivers whenever they desire and even if you don’t fancy having them on your PC. Some people can get quite upset about the fact that drivers are being updated when they notice it, although it is only fair to include that sometimes driver updates can be faulty and cause issues of their own. Those who are most upset about Microsoft automatically updating drivers are often the ones willing to go the extra mile to get them stopped, and the folks out of Redmond do make it possible to disable the driver updates manually, so everyone is happy in the end.
Anyone who is signed in as an administrator and is wanting the driver updates stopped so they no longer happen by themselves, can control them from the Settings application in Windows 10, while those of you who have the Professional, Enterprise or Education editions of Windows 10 can also disable the driver updates from the Local Group Policy Editor.
Microsoft has made a few modifications concerning the driver update policies in Windows 10 since the operating system arrived nearly some three years ago now. When Windows 10 first arrived and for some time after, users had no opportunity to enable or disable them anywhere from the OS. Then came Windows 10 build 14328 (announced by Gabriel Aul on the 22nd of April 2016) that gave Windows 10 Pro, Enterprise, and Education operating system owners the chance to enable and disable driver updates from the Local Group Policy Editor, after feedback from users who desperately wanted them stopped and were shocked at their inability to do so.
Next was the Windows 10 build 15002 update that Microsoft rolled out. With it came the option to turn on or off the driver updates from the Windows Settings.
How to Turn On/Off Driver Updates Using Settings App
You can choose to enable or disable the driver updates from Windows Update in the Settings application that Windows 10 has. Your prospects to enable or disable the driver updates from the Settings application in Windows 10 will depend on what software update you are running. As long as you haven’t manually decided to stop the software update rolling out to your machine, you should be running on a version of Windows 10 that offers the option if you are reading this as of today. Nonetheless, we’ll give you the specifics to go with it as well: Starting with the Windows 10 Insider Preview Build 15002 proclaimed by Dona Sarkar—the head of the Windows Insider program—from the official Microsoft website on the January 10 2017, there was an option from the Settings app that provided users the possibility to enable and disable the driver updates. Now, running on Windows 10 version 1703—last updated on the 16th of June 2017—the selection is no longer there from the Settings application. So, you’ll need to be running a version of Windows 10 close to the 15002 update from January.
Start by logging in to an account that has the administrator permissions attributed to it and then open up the Settings application from the Start menu. Next, click on the “Update and security” link from the Windows Settings menu. Then all you need to do is click on the “Advanced options” link in the right side pane.
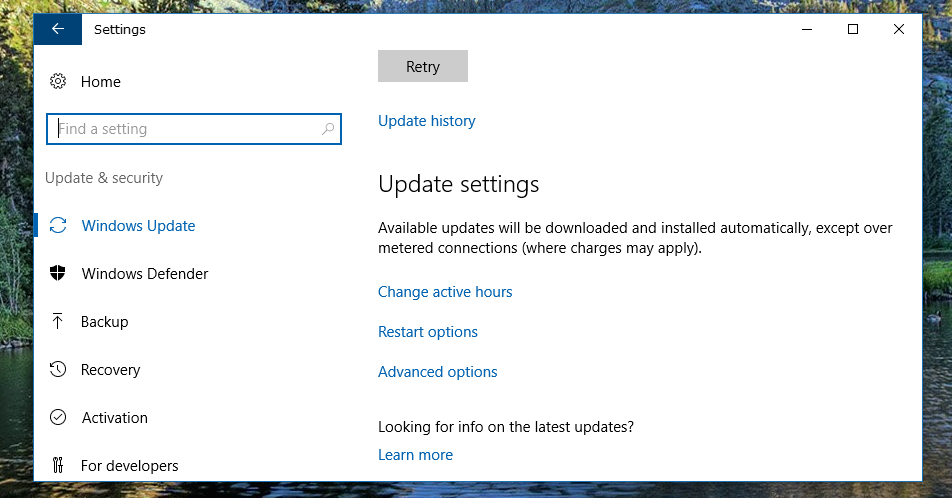
You’ll now have the Advanced Options screen open, and immediately below the heading that states “Choose how these updates are installed” is the checkbox you can choose to either check and uncheck with your mouse for enabling and disabling the driver updates. The text appending the box reads “Include driver updates when I update Windows.”
How to Turn on/off Driver Updates Using Local Group Policy Editor
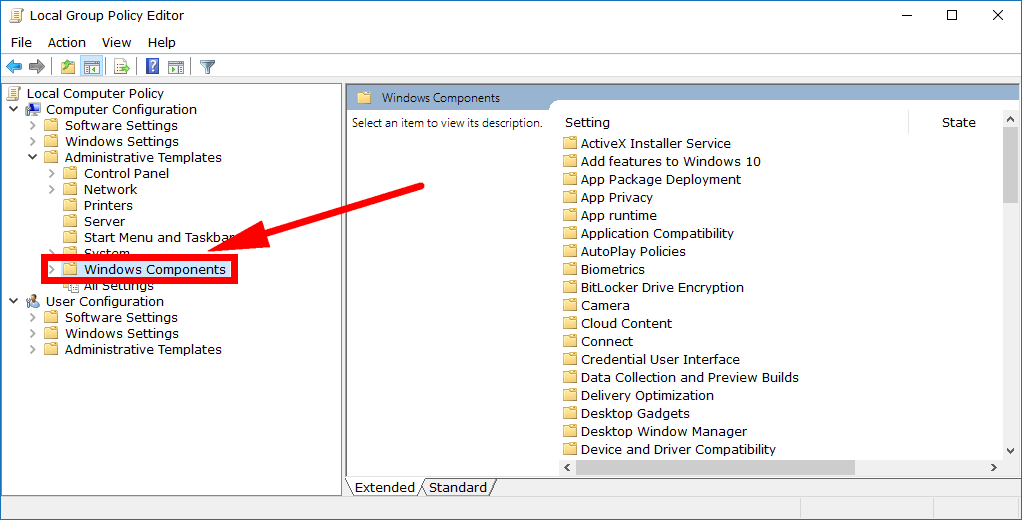
It’s also possible to enable or disable the driver updates by using the Local Group Policy Editor as well. Start by logging in to a user account in Windows 10 Professional, Enterprise or Education that has the administrator permissions assigned to it and then open up the Local Group Policy Editor. Can’t open the Local Group Policy Editor? You might be running on Windows 10 Home. You can upgrade from Windows 10 Home to Windows 10 Pro by heading to the Settings application if you want to be able to make changes to group policies. Now focus your eyes on the left side pane and click the mouse or tap your finger on the “Administrative Templates” folder.

You’ll notice a bunch more folders now available, one of them being the “Windows Components” folder that you need to click on next.
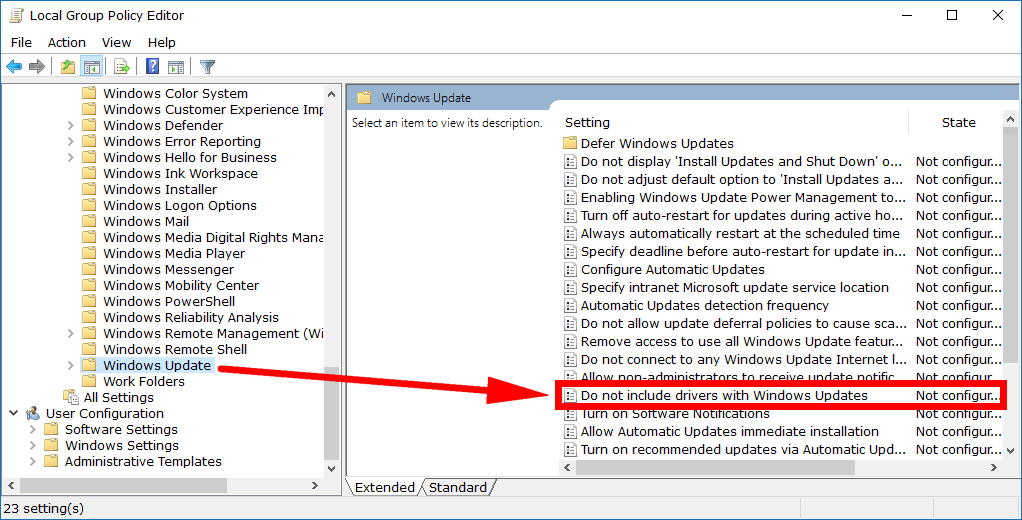
You’ll see numerous more folders have become available after the expansion again. Scroll down to the bottom and then click on the “Windows Update” folder and then look in the right side pane for the setting that says “Do not include drivers with Windows Updates.” You can either double-click on the setting or just click on it once, and then it becomes available from the middle pane, along with a description and link labeled “policy settings” that you can click on. Either one will direct you to the same thing which is having the policy window for that particular setting now open so you can make some changes to it.
The default option you get already is the “Not Configured” which means you’ll continue to get the updates over the air and automatically whenever Microsoft thinks is a good time for your computer (remember that there are lot of computers all around the world also getting updates, and sometimes Microsoft rolls out updates slowly to see the results and then correct any issues that they may have found.)

There isn’t much difference between leaving it on the “Not Configured” option and “Disable” this time around; both of them will effectively do the same thing, but you can change it to disabled if you prefer. The one time when disabling it might become relevant is in the future and if Microsoft chooses to have the default option different to what they have it set on now, remembering that “Not Configured” is going to always give you what Microsoft does by default. So this way you will permanently have it always set to receive driver updates until you go back into the Local Group Policy Editor in the future and change it.
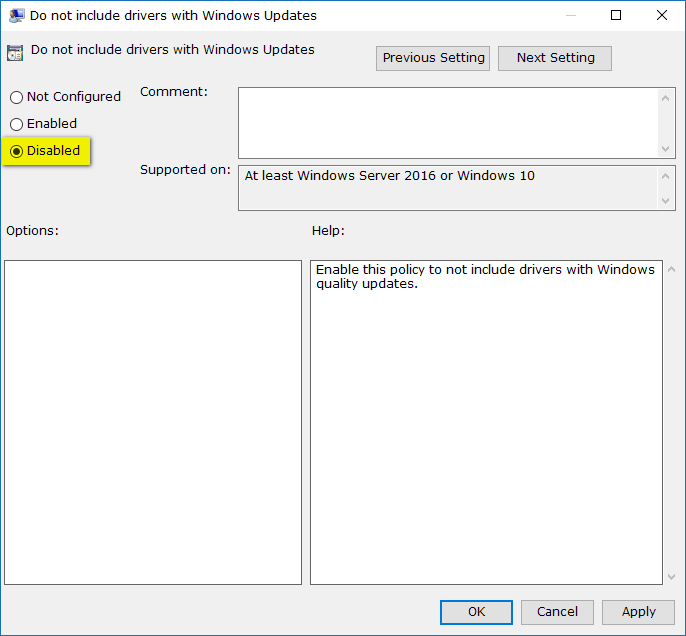
When you know you don’t want the drivers included with Windows software updates, you need to set this policy setting to “Enabled” and then they will stop. Click on the “OK” button at the bottom of the policy window to apply the changes and close the window.

Some people are stating that Windows Update is proceeding to download the updates, even after venturing into the Local Group Policy Editor and changing it from its default setting to the “Enabled” option like reported in the guide above. It is true that Windows Update does resume downloading the driver updates for the device, but it doesn’t install them. In other words, downloading an update and having an update installed are to be considered two entirely different things when it comes to using WIndows 10. Nothing is surprising about that when you understand how Windows 10 updates of any kind, including software updates or driver updates, work. Windows will report that an installation error has occurred in the Windows Update window instead of going through with the installation if you have disabled the driver updates. You’ll need to try to remember that error message is related to your driver settings that you’ve made, or you might get confused when you see it there while viewing your update history. If you are concerned about other individuals using the computer and user account and not conjecturing the message that Windows Update is giving, you could use the Show or Hide updates tool and stop the updates altogether if you prefer.
If you ever change your mind and want to have the device drivers installed again at a later date, it’s a moderately easy path to follow in the Group Policy Editor for Windows Professional editions and up, and simplified even more for everyone else who gets to use the Settings application for reasons outlined in the article.
Related Tutorials