Last Updated on December 26, 2022 by Mat Diekhake
Windows operating systems used to have an Advanced Boot Options screen that you could get access to by pressing the F8 key at the right time during the boot up process. It used to be something that technicians and people who knew their way around a Windows operating system pretty well would do.
Microsoft has decided to take the challenge out of it now and offer a way for any old individual to boot to the Advanced Startup Options screen in Windows 10. It’s even possible to always have your computer booting directly to the Advanced Startup Options screen if you prefer.
The Advanced Starup Options that Windows 10 has is the same thing as the Advanced Boot Options screen that older versions of Windows operating system use to offer, but it comes with some extra features and an entirely new design, unlike anything that you would be familiar with from past Windows experiences before Windows 8.
While many users have applauded what Microsoft has done with the new style of menu in more recent versions of Windows, the older Advanced Boot Options with the black and old school background is still available if you want it. The guide below demonstrates how to get access to the legacy F8 Advanced Boot Options screen at boot in Windows 10.
There are a couple of conditions you’ll need to adhere to if you are going to get this to work. Firstly, you can’t get to the Advanced Boot Options screen if you have the Fast Boot option from Windows 10 enabled. Most of you won’t since that’s something you would need to have entered the UEFI firmware settings to have altered. The Fast Boot option is not the same thing as the Fast Startup feature that comes new in Windows 10 editions that helps eliminate then ed for there to be a Hibernate mode.
Note: You can only follow either option in this guide if you are signed in to Windows 10 using an administrators account, that is an account that has the administrative permissions assigned to it, like the first account that was set up on the computer always has and can then be assigned to other user accounts should the user wish to do so.
How to Enable/Disable F8 Advanced Boot Options Using Displaybootmenu Command
To get to the legacy F8 Advanced Boot Options, you first need to open up an elevated Command Prompt window. Then to get the Advanced Boot Options menu to be enabled, type the command bcdedit /set {bootmgr} displaybootmenu yes and then hit the Enter key on your keyboards to execute the command.

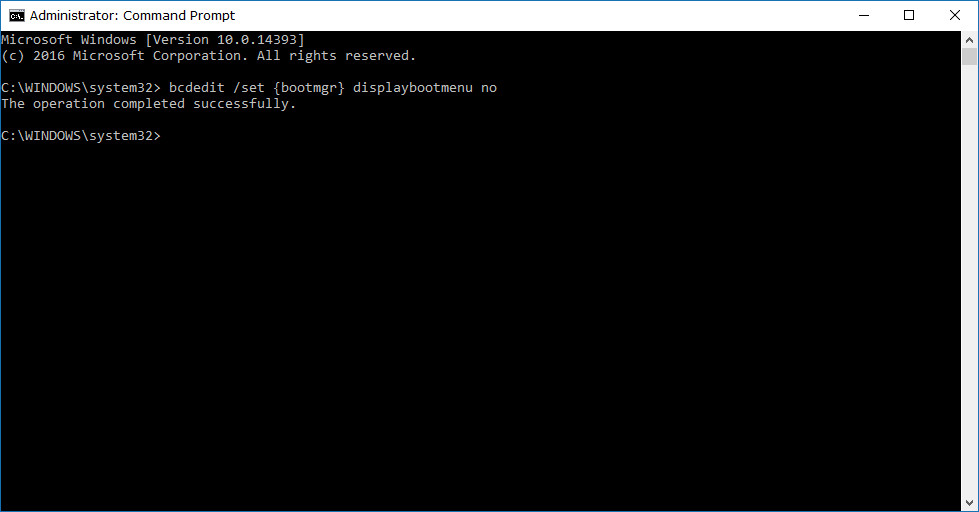
Should you ever wish to disable the Advanced Boot Options menu that you had just enabled, you need to open up the elevated Command prompt window and this time type the bcdedit /set {bootmgr} displaybootmenu no command and then hit the Enter key to execute the command.
How to Enable/Disable F8 Advanced Boot Options Using Bootmenupolicy Command
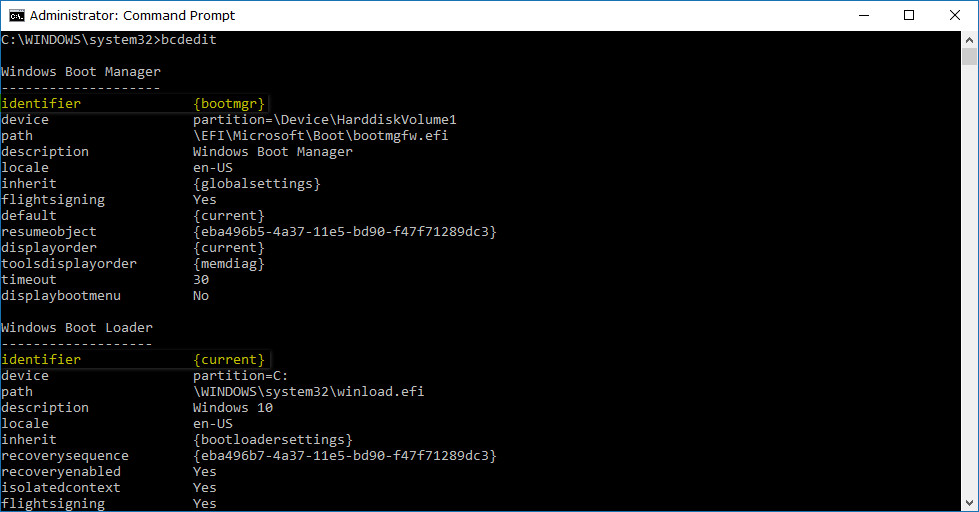
You can make the Advanced Boot Options screen appear by changing the boot menu policy instead if you prefer. To do it this way, open up another elevated Command Prompt window and this time enter the bcdedit command and press the Enter key on your keyboards to execute the command. Now look under the top Windows Boot manager for the identifier and keep the same Command prompt window open so you can see it.
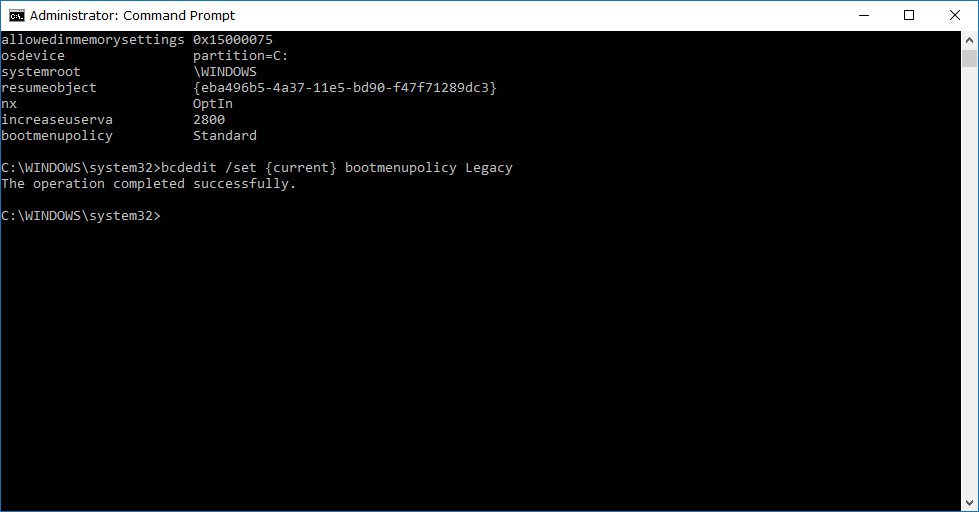
Next type the command bcdedit /set "identifier" bootmenupolicy Legacy and change where it says identifier and put your real identifier in there instead. Again, don’t forget to press the ENter key to execute the command.
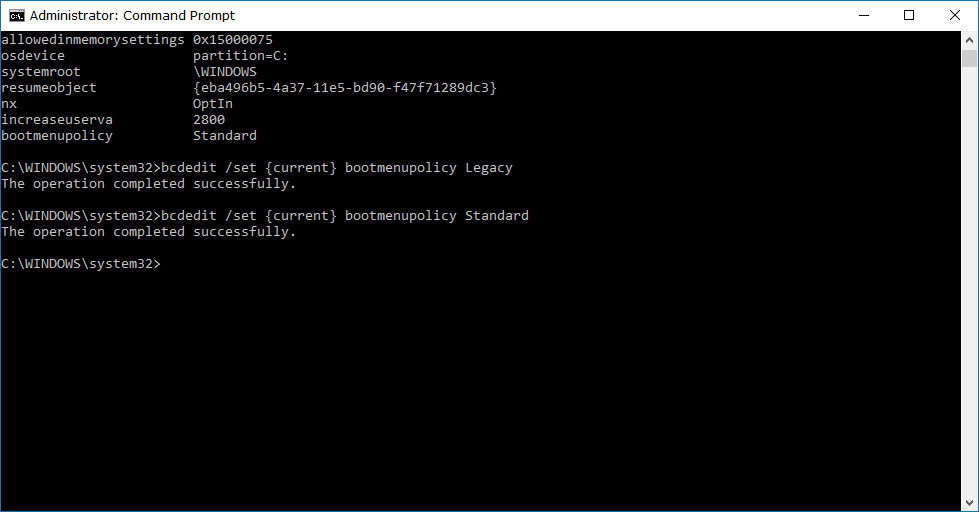
Should you ever want to disable the change you made to the boot menu policy for the Advanced Boot Options screen, just type the bcdedit /set {identifier} bootmenupolicy Standard command and then press the Enter key to execute the command.
Most people would agree that what Windows has created in Windows 10 with the Advanced Startup menu is a good thing, but like with anything, it takes time to get to know the changes and how to use it. Some people prefer going back to the Advanced Boot Options and using what they already know instead.
Related Tutorials