Last Updated on December 26, 2022 by Mat Diekhake
Virtual machines have been around for a long time now, offering people an uncomplicated way to start running another operating system without having to boot into one; you can run a virtual machine immediately from the operating system you are utilizing already. A virtual machine has been the go-to way to try an operating system version without you having to purchase it—they are prevalent among tech fans to use when someone wants just to check out some new features that might have become available recently. They are also popular for when people have no choice but to use another operating system in order to accomplish something—like running a particular tool that is only available for Windows PCs when they have a Mac, for example.
Virtual machines weren’t as widespread as they could have been though because they weren’t all that easy to set up: they took time to get to grasp how to use and the process of attaining the right package that you wanted to run wasn’t easy either (if you ever bothered trying to find it at all).
Windows 10 now extends a virtual machine experience that allows you to try out other operating system versions directly from its features, so you don’t have to do any running around and working out what you need this time around. Everything is there at your disposal already; you just need to find out where to download the ISO files onto your computer and then upload the ISO’s directly to the virtual machine. The virtual machine in Windows 10 is called Hyper-V—and although we are going to do a comprehensive article on how to manage it, you should be excited at how easy it is to use. We’re excited about Hyper-V because it’s going to allow us to run older operating system versions and start writing articles on them without us having to buy anything. You’ll also be able to run them and follow the articles as well, regardless if you have already upgraded to Windows 10 or not.
There is one “catch”—if you want to call it that—with Hyper-V, though, and that is that it is only available to use if you have either the Professional, Education or Enterprise editions of Windows 10. It isn’t necessarily professionals or people affiliated with the working enterprise that would enjoy using the virtual machine, but it isn’t a surprise that Microsoft has decided to limit it to those more costly versions of the operating system since it does fit the agenda of professional work. There are also some hardware obligations that might come into play for some of the computers out there running on the Home edition of Windows 10 whereas all computers running on Pro should handle running the virtual machine just fine since the Pro edition is always available on the more expensive laptops and desktops with the better hardware.
A little more detail about the whole hardware thing: the word “Hyper-V” isn’t just a fancy name given to the new virtual machine; Hyper-V is a native hypervisor. A hypervisor is computer software, firmware, and hardware that creates and then runs virtual machines. The native part means that it arrives already installed on your PC for you. Hyper-V can create virtual machines on x86-64 systems, but won’t work on anything less.
Hyper-V won’t let you run every operating system out there in existence—it won’t let you run a mobile operating system like Android or even the desktop version of macOS either, unfortunately—but it can let you run heaps of older versions of Windows as well as Linux versions, too. You can create a Windows virtual machine for Windows 7 or later or create a legacy virtual machine for Windows Vista or earlier. We’ll run through how to do both of those—as well as how to run a Linux virtual machine—in the guide below.
How to Enable Hyper-V on Windows 10
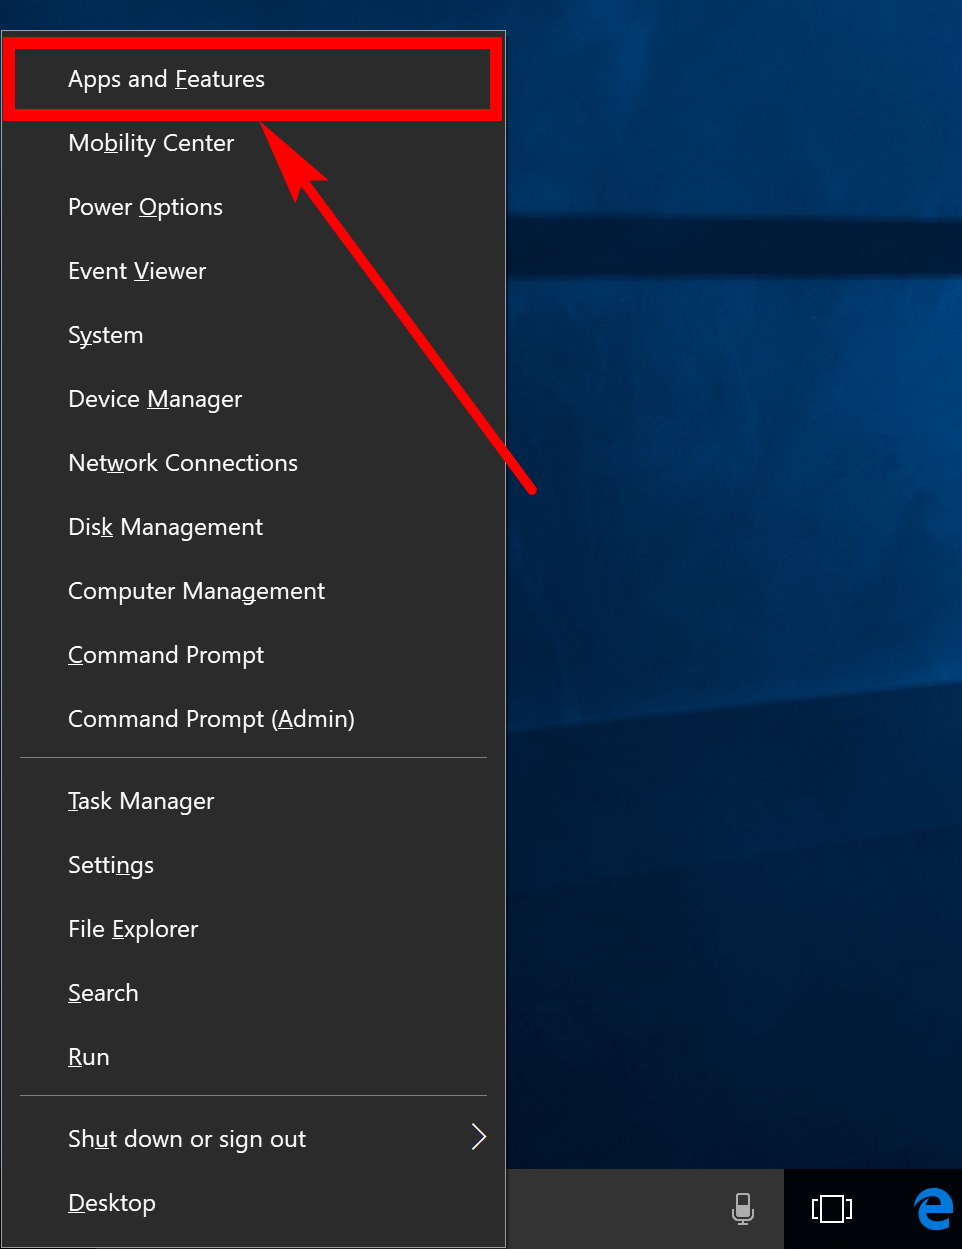
You need to setup Hyper-V before you can use a virtual machine. To get started with setting it up, turn on the computer and then press the Windows logo + X keys to bring up the Quick Links menu. The wording from the Quick Links menu can vary depending on your version of Windows 10, and the next couple of steps can vary as well, but you’ll be able to work around it if you need to just by clicking on the different “Network” link from the Control Panel window in its classic shell view. Assuming your computer is the same as ours (running on the Creators Update), you’ll see an “Apps and Features” link from the menu. Click on it.
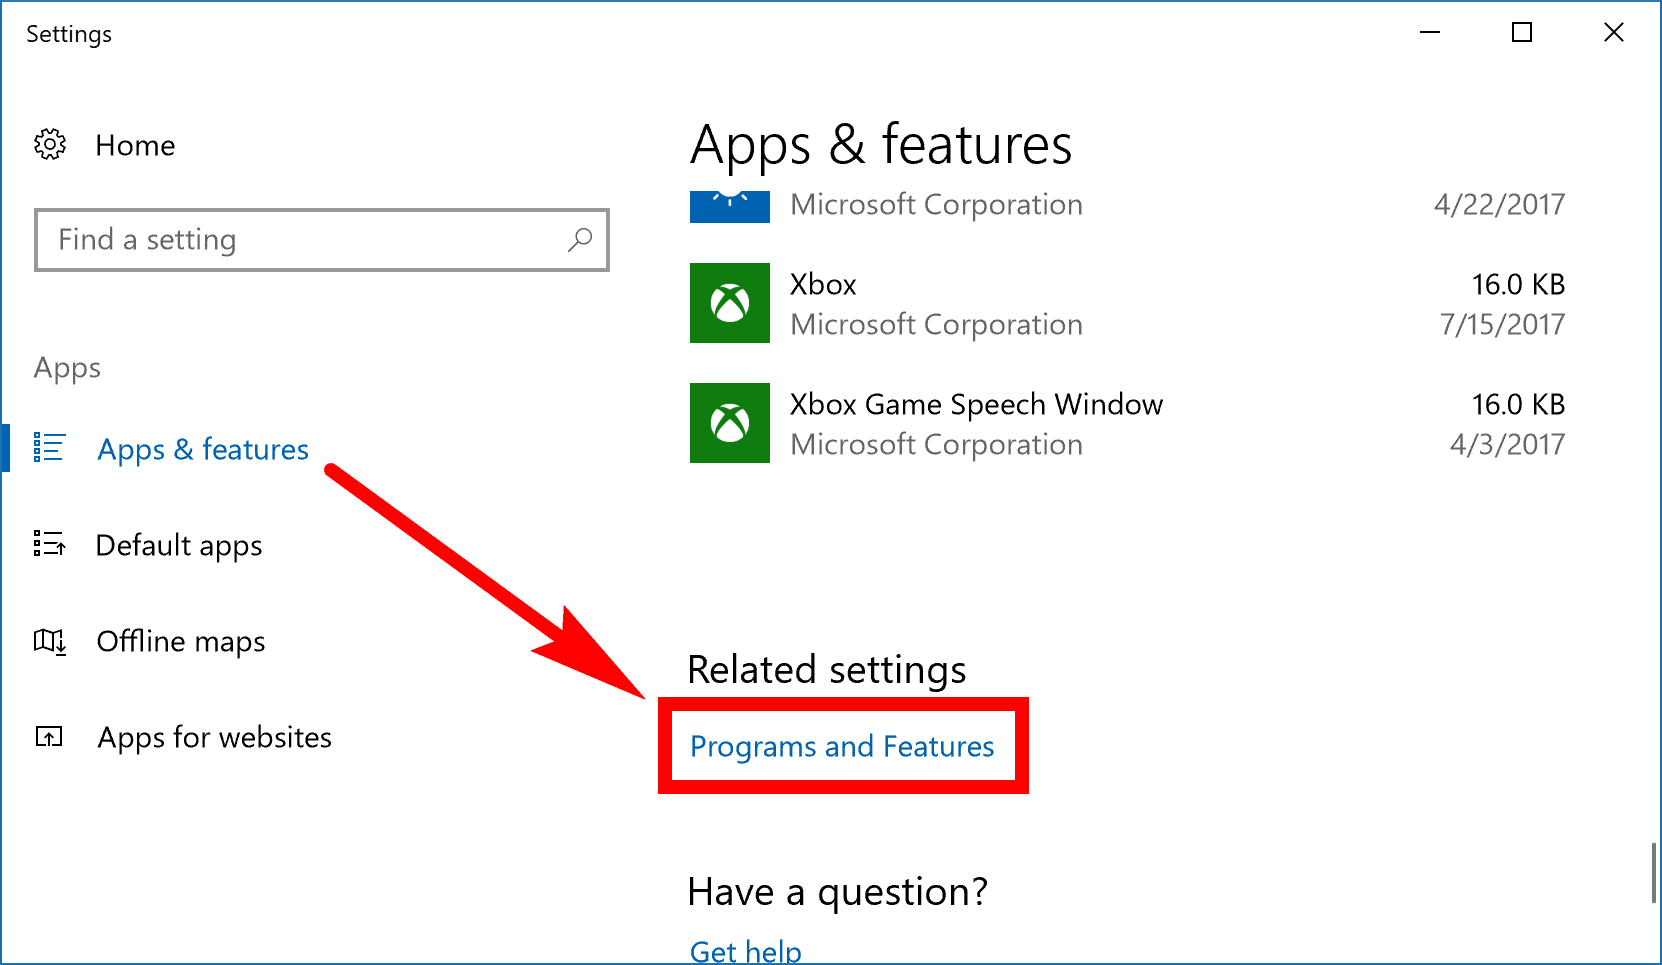
It directs you through to the Settings application where you need to click on the “Programs and Features” link from the right side pane under the Related settings heading.
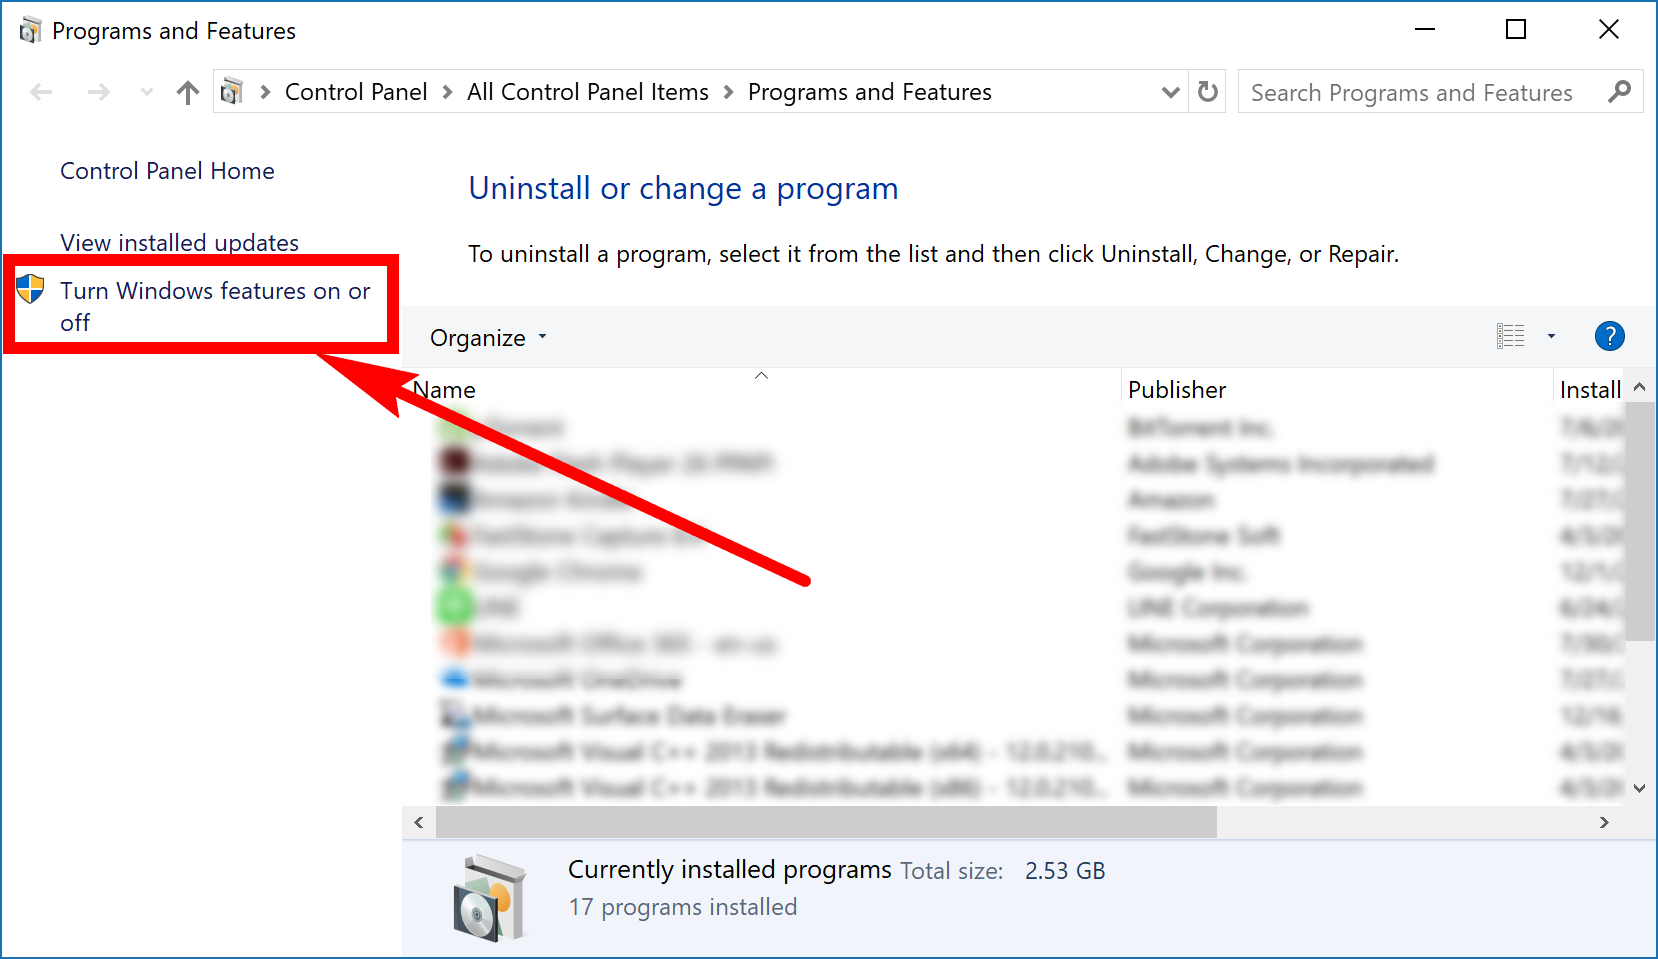
Now you’ll be directed through to the Control panel where you then need to click on the “Turn Windows features on or off” from the left side pane.
In the Windows Features window, look for the “Hyper-V” entry and put a checkmark in the checkbox that is available for it.

It’ll take a few seconds to apply the necessary changes to the computer. Wait for the progress bar to reach the other side of the computer’s display.

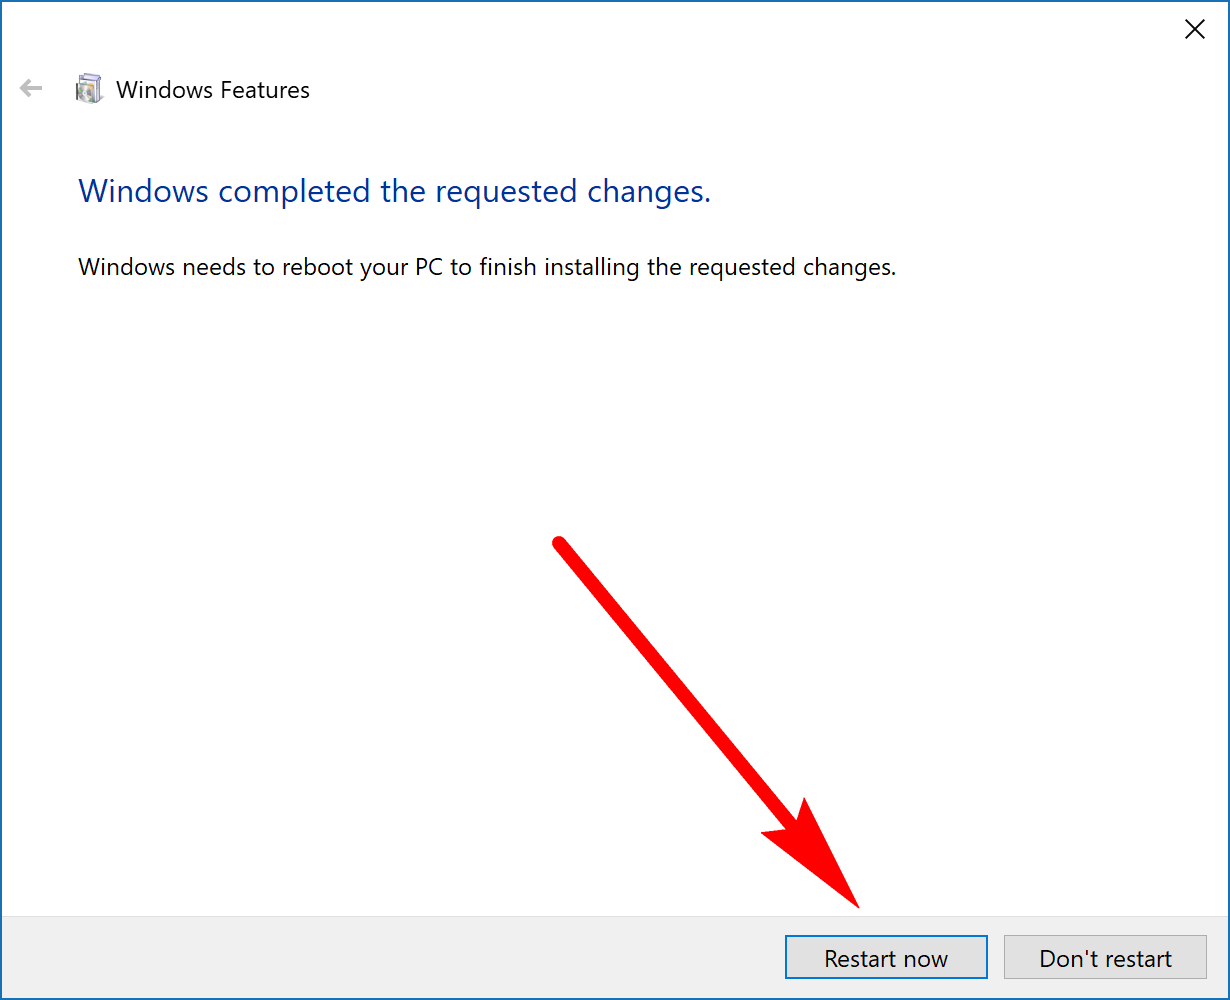
When Windows lets you know that it has completed the necessary changes, click on the “Restart Now” button at the bottom of the window. The computer needs to reboot for the changes to take effect in other words. Before you click on the button, it’s a good idea to bookmark this page so you can come back to it when the computer reboots.
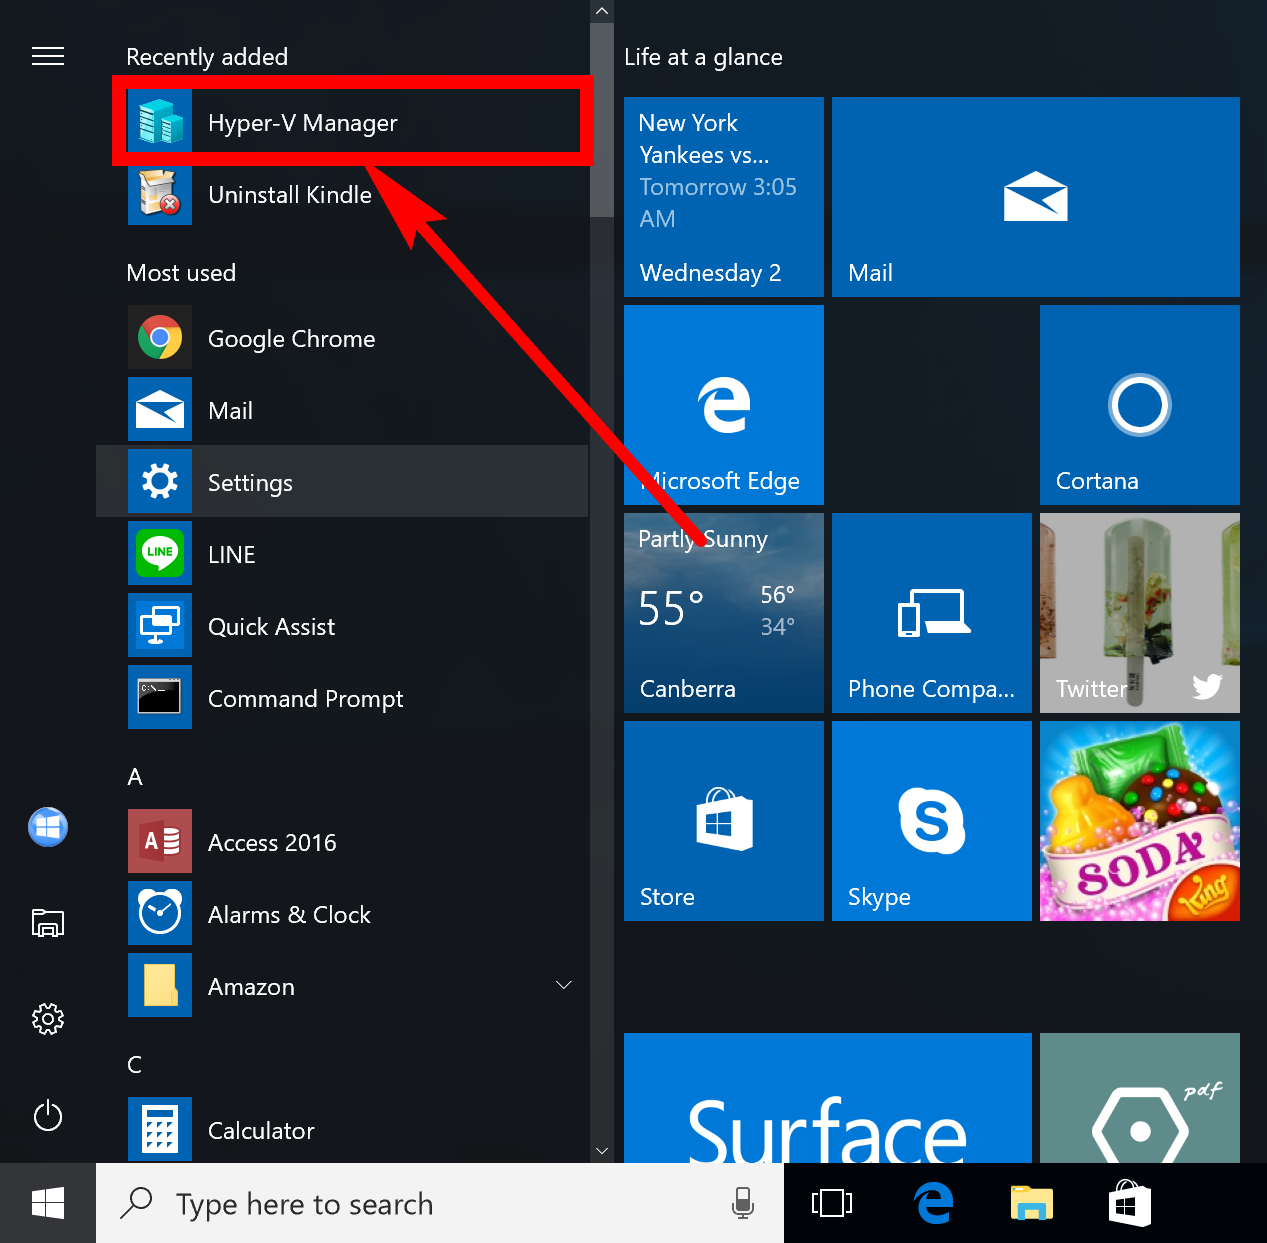
Once the computer has rebooted and you’ve logged back into your Microsoft accounts, you’ll see the Hyper-V Manager available under the recently added section in the Start menu—at the top of the All Apps list. Click on it to open it up.
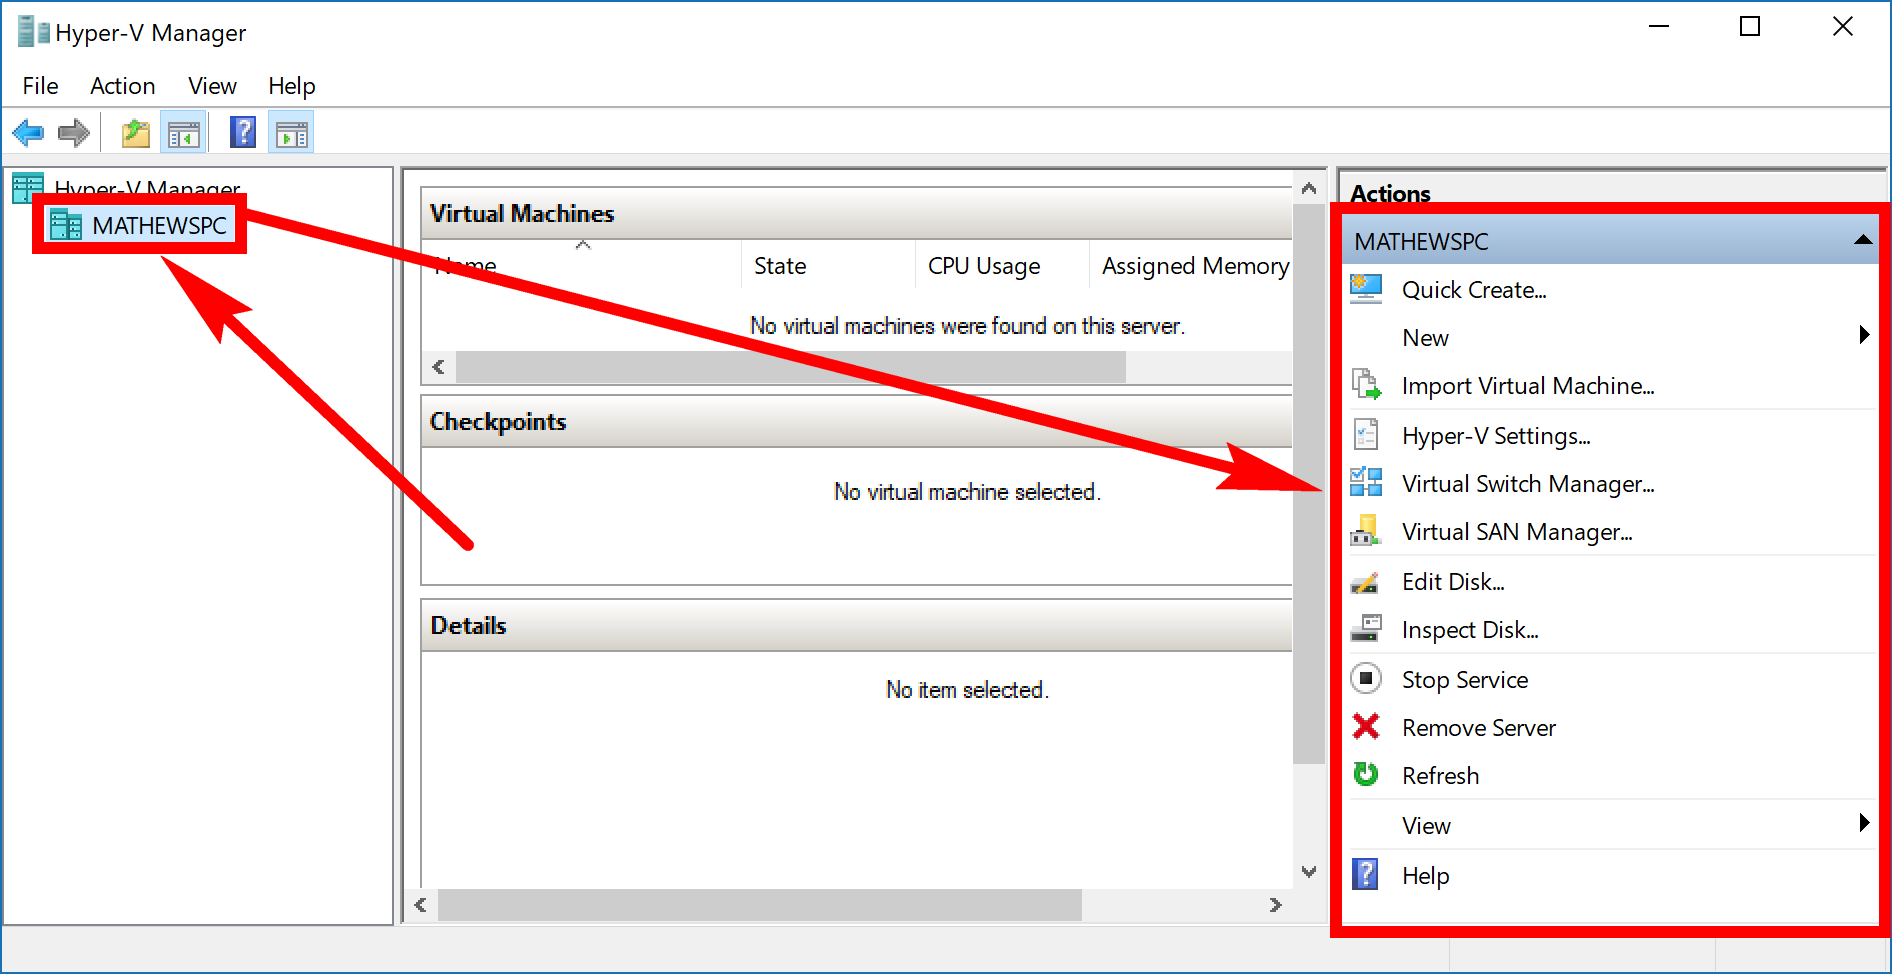
Your computer will already be available to select from the left side pane. Click on it so that it is highlighted and then you’ll see all the available actions become accessible in the right side pane.
How to Create a Virtual Switch
It’s great being able to use Hyper-V directly from Windows 10, but there still stands one thing in the way from it being straightforward as it could be and that is the virtual switch. The switch bridges the virtual machine and the host computer so the two can talk to one another. Without the virtual switch, you can’t run the virtual machine still, so you’ll need to set up the virtual switch before getting started with the virtual machine. To get started with that, click on the “Virtual Switch Manager” from the right pane.

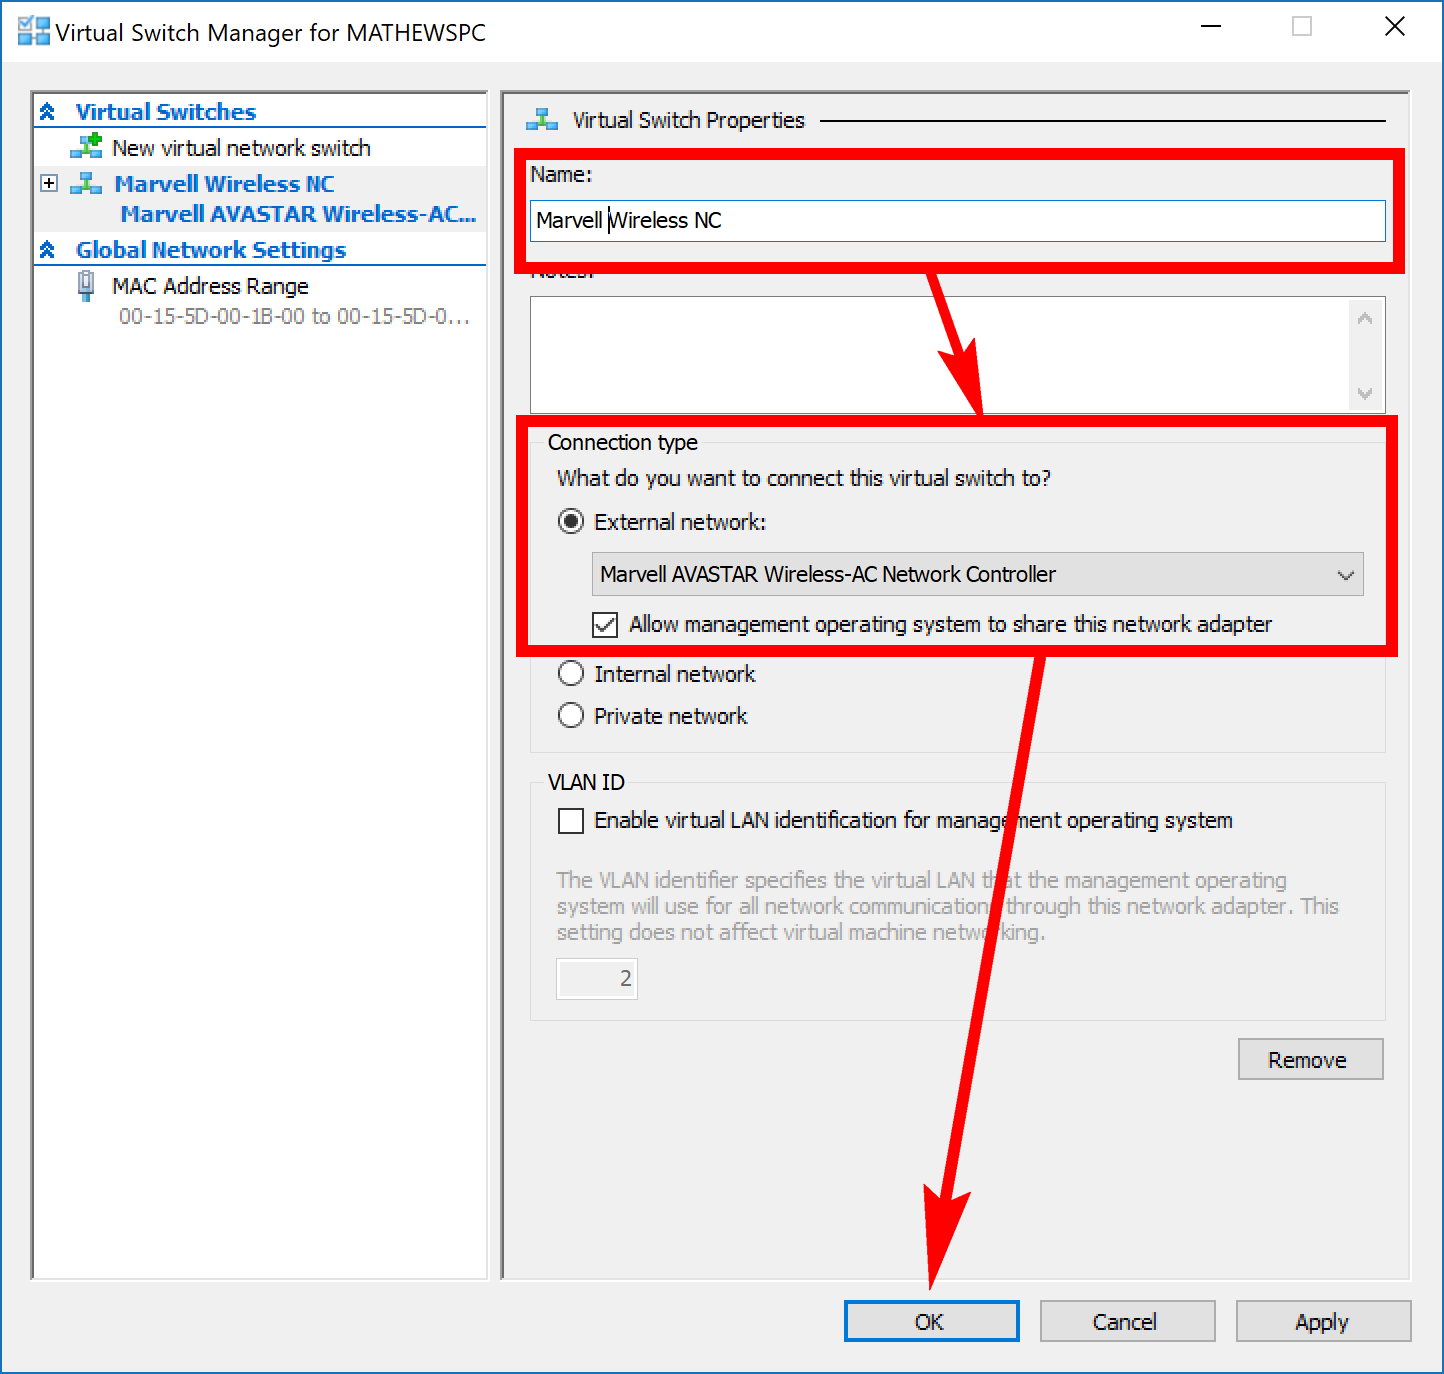
Click on the “New virtual network switch” from the left pane and then click on the “External” option under where it says the Create virtual switch heading and then finish by clicking on the “Create Virtual Switch” button at the bottom of the window.

Choose a name for the virtual switch (I called mine the same as the name of my network adapter, but it doesn’t matter what you call yours.) Next, keep the “External network” option selected and then click on the “OK” button at the bottom of the window.
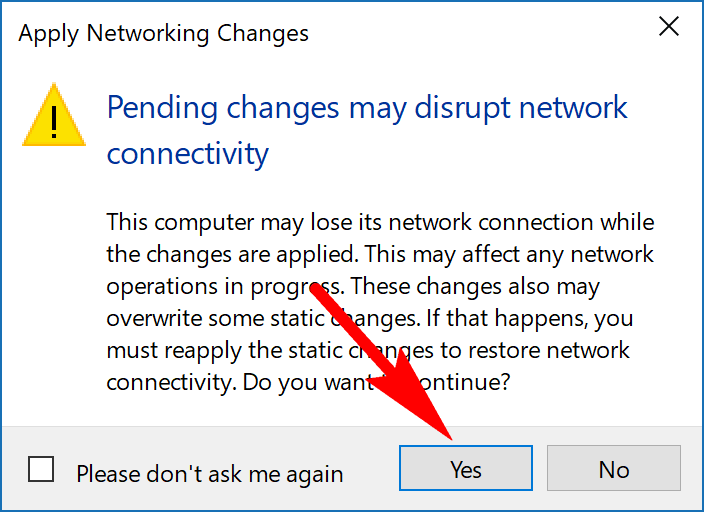
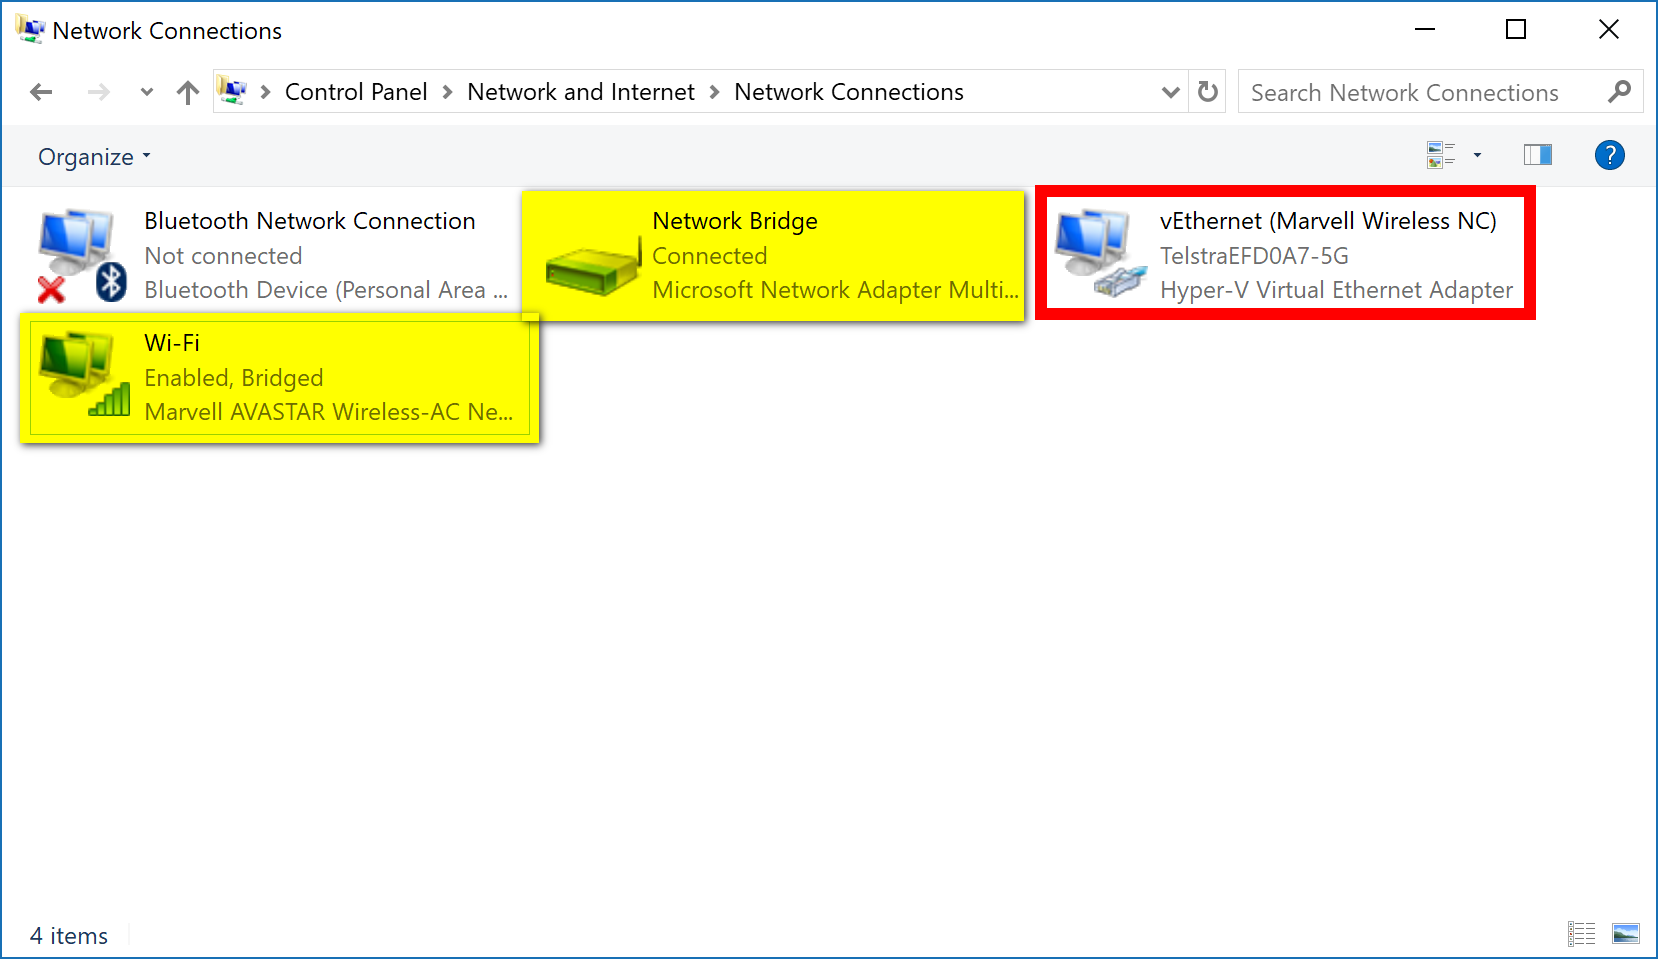
You’ll get a message letting you know that the pending changes may disrupt the network connectivity. Click on the “Yes” button to continue. You shouldn’t find any network issues after you continue (we didn’t experience any, and it seems like they would be rare.)
You should now have a similar set up to the one pictured below if you visit the Network Connections area available from the Control panel. You can check yours out by navigating to the Control Panel > Network and Internet > Network Connections.
How to Set up Virtual Machine
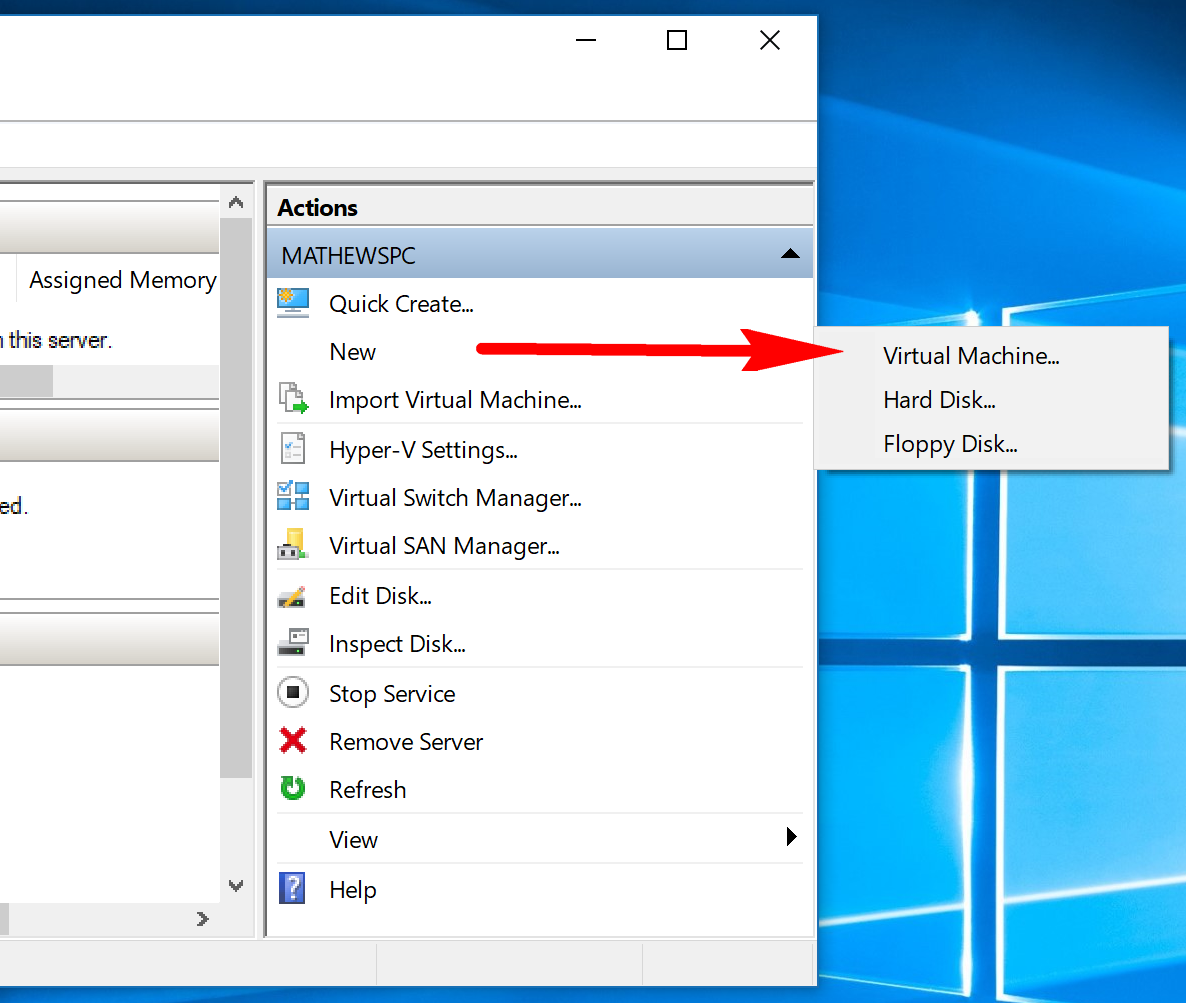
Now that the virtual switch has been created, it’s time to set up the virtual machine finally. To set it up, just go back to the beginning of the Hyper-V Manager and make sure your computer is selected in the left pane. Now look in the right pane and click on New > Virtual Machine to find everything that you need to create and run the virtual machine.
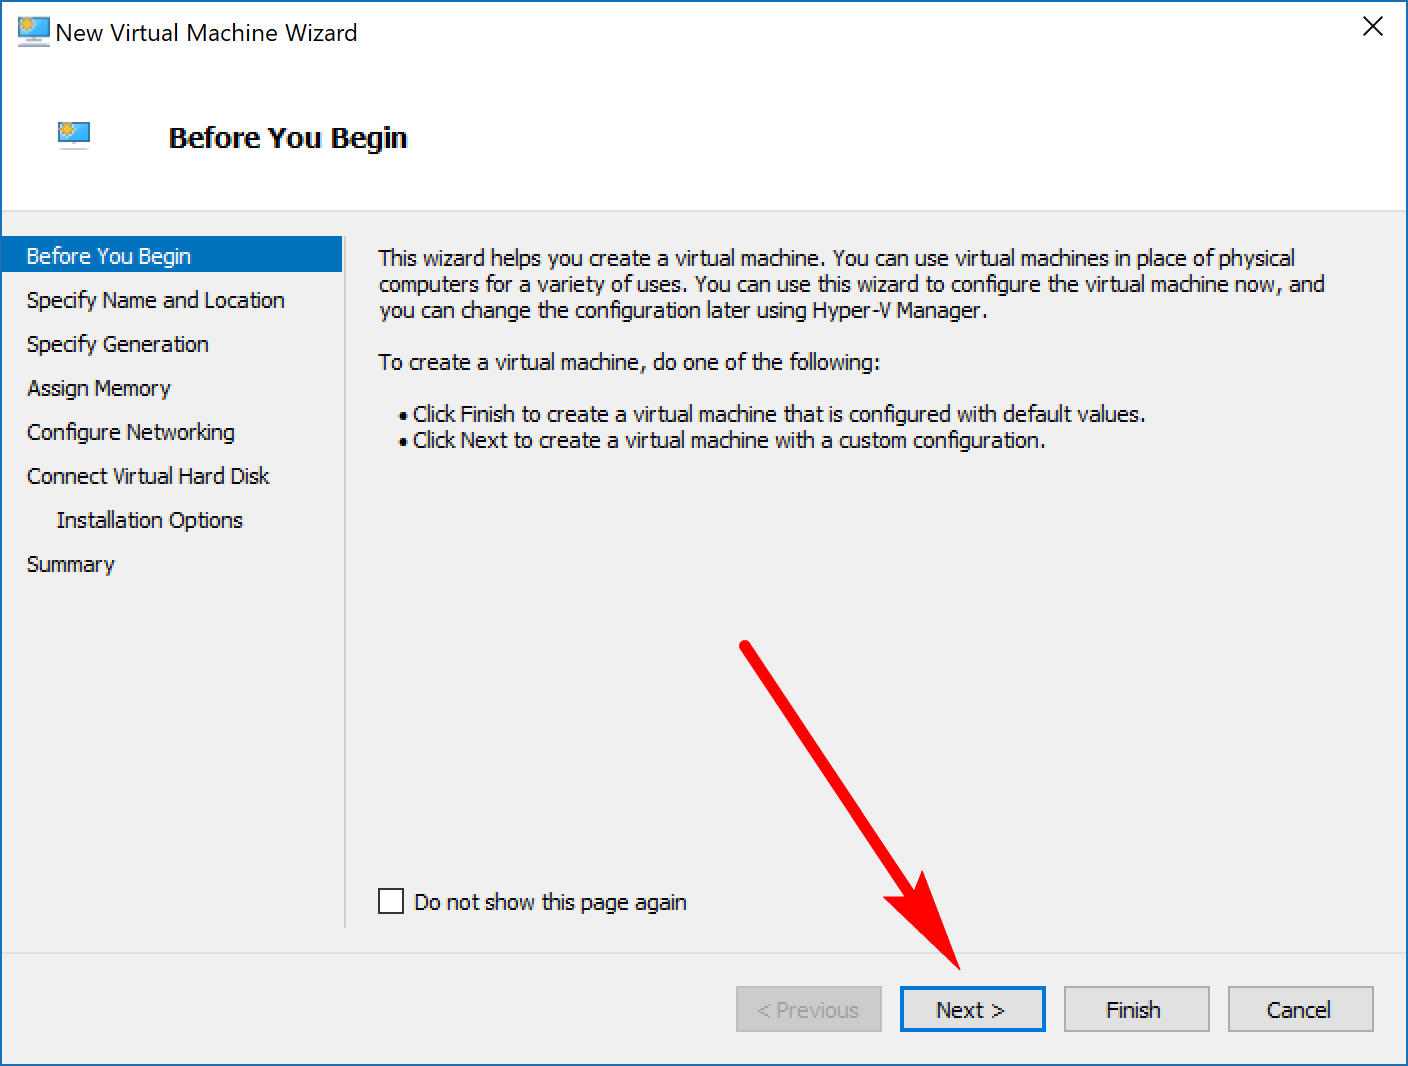
There are a couple of ways you can go about doing the setup process, but no matter what way you choose, you’ll need to go through the same steps eventually. For example, there’s no getting around not having to upload the ISO file to boot the operating system just by choosing to skip that part of the setup process; you’ll just need to add that later. So in order to set up the virtual machine, click on the “Next” button if you want to do it now.
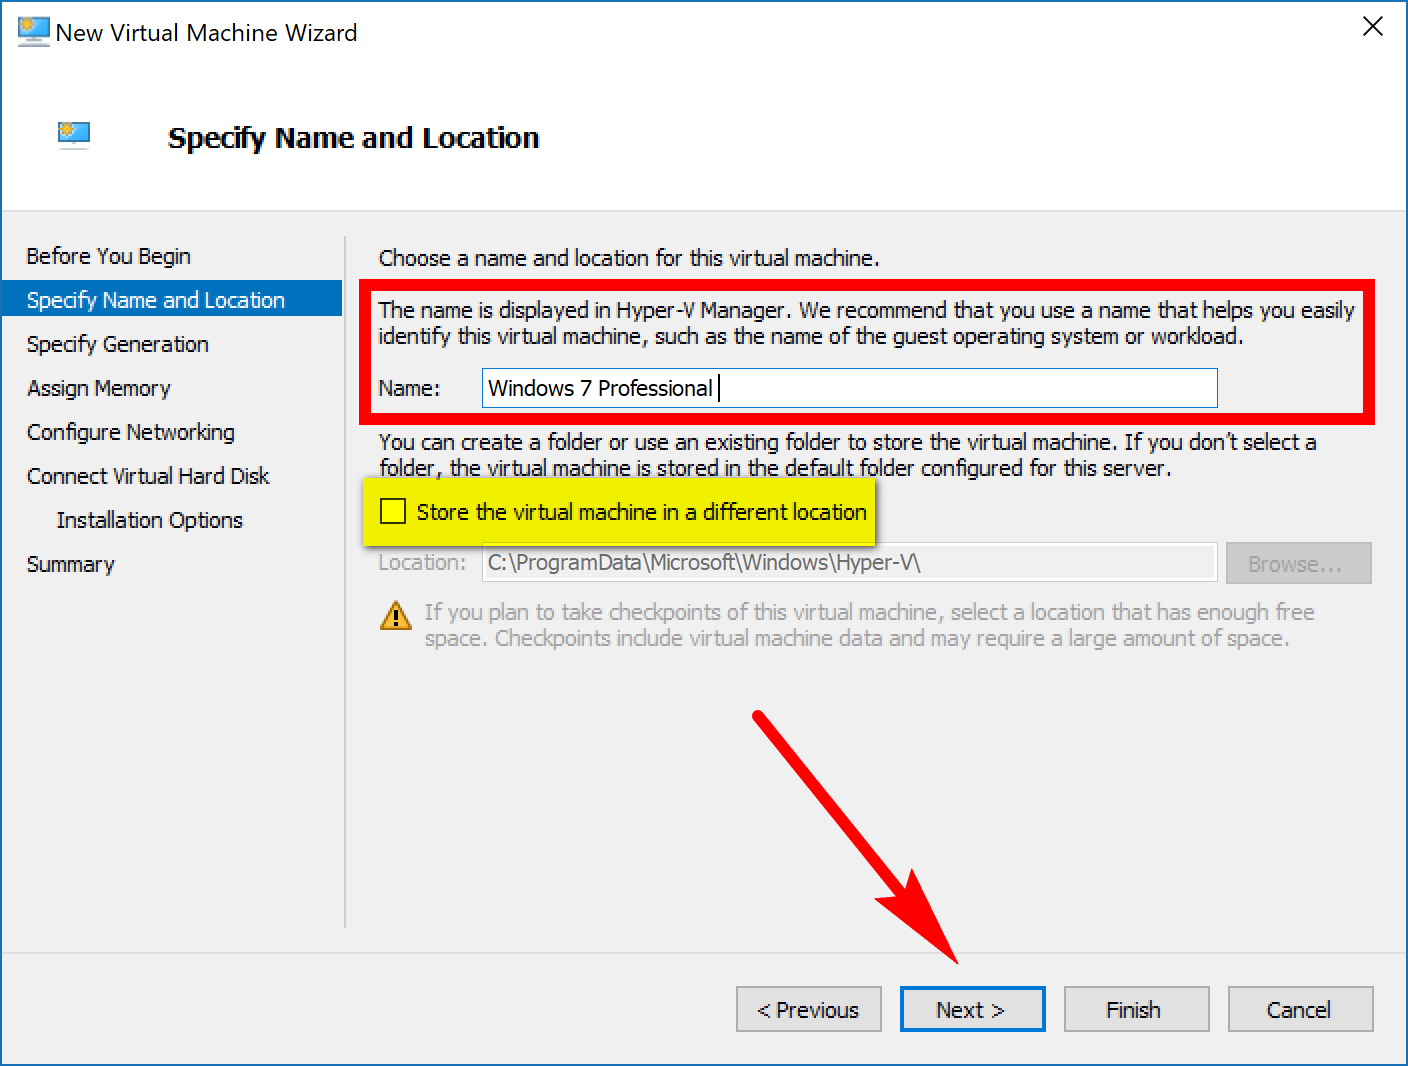
Choose a name for the version of Windows that you want to create the virtual machine for which should match up with the same name as the ISO you are going to download. It is possible to store the virtual machine in a different spot on the computer if you like. If you just want to keep it in the same place on the hard drive hard drive, then just leave the box unchecked. Click on the “Next” button to continue.
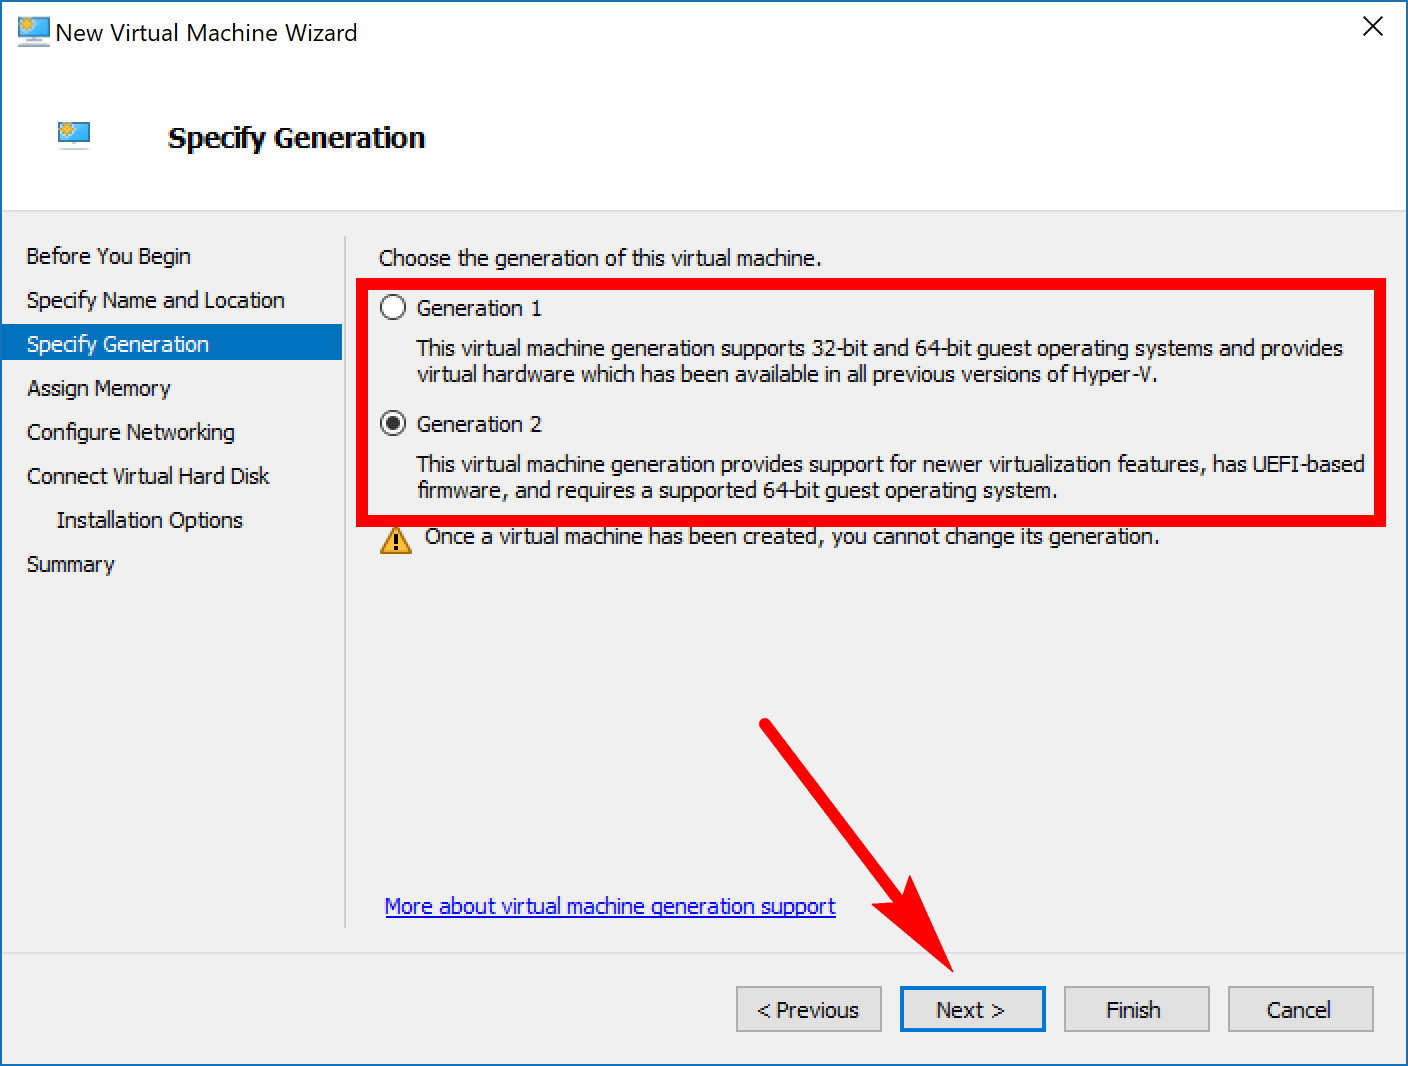
If you have an older computer with older hardware, then you’ll need to choose the “Generation 1” from this screen. Everyone else should be fine with selecting the “Generation 2” option. Microsoft has created a page that goes into more detail about whether you should choose generation 1 or generation 2 for Hyper-V from this screen if you need it.
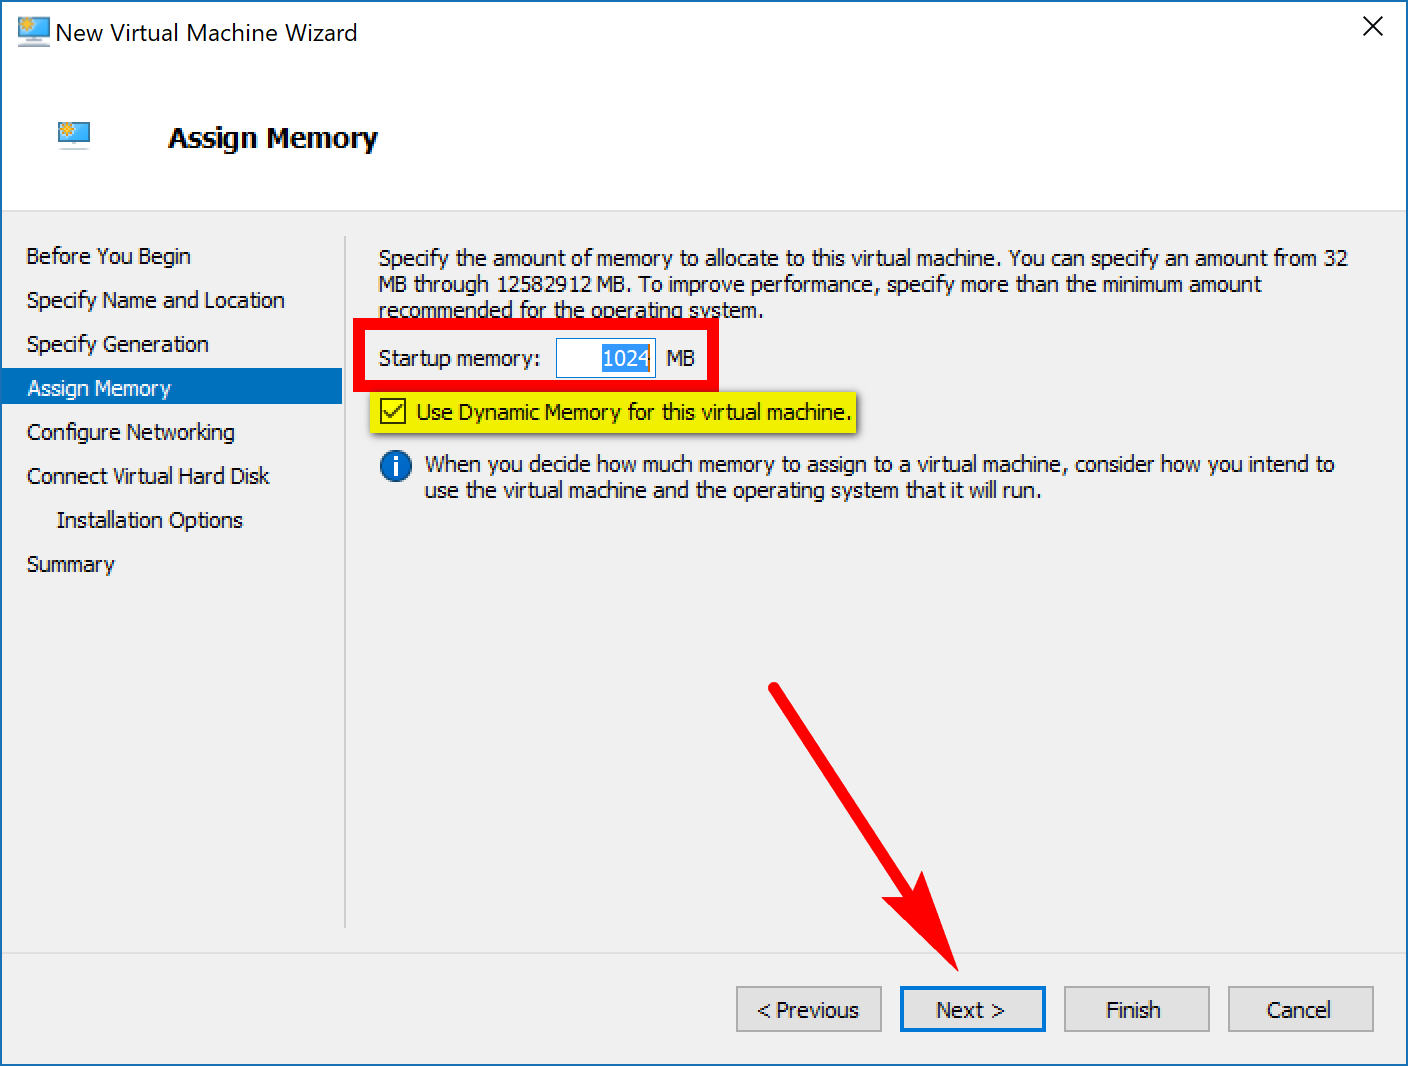
You then need to choose how much memory you are going to assign from the hardware of your computer to allow the virtual machine to run. The text in the window tells you to specify more than the minimum so that your virtual machine can run properly. 1024 should be more than enough for the virtual machine to be able to run and a good number so that the hardware of your computer doesn’t get cooked when it tries to run your operating system and the virtual machine over the top of it. It’s also recommended to leave the box beneath it checked so that it uses dynamic memory for the virtual machine. The dynamic memory is pretty complicated and should be researched separately, so you choose whether you want it or not. There is an article by Microsoft that goes into detail about what is the dynamic memory and should you use it over run time or not that you can read if you need it.
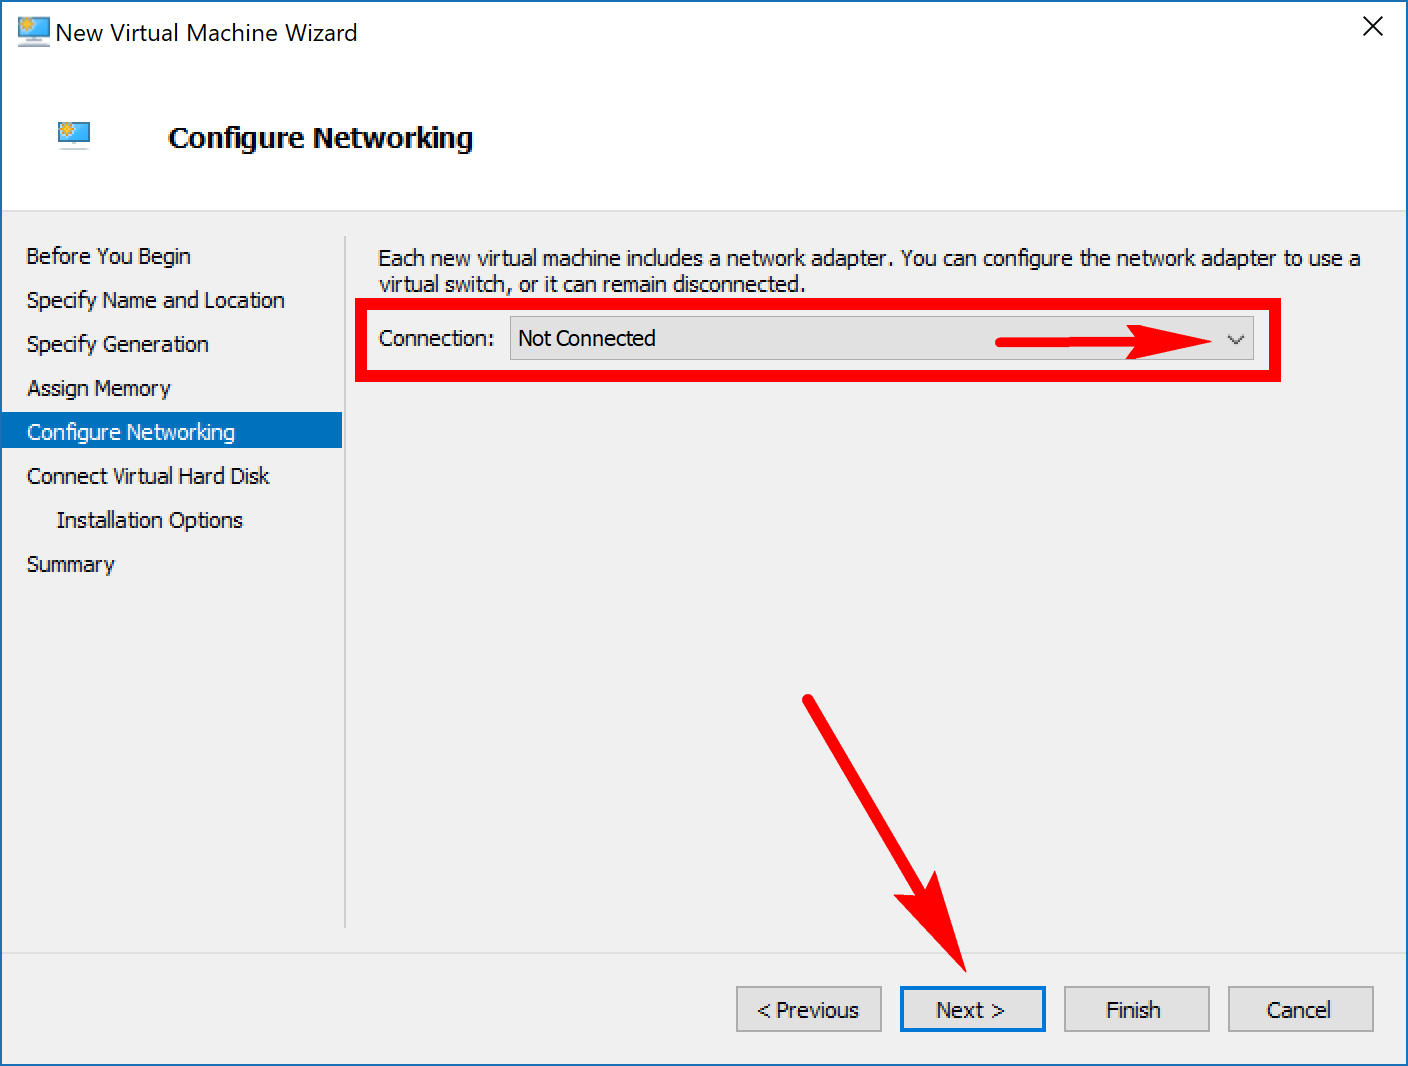
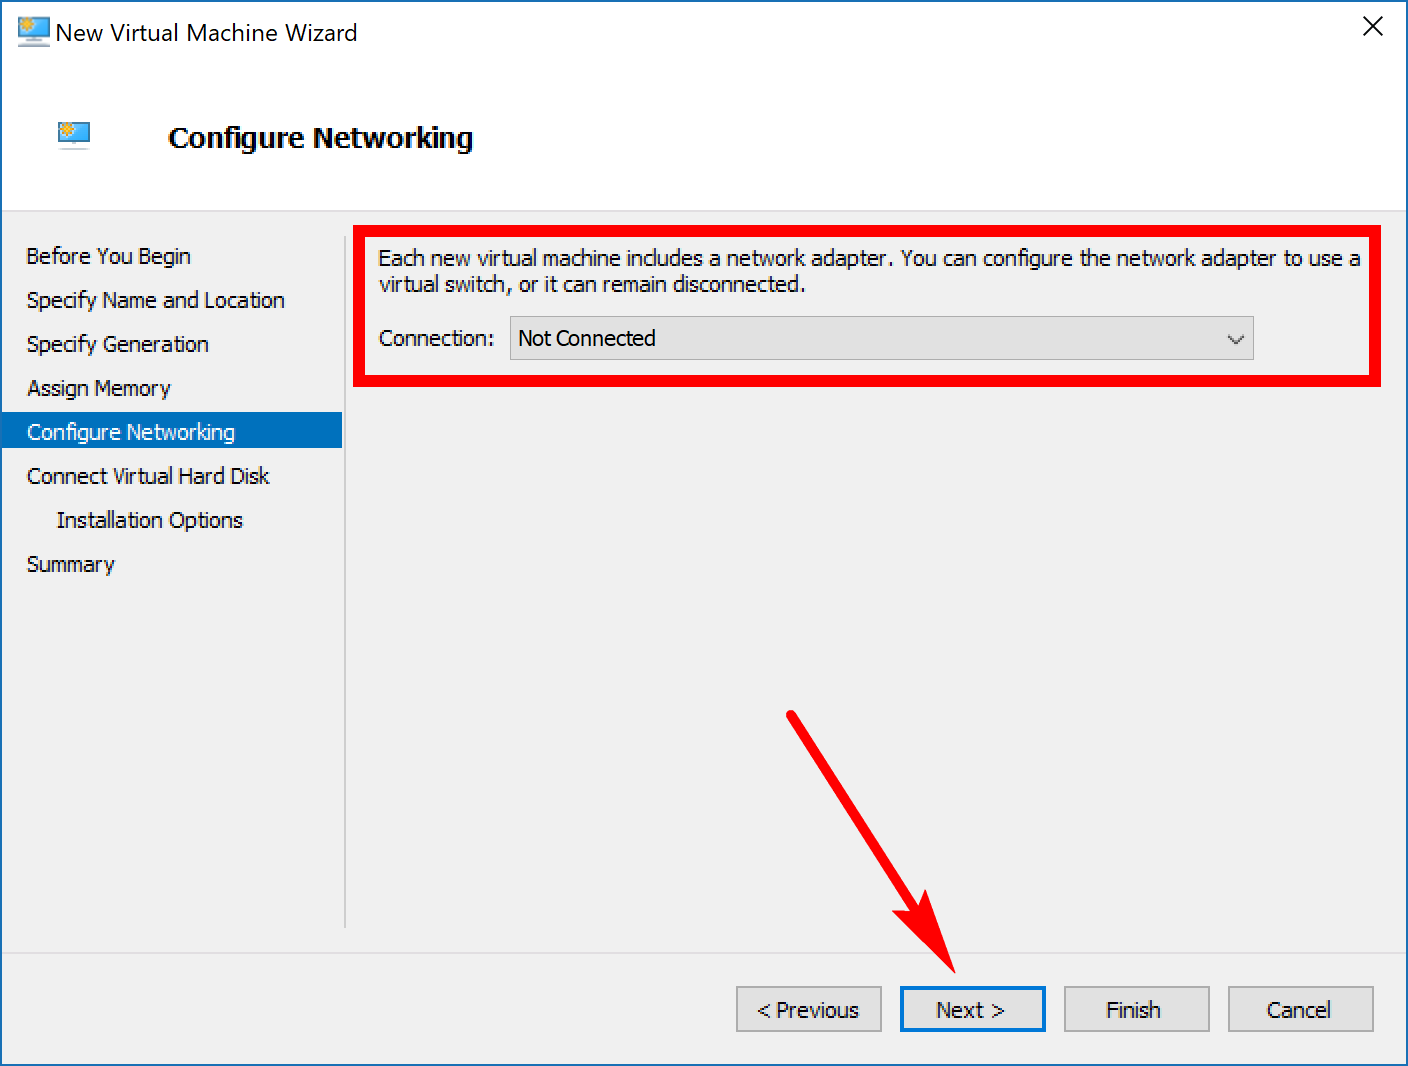
You’ll see that by default it shows “not connected” from the drop-down menu. Click on the arrow from the right side of the drop-down menu and then choose your network from the list. It’ll show the same network name as the one you saw when you first setup the Hyper-V bridge.
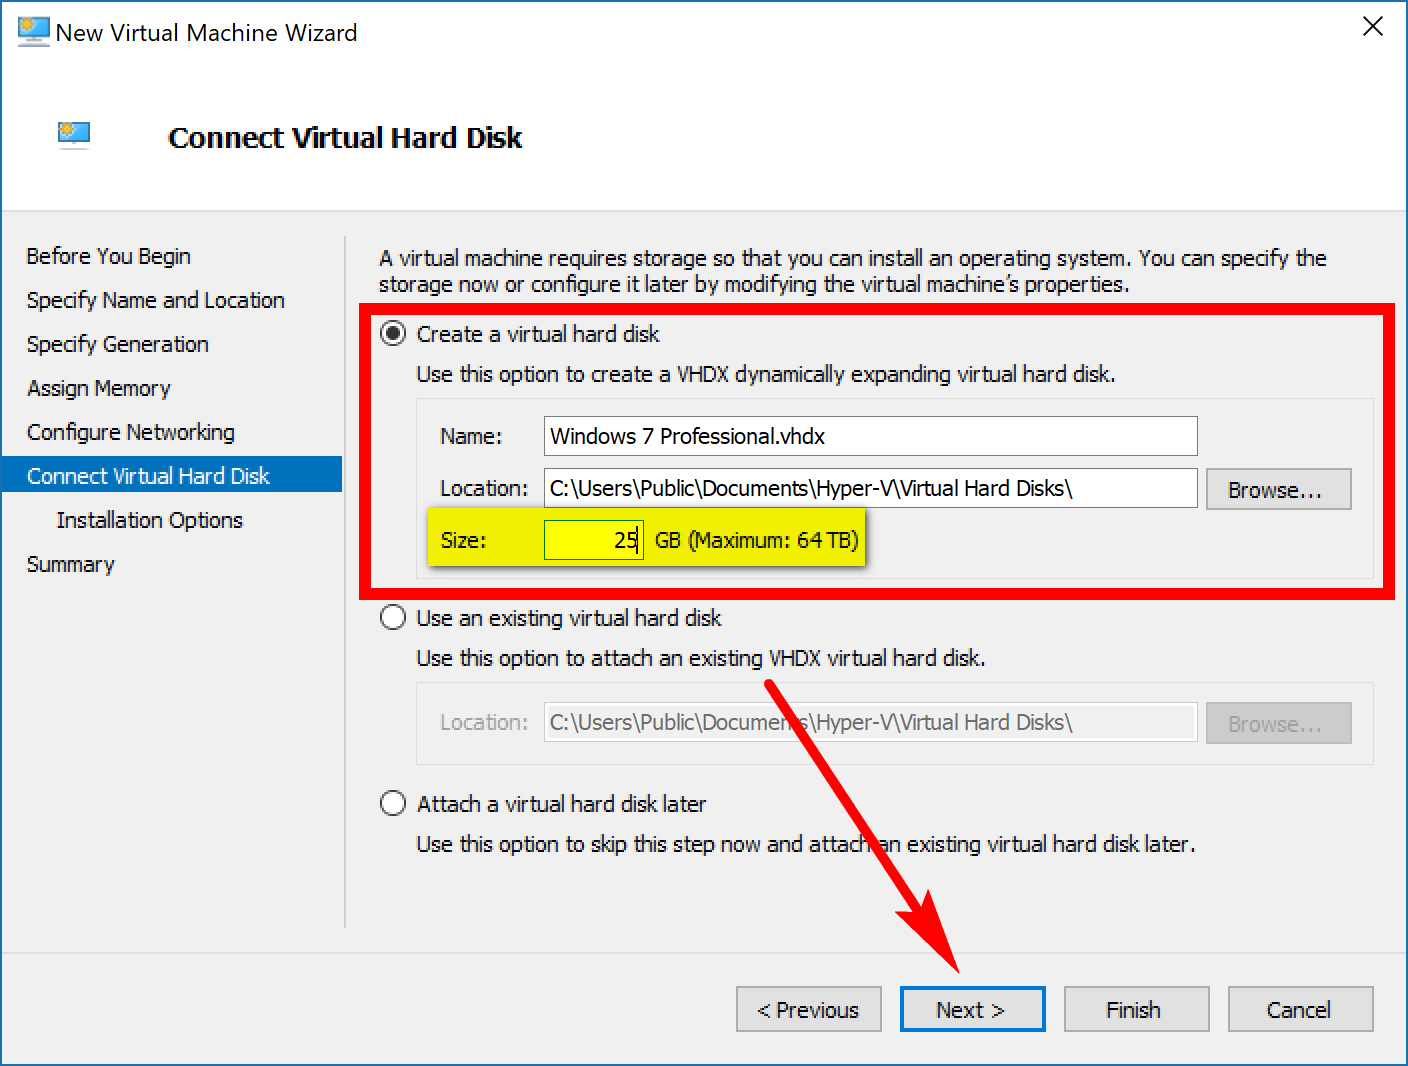
Select the “Create a virtual hard disk” box and then choose the maximum size that you want to be allocated to the virtual machines usage on the hard disk. Around 20 GB’s is all you need to run the virtual machine and all the second operating system, but if you want to install stuff like applications and programs when you use the second OS from the virtual machine, then you’ll need more. Adjust it accordingly. If you don’t know, then you could always find out how to check the amount of free space you have on your computer’s hard drive if you want.
Now all you need to do is select the “Install an operating system from a bootable image file,” click on the “Browse” button and then upload the ISO file that you have downloaded on the computer. If you’ve downloaded the ISO file from somewhere online but don’t have much experience with Windows, your file is likely available from the Downloads folder. You can navigate to that Downloads folder location from the Browse button—just keep searching through File Explorer until you see it.

How to Use Legacy Virtual Machine if You Need It
You’ll need to create a different type of virtual machine if you want to be running on Windows Vista or earlier than that by creating what is called a legacy virtual machine. To get started on the legacy virtual machine, you need to follow the same steps as above for setting up the virtual machine, but when you get to the part for configuring the network, you need to leave it on “Not Connected” this time from the drop-down menu.
Now go back to the main window of the Hyper-V Manager and right-click the mouse on the virtual machine that’s available in the middle column. Next, click on the “Settings” link from the menu.

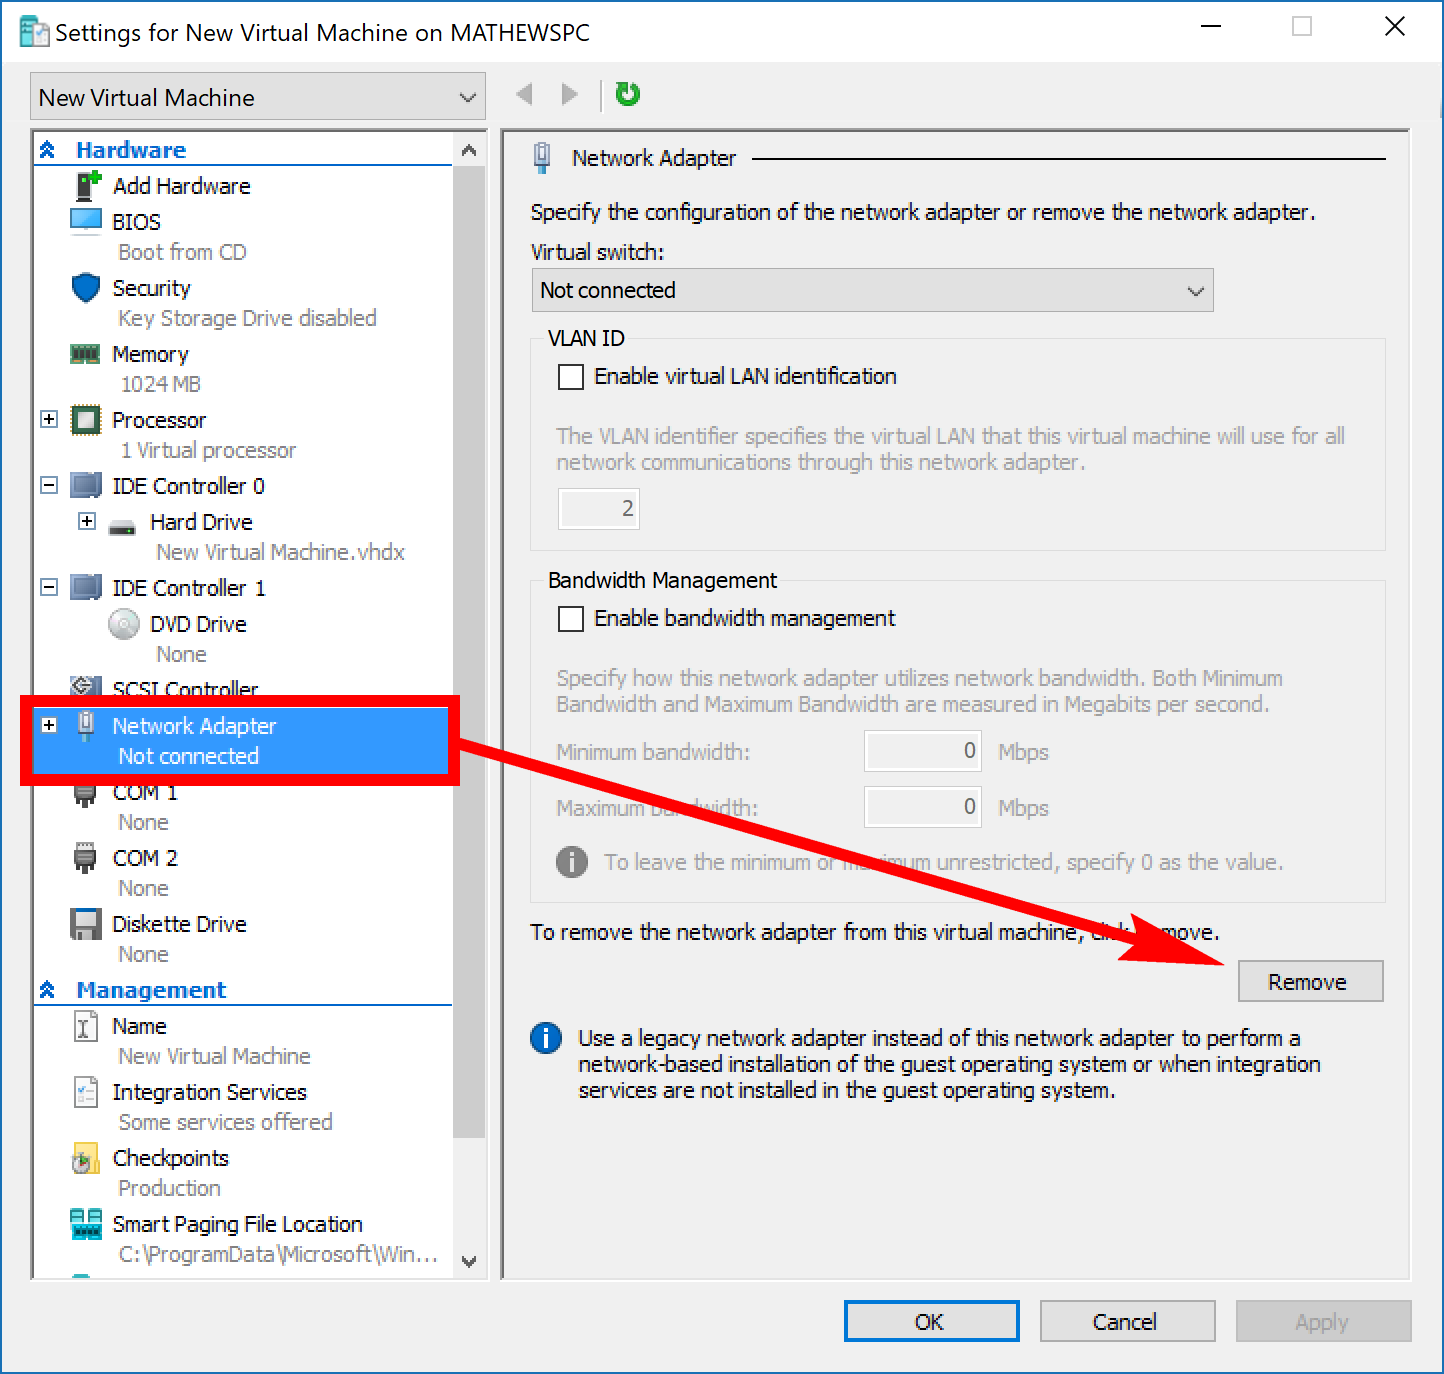
You’ve now got a lot of settings available at your disposal. What you need to do first is disable the network adapter by making sure that the “Network Adapter” is highlighted from the left pane and then click on the “Remove” button from the right pane.
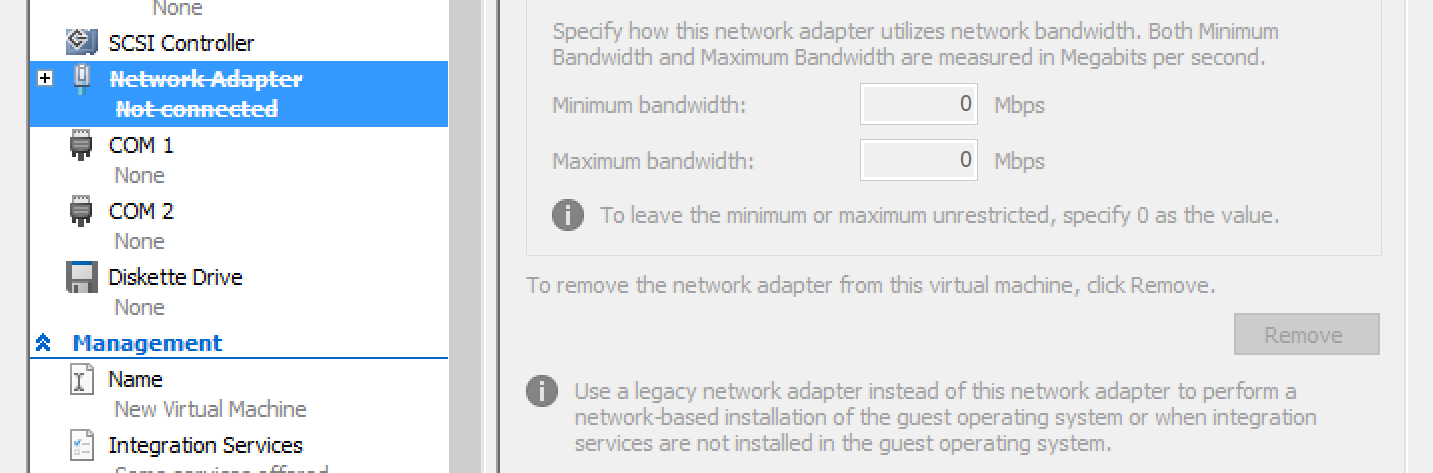
You can easily tell if the network adapter has been removed or not by seeing if it is still available or all grayed out like in the picture below.
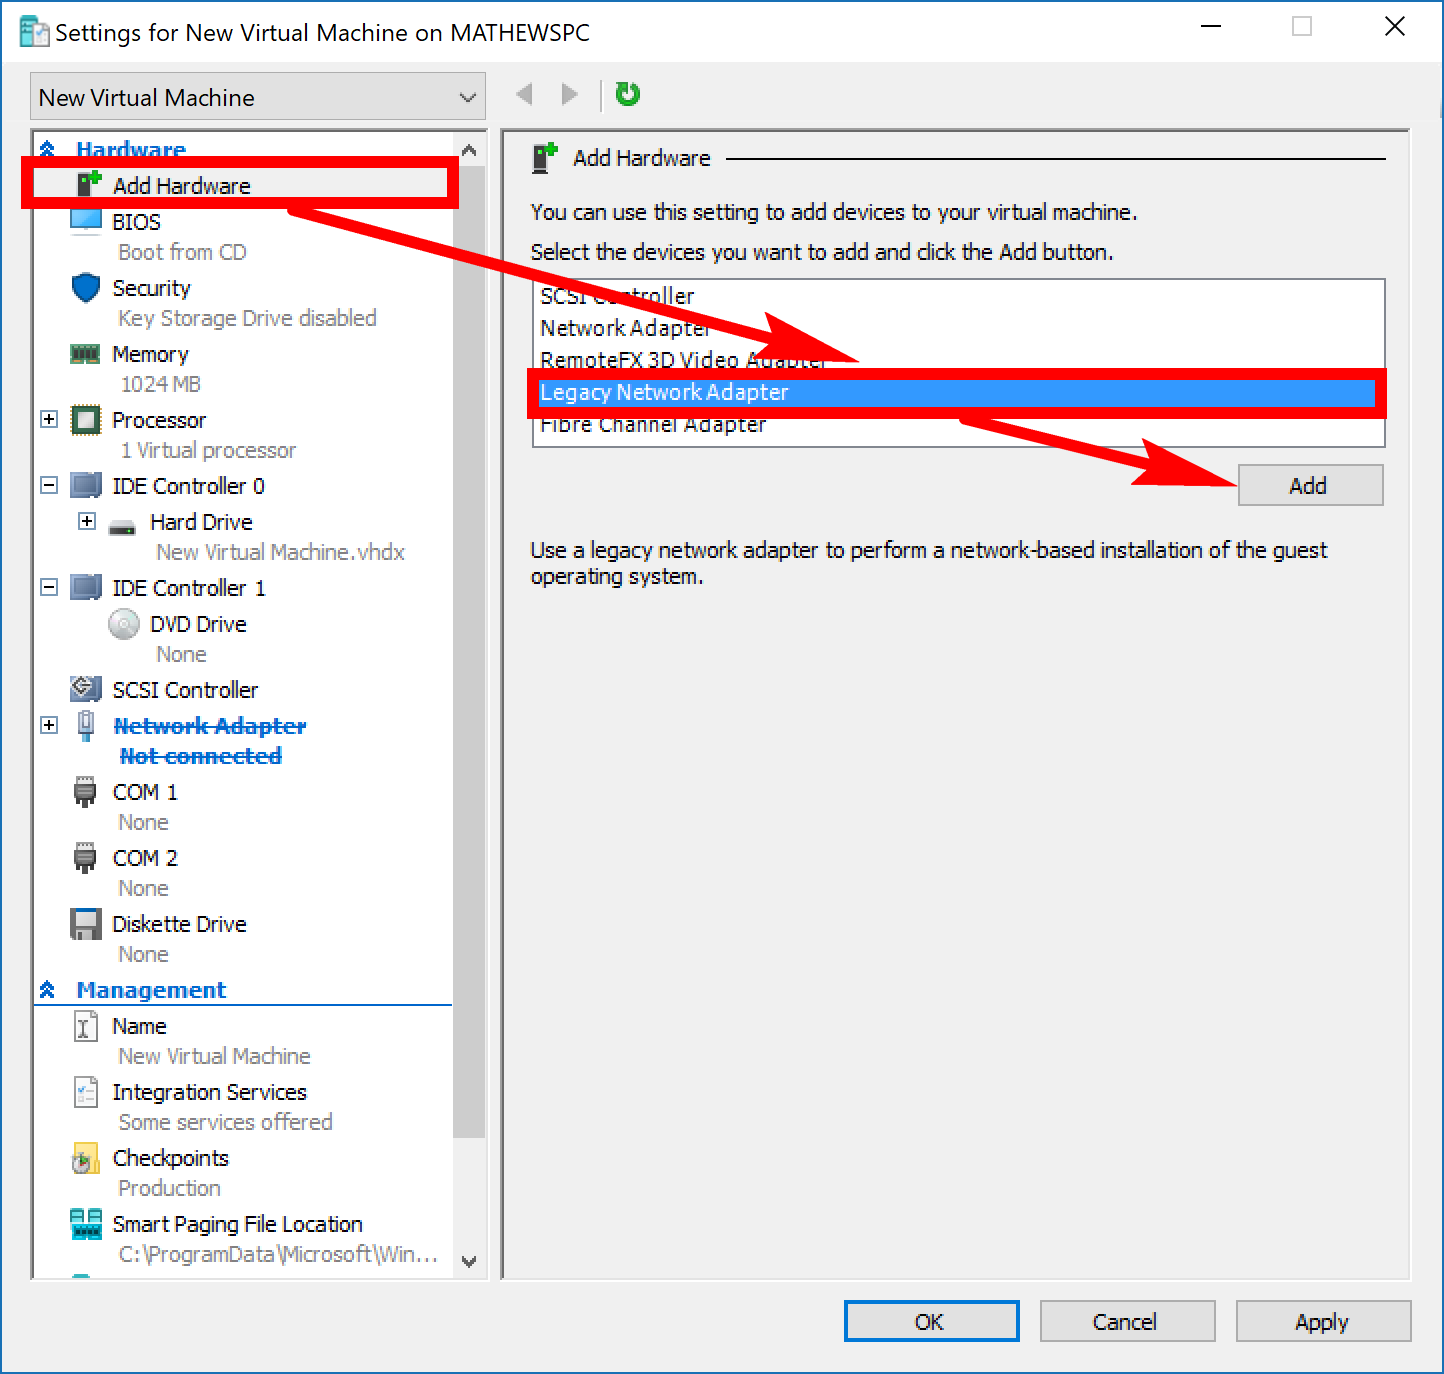
Next, click on the “Add hardware” link from the left pane and then click on the “Legacy Network Adapter” followed by the “Add” button, so you are adding the legacy adapter.
It’ll now have the Legacy Network Adapter already highlighted in the left pane and its options available to you in the right pane. Choose the network you want from the drop-down menu where it gives you the Virtual switch heading and then click on the “OK” button at the bottom.

Being able to run alternative operating systems from your existing one still isn’t as simple as it might one day be, but once you download the ISO files yourself, you can start using the Hyper-V virtual machine for creating and running a new operating system pretty easily. The Hyper-V is advertised as a tool that allows you to run another operating system without having to use any additional software, but technically you do need to find the ISO files first. Once you have the ISO files, the Hyper-V setup makes it arguably easier to install than any of the other tools you would typically need to do something like installing Windows 7 Professional on a computer that already has Windows 10 professional running on it. All you need to do is click on the Browse button, upload the ISO and you’re away.
You might also be interested in:
- What Is the Difference Between the “Apply” and “OK” Buttons Around a Windows OS?
- How to Upgrade from Windows 10 Home to Windows 10 Professional
- How to Uninstall and Block Updates and Drivers on Windows 10
- How to Change Screen Resolution of Display in Windows 10
You can subscribe to our RSS, follow us on Twitter or like our Facebook page to keep on consuming more tech.