Last Updated on December 26, 2022 by Mat Diekhake
When you’re in the enterprise world, you’ll notice a couple of differences right off the bat: you don’t want to be making any mistakes, and these people use a lot less space than my family does on hard drives.
Because people at work use less space than at home some administrators fall into the trap of thinking that there will always be plenty of space on the web server for everybody, but history has proven that that is not the case.
There will be times when someone who works for a company will accidentally sync their laptop with the server at your work, not fully understanding what they’re doing, and that could be enough to stop everyone in the company from being able t upload anything else—unless you are using disk quotas.
The disk quota is a way of breaking up the total amount of space on a server so that each employee has a small part of it to use for themselves.
Administrators can choose between having a hard limit or a soft limit. The hard limit will enforce the disk quota limit so the person who has used up their space cannot go over it until the administrator allocates that user some more space. A soft limit, on the other hand, will give a warning message when the person has used up all the space the administrator had hoped they would use.
It’s often advised to set these warnings for people who are higher up in the company instead of applying the hard limit because they probably won’t be very pleased with you otherwise and that could end badly.
You can also set up a warning and a maximum usage of the same user, so they’ll get a warning to let them know that they are running low and it’s time to start thinking about conserving space, and if they continue to use up space, they get a hard limit enforced. You have control over how much more space it will be before that hard limit comes into play as well.
How to Set Disk Quota Limit and Warning Level for Users in File Explorer
You can set the disk quota limit and a warning level for a specific user directly from the Drive Properties dialog in the Windows 10 operating system.
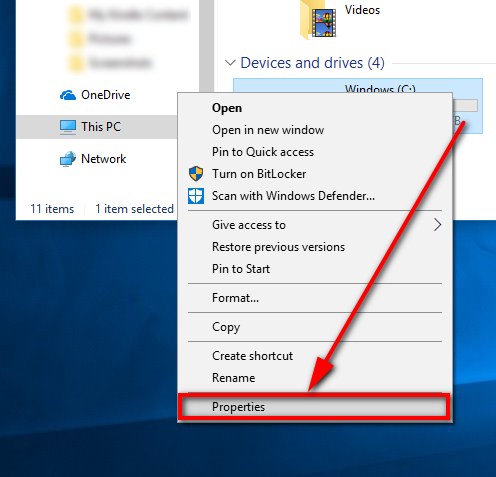
1. Start by navigating to the Start menu > File Explorer > This PC from File Explorer’s navigation pane and then right-click on the drive of your choice and select “Properties” from the menu.
2. Make sure you select the “Quota” tab from the top of the dialog and then click on the “Show Quota Settings” button.

3. Make sure you select the “Enable quota management” checkbox if you have not done so already and then click on the “Quota Entries” button at the button of the dialog.

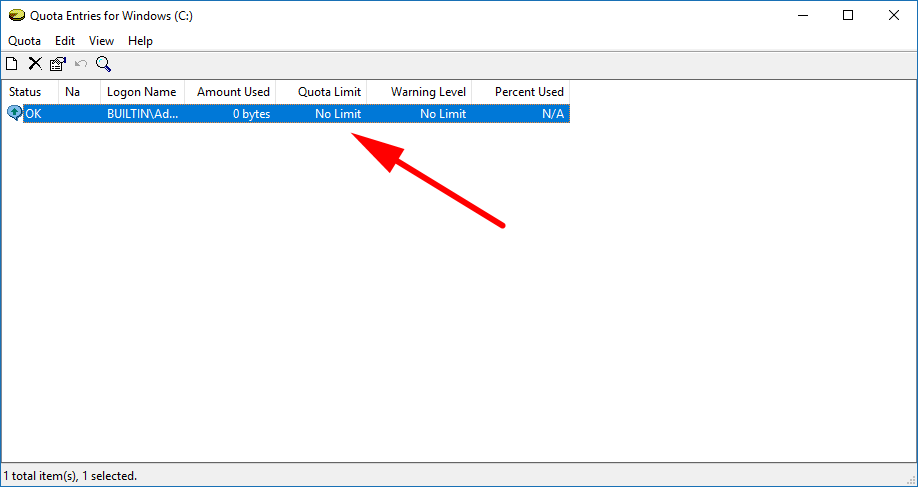
4. You’ll now see the different users available. Double-click on the user of your choice to change the disk quota level for that specific user on this drive.
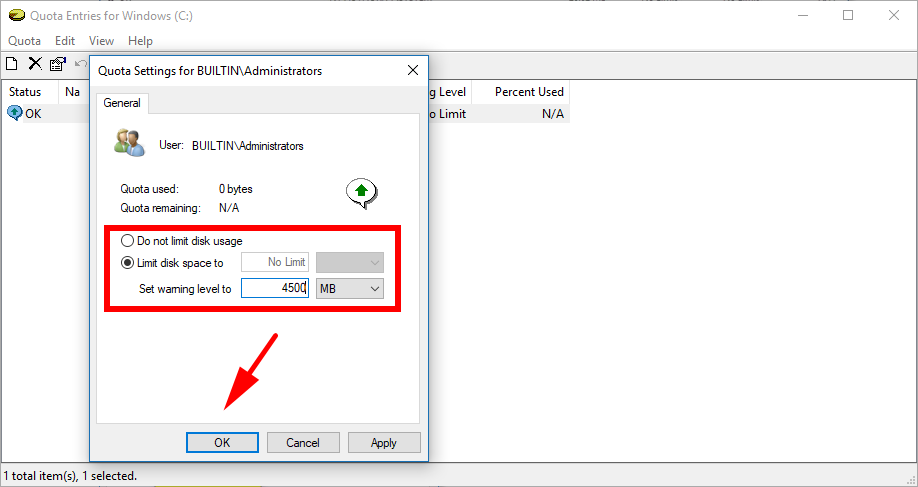
5. Click on the box available for “Limit disk space to” and then type the amount that you want and use the drop-down menu to select the type of bytes you want it to keep a record of.
How to Set Disk Quota Limit and Warning Level for Specific Users in Command Prompt
You can also use the Command Prompt to set a disk quota limit and warning level for a specific user of a particular drive if you want.
1. Start by opening the elevated version of the Command Prompt window and then type the fsutil quota query (drive letter): command and hit the “Enter” key on your keyboards to execute it, i.e., fsutil quota query E:.
2. You’ll then see some information that includes the username, quota limit, quota threshold, so forth from the command line results. Now type the fsutil quota modify (drive letter): (warning level in bytes) (quota limit in bytes) (user name>) command and hit the “Enter” key on your keyboard to execute it.
The disk quota for the specific user on a particular drive has now been set, and you may close the Command Prompt window and continue using the computer.
You might also be interested in:
- How to Set Disk Quota Limit and Warning Level for New Users in Windows 10
- How to Roll Back Driver to Previous Version in Windows 10
- How to Change Maximum Processor Frequency in Windows 10
- How to Determine File System of Drive in Windows 10
You can subscribe to our RSS, follow us on Twitter or like our Facebook page to keep on consuming more tech.