Last Updated on February 25, 2024 by Mat Diekhake
Disk quotas allow administrators to put limits on the amount of allocated space each employee can use for NTFS file system volumes. It solves the problem of some people using up all the server space so that nobody can upload anything. Now once a user uses up all their space, everyone else still has their space to use when they need it, and the administrator can allocate the user who has run out of space some additional space if they think they need it.
Disk quotas also come with added functionality that allows for hard limits and soft limits. A soft limit would mean that the user who has run out of space will receive warning notifications but still be allowed to upload and use more space. The hard limit, however, means that all space is gone for that user and they would need to wait for the administrator to allocate them more space or delete stuff that it using up the existing space.
This guide shows you how you can enable or disable the option for the hard limits, or otherwise known as the enforced disk quota limits when you’re using any version of the Windows 10 operating system.
How to Enable or Disable Enforce Disk Quota Limits for Single NTFS Drive from File Explorer
You can enable or disable the option that forces disk quota limits for an individual NTFS drive from the Properties dialog for that drive found in This PC in File Explorer.
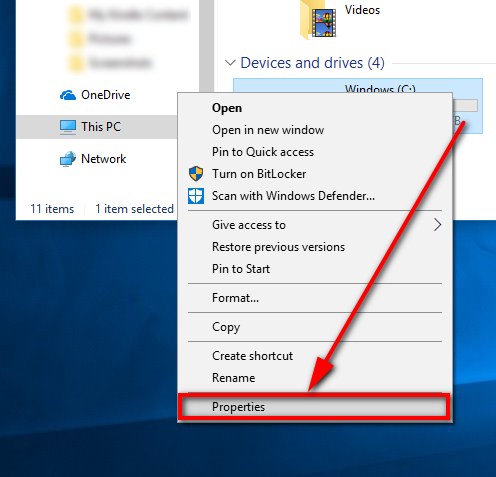
Start by navigating to the Start menu > File Explorer > This PC from File Explorer’s navigation pane and then right-click on the single drive of your choice and select “Properties” from the menu.
You’ll now have the Properties dialog for that particular drive open. Click on the “Quota” tab at the top of the window and then click on the “Show Quota Settings” button.

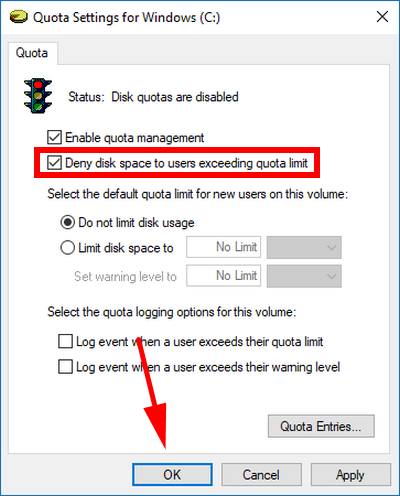
Check the box next to where it says “Deny disk space to users exceeding quota limit” and then click on the “OK” button at the bottom of the Quota Settings dialog box. (If you haven’t already turned on disk quota, then you’ll also need to check the box directly above it first where it says “Enable quote management.”
How to Enable or Disable Enforce Disk Quota Limits for All NTFS Drives with Local Group Policy Editor
You can also enable and disable the option that forces disk quota hard limits, but this time for all the NFTS drives, by using the Local Group Policy Editor.
Start by pressing the Windows logo key + R to bring up the Run dialog and then type “gpedit.msc” and hit the “OK” button at the bottom of the dialog. You’ll then have the Local Group Policy Editor window open the background.
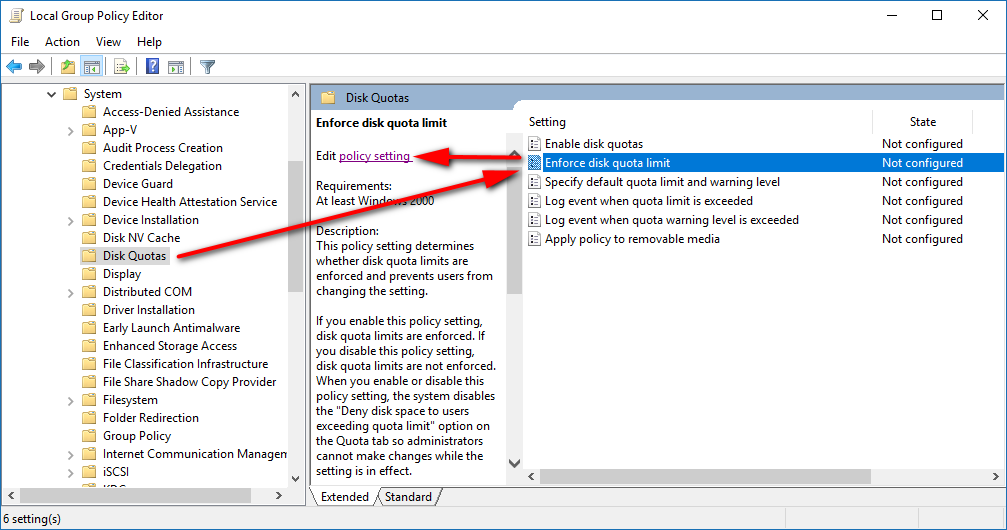
Click on the LGPE icon in the taskbar to bring it up and then navigate to the Computer Configuration\Administrative Templates\System\Disk Quotas path by using the left side pane and then click once on the”Enforce disk quote limit” policy in the right pane and then click on the “Edit policy setting” link from the middle column.
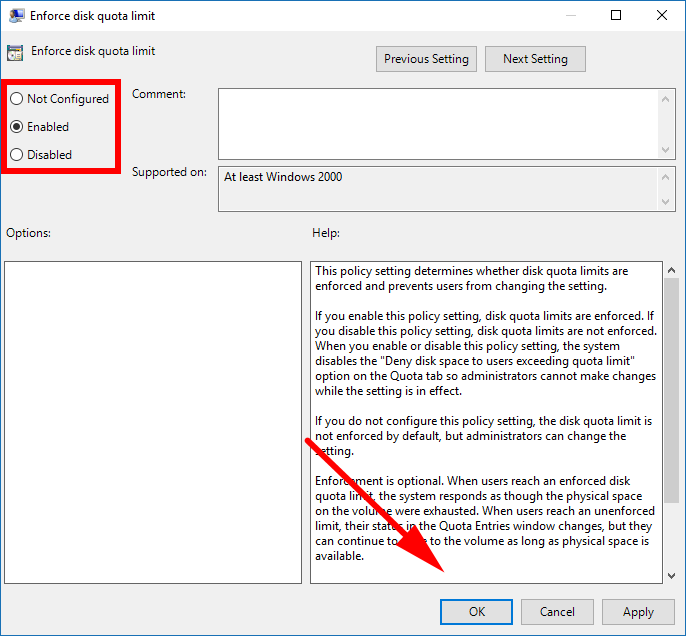
You’ll now have the Enforce disk quota limit policy window open. If you swap it over to the “Enabled” setting and then click on the “OK” button at the bottom of the window, it’ll enforce the disk quota limit.
If you ever want to take it back off again, you open the same policy window and change the setting back to “Not configured” or “Disabled” and hit the “OK” button at the bottom of the window to apply the changes again.
You probably won’t want to apply hard limits such as these to people in management positions, but it’s not usual to enforce a disk quota limit to those more toward the bottom of the ladder within your enterprise.
You might also be interested in:
- How to Set Disk Quota Limit and Warning Level for Specific Users in Windows 10
- How to Set Disk Quota Limit and Warning Level for New Users in Windows 10
- How to Roll Back Driver to Previous Version in Windows 10
- How to Change Maximum Processor Frequency in Windows 10
You can subscribe to our RSS, follow us on Twitter or like our Facebook page to keep on consuming more tech.