Last Updated on May 13, 2023 by Mat Diekhake
Rooting the Samsung Galaxy A3 smartphone is the only way for you to gain full control over the operating system. Google and Android take away the root user account from you so that apps cannot move around but that also stops your ability to get around too.
There are heaps of apps out there from the Google Play Store and other sources online that need you to have root access to the Android operating system before they can run.
One of those root apps that you might be interested in checking out is the Titanium backup app. Constantly a personal favorite of my own, the Titanium Backup app gives you a chance to backup every app that is running on the device as it stands today and when you sought through the list, you will likely come across some that you never even know that your device had. Moreover, Titanium Backup is also perfect for removing any app that is on the device. Because of the root access power that Titanium backup app, that means you can uninstall anything from the system partition and that means removing the bloatware or system apps.
Notes:
- Chainfire had the MMB29K.A310N0KOU1BPFA firmware build number running on his Samsung Galaxy A3 SM-A310N0 smartphone when he created the working method that is available in this guide. He doesn’t show that information because you need to be running it too. He just gives that information so you can use it later as an indicator of you need it. You can follow this guide and use the file in this guide if you have the right model number, and it is running on the Android 6.0.1 Marshmallow software updates.
- There are times when the CF-Auto-Root tools can stop working temporarily. These times are usually when a new bootloader is present. The new bootloader usually only come in new versions of Android which means that you shouldn’t have those problems in our guides that are only written for one Android version (Android 6.0.1 Marshmallow). Still, if you think a file is not working as it should, you can let Chainfire know about it by leaving a message on the CF-Auto-Root tool thread made at the DA-Developers website. You need to leave the recovery image file from the new firmware that is running on your device in the message so he can use it to update the rooting file so that it starts working again.
Download Samsung Galaxy A3 SM-A310N0 CF-Auto-Root and Drivers
- Download the CF-Auto-Root tool for the Samsung Galaxy A3 SM-A310N0 running on Android 6.0.1 Marshmallow updates.
- Download the Samsung USB Drivers that you need on the computer that is running Windows operating systems.
Rooting the Samsung Galaxy A3 SM-A310N0 running the Android 6.0.1 Marshmallow software updates using CF-Auto-Root by Chainfire
1. Unlock the Developer Options menu on the Samsung Galaxy A3 smartphone so you can turn on the USB Debugging Mode option that is available inside.
2. Enable the USB Debugging Mode from the Developer Options menu so that the Android software running on your smartphone will allow you to make changes to it which is required for the rooting to work.
3. Run the Samsung USB Drivers on the Windows computer so the Odin flashing application can then detect your device when you connect it to the computer with the USB cable.
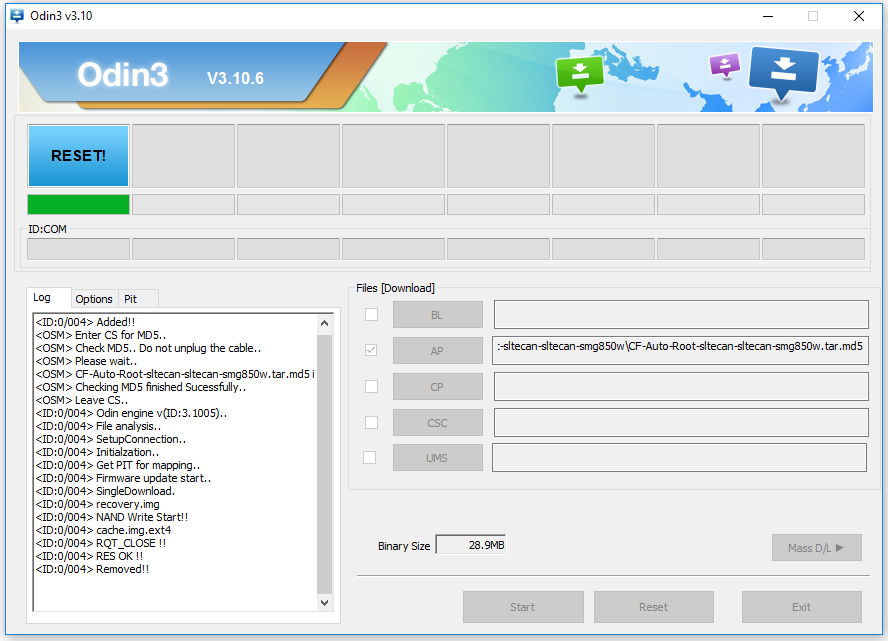
4. Extract the CF-Auto-Root tool to the Downloads folder and when you do you get the Odin flashing tool app and the rooting file that can be flashed in the rooting app.
5. Click and open the Odin flashing tool app so that the flashing tool user interface opens on the computer.
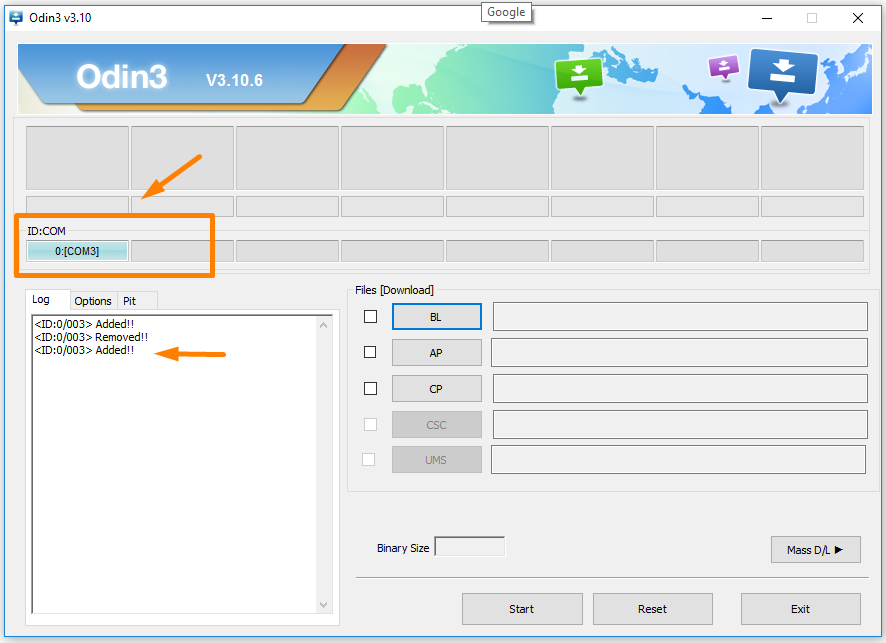
6. Boot the Samsung Galaxy A3 SM-A310N0 smartphone into the Download Mode and then connect it to the computer with the USB cable.
7. Doing so should result in a blue or yellow box lighting up in Odin which is the ID: COM port. The added message also needs to appear in the Log entry. Both of these things are there to let you know that the Samsung USB Drivers are installed and working for your device.
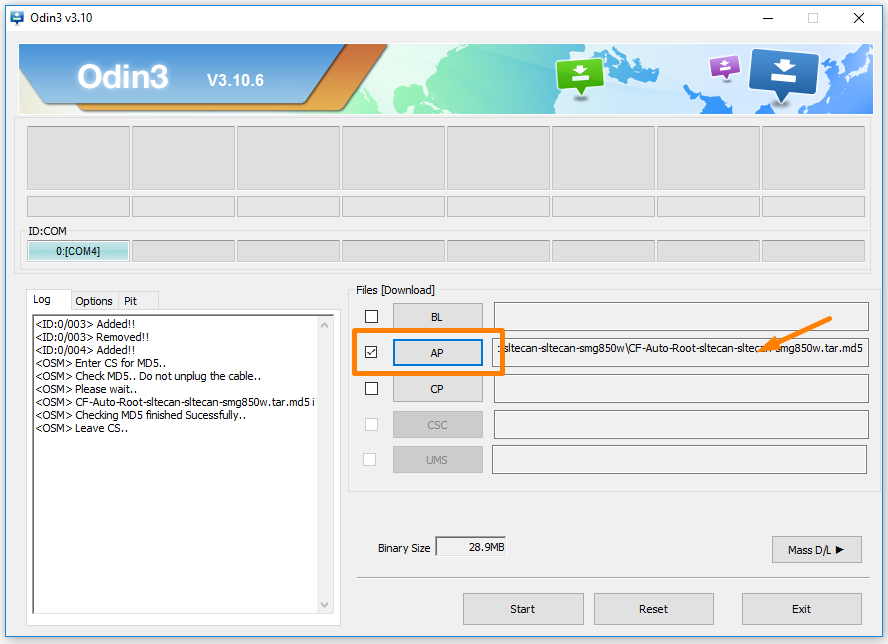
8. Click on the AP button that is available from the Odin flashing tool user interface. Browse through to the Downloads folder from the menu and then select the rooting MD5 file to upload to this location in Odin.
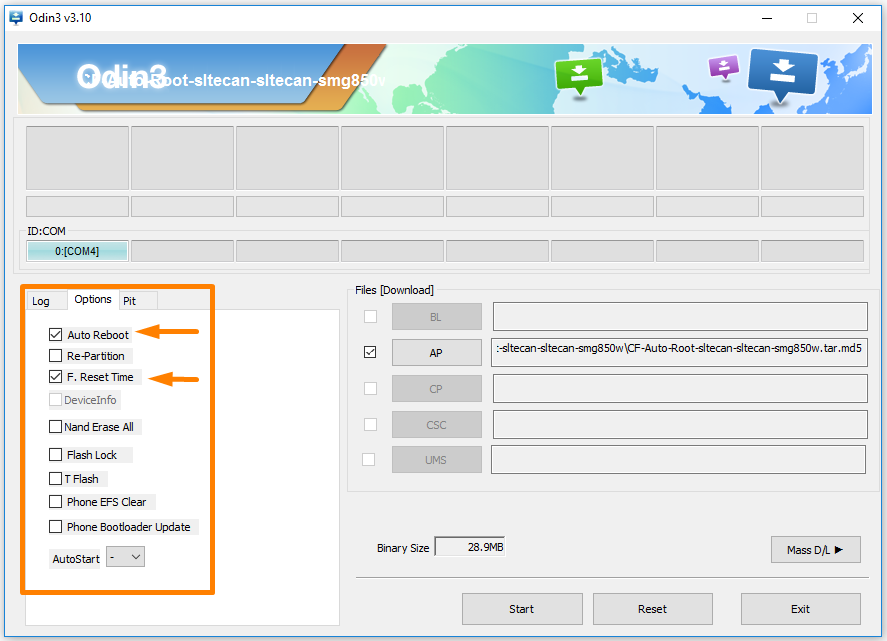
9. Click on the Options tab and make sure your settings as the same as the default settings that are showing in the images below.
10. Click on the Start button and the Odin flashing tool begins to root your device with the CF-Auto-Root tool. It is normal to see them change to Recovery and Cache during the rooting process and for the green progress bar to be making its way across the screen from the bottom.
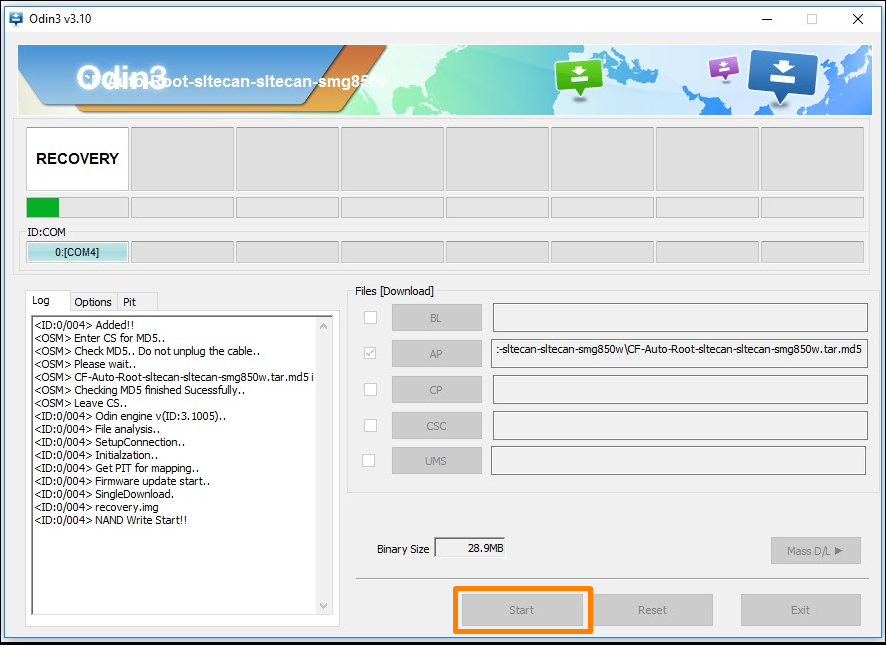
11. Wait until you get a blue reset button and then the green progress bar will show on the display.
12. Wait for the green progress bar to show up on the display and then you know that it is ready to be unplugged from the computer.
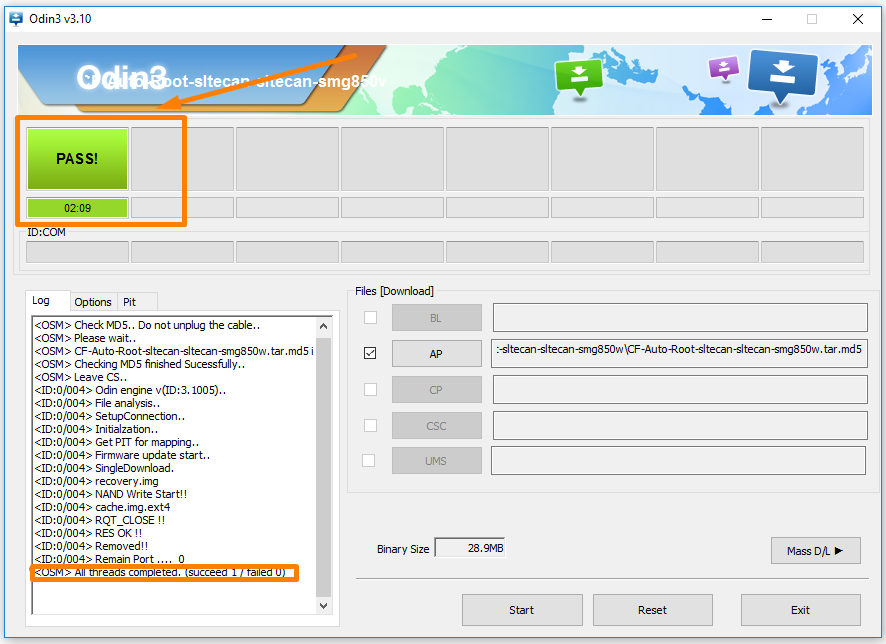
In conclusion, that is how to root the Samsung Galaxy A3 SM-A310N0 running on the Android 6.0.1 Marshmallow software updates by using Chainfire’s SuperSU. You should find that the guide works for all versions of the Android 6.0.1 Marshmallow software updates and not just the firmware version that you are using.
Related Tutorials
- How to Root Nexus 5 on Android 6.0 Marshmallow Developer Preview 3 (MPA44G)
- How to Root Nexus 9 on Android 6.0 Marshmallow Developer Preview 3 (MPA44G)
- How to Root Nexus 6 on Android M MPZ79M (Developer Preview 2)
- How to Root Nexus 6 on Android M Developer Preview with SuperSU and Despair Kernel
- How to Root Android N Developer Preview on Nexus Devices
- How to Root Google Nexus 6 on Android 6.0.1 MMB29X Marshmallow
- How to Root Google Nexus 6P on Android 7.1
- How to Root LG Nexus 5 on Android 6.0 Marshmallow
- How to Root LG Nexus 4 on Android 6.0 Marshmallow
- How to Root Google Nexus 5X with Encryption Disabled