Last Updated on November 30, 2024 by Mat Diekhake
Every time you buy a new computer that runs on a version of the Windows operating system, the first person to set up the computer gets control of the “Administrator” account. That administrator can then assign the same administrator permissions to another user, or they can assign a standard user account to another user if the administrator chooses to want to create another user account.
The standard user account gives enough permissions to be able to do basic things on the operating system like install apps, use the File Explorer and settings and so forth. However, a standard user account can’t do things like enter the Local Group Policy Editor and edit people’s user roles or uninstall programs created from outside their standard user account.
On top of the standard administrator’s account, there’s an elevated administrator account. This elevated version of the administrator account is not the same account that you create the first time you set up the PC. Instead, this is a built-in administrator account that is always there. Unlike the admin account you are assigned when setting up Windows that allows you to be the admin of a Microsoft account or a local user account, the built-in elevated admin account is always a local account. Everything you do from the built-in elevated admin account does not go through User Account Control. This built-in admin account has full unrestricted control of the Windows operating system, similar to the root user account in Linux. As such, it’s not recommended that you get access to this version of the admin account for your everyday usage. Not using it helps eliminate the chance of you making a mistake.
How to Enable/Disable Elevated Administrator Account in Windows 10
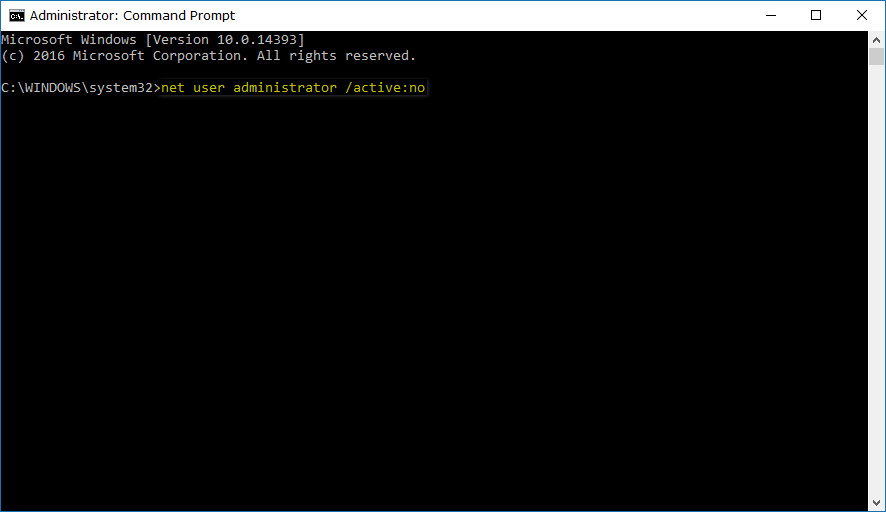
Open an elevated Command Prompt in your Windows 10 operating system.
Type the “net user administrator /active:yes” command and then press on the Enter key on your keyboard to enable the built-in elevated Administrator account.

Type the “net user administrator password /active:yes” command and then press the Enter key to enable the built-in Administrators account that comes with a password.

Type the “net user administrator /active:no” command and then hit the Enter key on the keyboard when you want to disable the elevated administrators account.
How to Enable/Disable Built-in Administrator in Local Users and Groups
Note: You need to have a version of the Windows 10 Pro, Windows 10 Enterprise or Windows 10 Education to use the Local Users and Groups part of the operating system. It isn’t available in other things like Windows 10 Home. You can upgrade from Windows 10 Home to Windows 10 Pro by heading to the Settings application if you want to be able to make changes to group policies.
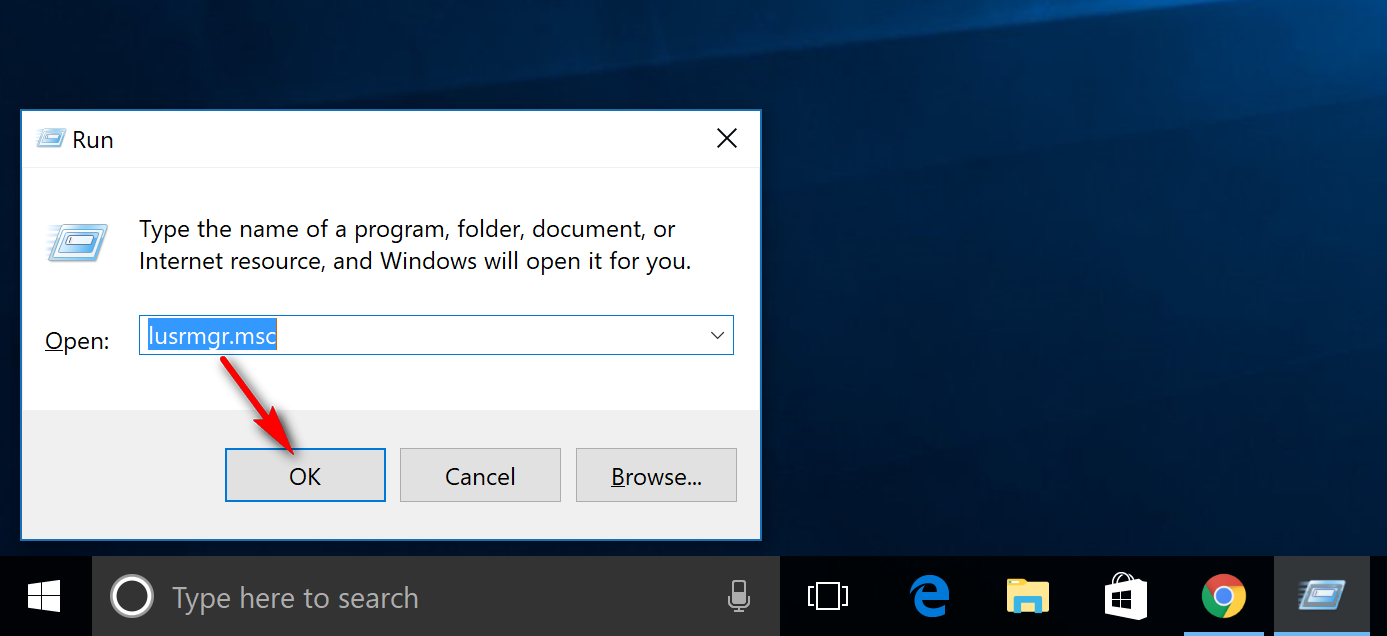
Open up the Run dialog box by pressing the Windows logo key + R keys on the keyboard and then type “lusrmgr.msc” into the available field and then click on the “OK” button.
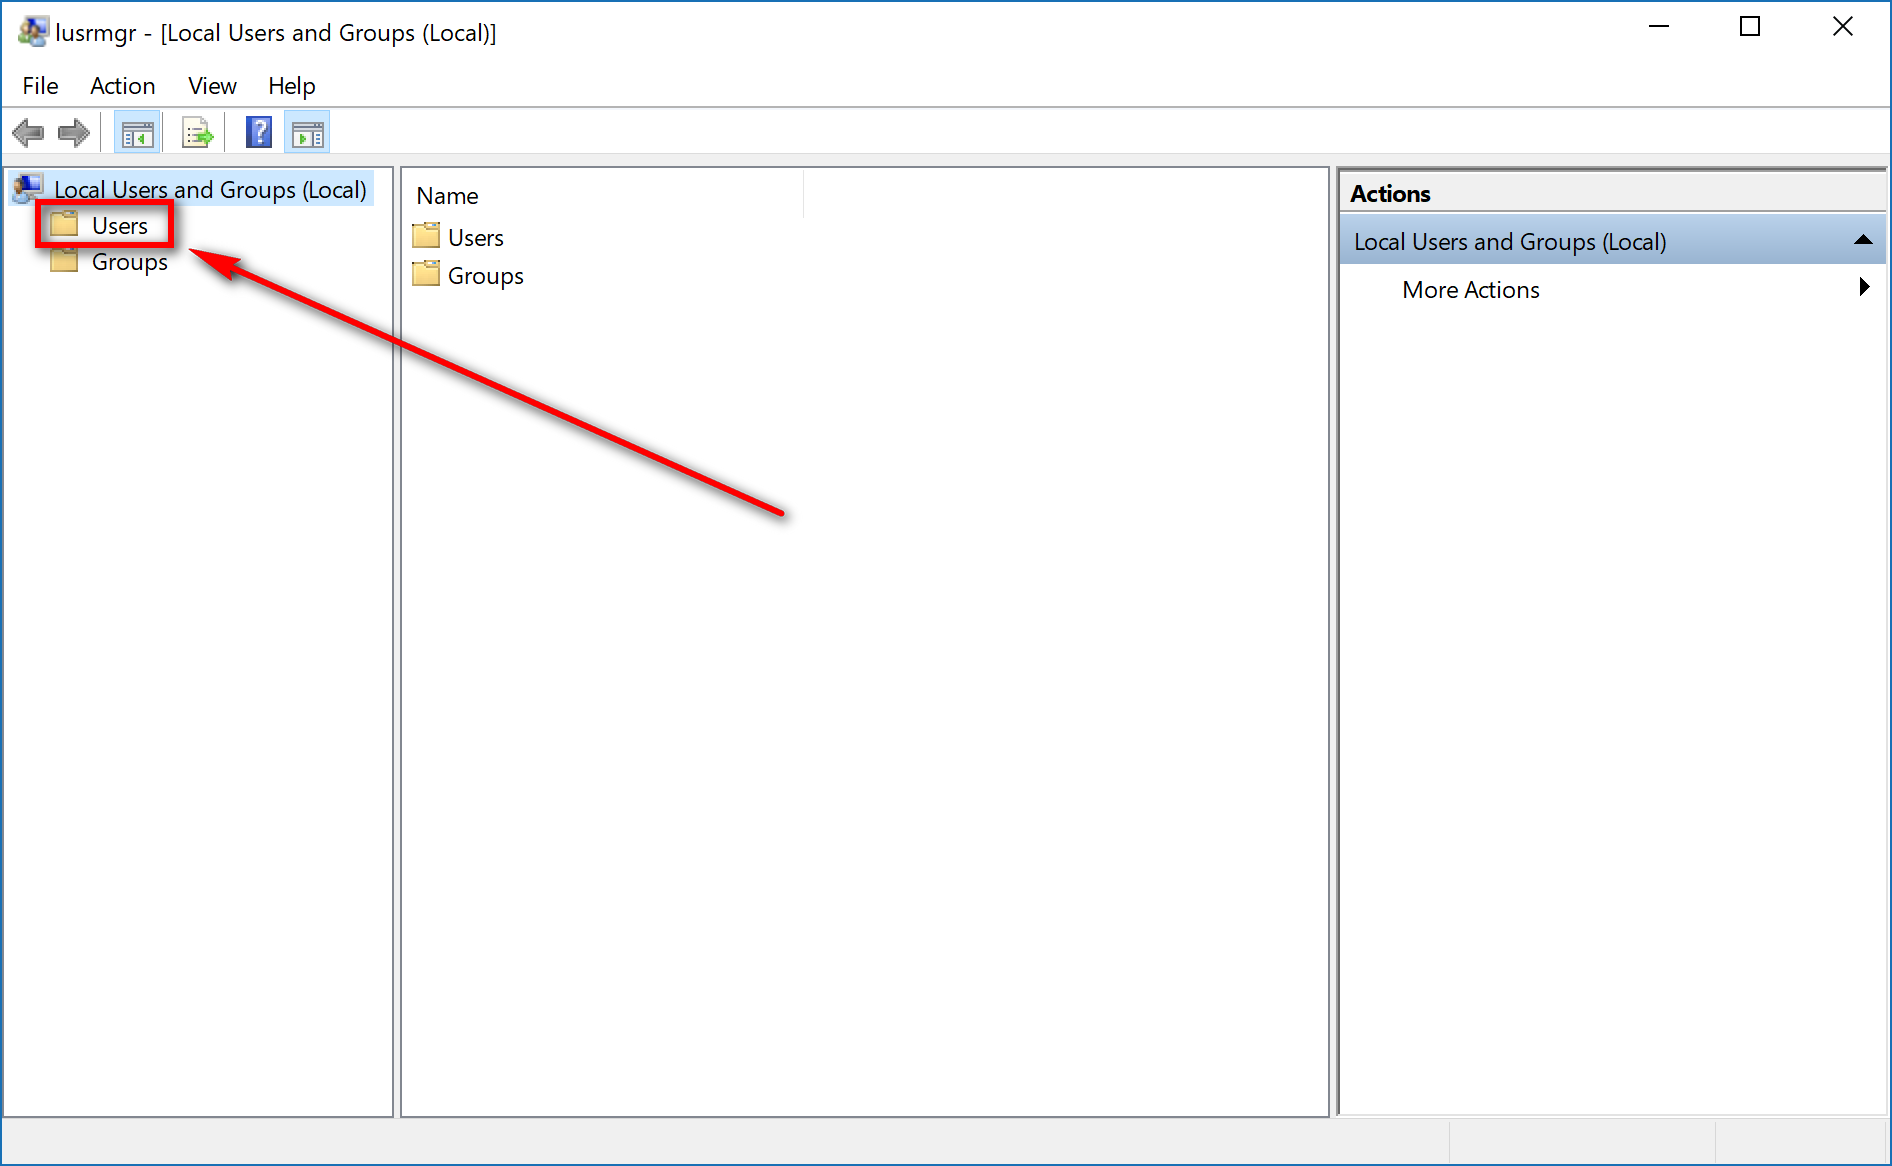
 Click on the “Users” folder available from the left side pane to expand it.
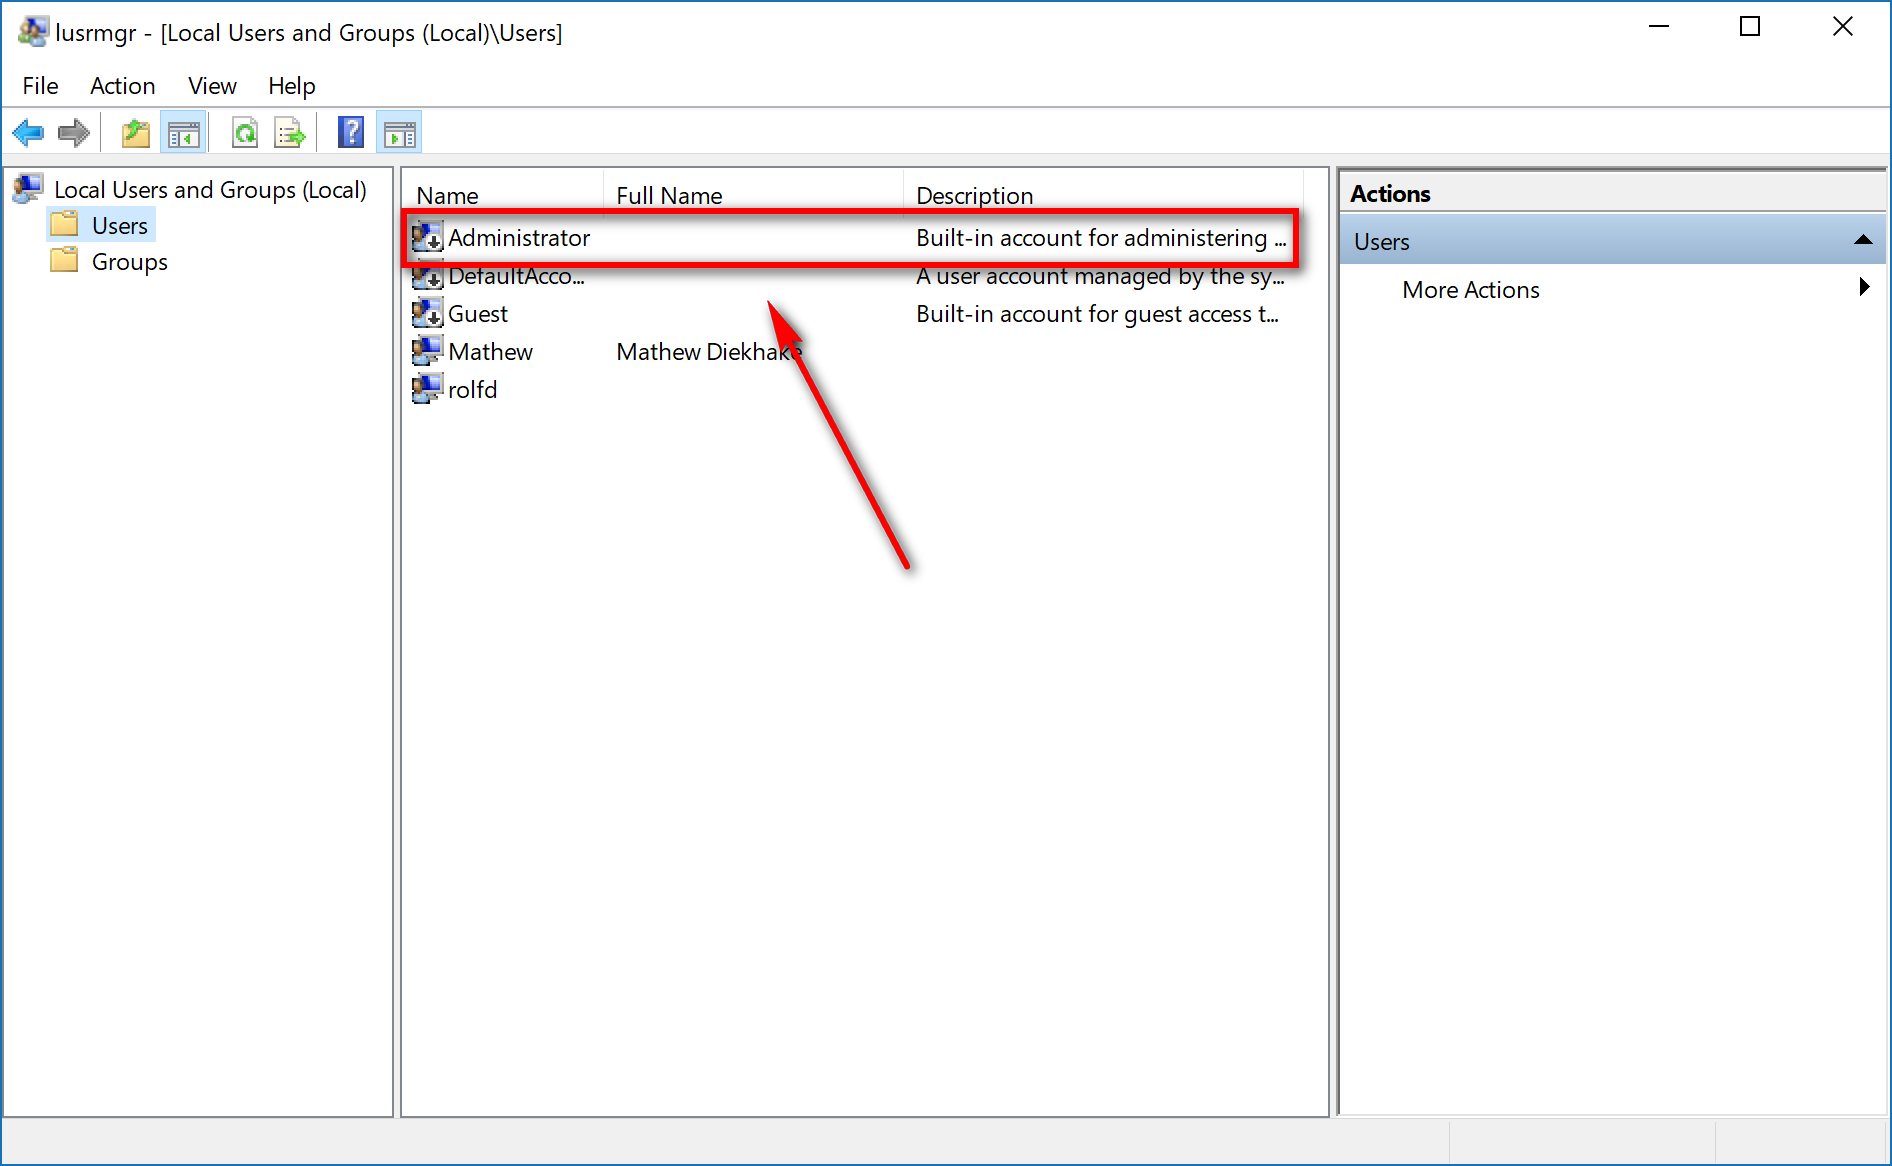
 Double-click on the “Administrator: Built-in account for administering” in the middle pane.
Deselect the checkbox available for the “Account is disabled” and then click on the “Apply” and “OK” boxes at the bottom to apply the changes.
Likewise, if you ever want to disable the elevated administrators account again in the future, you need to open the same “Administrator Properties” dialog box and then put a checkmark in the checkbox that says “Account is disabled.” (The same checkbox that you deselected in the step above.)

How to Enable/Disable Built-in Administrator in Local Security Policy
Note: You can only open up the Local Security Policy by using a version of the Windows 10 Pro, Windows 10 Enterprise or Windows 10 Education versions of the operating system.
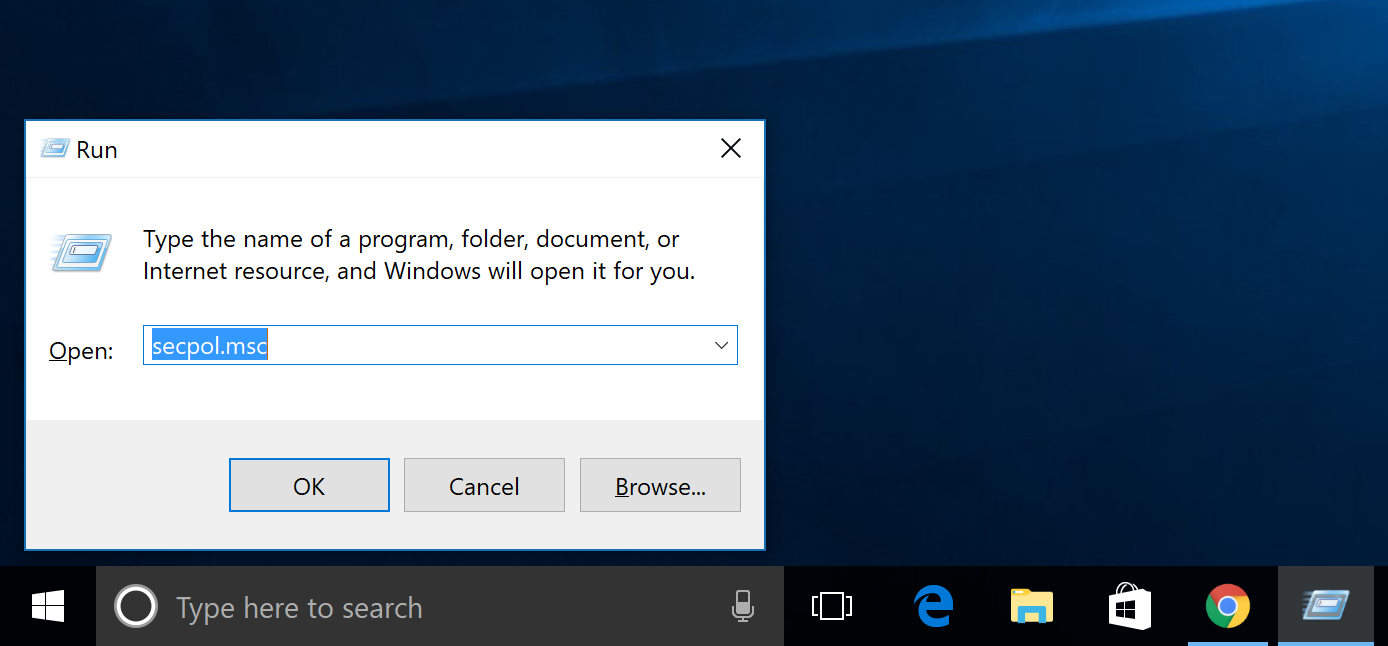
Open up the Run dialog box once again by pressing the Windows logo key + R keys on the keyboard and then type secpol.msc
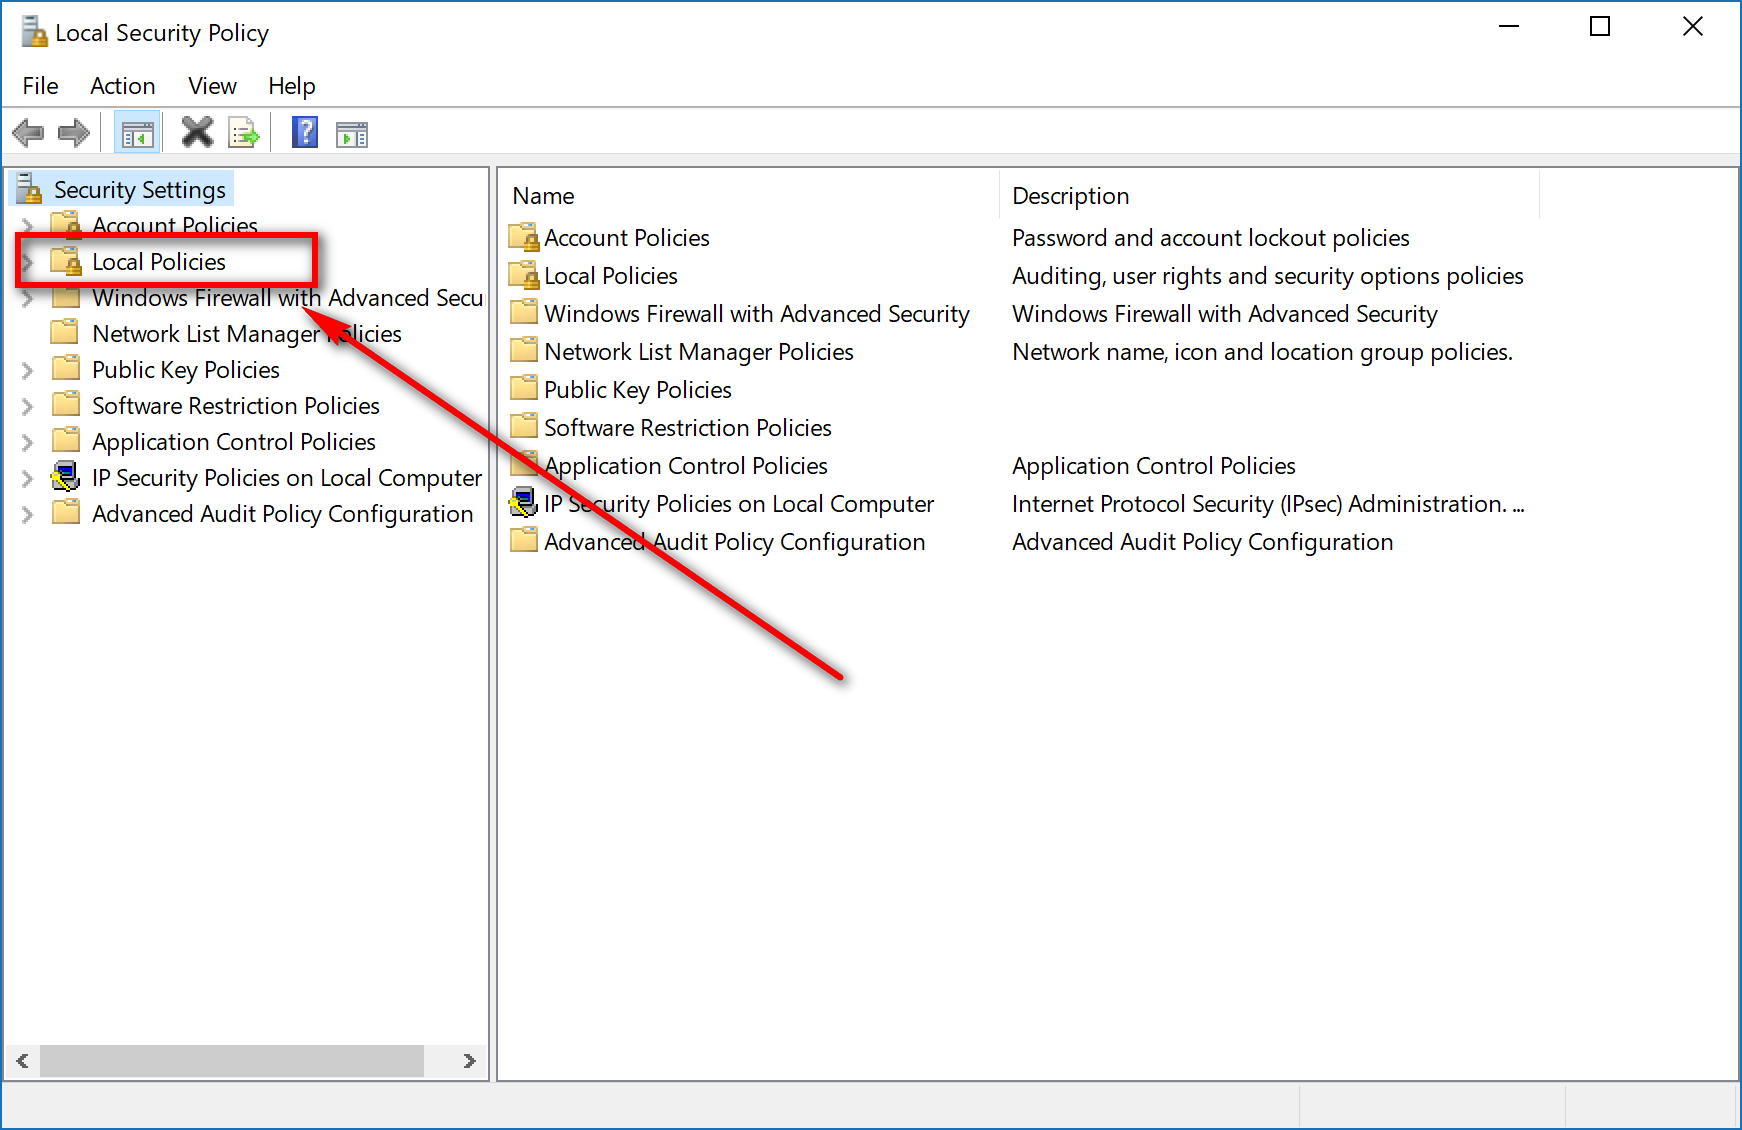
Click on the “Local Policies” folder from the left side pane.
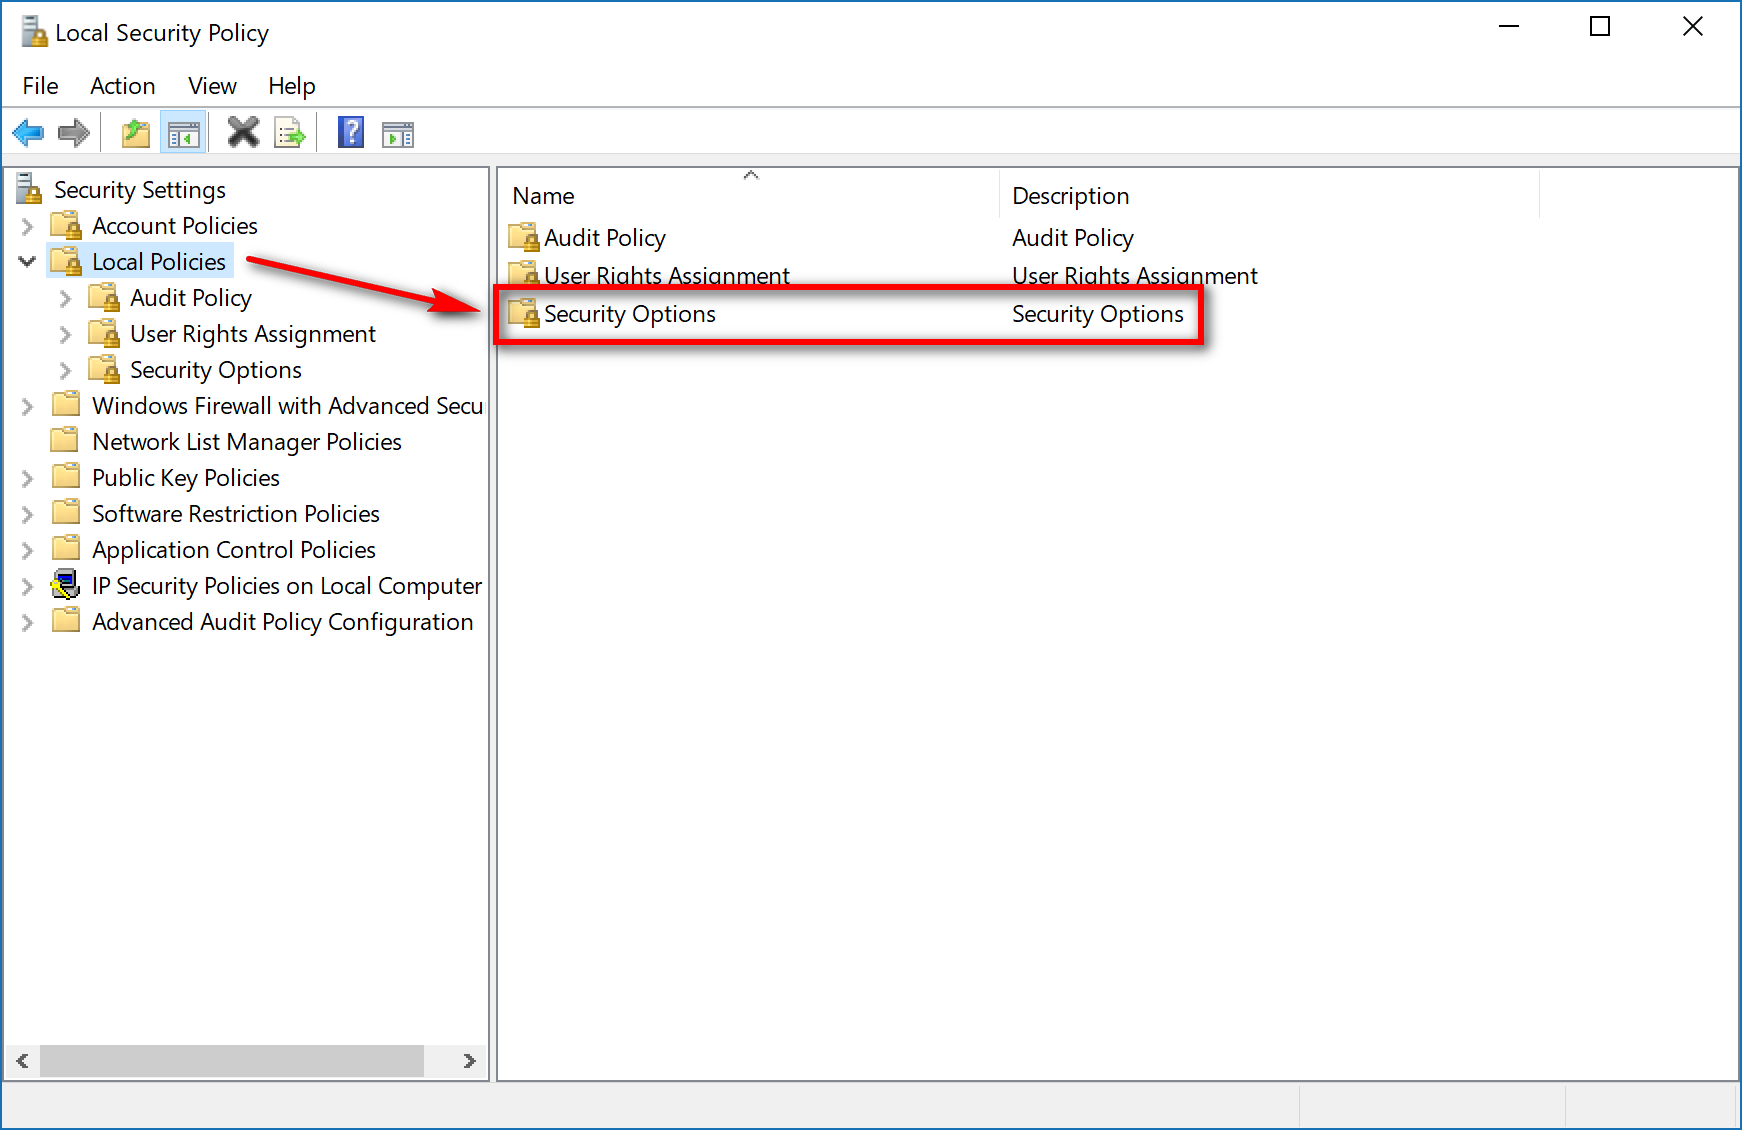
Click on the “Security Options” folder from the right side pane.
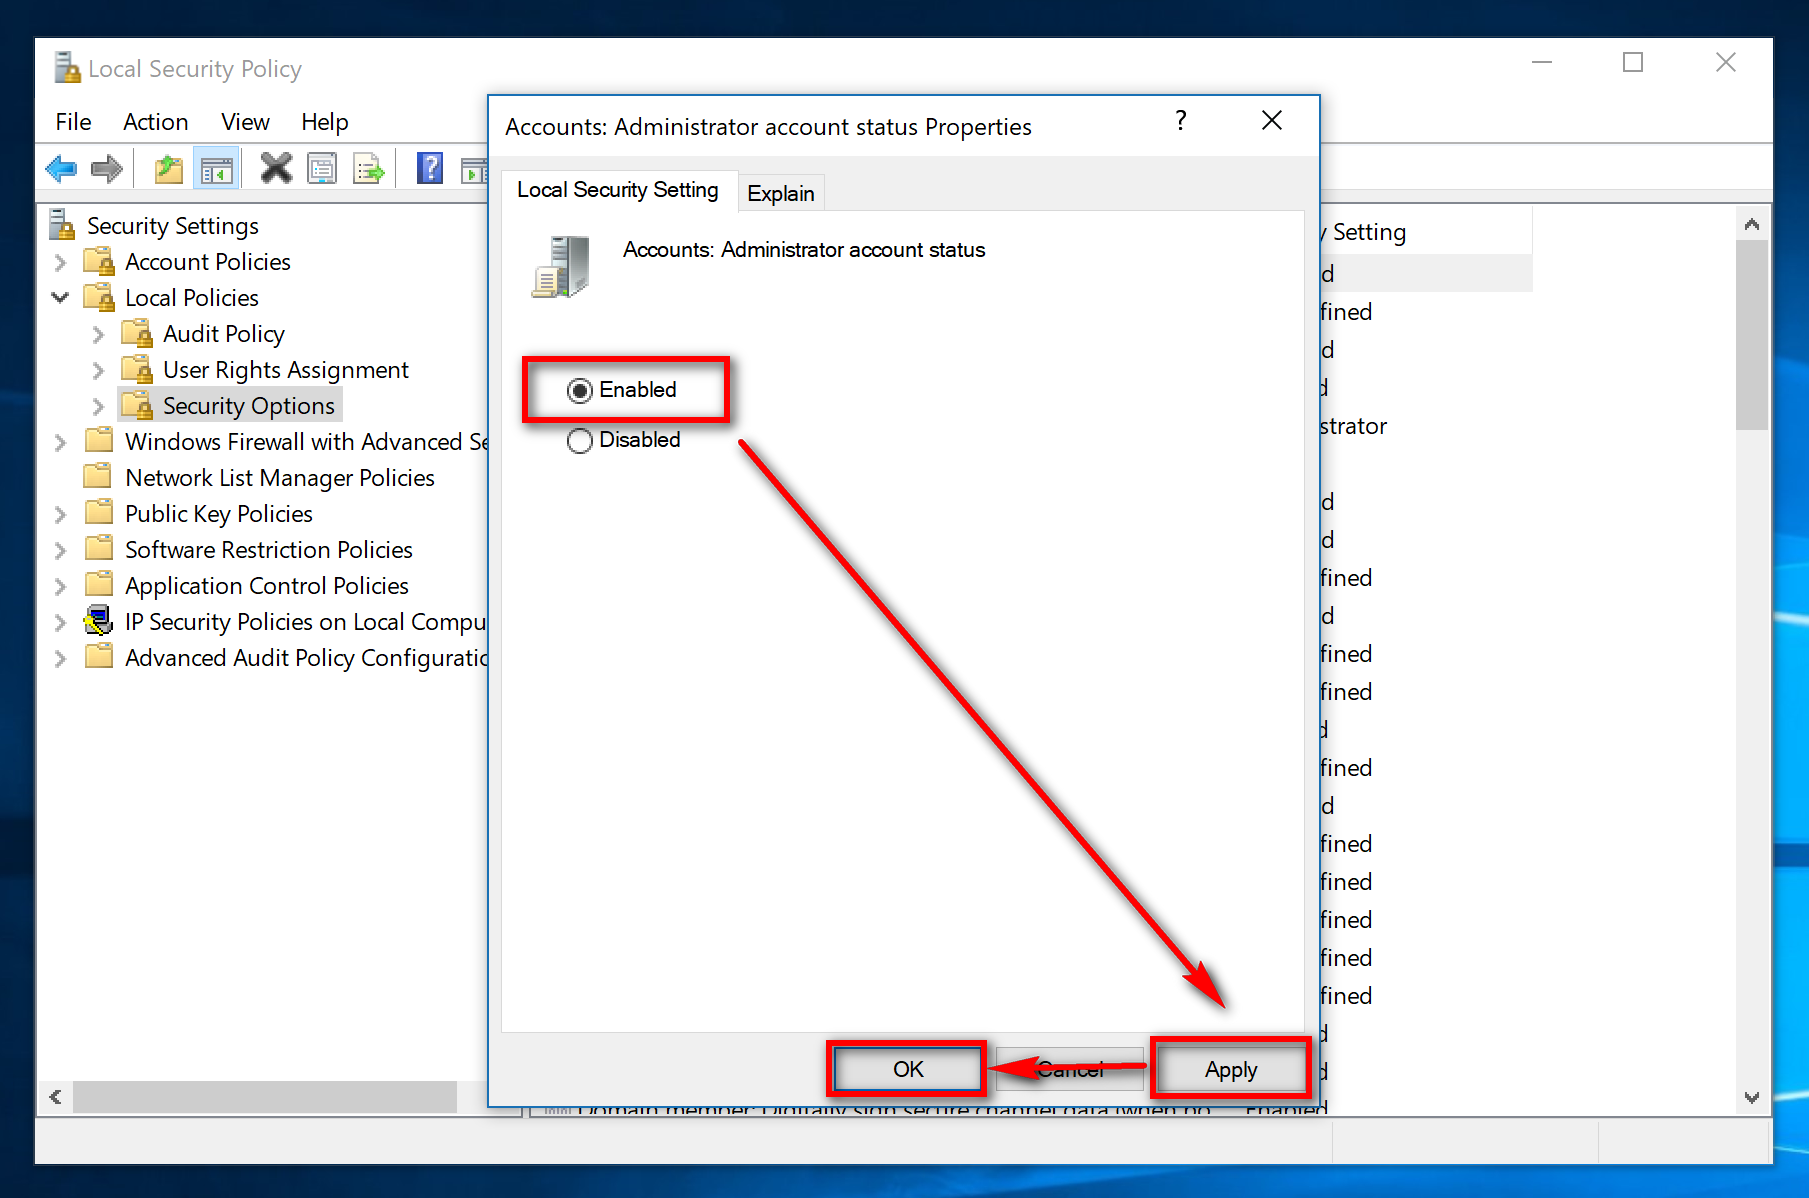
Double-click on the “Accounts: Administrator account status” to open the dialog box that is related to it.

Click on the “Enabled” checkbox, so the checkmark moves from the “Disabled” box to the “Enabled” box. When done, click on the “Apply” and “OK” buttons at the bottom.
That’s all you need to enable or disable the elevated administrators account in versions of the Windows 10 operating system. Keep in mind that all programs that you run while using this elevated admin account have full unrestricted access to the computer, so you don’t want to be using this local account with your guard down. That’s why it’s best only to use the elevated admin account when you need it.
Related