Last Updated on December 26, 2022 by Mat Diekhake
You can create new partitions, otherwise known as volumes, to prevent data loss, run multiple operating systems on the same computer, improve the hardware performance, and help arrange the data easier.
As easy as the partitions are to create they are to delete. All computers start off with at least one partition for the system and booting, and you won’t be able to delete that one if you try. However, if you’ve opted to have more than one partition by shrinking the initial volume, then you can delete all those extras and reduce it back to the one.
This is how you can delete a partition/volume when using the Windows 10 operating system.
How to Delete Volume or Partition in Windows 10
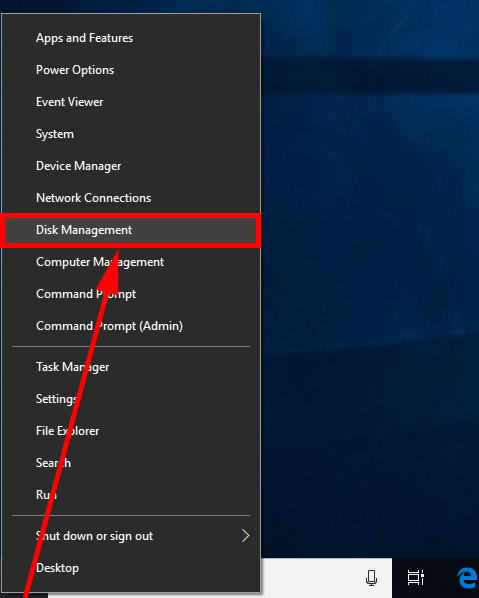
You can delete a volume or partition from Disk Management when you’re using Windows 10. Right-click on the “Start” button in the taskbar and then select the “Disk Management” from the Win+X Quick Links menu.
You’ll then see the Disk Management window open. Toward the bottom of the window is where it lists all your volumes and partitions. Find the volume or partition that you want to delete and then right-click on it > select “Delete volume” from the menu. You’ll then see a Delete Simple Volume confirmation box where you need to click “Yes” to continue.
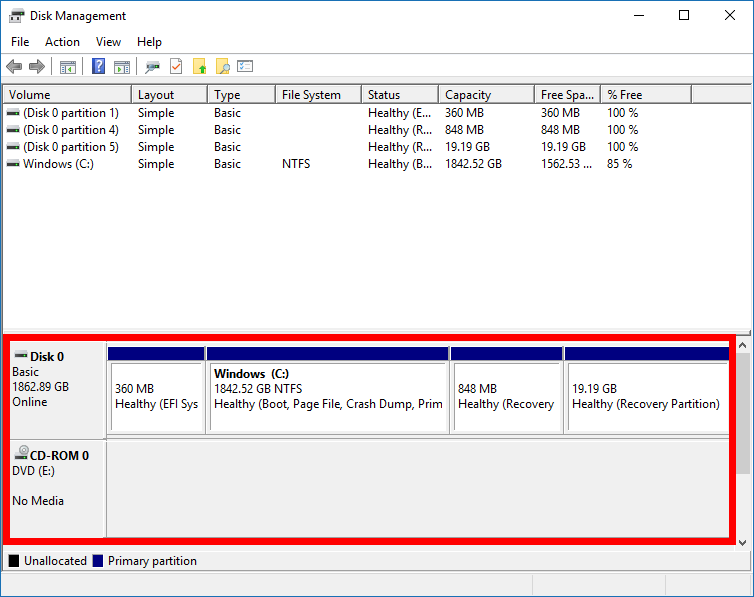
The volume has now been deleted. All the space that was being used by that volume and is now unallocated will be viewable from the same area within Disk Management. You might want to extend one of the other volumes to help use it up or keep it the way it is for another volume in the future.
How to Delete Volume or Partition on Disk in Command Prompt
You can also delete a volume or partition by using the Command Prompt in Windows 10 if you don’t want to go through Disk Management. Open the elevated Command Prompt window or the Command Prompt at boot.
Once you’ve got the CMD window open, type the diskpart command followed by the list volume command to get a list of all the volumes you have available on the computer as well as the numbers they have been given.
Using the information you gathered from the command above, type the select volume (number) command and change where it says “(number)” with the actual number of your volume, i.e., select volume 4.
You’ll then see that the volume has been selected. Now to delete the volume, type the delete volume command and it’ll be gone.
How to Delete Volume or Partition on Disk in PowerShell
You can also delete a volume or partition from the Windows PowerShell if you prefer. You’ll need to start by opening up the elevated Windows PowerShell window.
When it’s open, type the Get-Volume command so you can get the details of all the computers that are on your computer, and more specifically, the one that you want to delete.
Now type the Remove-Partition -DriveLetter "(drive letter)" command but replace where it says “(drive letter)” with the actual letter of the drive that you found in the command above, i.e., Remove-Partition -DriveLetter "E."
The Windows PowerShell will then make you confirm you want to perform this action. Press the “Y” button on your keyboard, and it’ll then be deleted.
You might also be interested in:
- How to Collecting System Specifications in Windows 10
- How to Set Up an Out of Office Reply in Windows 10 Mail
- How to Verify if System Files and Drivers are Digitally Signed in Windows
- How to Extend Volume or Partition in Windows 10
You can subscribe to our RSS, follow us on Twitter or like our Facebook page to keep on consuming more tech.