Last Updated on May 30, 2021 by Mat Diekhake
Many times what happens is that you see really large content on your new Android device and that is because of the resolution values of the device. If the resolution has been set too low, everything will look bigger. Similarly, if you increase the resolution, the content on the screen would look smaller.
The Android OS, by default, does not allow you to change the resolution on your device because that should not be in users’ hands as they think that. However, you can use ADB to get the resolution changed to your liking on your device.

It’s really easy to change the resolution of an Android device using ADB, and the following guide is all about doing just that. So, follow it and get your resolution changed:
Changing the Resolution of an Android Device without Root
The following procedure has been done on a Mac using ADB for Mac. These steps should work for a Windows user as well with slight differences in the steps, but you get an idea.
Head over to the Android Developer website and download the ADB suite that is for your operating system. I am downloading the Mac version as I use a Mac. Save the downloaded file on your desktop for easy access to the suite.
Double-click on the downloaded archive and extract the “platform-tools” folder on your desktop. That folder is where the adb and fastboot files are available that you can use to play around with your Android device.
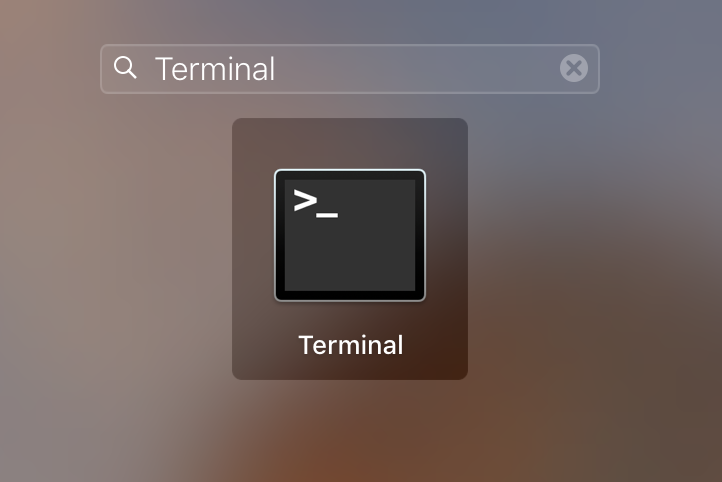
Launch the Terminal app on your Mac by clicking on Launchpad in the Dock and searching for and clicking on “Terminal.” The app should launch.
When Terminal launches, type in the following command and press Enter. What this command does is it makes the “platform-tools” folder on your desktop to be the current working directory for you to issue commands through ADB.
cd desktop/platform-tools/

You now need to enable an option on your device that will let your device communicate with your computer. To do that, head to “Menu->Settings>About phone” and tap on “Build number” for 7-8 times and it will say you are a developer. It means it has just unlocked the developer menu for you.
Head to “Menu->Settings->Developer options,” which is the newly unlocked menu, and enable the option that says “USB debugging.” The option allows your computer to talk to your device.
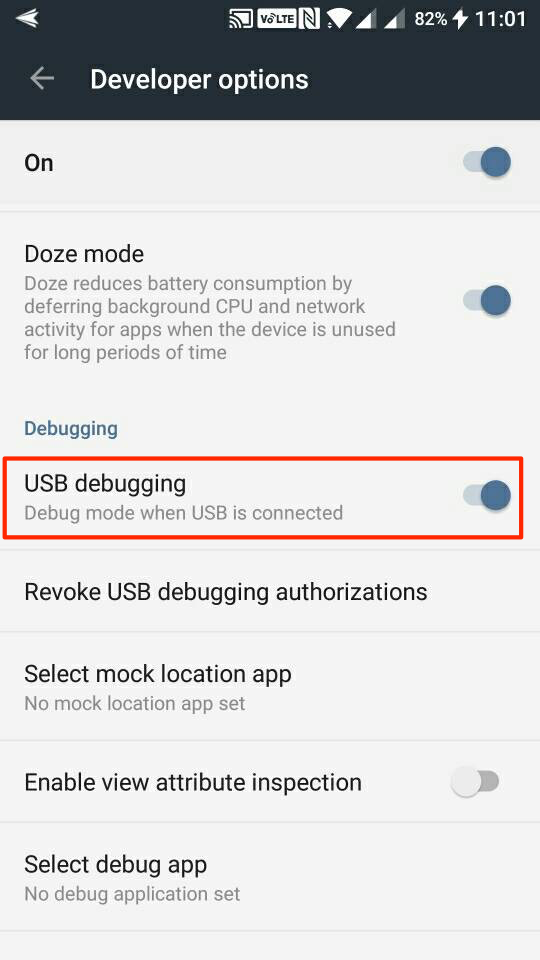
After enabling the USB debugging option, plug in your device to your computer using a suitable cable.
Get back to the Terminal window you had open. Type in the following command into the Terminal window and press Enter.
adb shell dumpsys display | grep mBaseDisplayInfo
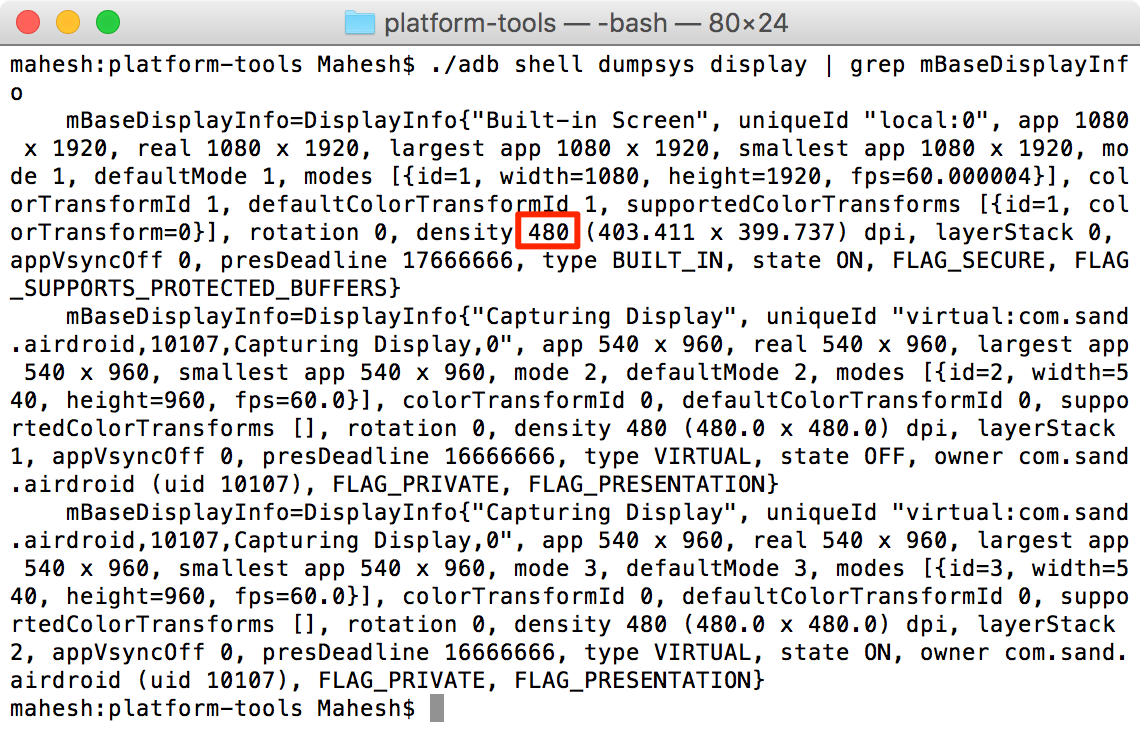
What this command does is it lets you see the current DPI of your screen. That is important, and you should note down the current values of DPI as these are changed in the below steps and making a note ensures you can get back to the original values should you want.
After you have noted down the default DPI values, it is time to change it to change the resolution of your device.
Type in the following command into the Terminal window and press Enter. In the command, replace DPI with the value you want, and that changes the resolution of your device. You can enter anything from 120 to 640.
640.adb shell wm density DPI && adb reboot
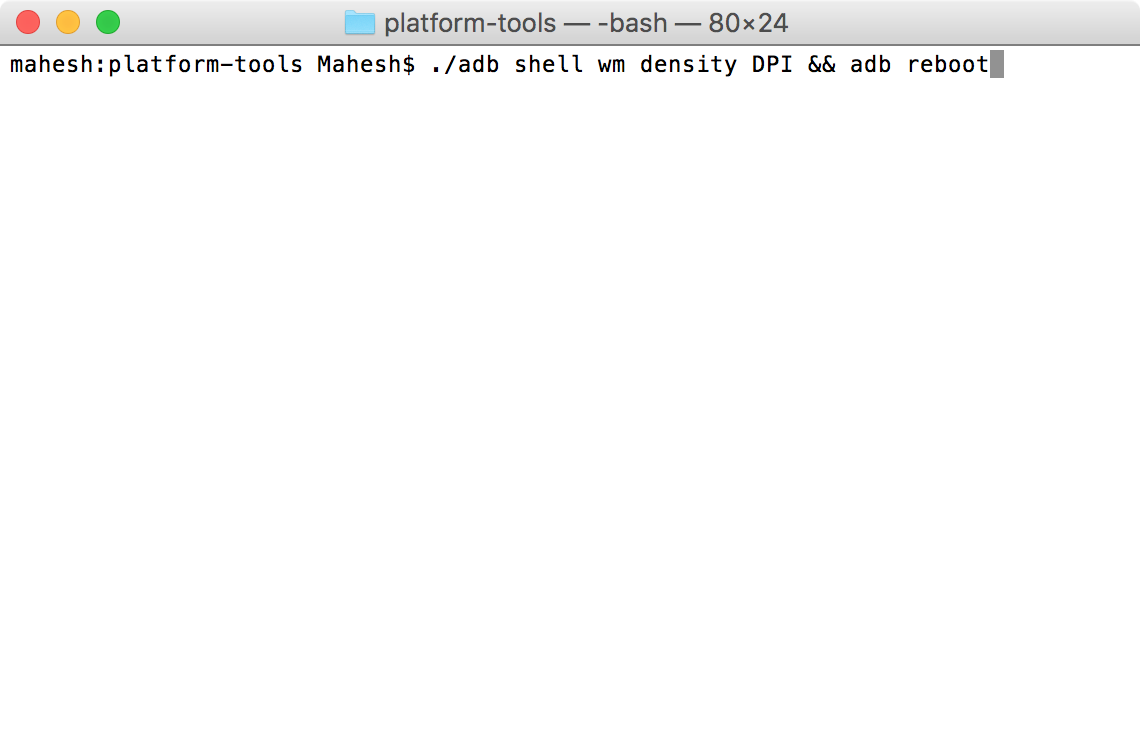
After you have executed the above command, your device reboots, and the DPI you set is now the default resolution for your device unless you re-run the command with a different value.
So, that was how you could change the resolution of an Android device without having you to root your device.
You might also be interested in:
- How To Always Show The Number Row In Gboard Keyboard For Android
- How To Scan And Save Documents On An Android Device
- How To Turn Off Video Autoplay In Facebook For Android
- How To Create A Shortcut For Custom Text On Your Android Device
Have something to say? You can contribute to this tech article by leaving a comment below.