Last Updated on May 30, 2021 by Mat Diekhake
While there are a number of apps that let you edit photos on your Android device, many of them require you to go through dozens of steps before you can turn a photo to black and white. The task of converting a photo to black and white should not be that difficult as it is just a simple process and you should be able to do it very quickly and properly.
Fortunately, converting a photo to black and white on an Android device can be done very quickly using the Android’s built-in app called Google Photos. Besides other editing options, the app lets you quickly convert your photos to black and white with a simple procedure.

For this to work on your device, you do not need to be rooted, and you do not need to upload your photos to the cloud. All you need is the Google Photos app, and you are good to go.
Here’s how:
Turning Photos to Black and White on an Android Device
As I said above, to do the task, you are going to use a free app called Google Photos. On most Android phones, the app comes preinstalled, so you will not even have to download or install it as it already exists on your device and ready to be used.
Open the App Drawer on your Android device and tap on “Photos.” It opens the Google Photos app on your device.

When the Photos app launches, you can see all of your photos in there. If you do not see a photo you really wanted in the app, then you will have to manually add it to the app to then be able to edit it.
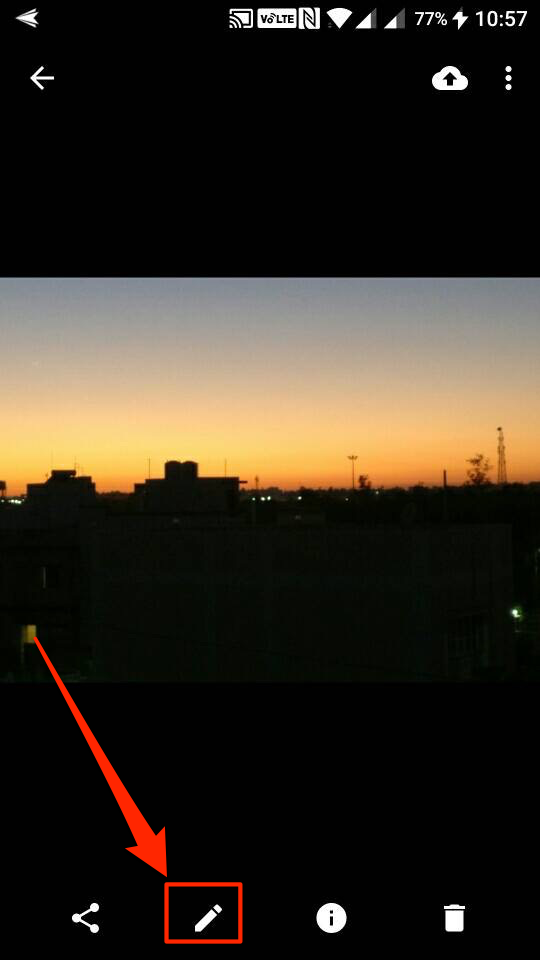
What you need to do here is tap on the photo that you wish to convert to black and white. Single-tapping on a photo enlarges the photo to the full-screen.
When the photo opens in full-screen, you need to tap on the edit button to edit the photo. The edit option looks like a pencil icon located in the bottom bar of the app. So, tap on it, and it opens the editing mode.
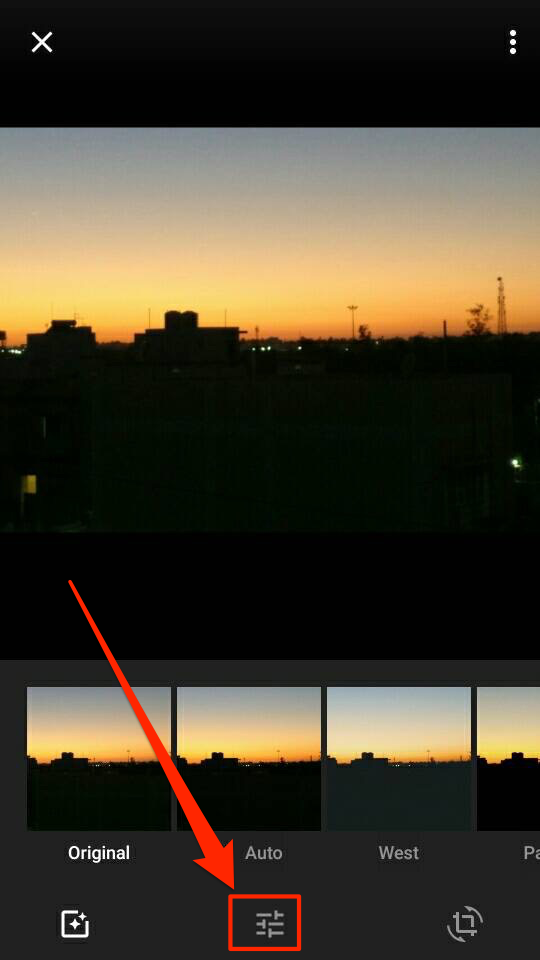
When the editing mode opens, you can apply the predefined filters to your photo, but that does not change the photo to black and white. What will do that is the manual filters option which you need to activate by tapping on the filters icon in the bottom bar of the screen.
When the filter options appear, drag the bar for the “Color” option all the way to the left. It removes all the colors from the photo making it an entirely black and white photo.
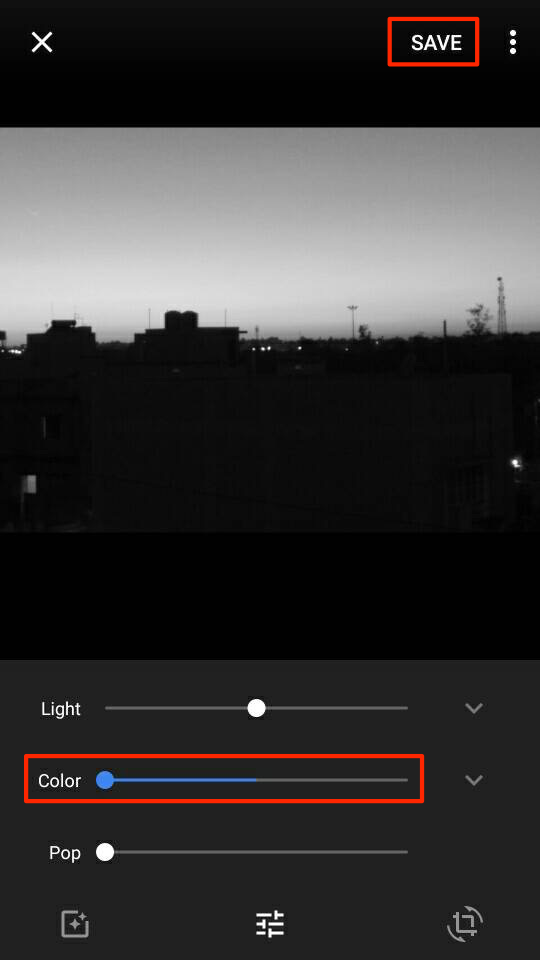
You should be able to see the preview of the photo. If that’s what you want, tap on “Save” at the top and the photo will be saved.
The original photo is also preserved, and the edited photo is saved as a copy of the photo. So, you will still have access to the old color photo should you want it.
You might also be interested in:
- How To Always Show The Number Row In Gboard Keyboard For Android
- How To Change The Resolution Of Your Android Device Without Root
- How To Get A Virtual Navigation Bar On Your Android Device
- How To Enable And Use System UI Tuner On An Android Device
Have something to say? You can contribute to this tech article by leaving a comment below.