Last Updated on May 30, 2021 by Mat Diekhake
We all happen to use numbers in our daily life typing, but unfortunately, the keyboards in Android phones do not always show the number panel. That way you need to tap an option or two to be able to see the numbers and be able to type them which is very annoying if you type a lot of numbers on your phone daily.
However, that can be changed as long as you use Google’s Gboard keyboard on your device. With Gboard on your device, you have the options to customize the layout of the keyboard, and that means you can have a number row added to your keyboard which will always appear on the keyboard.

By adding a number row to the Gboard, you are making your life a little easier as the row will always appear on the top of your keyboard helping you type whatever numbers you want without opening the extra numbers screen. The number row will appear on the top, and it will have zero to nine numbers for you to type.
Please keep in mind that this should only work if you use the Gboard keyboard on your Android device. If you are using a keyboard that is not this one, then the steps for adding a number will be different and also there are chances that the keyboard you use just doesn’t have the number row feature.
Even if your device has not come with the Gboard keyboard, you can still get this keyboard on your device by heading over to the Play Store and downloading and installing it on your device.
So, with the Gboard keyboard installed on your device, here’s what you need to do to enable the number row:
Showing the Number Row in the Gboard Keyboard for Android
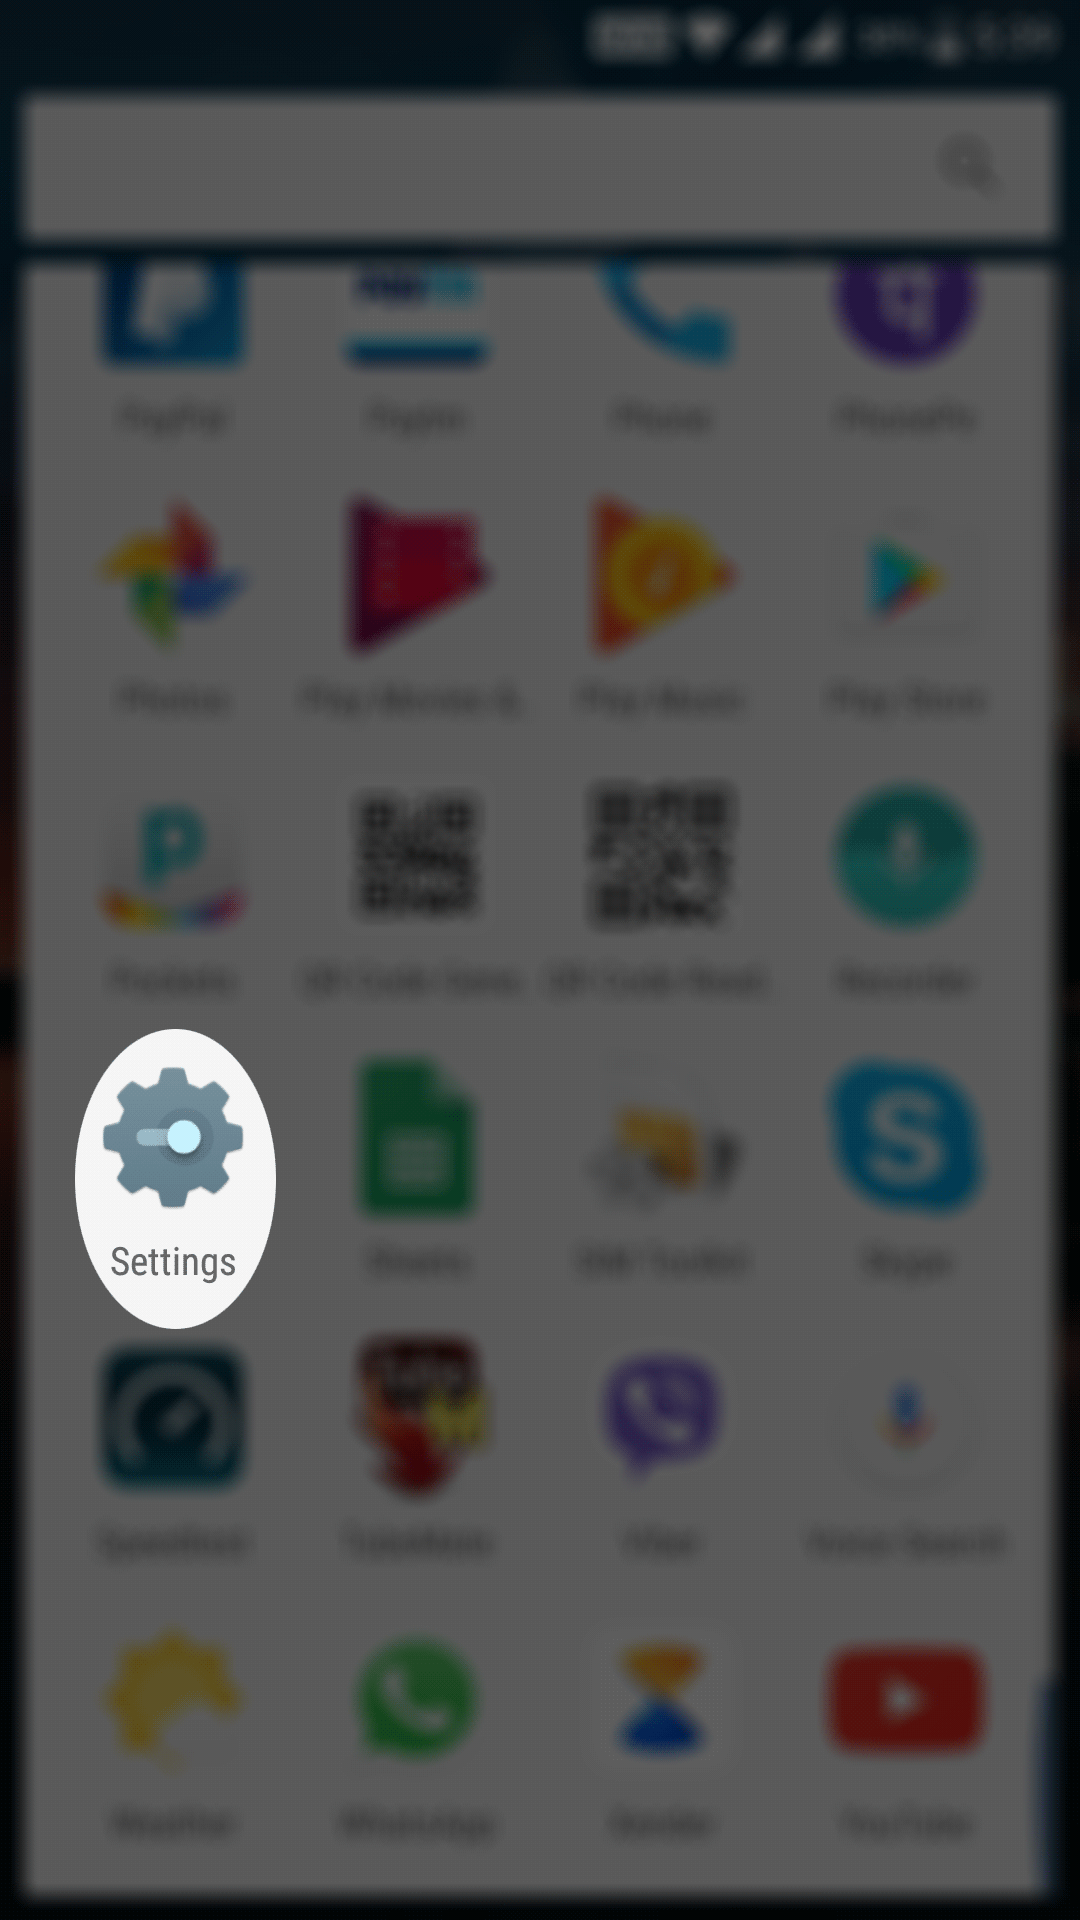
Open the App Drawer on your Android device and find and tap on “Settings.” It opens the Android settings menu from where you can control almost all of your device’s settings.
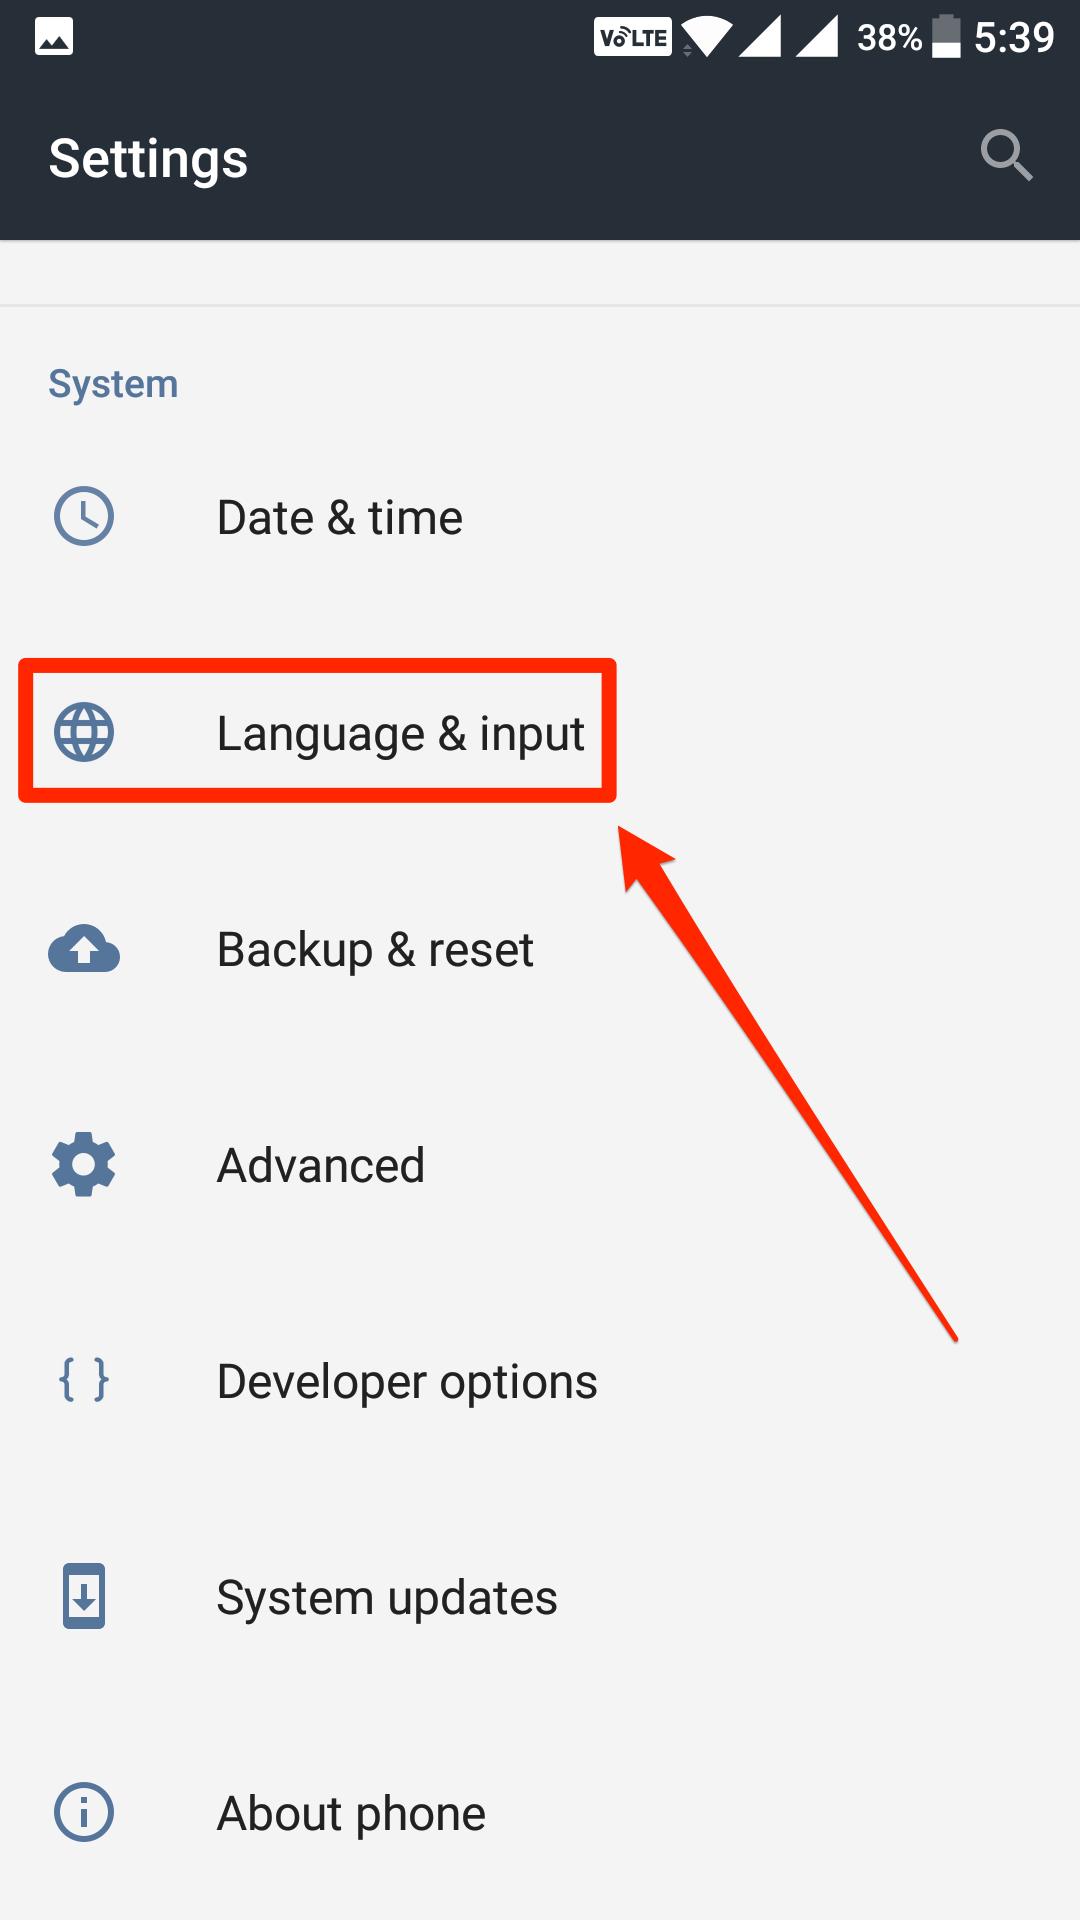
When the settings menu opens, scroll all the way down and tap on the option that says “Language & input.” That is where the keyboard related settings are located at.
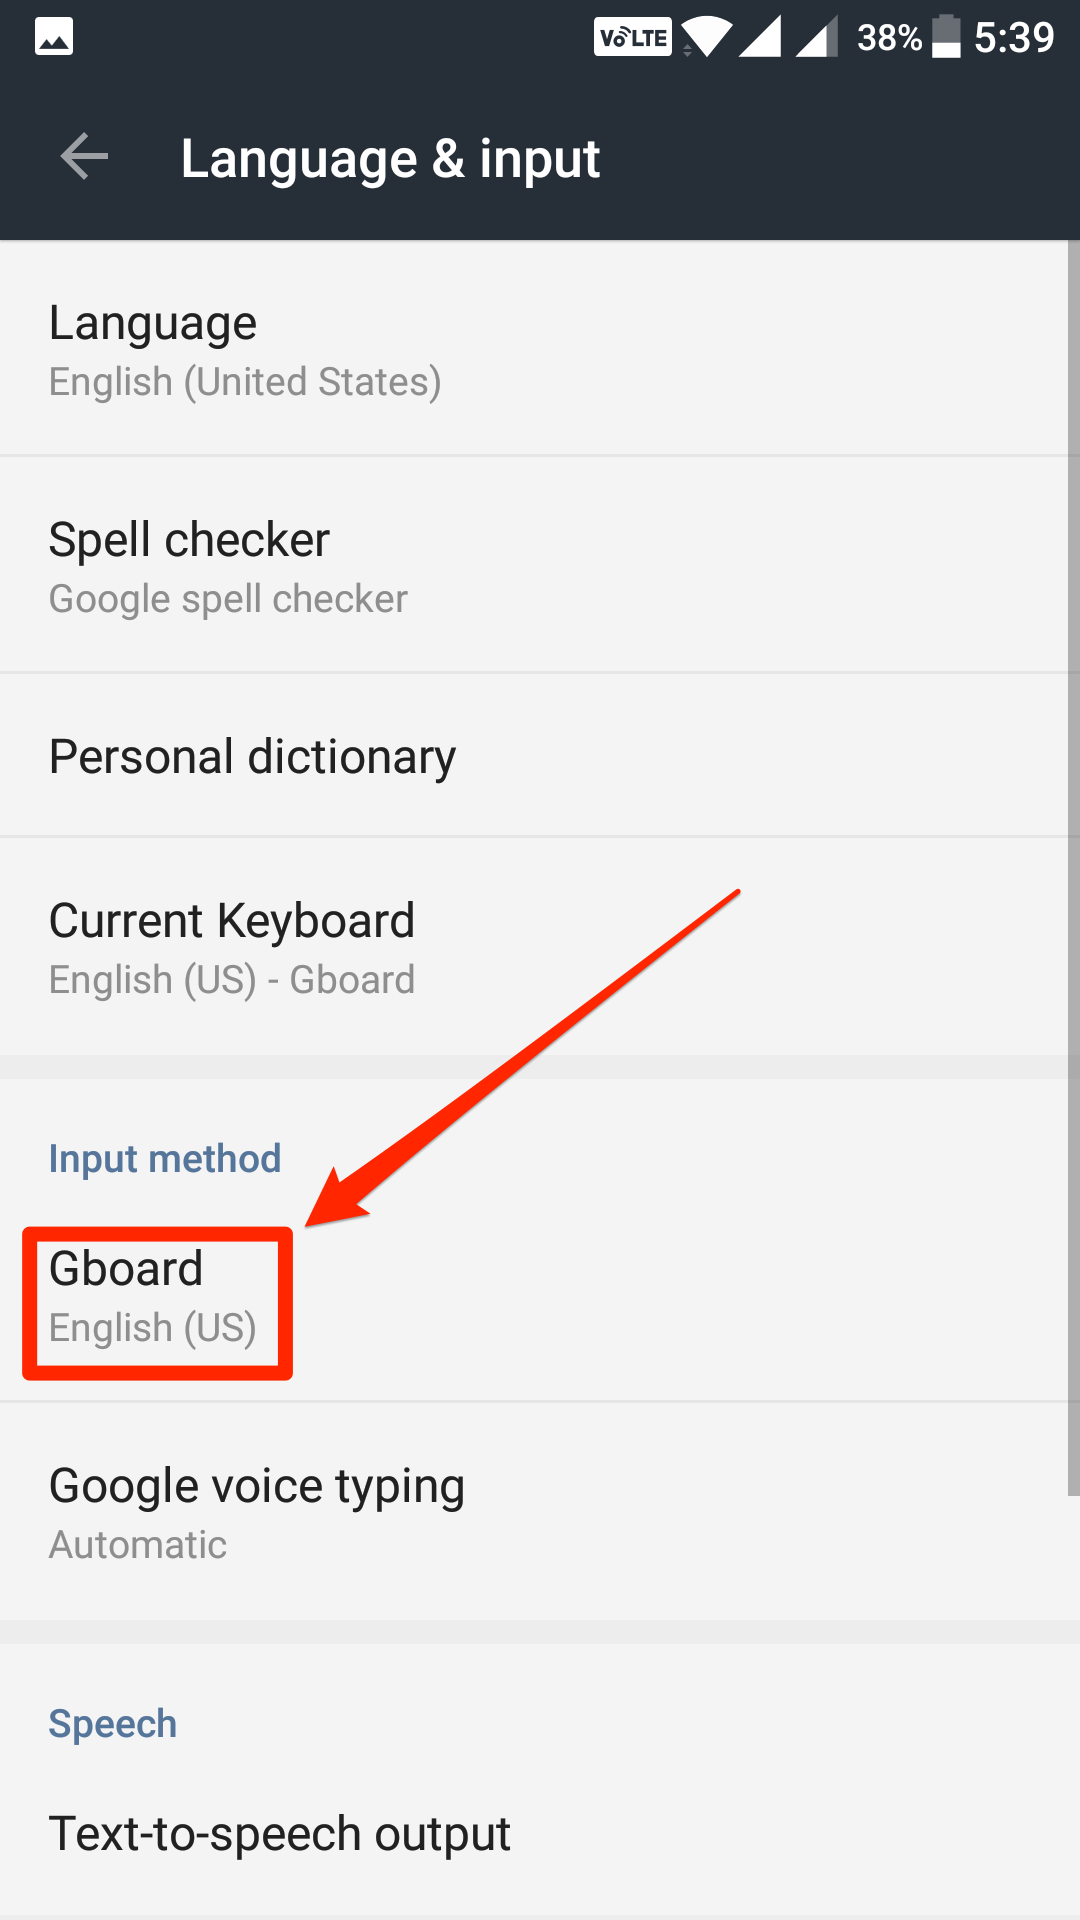
When the language & input menu launches, you will find an option saying “Gboard” under the Input method section. Tap on it to open the Gboard keyboard settings menu.
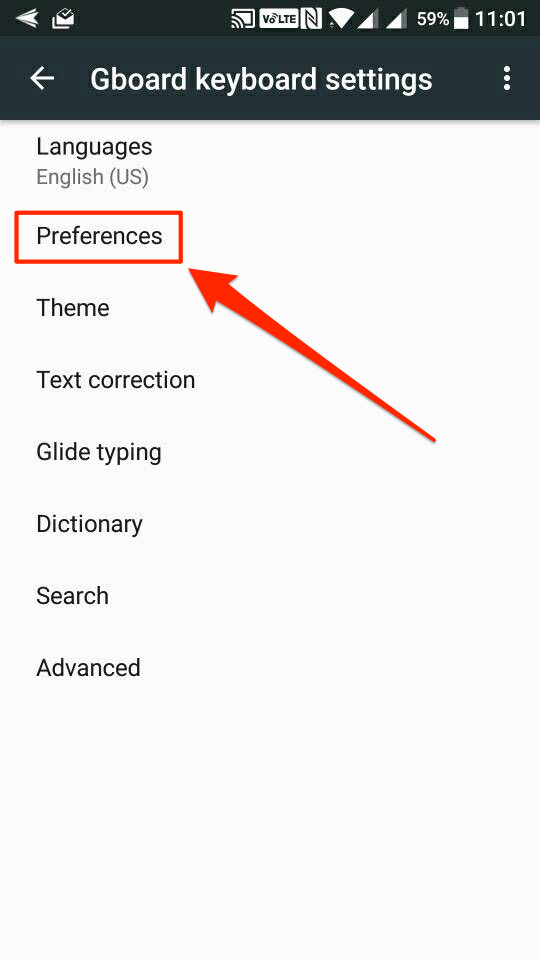
On the following screen, you will see all the settings that you can adjust for the Gboard keyboard on your device. The one that you are supposed to tap on is “Preferences.” So, tap on it and it opens the preferences panel for the Gboard.
Inside the “Preferences” panel, you will find an option that says “Number row.” This is the option that needs to be enabled for the number row to appear in Gboard. So, go ahead and turn the toggle to the on position for this option and the feature will be enabled.
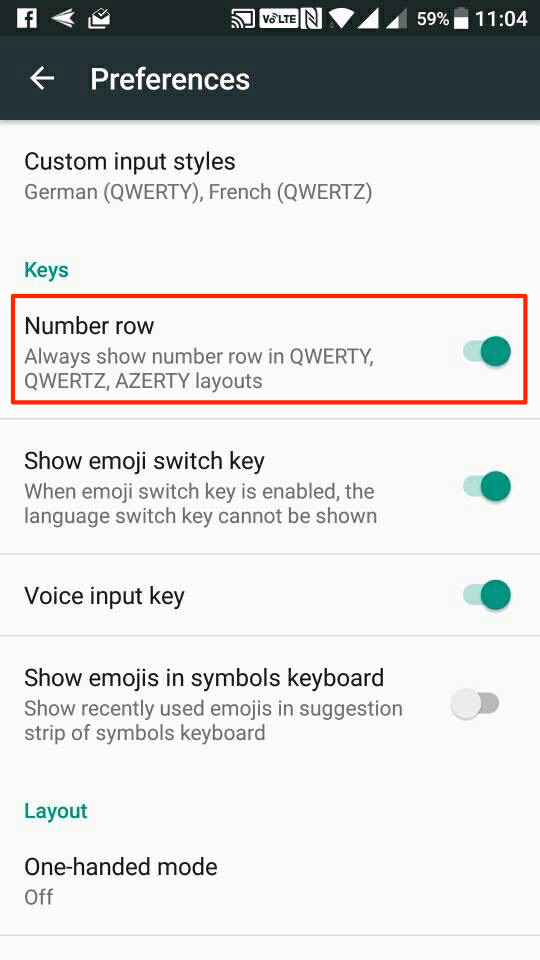
From now, every time Gboard pops up, you will see the number row.
So, that was how you could make Gboard always show the number row when you are typing something.
You might also be interested in:
- How To Change The Resolution Of Your Android Device Without Root
- How To Turn Photos To Black And White In Android
- How To Save Battery While Still Having Snapchat In Android
- How To Block Ads Without Root Access On Your Android Device
Have something to say? You can contribute to this tech article by leaving a comment below.