Last Updated on December 26, 2022 by Mat Diekhake
User Account Control, or UAC, is one of Microsoft’s new fundamental security features on offer in Windows 10.
Microsoft has made many security changes over the last few versions of the Windows operating system. To date, Windows XP has been many people’s favorite OS to use, but its security was far inferior in comparison to today’s standards that comes with Windows 10.
One of the most significant changes has been Secure Boot that prevents any unsigned program from booting up at startup. Back in the days of Windows XP, malicious code often used this technique to install itself onto a computer. These days that option is completely blocked from the operating system—if it isn’t signed off by Microsoft then it cannot run.
It’s the same type of wall that Microsoft created with Secure Boot that makes user Account Control so efficacious too. The way it works is by prompting consent from the user before any token that required an administrators account can run. In other words, if you go to open a program that is only available from an administrators account, UAC will pop up on the display, and you’ll need to confirm the action before continuing. This stops any potentially malicious code from running itself, and the only price you as the user needs to pay is taking an extra few seconds to wait for UAC to let you start using that program. For now, using UAC seems like a pretty foolproof idea for most people.
That said, though, UAC won’t be for everybody: if you are an administrator and always using programs that prompt UAC, then having to give consent over and over again will get pretty old in a hurry. Fortunately, the Windows 10 operating system does allow for you to turn it off if you ever want to disable it. And you don’t even have to delve into the registry to make it happen either, although there is a registry tweak that you can use if you prefer as well.
You can visit the Microsoft website for more information on how User Account Control works if you’re interested in reading more about it.
Changing UAC Settings with User Account Control Tools
There are some tools out there that can help you change the User Account Control settings if you don’t want to go to the effort of doing it manually. The first, appropriately named UAC Controller tool, lets you change the UAC permissions from the system tray. If you don’t want to add too many programs to your computer, or you don’t want any additional tools showing up in the system tray, then you might prefer using the Winaero Tweaker. The Winaero Tweaker is one program that can do many things for your computer, one of which is change the UAC settings by navigating to Accounts > Disable UAC once you’ve got it open.
How to Turn Off and Disable UAC from Control Panel
You can turn off and disable User Account Control (UAC) directly from the Control Panel in Windows 10. Here’s how to do that:
1. Open the Control Panel by beginning to type Control Panel into the search field in the taskbar and then clicking on the Control Panel desktop app result under the Best match section.
2. Use the menu in the top right side of Control Panel to bring up its more classic view with the smaller icons, and then click on the User accounts link.
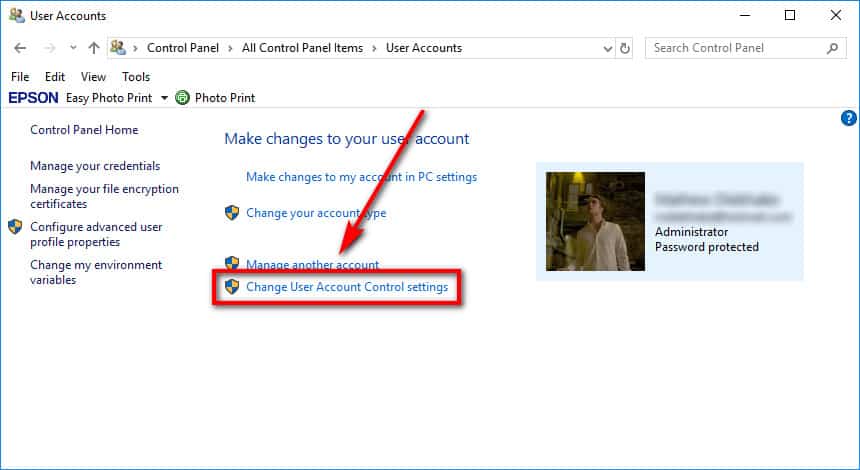
3. Under the Make changes to your user account heading, click on the Change User Account Control settings link.
4. Use the slider on the left side of the User Account Control settings page to turn it off. After setting it to Never notify, click on the OK button to confirm the changes

How to Turn Off and Disable UAC from Cortana Search
You can also get to the User Account Control settings by using the Cortana search field in the taskbar instead if you can’t open Control Panel during your time of visit. Here’s how you can do that:
1. Start typing UAC Settings into the Cortana search field, and then click on the Change User Account Control Settings link for Control Panel under the best match section at the top of the window.

2. You’ll now see the same User Account control screen where you can change the UAC level and then confirm the changes before you leave by clicking on the OK button.

How to Turn Off and Disable UAC with Registry Tweak
You can also dig into the registry and change the User Account Control settings that way if you ever need to. Here’s how to do that:
1. Open the Registry Editor by pressing the Windows logo + R keys to bring up the Run dialog and then typing Regedit and hitting the OK button.

2. Since this is an administrative program, you’ll be prompted by User Account Control. Click on the OK button to continue opening the Registry Editor.
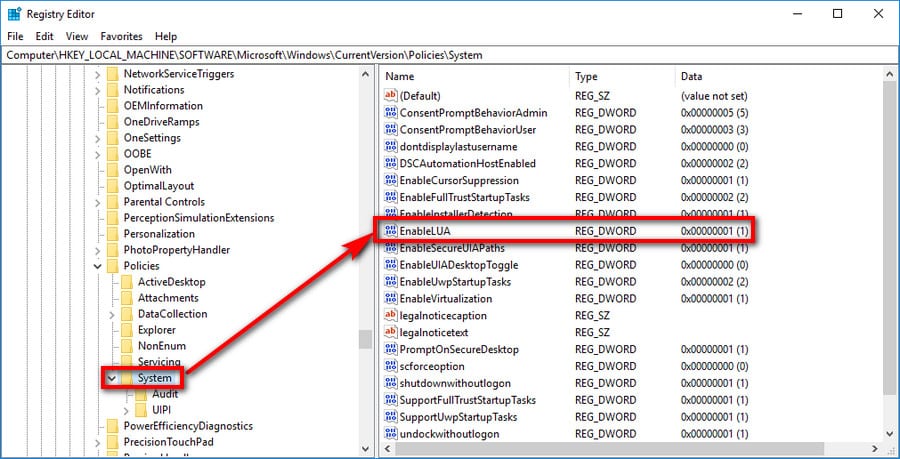
3. Next, using the left side pane, navigate to the following path:
HKEY_LOCAL_MACHINE/SOFTWARE/Microsoft/Windows/CurrentVersion/Policies/System
4. Once System has been expanded, click on the EnableLUA link from the right side pane.
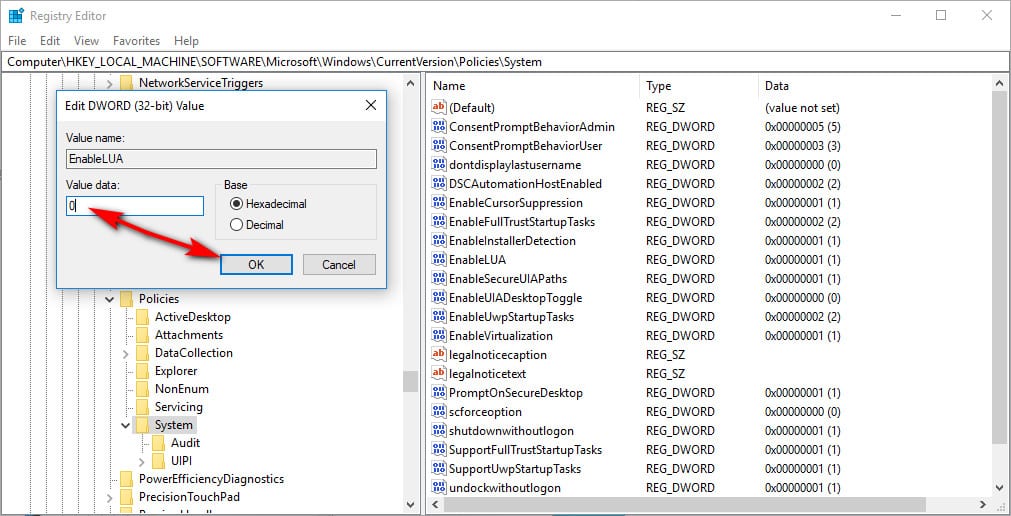
5. Change the Value data to 0 and then click on the OK button to save the DWORD changes.
That’s all.
This article was last updated on May 21, 2019.
Related Tutorials
- Reset Password of Local Account or Microsoft Account in Windows 10
- Change Account Type in Windows 10
- How to Change Account Username in Windows 10 When Signed In to Microsoft Account or Local Account
- How to Change Password of Account in Windows 10
- How to Remove Old User Account Pictures in Windows 10
- Enable/Disable Built-in Elevated Administrator Account in Windows 7