When you first setup the Windows 10 operating system on the computer, you are asked to either create a Microsoft account or log in to an existing one. Once you are inside the Windows 10 operating system, you can choose to exchange that Microsoft account for a local account if you prefer.
Regular readers of ours will already know we’ve covered many times the main reasons for Microsoft wanting people to use Microsoft accounts: it allows them to sign in to the account from multiple devices anywhere and allows you to download applications from the Windows Store.
Apart from teaching people how to swap the Microsoft account for the local user account, we haven’t done many guides on accounts—but one of the things that is possible to do is rename the Microsoft account or the local account in Windows 10. Doing so will save you from having to delete the current account and create a new account if you ever want the name changed.
How to Change Microsoft Account Name in Windows 10
Click on the Start menu.
Click on the “Settings” gear icon from the Start menu
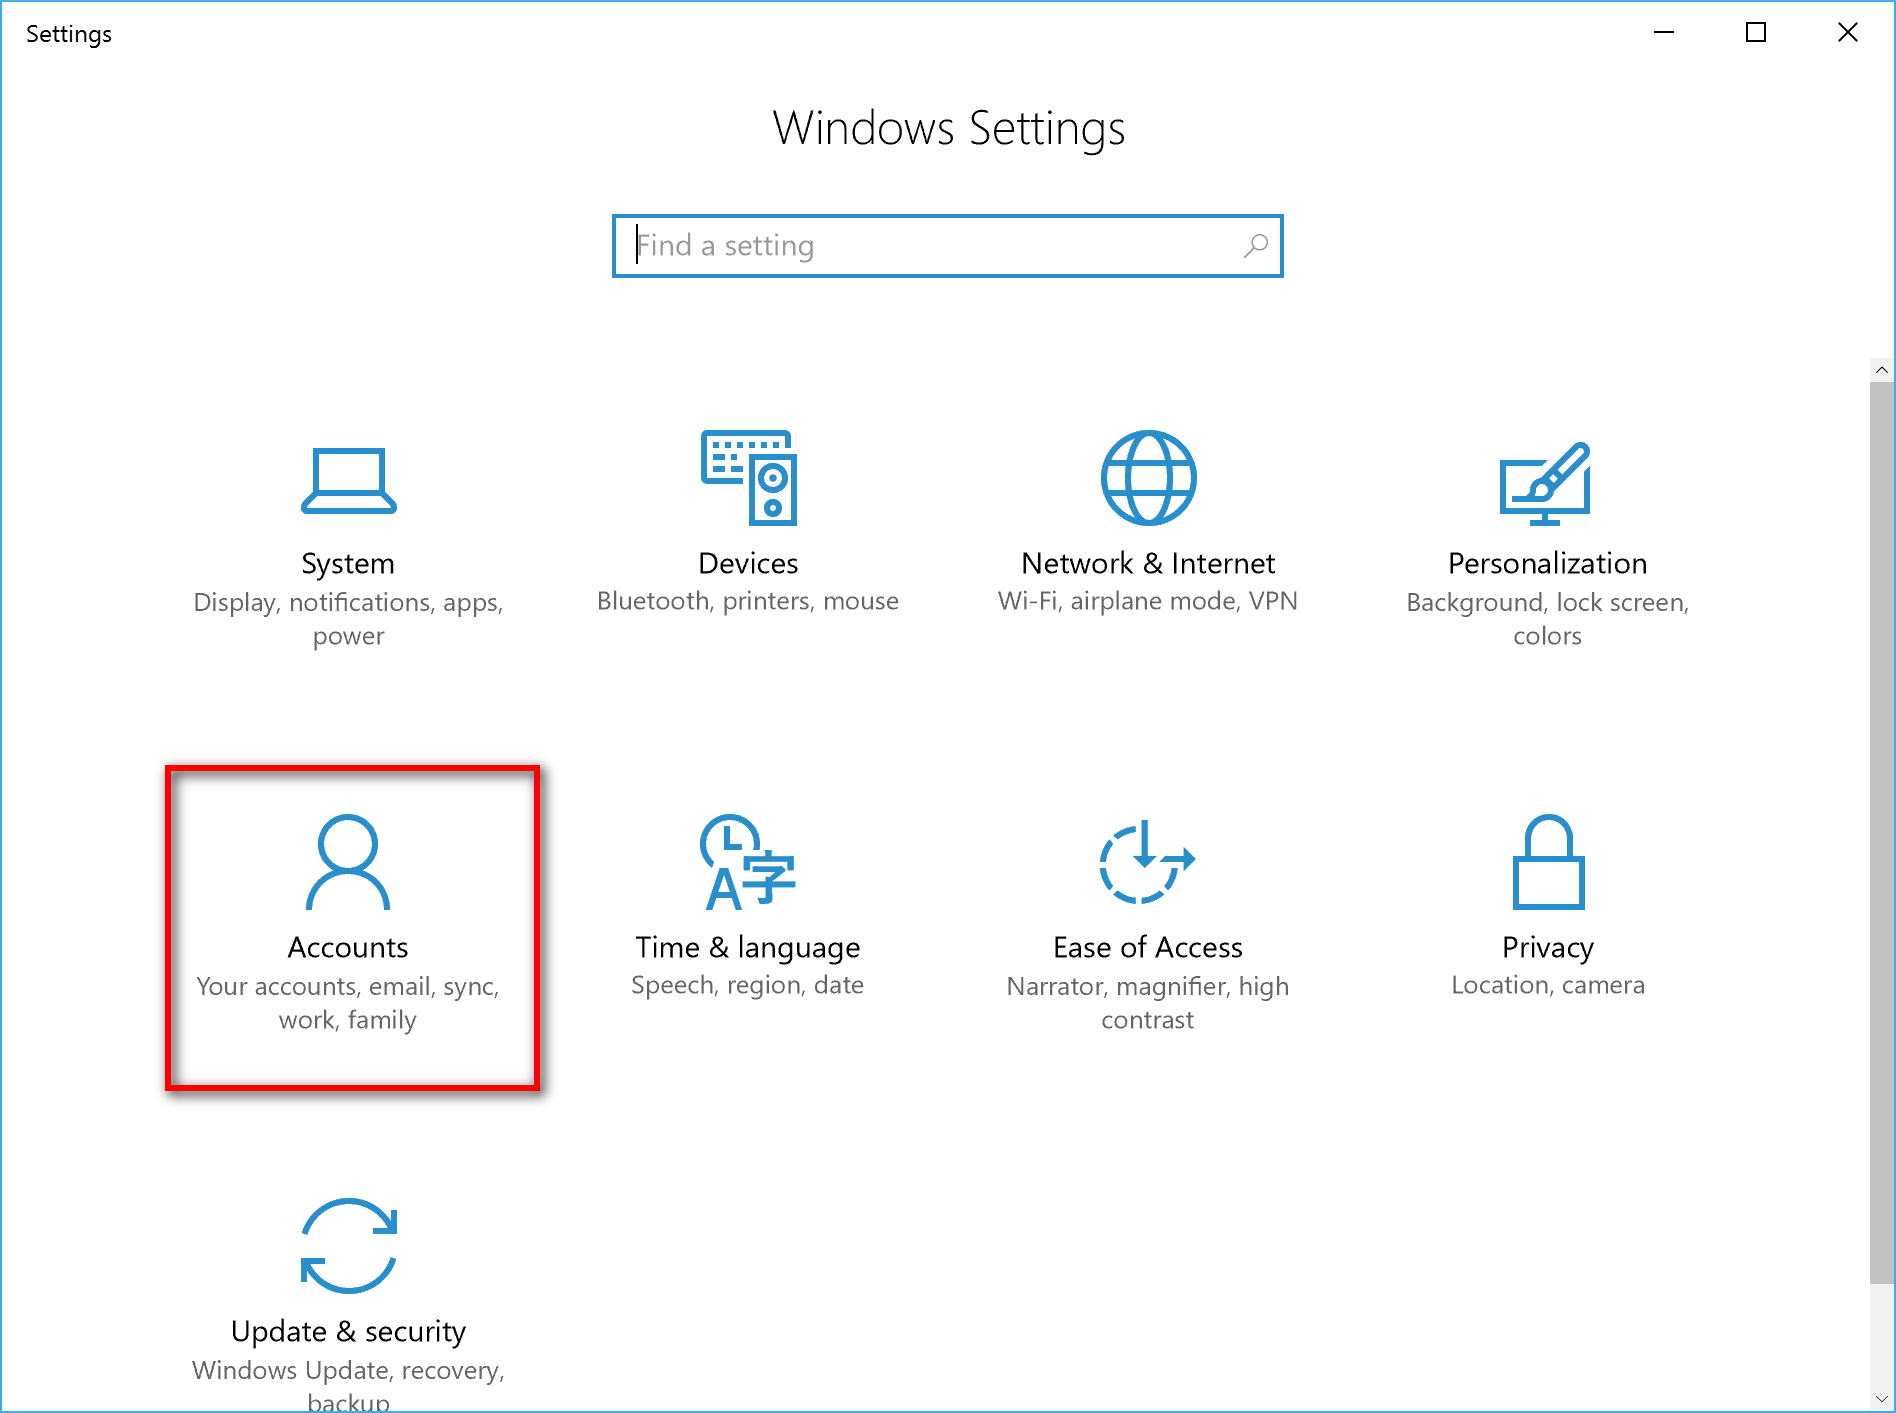
Click on the “Accounts” option from the Windows Settings screen.
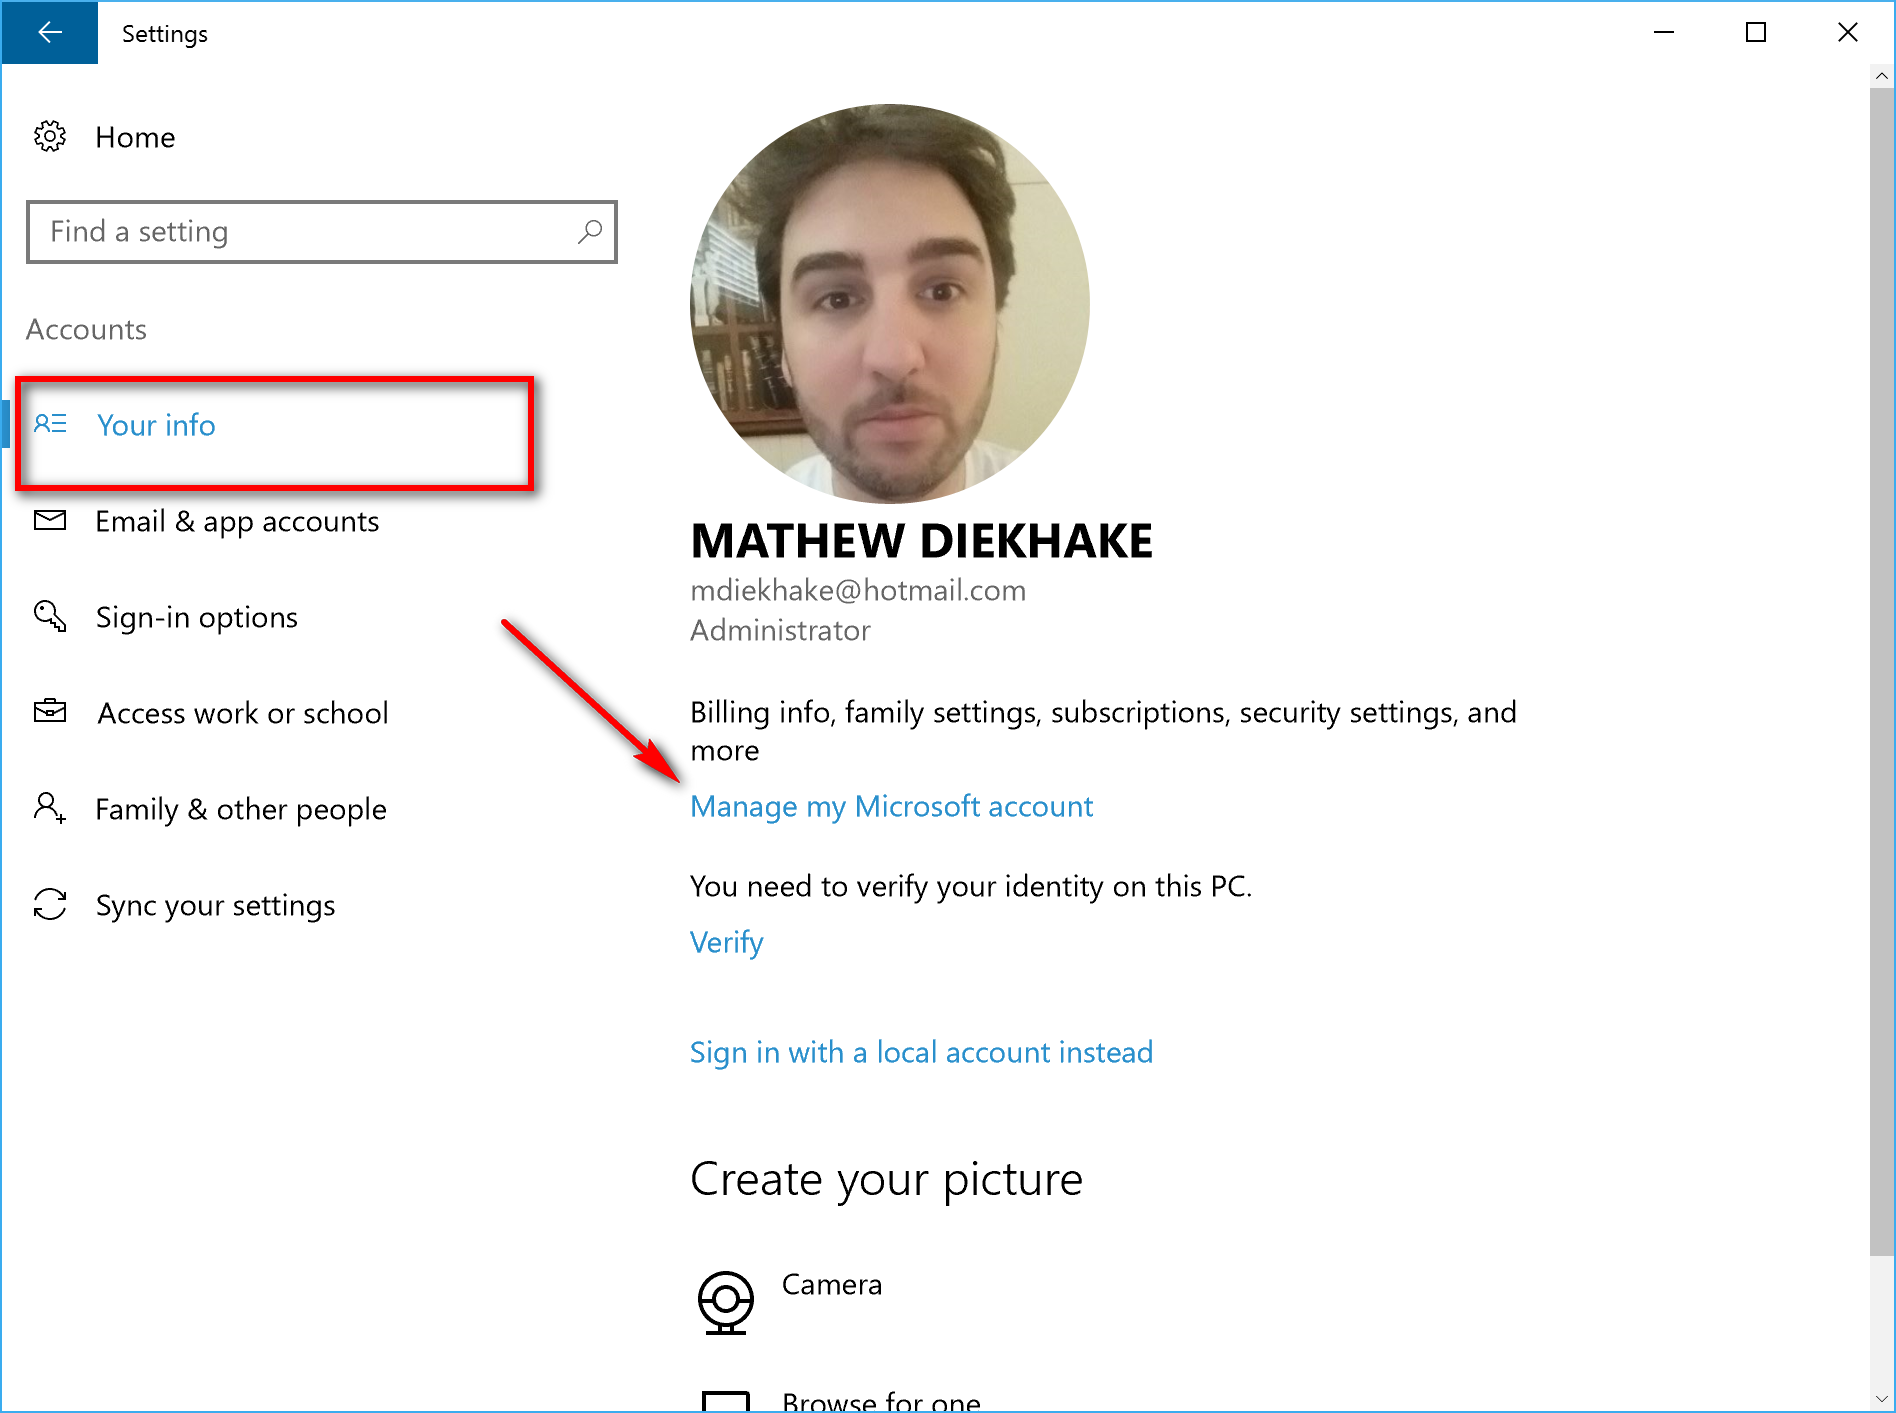
Click on the “Manage my Microsoft account” from the right side of the computer’s screen when you have clicked on the “Your info” section from the left pane.
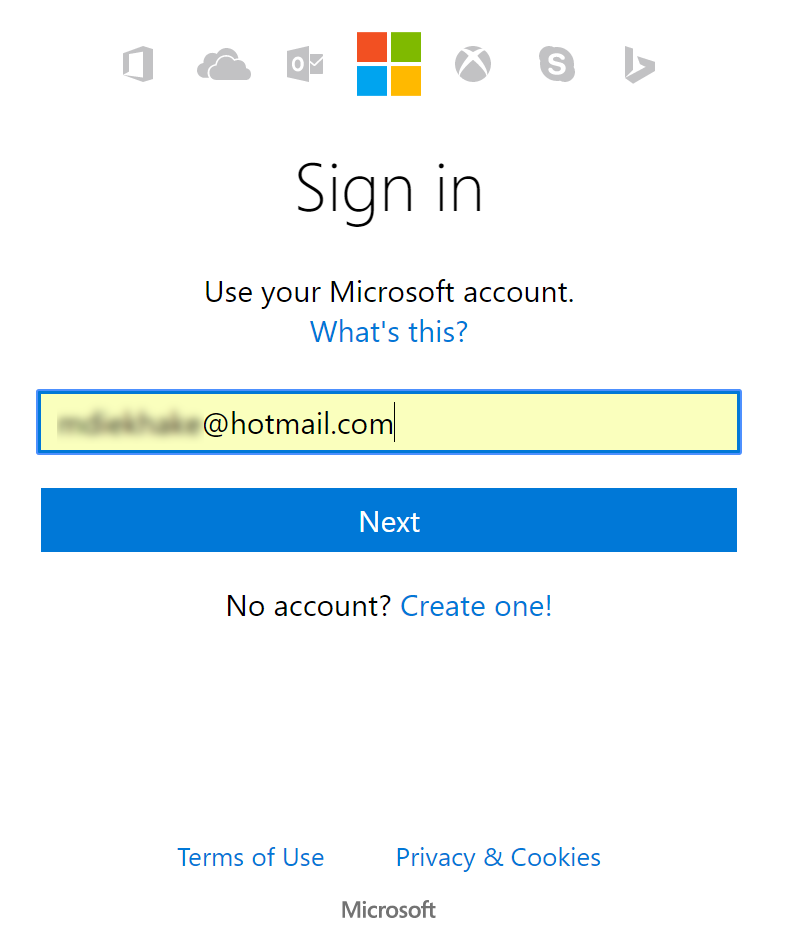
Log into your Microsoft account if it is not logged in already by clicking on the “Sign in with Microsoft” button.
Enter your email and password for the Microsoft account.
Once you are logged in, click on the “Edit name” link next to where it shows your name.
Change local user account in Windows 10
Type “Control Panel” into the search field available in the taskbar.
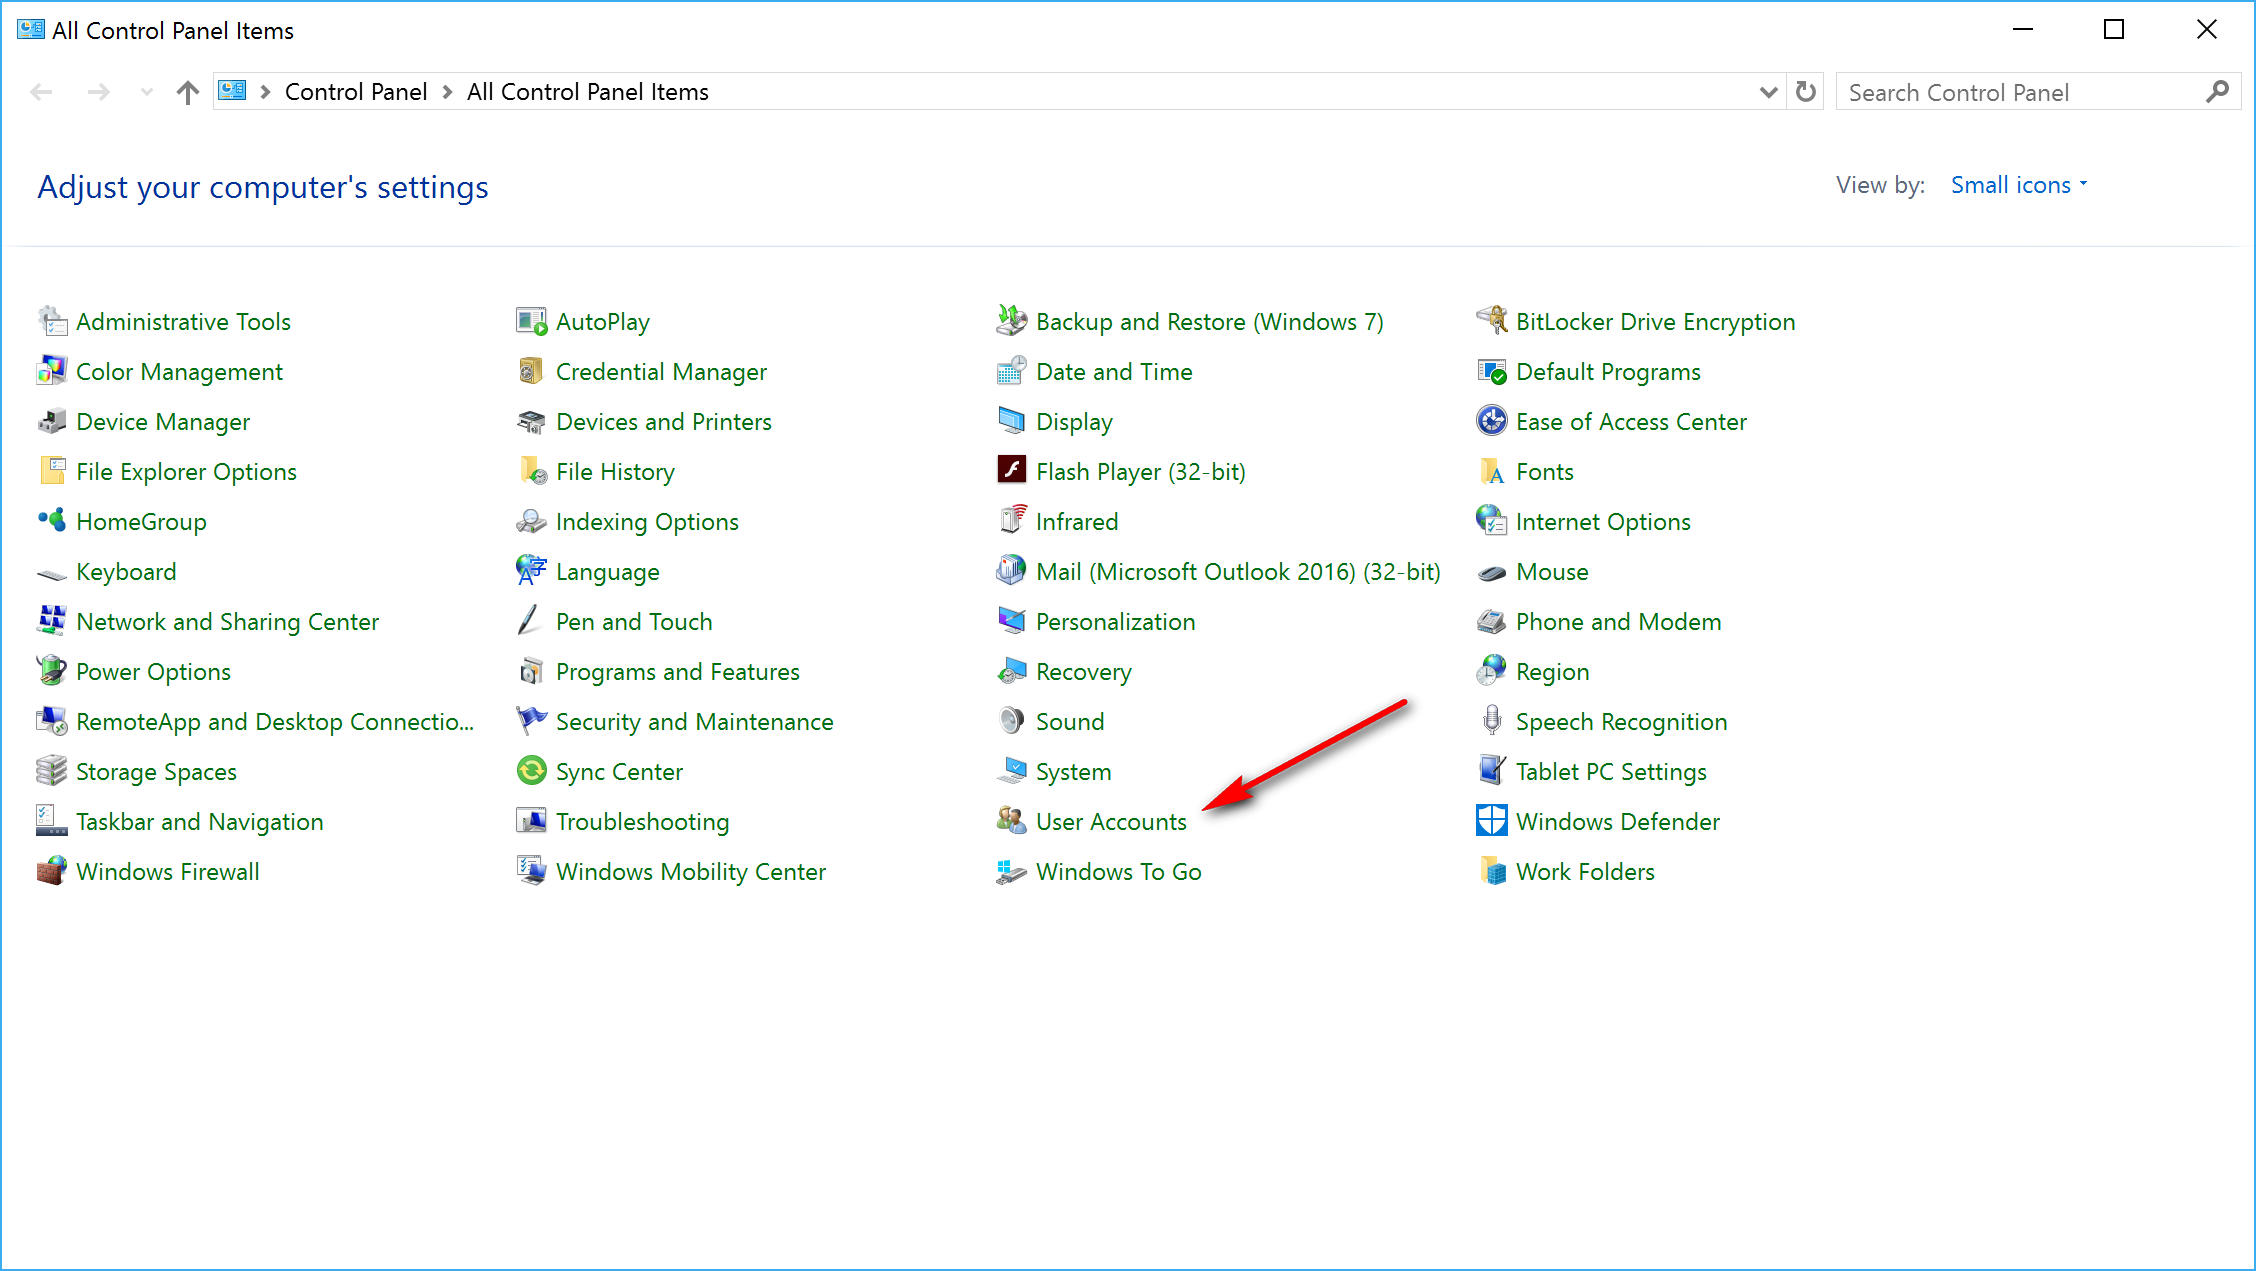
Click on “User Accounts” from the Settings screen. (If you can’t see the option that says user accounts there in the menu, then try clicking on the “View by” drop-down menu in the top right-hand corner of the screen and then change it to “Small icons” and it will be available.)
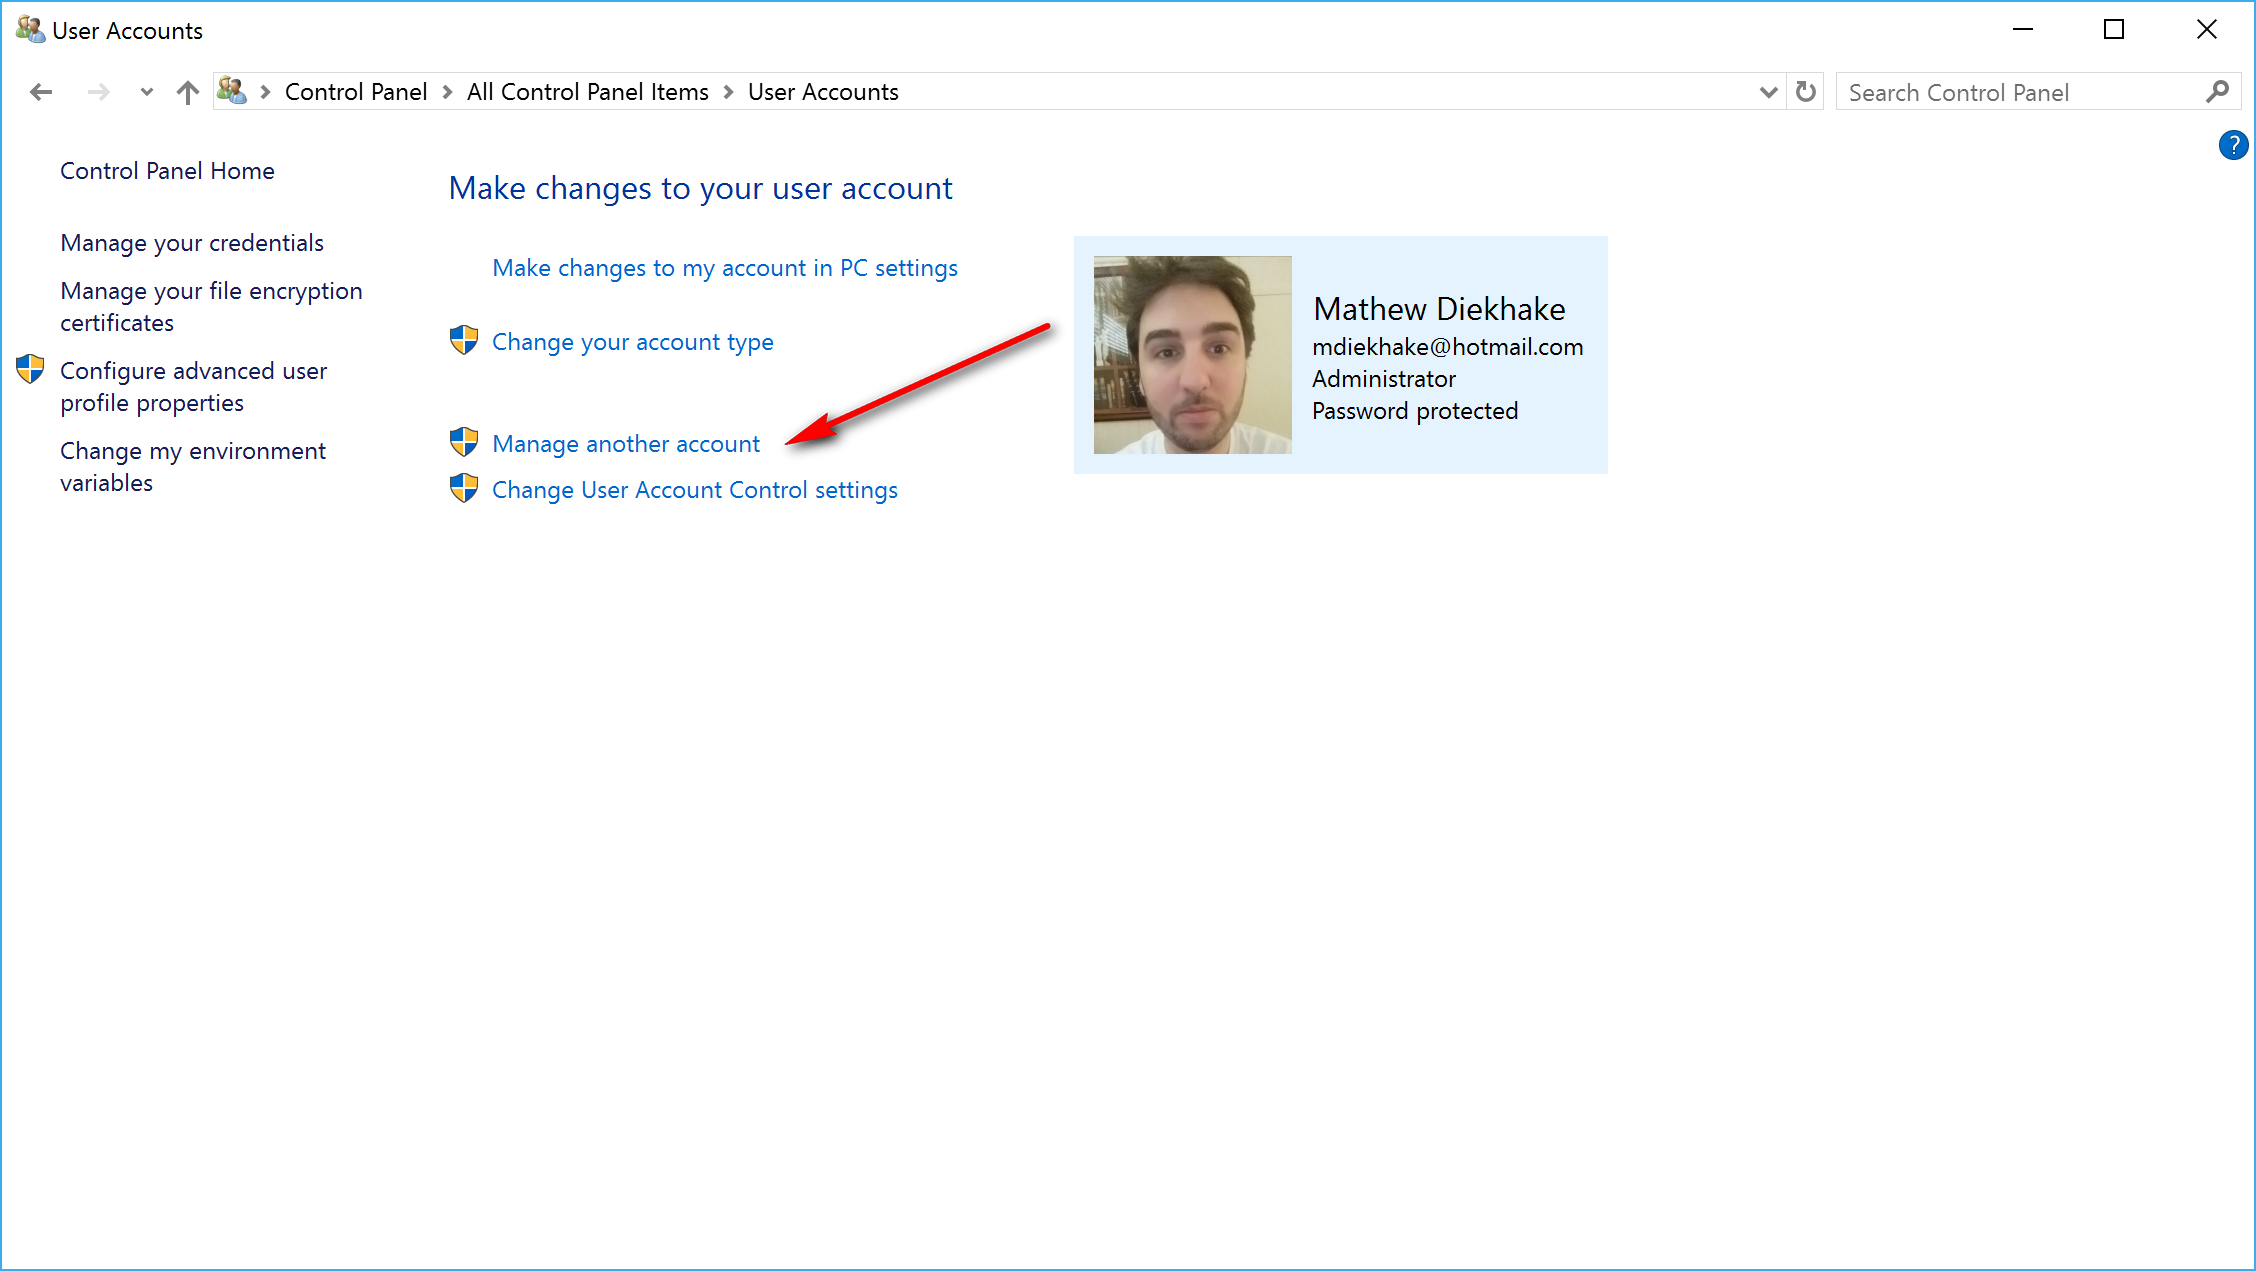
Click on the account that you want to alter the name of — my laptop only has the one account, but you will see all of your accounts on this screen and need to click on the right one that represents the account name you want to be changed.
Click on the “Manage another account” link next to your name and then if your account permits it, you then get another blue link appearing from the following screen that says “Change the account name” that you must click. Click on the “Change name” button after you have entered the new name that you desire and then it is saved.
The Microsoft account you use now has a new name as does the local user account on the computer.


