Last Updated on December 26, 2022 by Mat Diekhake
If there is one version of the Windows operating system that most people believe should never have happened, it is Windows Vista. At one point, Windows fanatics liked to think of Vista as something that was different and not a continuation of Windows XP for businesses when in fact the Windows developers had every intent of people using it for businesses and personal purposes just like they were with Windows XP.
Windows Vista wasn’t all bad, though, and there are still some things that the most current and up to date versions of Windows 10 use—one of them being the Windows icons. The Windows 10 icons are the same icons that were first introduced with Windows Vista way back in November of 2006.
There is nothing built into the Windows 10 operating system that allows you to change the look of these icons. What you can do though is download a third-party application developed by a third-party person called CustomizerGod. The CustomizerGod program was designed for earlier versions of Windows, so fans of changing the look of the icons may already have heard of the name. The difference is that up until recently there was no way for the tool to work for versions of the Windows 10 operating system. The developer has updated the CustomizerGod program now, and it works for all versions—both pre and post Anniversary Update. Moreover, there is a new update available called the Creators Update which is currently available for people to install via the Windows Insider program.
As with all good things associated with some kind of God Mode, the CustomizerGod tool can change all of the icons available in the Windows 10 operating system. All up there are hundreds of different kinds of icons that can be altered to better suits your needs.
How to Change the look of the Windows 10 icons
Download the CustomizerGod package to the computer.
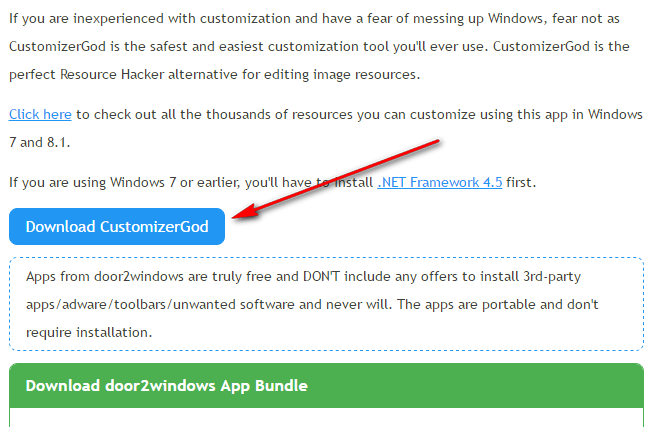
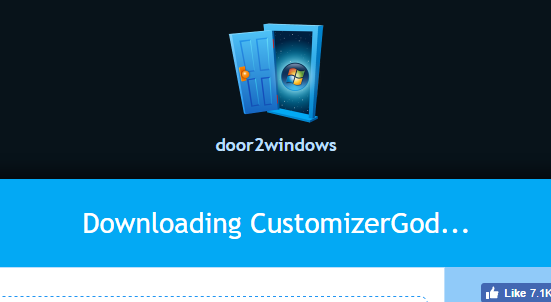
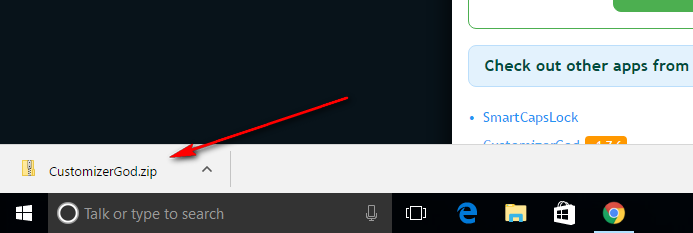
You get a message from the page letting you know that you are downloading the CustomizerGod package to the computer and then it appears above the taskbar as a file downloading.
Wait for the download to complete and then click on the file. When opened, choose the option to “view in folder” to find the folder where your file is located on the computer.
You’ll see that the file needs extracting when the folder opens. To extract the file, right-click the mouse or touchpad on it and then choose the “Extract here” option from the menu.
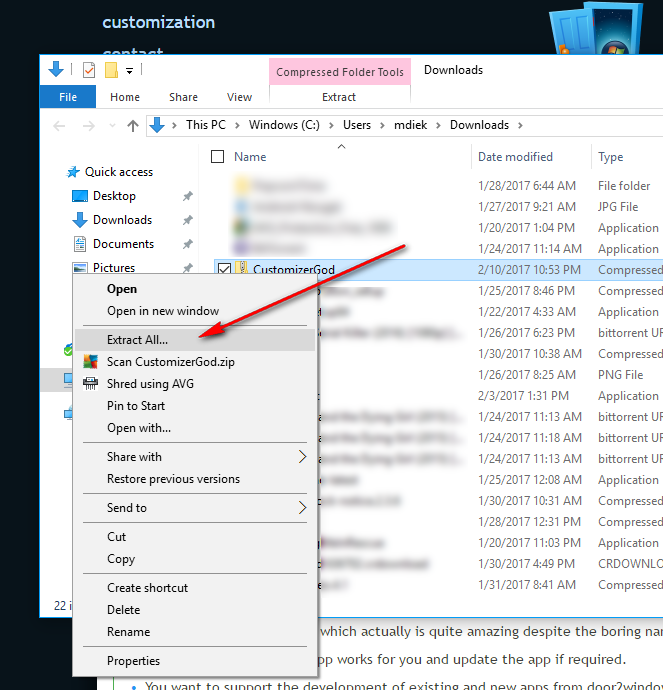
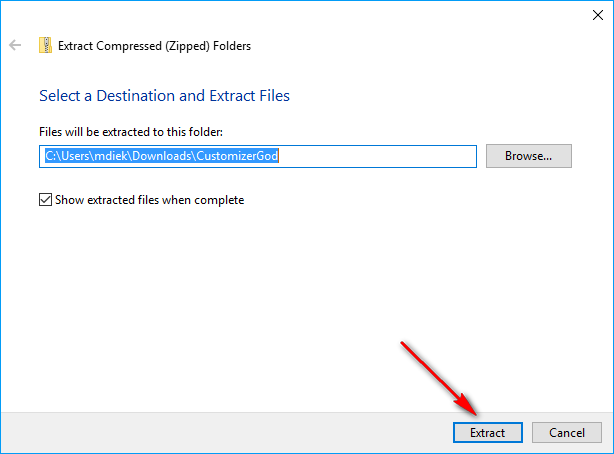
Choose the destination where you want the file stored. Leave it as the default settings if you don’t have any preference and then click on the “Extract” button available at the bottom.
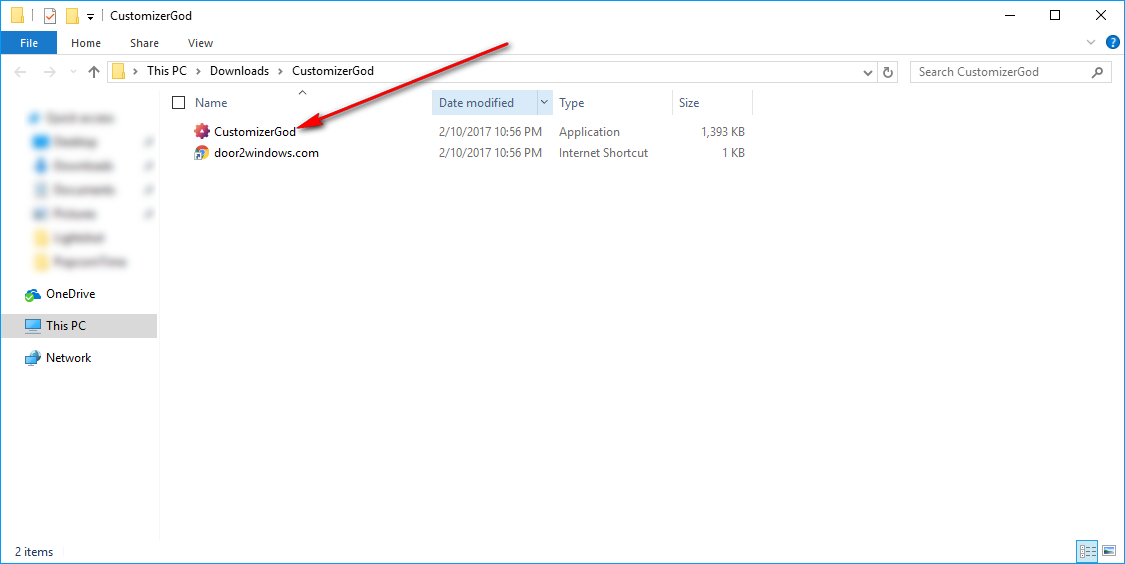
Click on the application when it becomes available. You know the file is extracted when you can see the correct logo of the application like in the screenshot below. Note that if you are logged into the computer using an account that is not the administrators, you cannot open the file because it doesn’t have the require permissions to run this tool. Log out of the current account and then log back in with the admin account and the application opens so you can use it. Make sure you take notice of the exact file location before closing it if you do have to log back out and into a different account to have the necessary permissions. That way you can find it again.
Once opened, you get to see how powerful the CustomizerGod application really is for your computer running Windows 10. A look down the left side pane shows
![]()
The CustomizerGod homepage shows you an example of what can be done with the Start menu button if you wanted to change it. It’s just one of the examples of what this tool can do. You can also change the charms bar, general icons, the Explorer ribbon, volume tray icons, network tray icons, Action Center icons, Login screen and much more.

The same page also gives you an example of what the General icons can be changed to with the click of a button. All you need to do is highlight the icon that you want to change and then click on the “Change” button at the bottom. Restoring the older button is easy too: just click on the “Restore” button that is available at the bottom right beside the Change button.
![]()
The Windows 10 icons are now able to be changed thanks to the CustomizrGod application that you need to install on your computer. If you have any problems with the app, you can click on the “Feedback” button that is available within the application and let them know about the problem you are having. The team of developers who update the app regularly, so it’s a worthwhile button to use.