Last Updated on December 26, 2022 by Mat Diekhake
Many people still love the Start menu that Windows 7 produced and prefer installing a tool like Classic Shell on Windows 10 to get it back. Those who liked Windows 8 will like the tiles that are still available from the Windows 10 Start menu that allow you to get access to applications quickly.
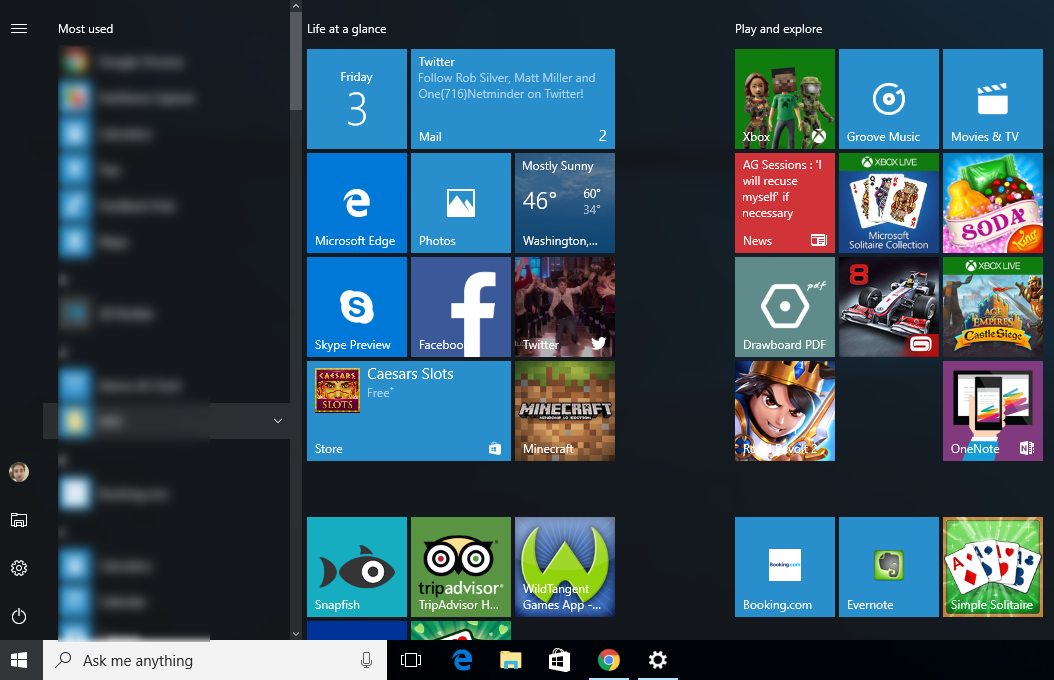
Tiles offer an easy way to customize the Start menu and to switch around the tiles, so you are showing the tiles you want to see and in the order that you want to see them. The stock version of the Windows 10 Start menu shows the “Life at a glance” section that offers the email client, the date, weather and things like social media — because these are the most popular choices for people to visit when they live their everyday lives. Directly to the right of that is the “Play and explore” section that offers the apps and the games.
The section on the right beneath the “Play and explore” section can be expanded if the current size of the Windows 10 Start menu is not large enough for you. That way you can display more tiles for you to access when you want them quickly.
How to Add More Tiles to Windows 10 Start Menu
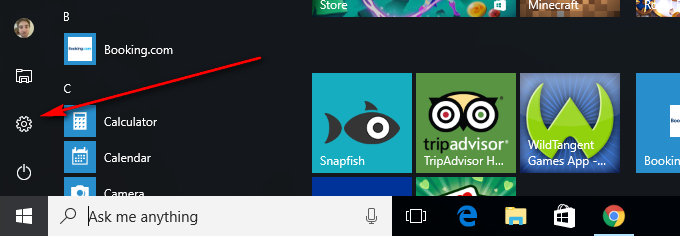
Click on the Start menu and then click on the Settings application from the Start menu’s left-hand side pane.
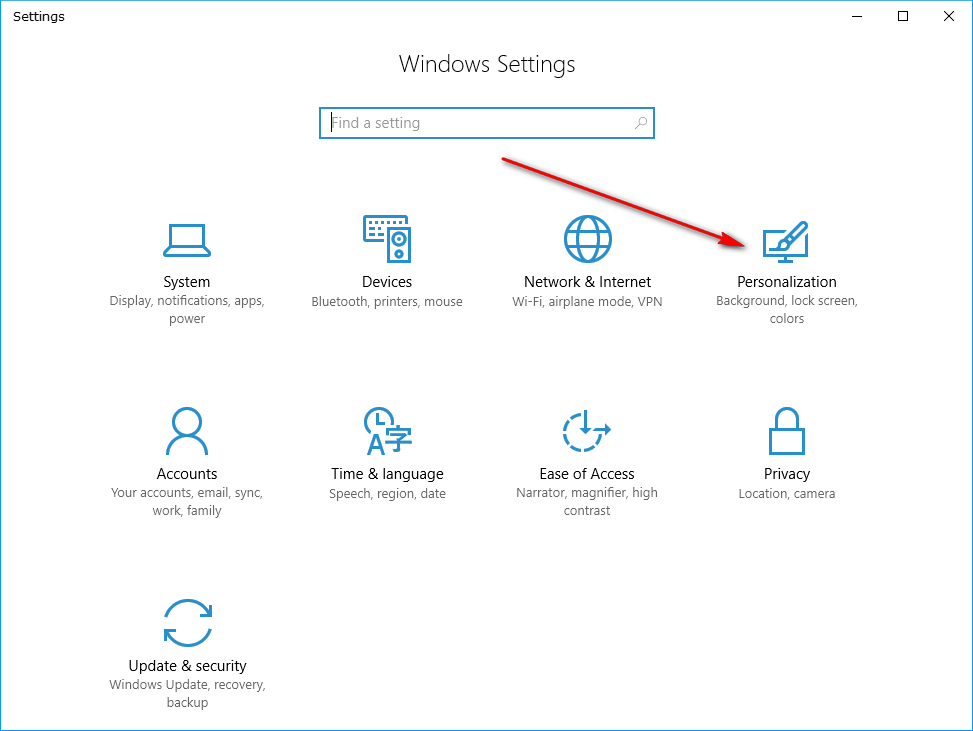
Click on the “Personalization” button from the Windows Settings menu. Depends on the size of your screen and the default setting of the layout, your buttons might be in a different location — but there will always be the Personalization button there on the screen from the Windows Settings menu.
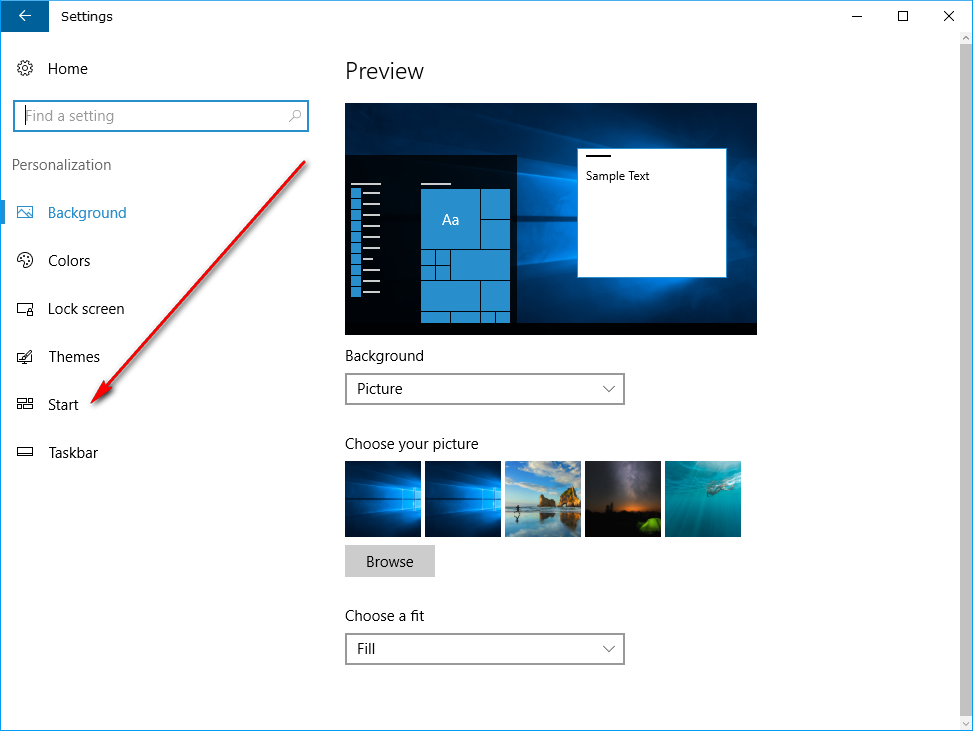
Click on the “Start” option from the Personalization’s left-hand side pane.
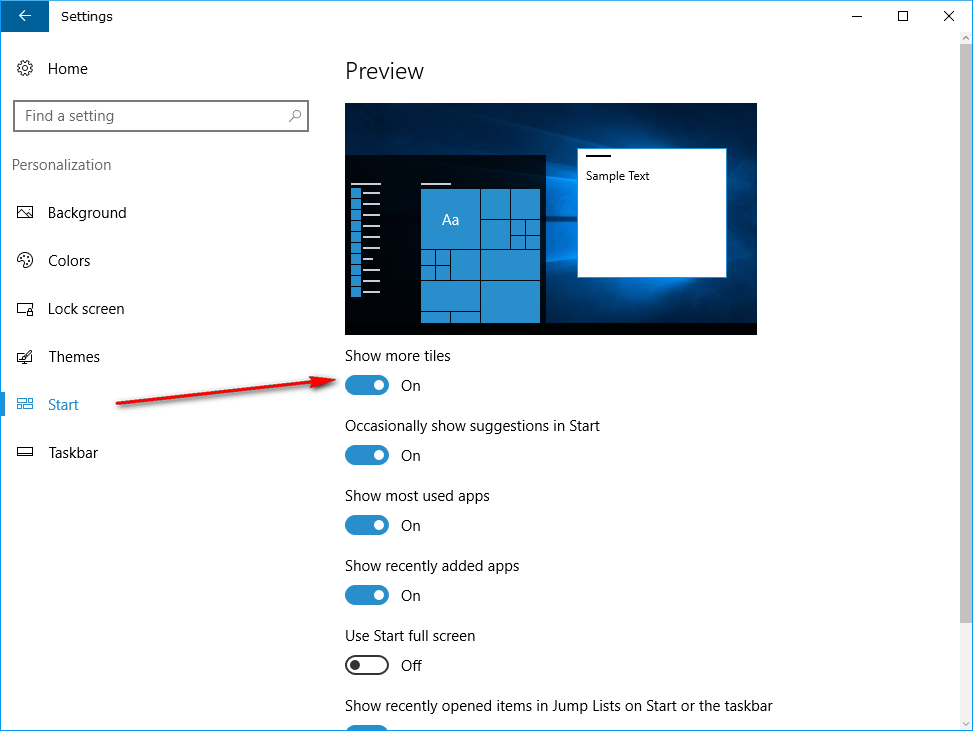
Click on the “Show more tiles” toggle switch so that it is blue. By default, it is turned off, so you only have the default amount of tiles available from the Start menu. Once this toggle is turned on, you can close the Windows Settings, and it remembers your preference of displaying more tiles.
Now if you click on the Start menu button (The Windows icon from the taskbar) and bring up the Start menu, you’ll notice there is a gap between the two different sections.
You can click on the applications that you want to add to the Start menu tile section and choose the option that says “Pin to start” to pin it to the Start menu. You can see in the screenshot below, I’ve pinned a few applications that were in my list of applications between the tiles and the left-hand side pane from the Start menu, and I’ve pinned them. The difference is that now you’ve got a fourth column appearing on the far right side. That is where your new applications that you choose to pin to the Windows 10 Start menu begin to appear.
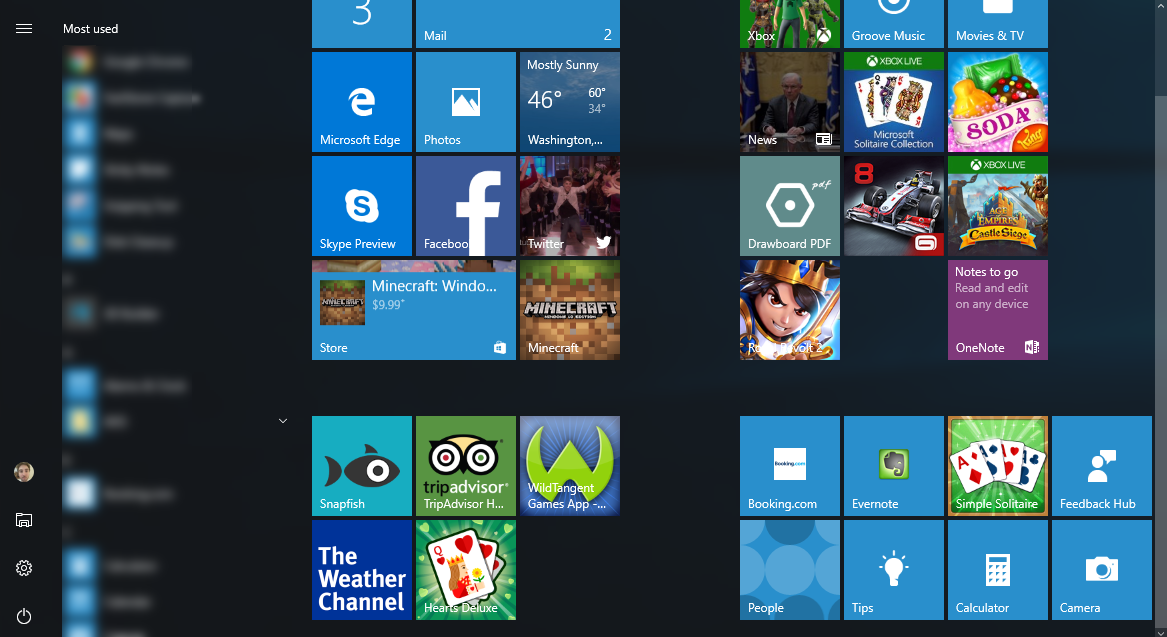
There is now a fourth column added to the Start menu in your version of the Windows 10 operating system. Hopefully, that has provided you with what you need to have all of the applications or programs that you wanted to be displayed as a tile on your personal Start menu.
January 28, 2019 @ 07:46
Some live tiles I appreciate while others I get annoyed I have to continually turn off. I don’t want the pictures on my pictures folder to continually flick through so whoever is walking past my computer can catch a glimpse of whatever picture Microsoft feels like pulling up at the time (not sure who would want that either).
But other tiles such as the weather are very good. I enjoy looking at the weather tile just to see the temperature. And I think it’s very nice of MSN to allow this because it basically would be resulting in far fewer clicks through to their website which might have made them money if they wanted it too.
In more recent versions of Windows 10 however (I’m currently running on Windows 10 build 18309) the weather has stopped displaying. I’m not sure how many days it has stopped for, it has seemed like today is apparently going to be 41 degrees for a long time. But I didn’t cotton onto this until now. It’s just when I try to think that I realize that it has been saying this for at least a while. I waited overnight to see what it would say today and it’s 41 again. Is there any troubleshooter for the Start menu or way to troubleshoot the live tiles apart from letting Microsoft know about the issue?