Last Updated on August 15, 2024 by Mathew Diekhake
The Settings application is your cornerstone in Windows 10. The idea behind it is to eventually completely replace the Control Panel that you’ve known from earlier Windows versions.
The Control Panel still exists in Windows 10, but much of what used to be there is now found in the Settings app. Microsoft has said that the plan is to continue the shift from the Control Panel until everything is eventually available in the Settings app.
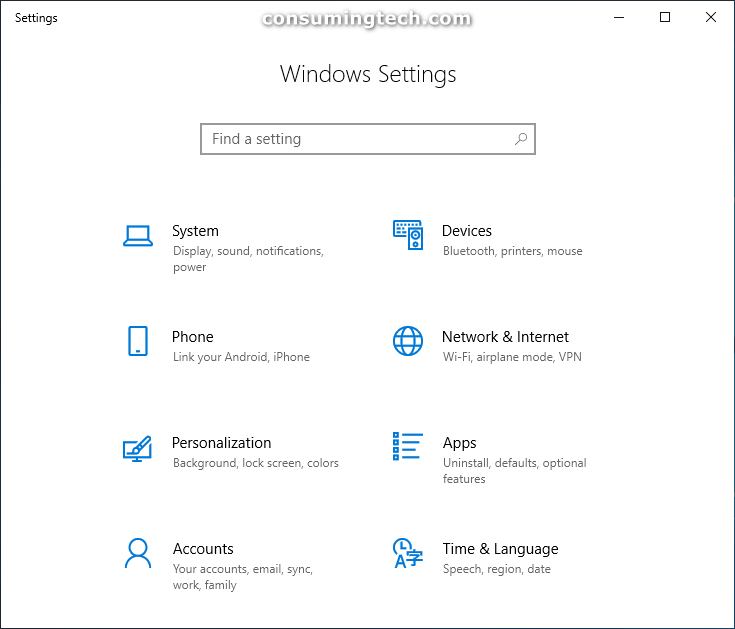
The following tutorial demonstrates how to open the Settings app when you’re using a version of the Windows 10 operating system.
Method One: How to Open Settings with Keys
1. You can open the Settings application by pressing the Windows logo + I keys on your keyboard.
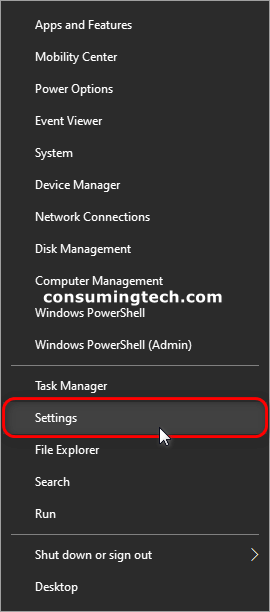
Method Two: How to Open Settings from Power User Menu
1. You can open the Settings application by pressing the Windows logo + X keys to bring up the Power User menu and then clicking on the Settings link.
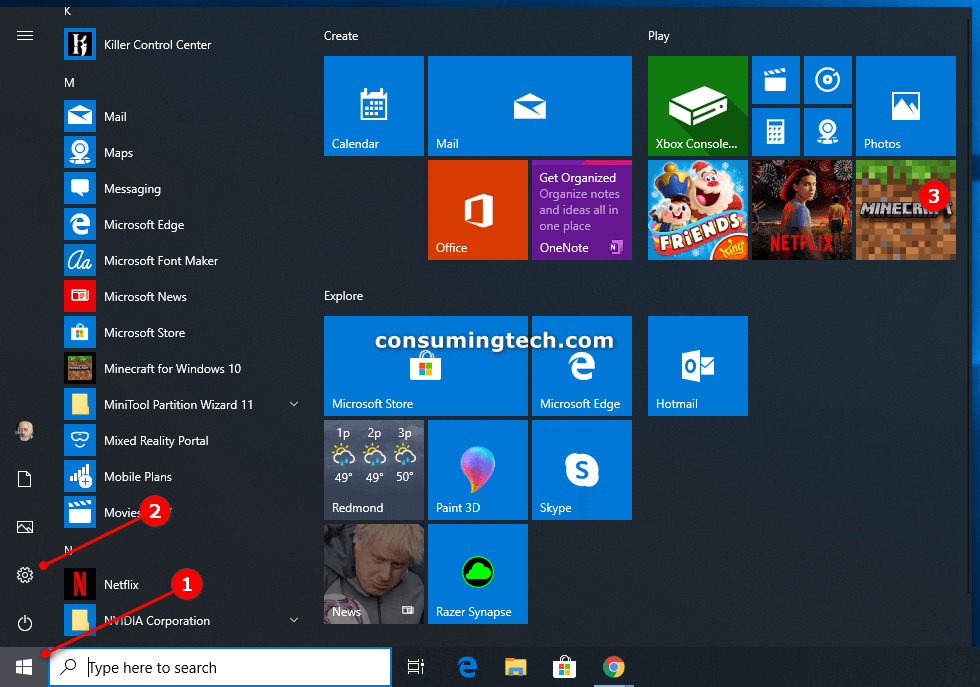
Method Three: How to Open Settings from Start Menu
1. You can open the Settings application from the Start menu by clicking on the Start button and then the Settings gear icon.
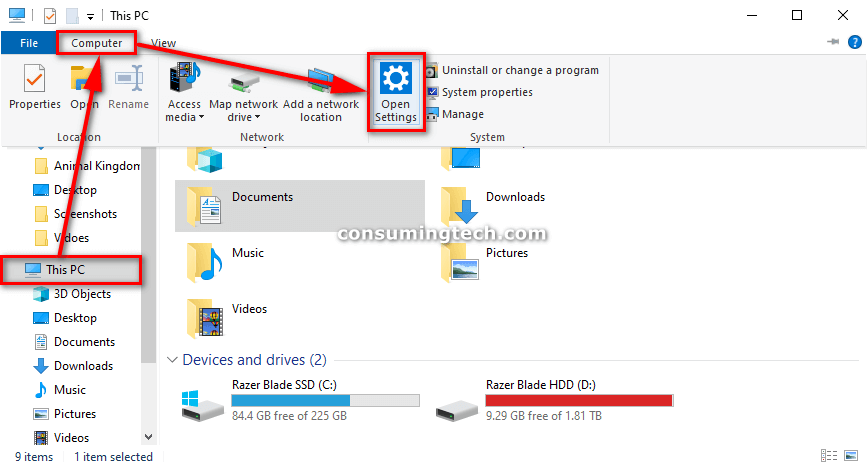
Method Four: How to Open Settings from File Explorer
1. You can open the Settings application from File Explorer by clicking on This PC from the navigation pane and then Computer and the Open Settings link.
Method Five: How to Open Settings from Action Center
1. You can open the Settings application from the Action Center by first expanding the menu and then clicking on the All settings link.
All Settings Pages
System:
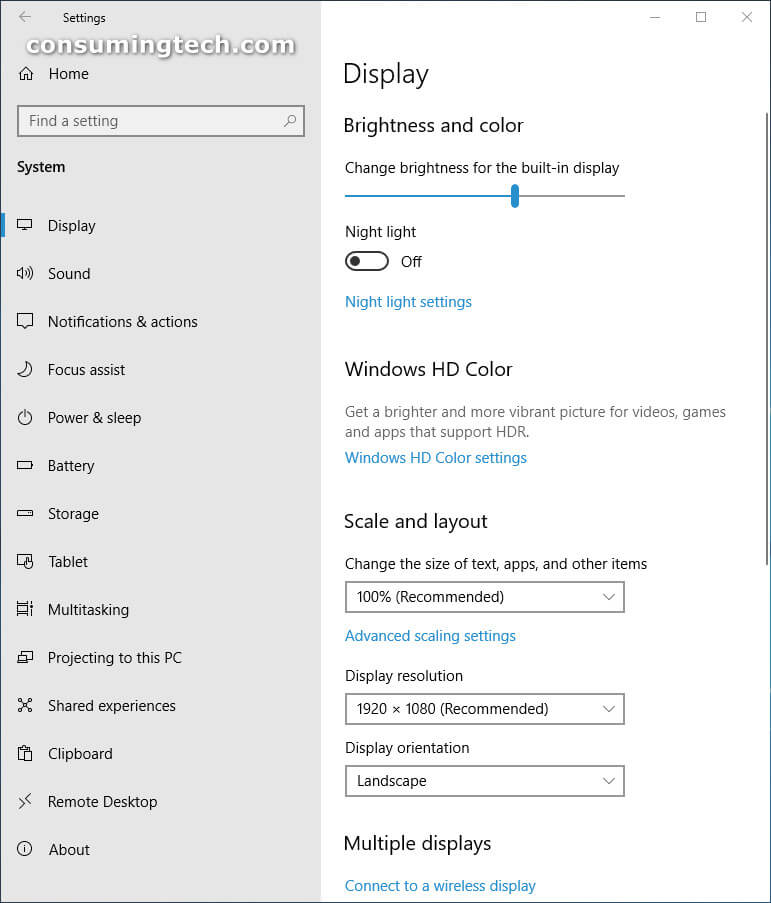
After clicking System from the Windows Settings menu, you will notice all categories for customizing the display first in the left side pane. You can change the brightness level from here. (The user interface inside the display section has changed quite a bit since before the Creators Update. You always had the chance to modify the brightness level by using a bar similar to how it shows now post Creators Update, but the brightness bar was further down the page. Microsoft has also chosen to remove the large picture of the display which was taking too much attention away from what else was on offer and making it harder than necessary to navigate. The user interface of the display section is definitely better after the Creators Update.)
Devices:
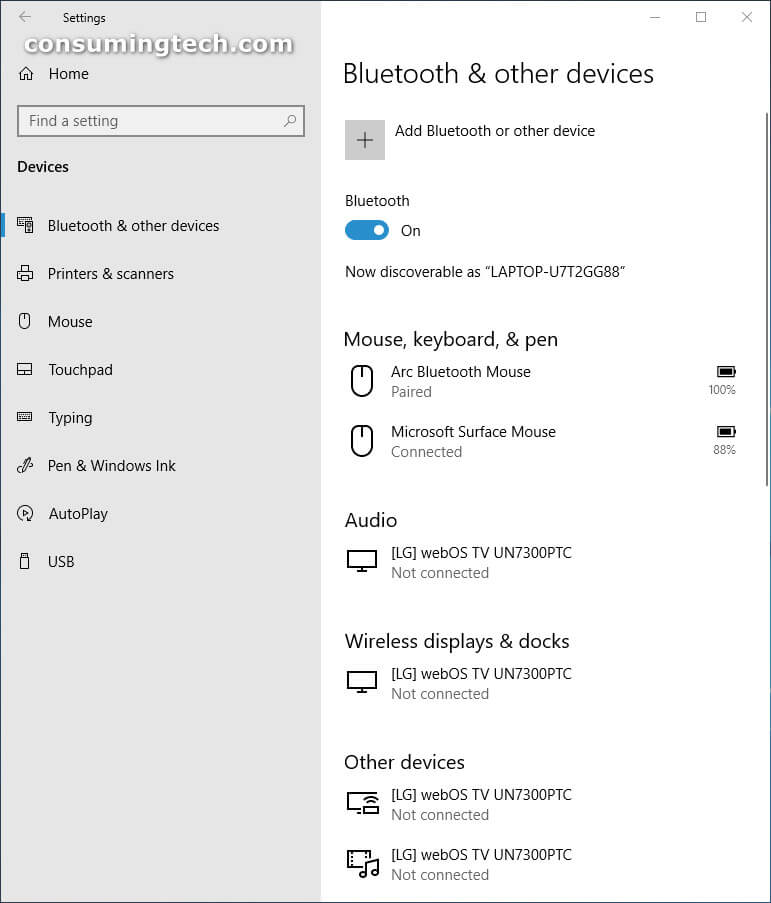
Inside the Devices section you can turn Bluetooth on or off, connect other devices like the Surface Book to USB 3.0 and connect other devices like the Surface pen that comes with the Surface Book and Surface Pro (plus the Surface laptop now), and use the Surface integration service. It’s also in here where you find the printers and scanners that you have connected to the computer. If you want to change the default printer in Windows 10, you still need to do that from the Control Panel. You can click also click on the Mouse from the left pane and choose how many lines the mouse scrolls each time, toggle the switch for scrolling inactive windows when hovered, choose to set the primary mouse button (between it being the left or right) and choose how many lines are scrolled when you scroll the mouse. The Touchpad link in the left pane gives you the chance to enable and disable the touchpad, choose to have the touchpad on or off when the mouse is connected, change the cursor speed (faster or slower depending on your preference), choose the touchpad sensitivity, as well as choose what functions that touchpad has on offer, such as the option to choose a two finger tap to right-click.) The Typing from the left pane lets you choose if you want Windows to autocorrect misspelled words for you or not, choose if you want Windows to highlight misspelled words for you if you want, toggle show text suggestions and adding a space after the suggestions on or off, the chance to add a period after double-tapping the spacebar and get access to many toggles for the touch keyboard. There’s also some features for the Surface pen and Windows Ink Workspace. Plus the chance to choose to have Autoplay on or off for autoplaying all media and devices. The USB at the bottom lets you get notifications for any issues with USB drivers connecting, and the chance to turn off the option for stopping the device when the screen turns off which is useful if you have trouble connecting devices.
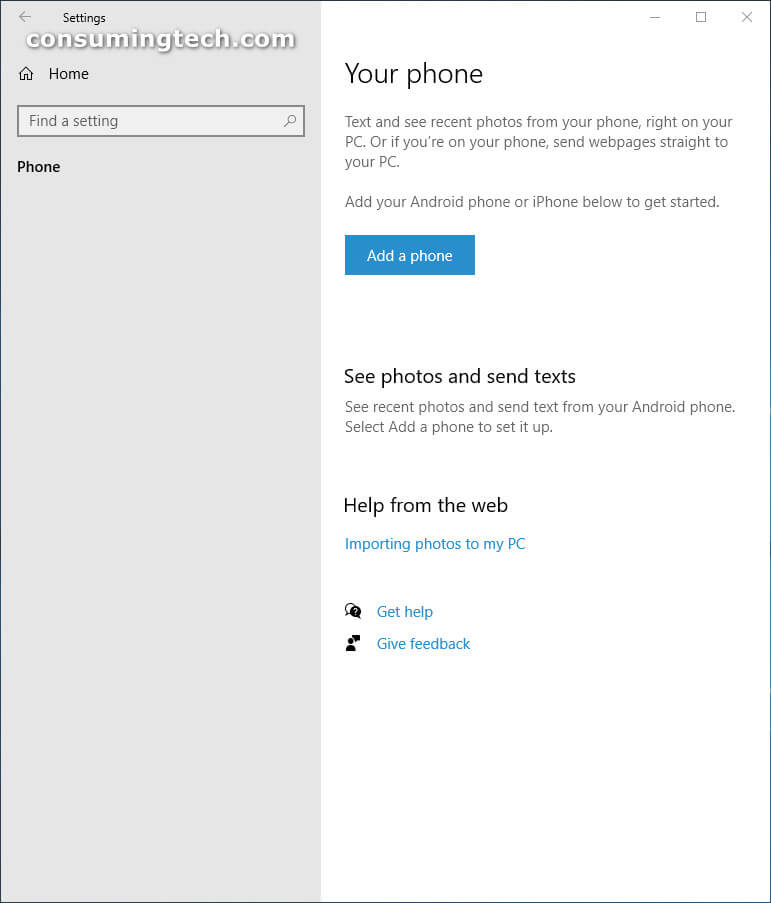
Phone:
Network and Internet:
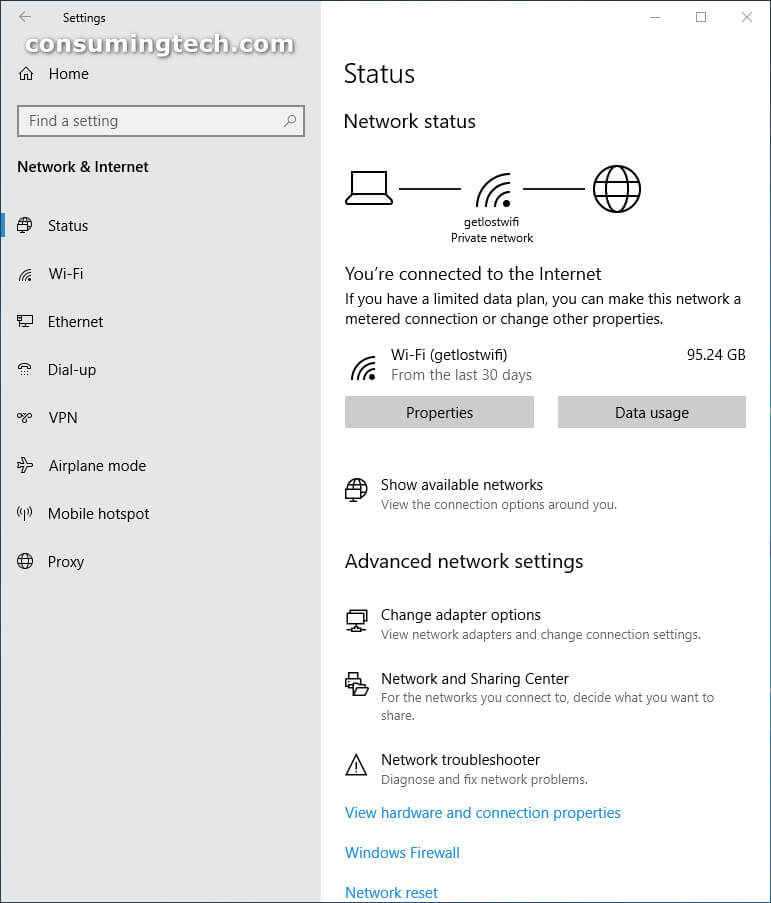
The first option is the Status from the left pane, and it is one of the most important places in the Windows Settings for many people because it is the status of the WiFi connection. If your WiFi is not working, you’ll know it by looking here. You can also choose to swap networks here by clicking on the Show available networks link. If you do have problems and don’t know how to fix them, then you can scroll down the page to find the Network troubleshooter. The WiFi link in the left pane is also important for your network connection because it offers a toggle for turning on or off the WiFi. You can also choose to connect to the WiFi automatically or not from here, plus an interesting feature that might be worthwhile in the near future: the chance to Find paid plans for suggested open hotspots near me. Windows 10 also offers an opportunity to set up a dial-up connection instead of WiFi. You’ll find all of that available from the Dial-up link in the left pane. There’s also a VPN link in the left pane if you want your Windows 10 operating system to connect to a virtual private network. A VPN stops people from being able to trace where you are when you do things like browse websites. (The VPN is not going to hide you from the federal police or anything of that nature, but it does stop the average website from being able to track you personally and is useful if you want to browse the web anonymously.)
Personalization:
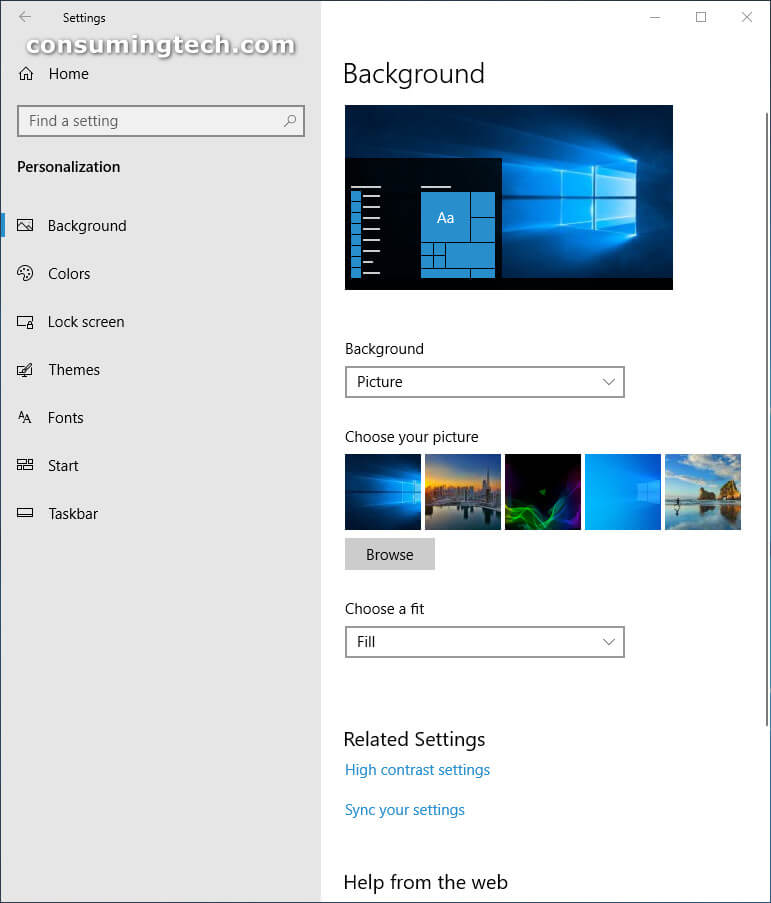
The Background link in the left pane is one of the more popular options available within the Windows Settings app. It was never easy to know how to do something like change the background or wallpaper in Windows unless someone had taught you how to right-click on the desktop. Microsoft has kept the chance for you to right-click on the desktop to get access to the background and wallpaper settings, but you can also get there by navigating to the Windows Settings from the Start menu. It’s here where you can browse the pictures on the computer for a new background, enable the desktop background slideshow, or just pick a solid color instead. The Colors link in the left pane now lets you choose a color of the operating system no matter what picture you choose to show as the desktop background. (Earlier versions of Windows 10 before the Creators Update would choose the color automatically for you based on the tones in the background picture you were displaying.) The Lock Screen link in the left pane lets you choose the lock screen background by having the Windows Spotlight feature running, or just a picture or slideshow of your choice. There’s also the chance to choose a theme instead of just customizing your desktop wallpaper and colors by yourself. To do that, just click on the Themes link in the left pane. The theme is similar to what used to happen before the Creators Update where Windows applies a color of its choice based on the background picture. Most people don’t enjoy this very much, hence why the swapped it for giving people the chance to choose their own colors.
Time and Language:
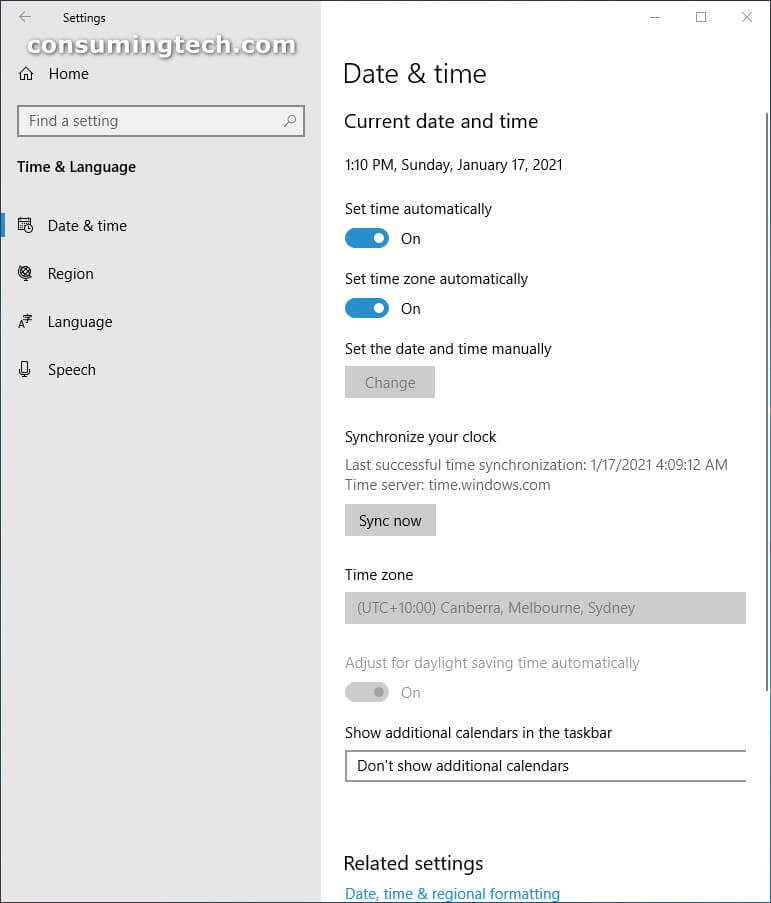
From the Date and time link in the left pane, you can choose what time zone your computer uses, so the time on display in the system tray (bottom right corner of the taskbar) is showing the right time that you want to see. That might not always be the time that is in the area you are currently in now if you are about to travel, for example. But there is also a chance to allow the Windows 10 operating system to know your location, and then it will automatically adjust these times for you.
Apps:
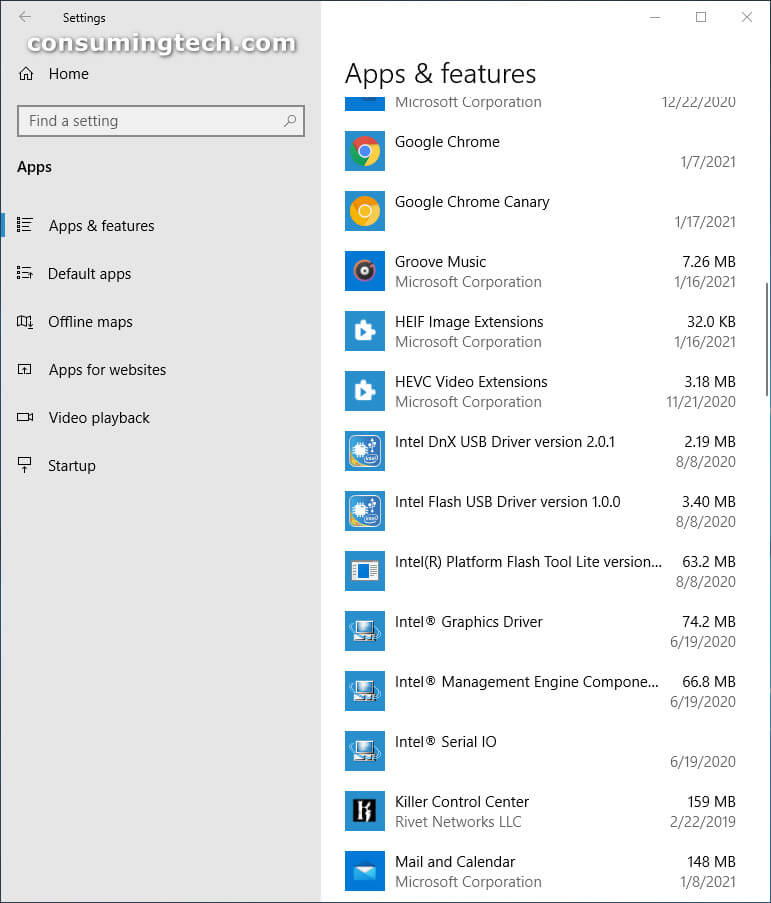
The Apps section is new since the Creators Update. Most of the things available from in here were originally available in the System section. But since they weren’t really easy to find from the Settings app main menu because most people didn’t relate apps to do with the system, it appears as though Microsoft has decided to then give them their own section so people can navigate to it more easily. In the Apps and features link in the left pane is where you can find all of the applications that are installed on the computer at the moment. Click on each one of them to find the same drop-down menu that has always been there for uninstalling them. The Default apps link in the left pane lets you choose what the default application on Windows 10 will be when you use the operating system. For example, you can click on the current web browser that is on display and then choose to change the default browser to another browser.
Accounts:
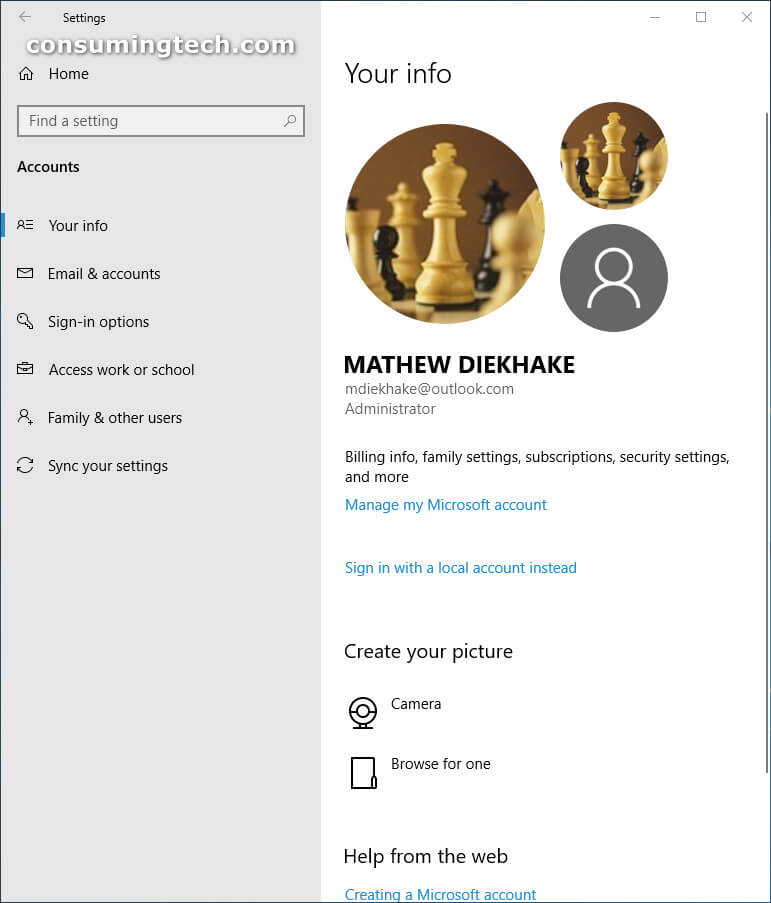
Inside the Accounts section is where you can swap between signing into your Microsoft account and signing into your local user account. You can also get access to this area to delete a user account in Windows 10. There’s also the Sign-in options that you can configure your sign-in settings, the Windows Hello facial recognition feature and fingerprint sensor for singing in if you have compatible devices, a toggle for choosing whether you want to dismiss the lock screen automatically, and the chance to change your account password. There’s also an option for you to Improve recognition in Windows Hello which is another way of saying take another look at your face so that it hopefully works better the next time if you were having problems with it recognizing your face in the past.
Cortana:
No longer available.
Ease of Access:
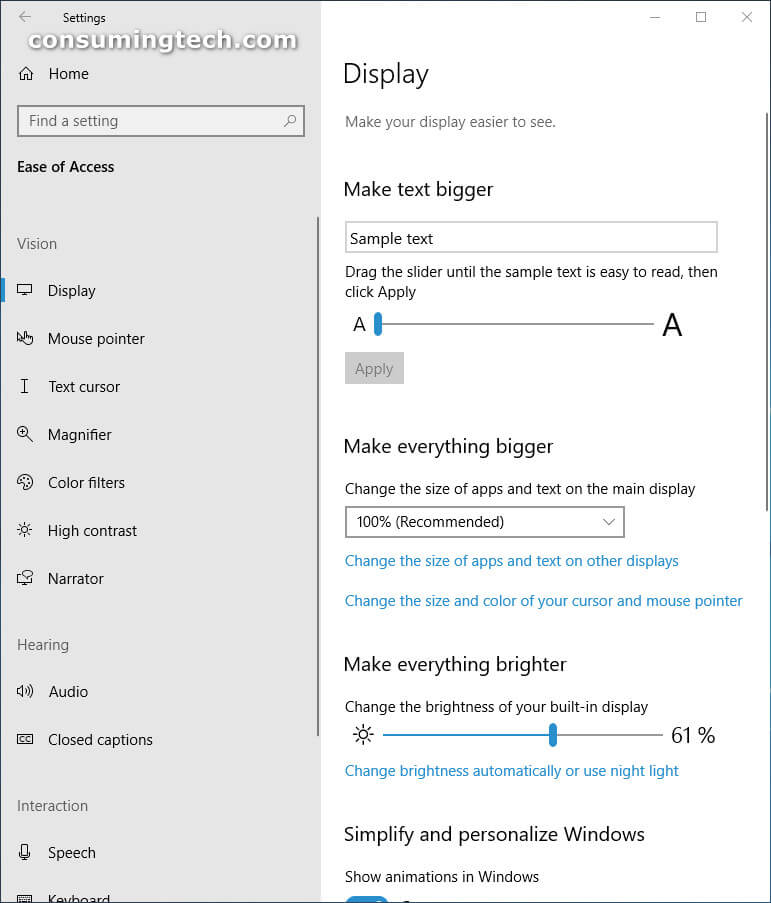
You might have noticed that as the list goes further down, the importance of the features tends to die off. That is definitely true. Hardly anybody is going to enter the Ease of access area, and most people couldn’t care less about the narrator (which is also available from the lock screen mind you). The narrator is a screen reader that can read all of the text that is being displayed on the screen. The narrator feature is typically used by people who have trouble with sight and not many others. You don’t use the narrator just because you can’t be bothered reading. That would be abnormal.
Gaming:
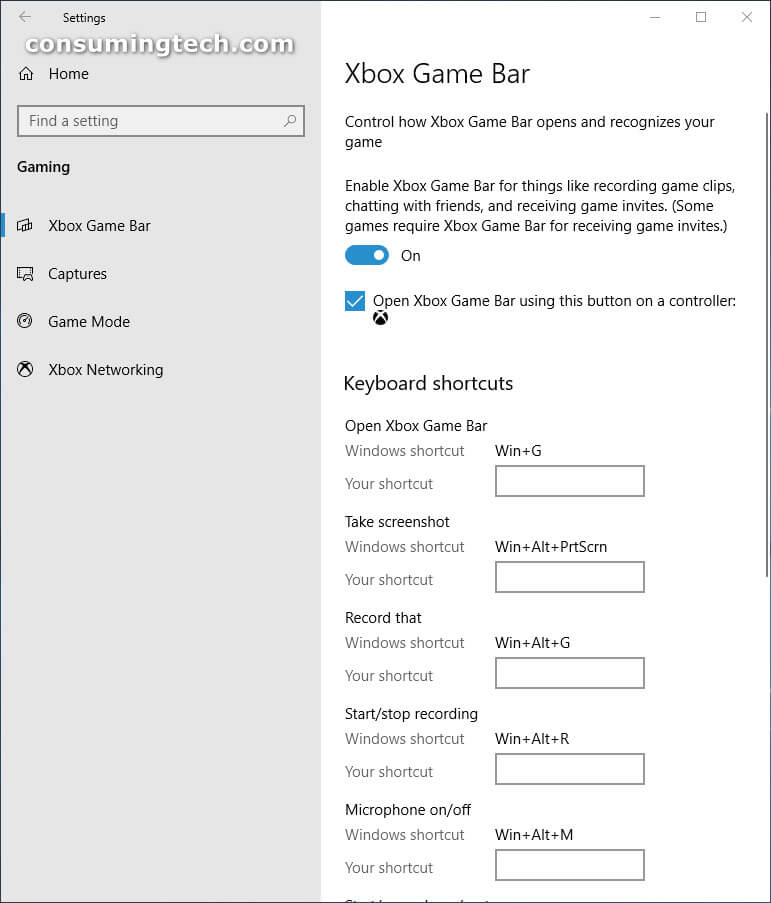
The Gaming link from the Settings app is one of the two new features that came in the Creators Update for Windows 10. It’s in here where you can find all of the settings to do with your Game bar. The Game bar lets you record gaming clips, take screenshots of games, and even broadcasting your gaming experiences. These options are making the Xbox (also owned by Microsoft by the way) look like an excellent purchase. However, you don’t have to have any of these features turned on if you don’t want them. It’s also here where you find the Game Mode link in the left pane. The Game mode is a new feature brought in by Microsoft in the Creators Update that focuses on trying to create a better gaming experience when users are playing games on the PC. It does this by intelligently understating when a game is being played and focusing the computer’s resources on the game more than it did before. Gaming is a popular past time for many kids, and games are typically pretty cool to play on a computer. However, one of the downsides with gaming on PC is that it requires an expensive computer to handle the demands of modern-day gaming and most people simply don’t have a computer good enough to handle the most popular games out there that people play on Xbox One. This new Game Mode helps change that a little bit.
Privacy:
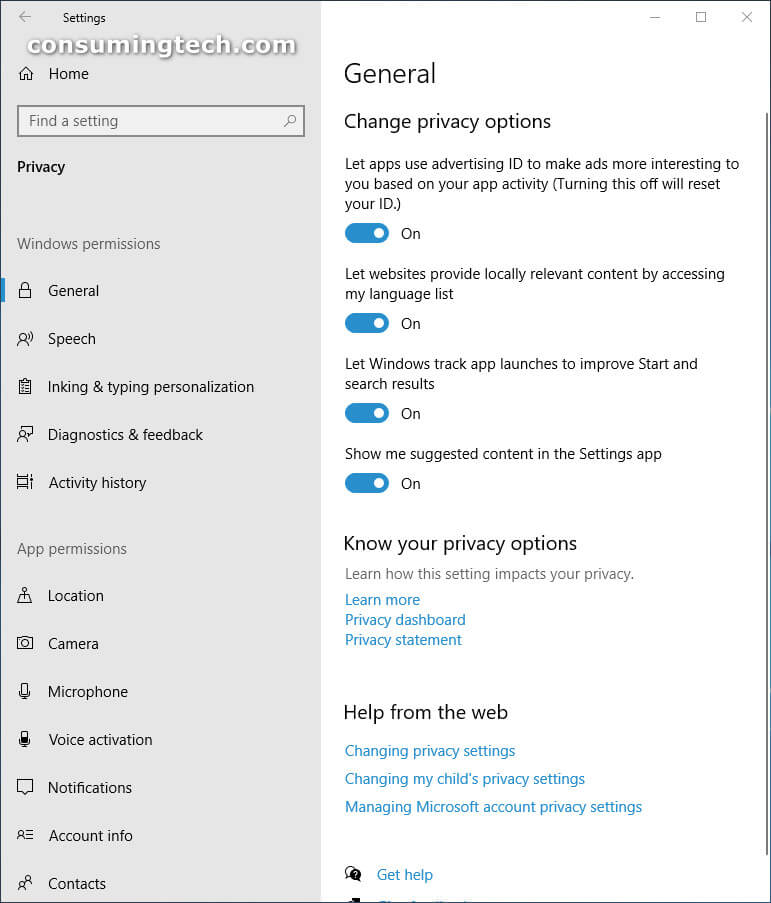
Most people love as much privacy as they can get which is why they don’t like the idea of cookies and web beacons very much—even though they do not mean a person is sitting at a top secret facility checking out on the words you search for in Google or around the web. It’s all obviously done by computer. You don’t get to control web beacons and cookies in here, but you can choose to enable or disable the location service so Windows and apps know the location of the computer and can work around that accordingly. You can also enter the Microphone area from the left pane and then choose to enable or disable the microphone from being used by apps if you want. (You can’t disable the microphone on the computer entirely from here. For that, you need to enter the Registry Editor.)
Update and Security:
If you are a keen user of the Windows operating system, then you’ll enjoy this new area that Windows 10 has made available where you can check out the Windows Update feature. With it, you can check for updates and install updates that are waiting for you. These updates will eventually be installed automatically, but Windows doesn’t check for updated all that often which is why you can sometimes find updated available that are ready to be installed but just haven’t been yet. It’s also in this area where you can choose to become a Windows Insider by clicking on the Windows Insider Program link in the left pane. The Insider program allows people to receive future versions of Windows before they are being rolled out to the public who are not signed up to be an Insider. The idea of the program is to be able to create more stable versions of Windows to be released to the public because finding all bugs by themselves is tough. But Windows fans love getting these updates, so they can try new features faster than they originally would have been able to if they weren’t signed up. You might be interested in doing the same.
That’s all.
Related Tutorials
- How to Reset Windows 10
- How to Choose Default Operating System to Run at Startup in Windows 10
- How to Change Windows To Go Startup Options in Windows 10
- How to Change Product Key in Windows 10
- How to Upgrade Windows 10 Pro to Windows 10 Enterprise
- How to Change Account Used to Get Insider Builds in Windows 10
- How to Change Operating System Name at Startup in Windows 10
- How to Change Time to Display Operating Systems at Startup in Windows 10

