Last Updated on December 26, 2022 by Mathew Diekhake
Many modern-day devices running on Windows 10 are now coming with Windows Hello—a new friendly winking face gesture feature that allows people to sign in with facial recognition instead of a password. Another thing that Windows Hello offers is the chance for you to set up a PIN code.
The PIN is 4 digits long and allows you to get access to your device quicker than a longer password would. Most people opt to sign in with the PIN code whenever the Windows hello facial recognition cannot identify them. Usually, Windows Hello is magnificent at the identification of a face, but sometimes it is not convenient for you to be sitting up in front of the computer. Those are the items when the PIN comes in handy.
There are a few differences between using a PIN code and a password. The main difference that isn’t to do with the password itself is that a PIN code can only be utilized for the computer you set it up on. The Windows Hello PIN is not a universal feature that can be used on other devices when you try logging in with the same Microsoft account. It’s only once you are inside the Microsoft account that all of your things are synced across devices. The only exception to that rule is when you have a password associated with your Microsoft account.
Note: You’ll need to be using a Windows 10 Pro, Education or Enterprise edition of Windows 10 for this guide to work. You can’t make policy changes in the Local Group Policy Editor using the Windows 10 Home. You can upgrade from Windows 10 Home to Windows 10 Pro by heading to the Settings application if you want to be able to make changes to group policies.
How to Enable or Disable Domain Users to Sign in with PIN to Windows 10
Open the Local Group Policy Editor on the computer that runs on an Education, Pro or Enterprise version of the Windows 10 operating system. (You need to have one of the three versions of the Windows 10 operating system mentioned in the previous sentence [Pro, Enterprise or Education versions; not the Home version]. Moreover, you then need to sign into the computer as an administrator, so you have those privileges.)
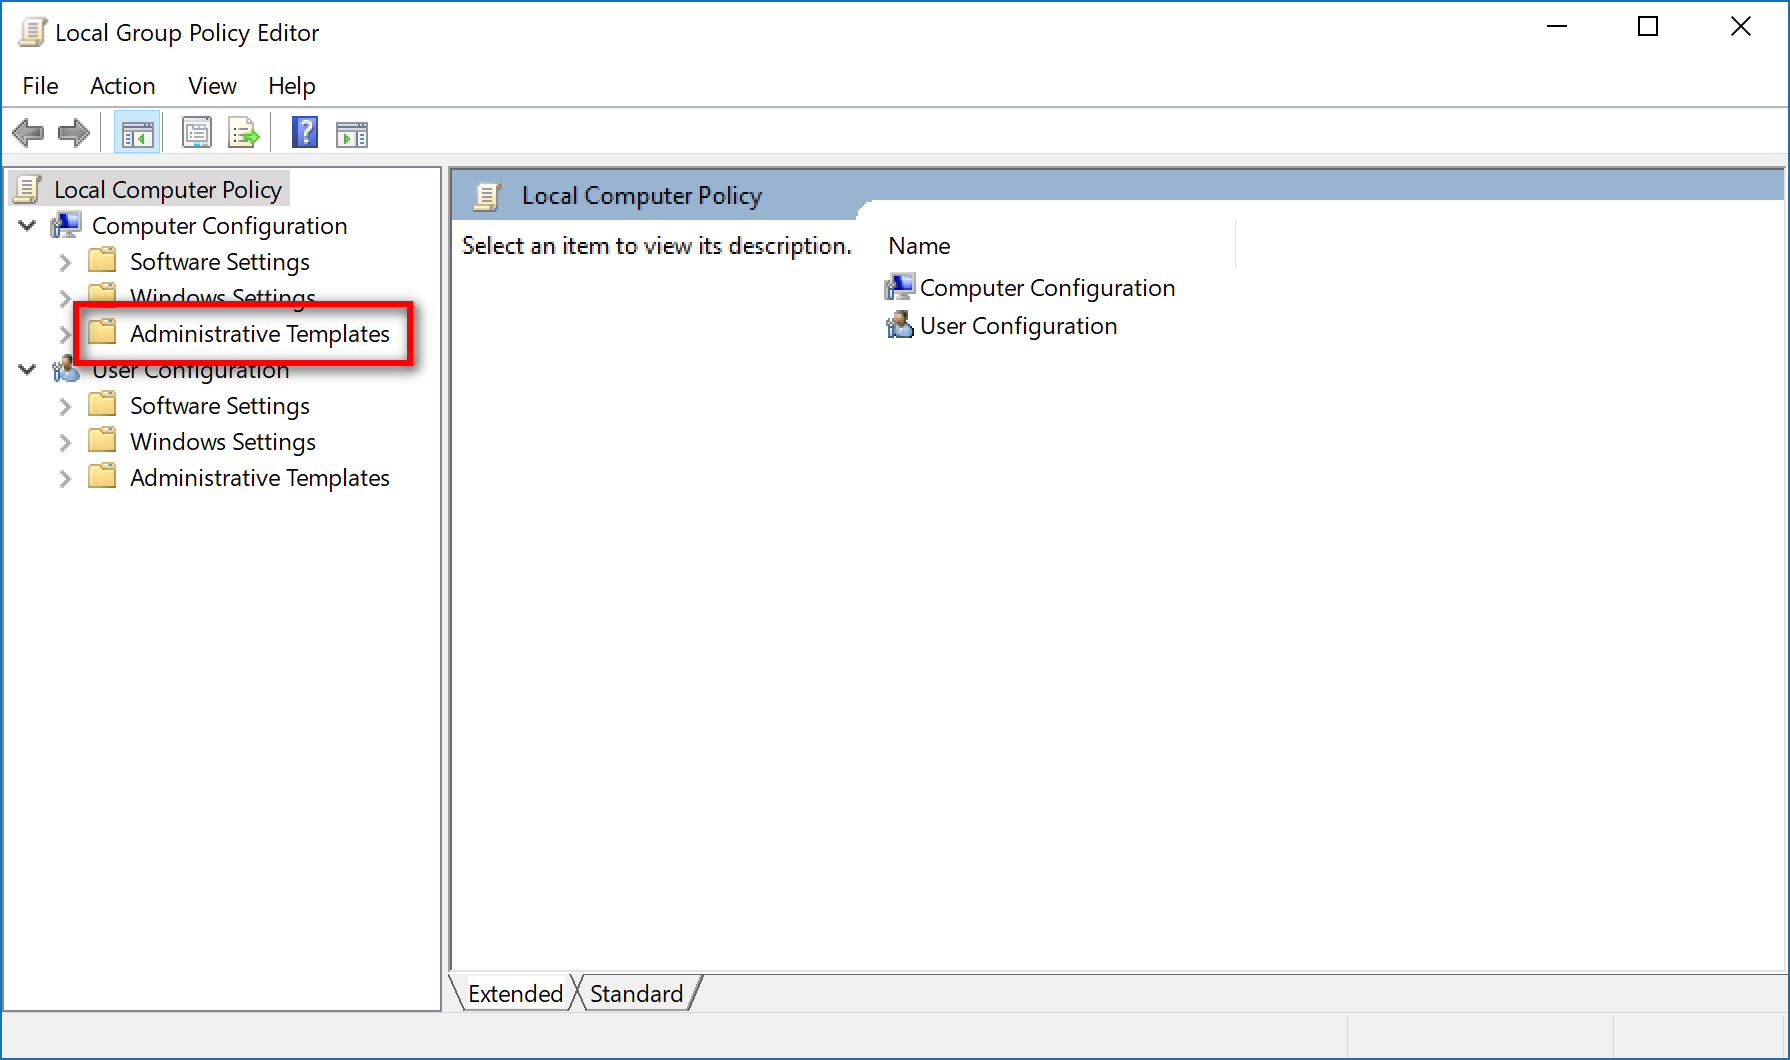
Once you have opened up the Local Group Policy Editor, click on the “Computer Configuration” key to expand it.
Click on the “Administrative Templates” key to expand it.
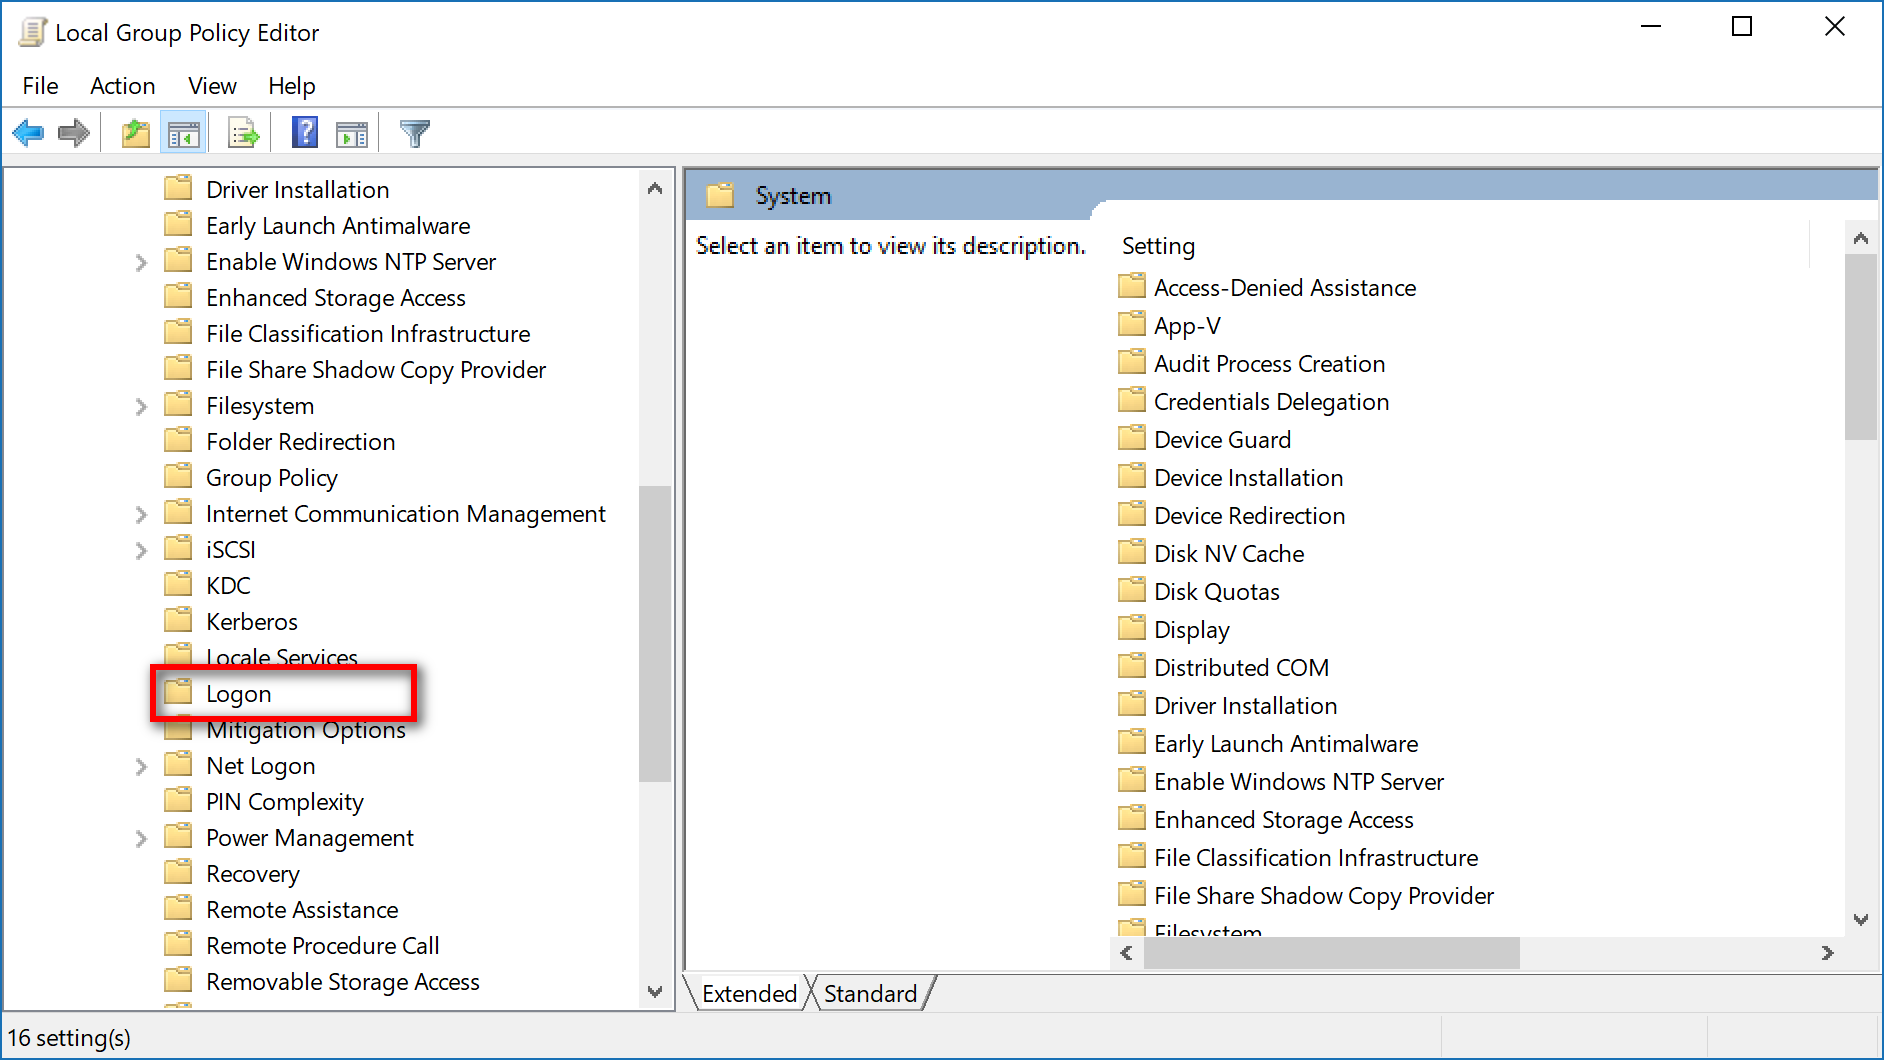
Click on the “System” key to expand it.
Click on the “Logon” key to expand it.
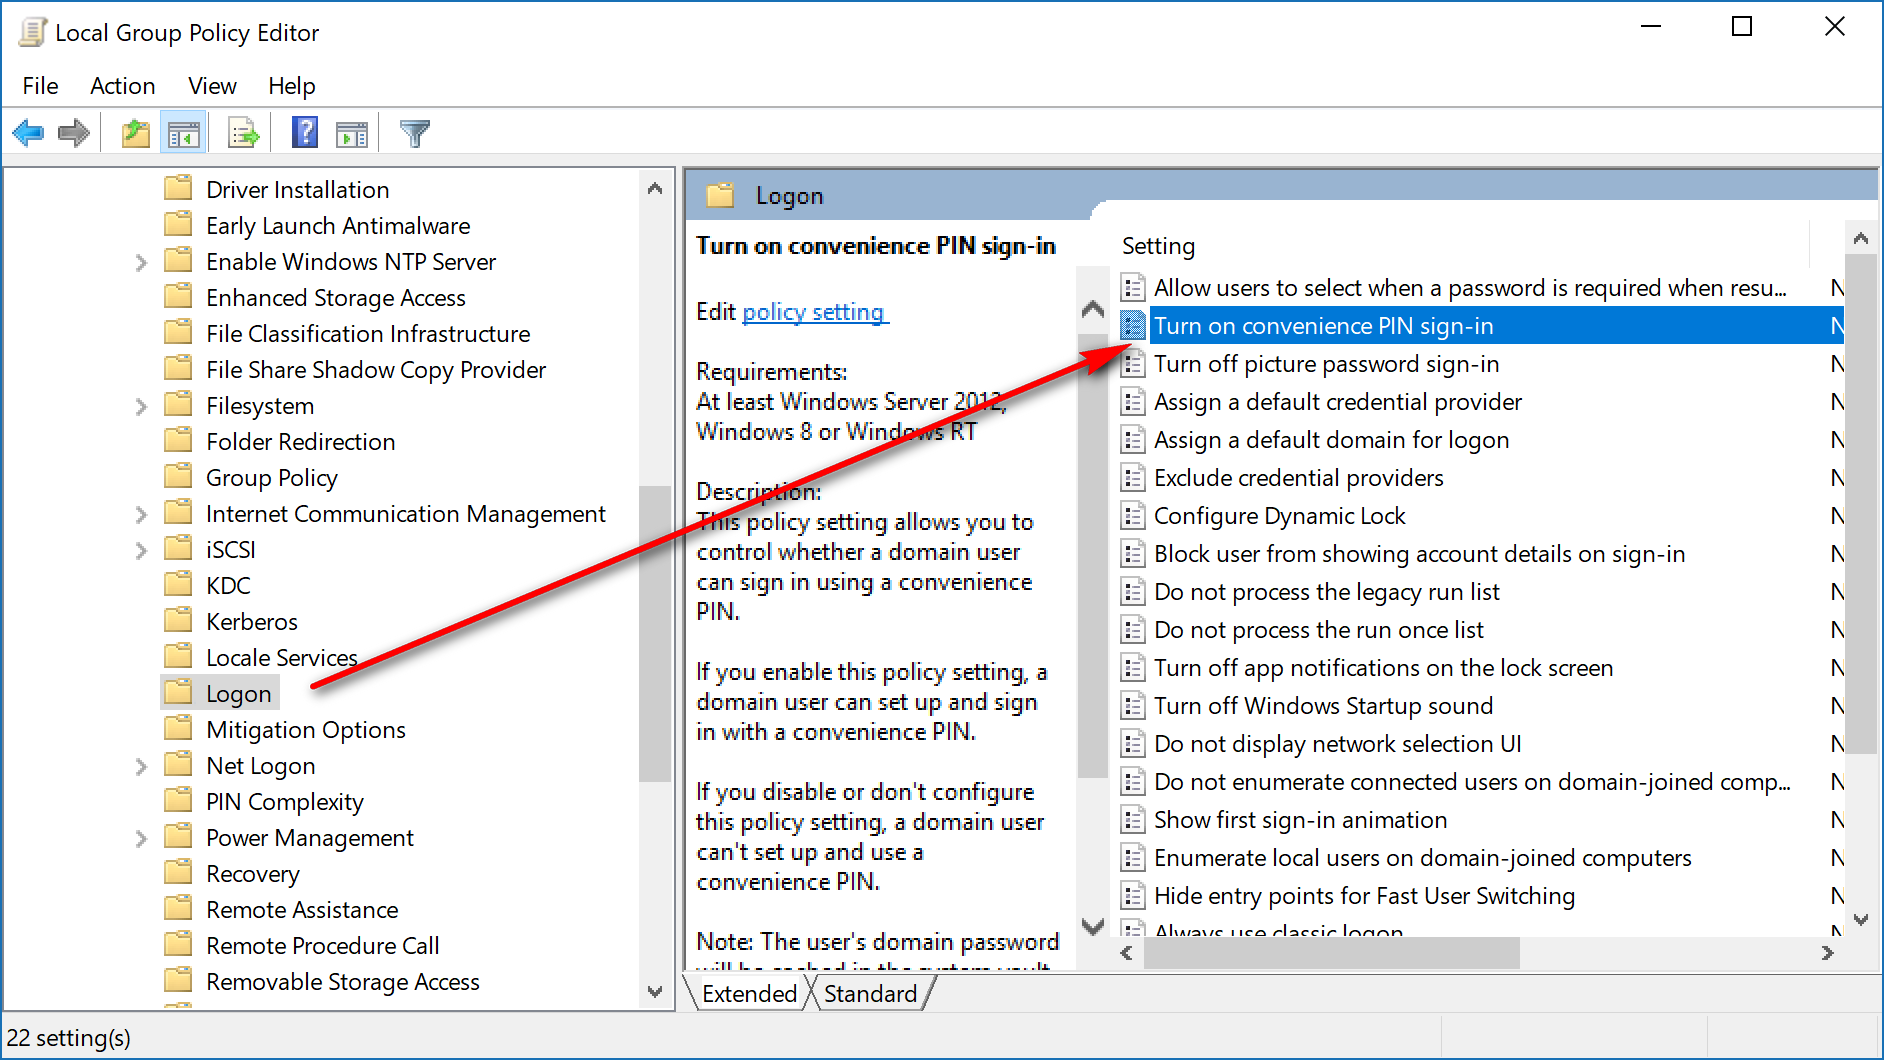
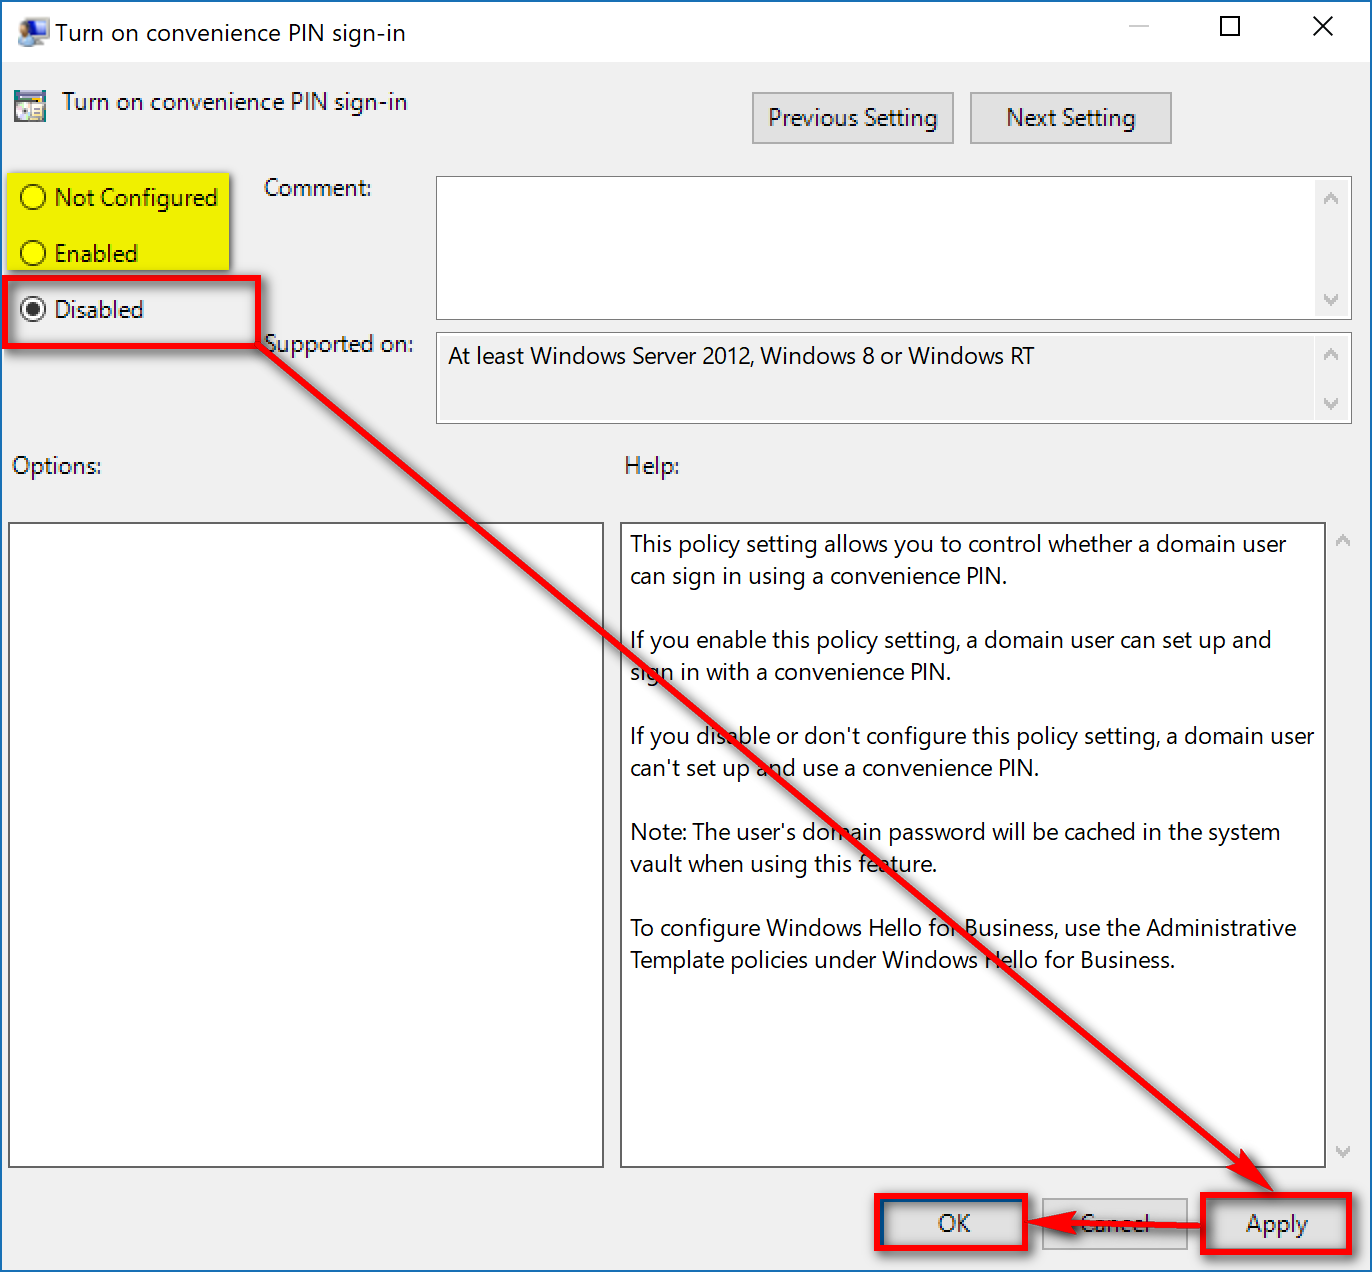
You then get everything related to that logon key showing up in the right side pane. Look for where it says “Turn on convenience PIN sign-in” and click on that option to open up the dialog box for it. (Windows calls it the convenience PIN, but it is the same as the Windows Hello PIN code that we want to change.)
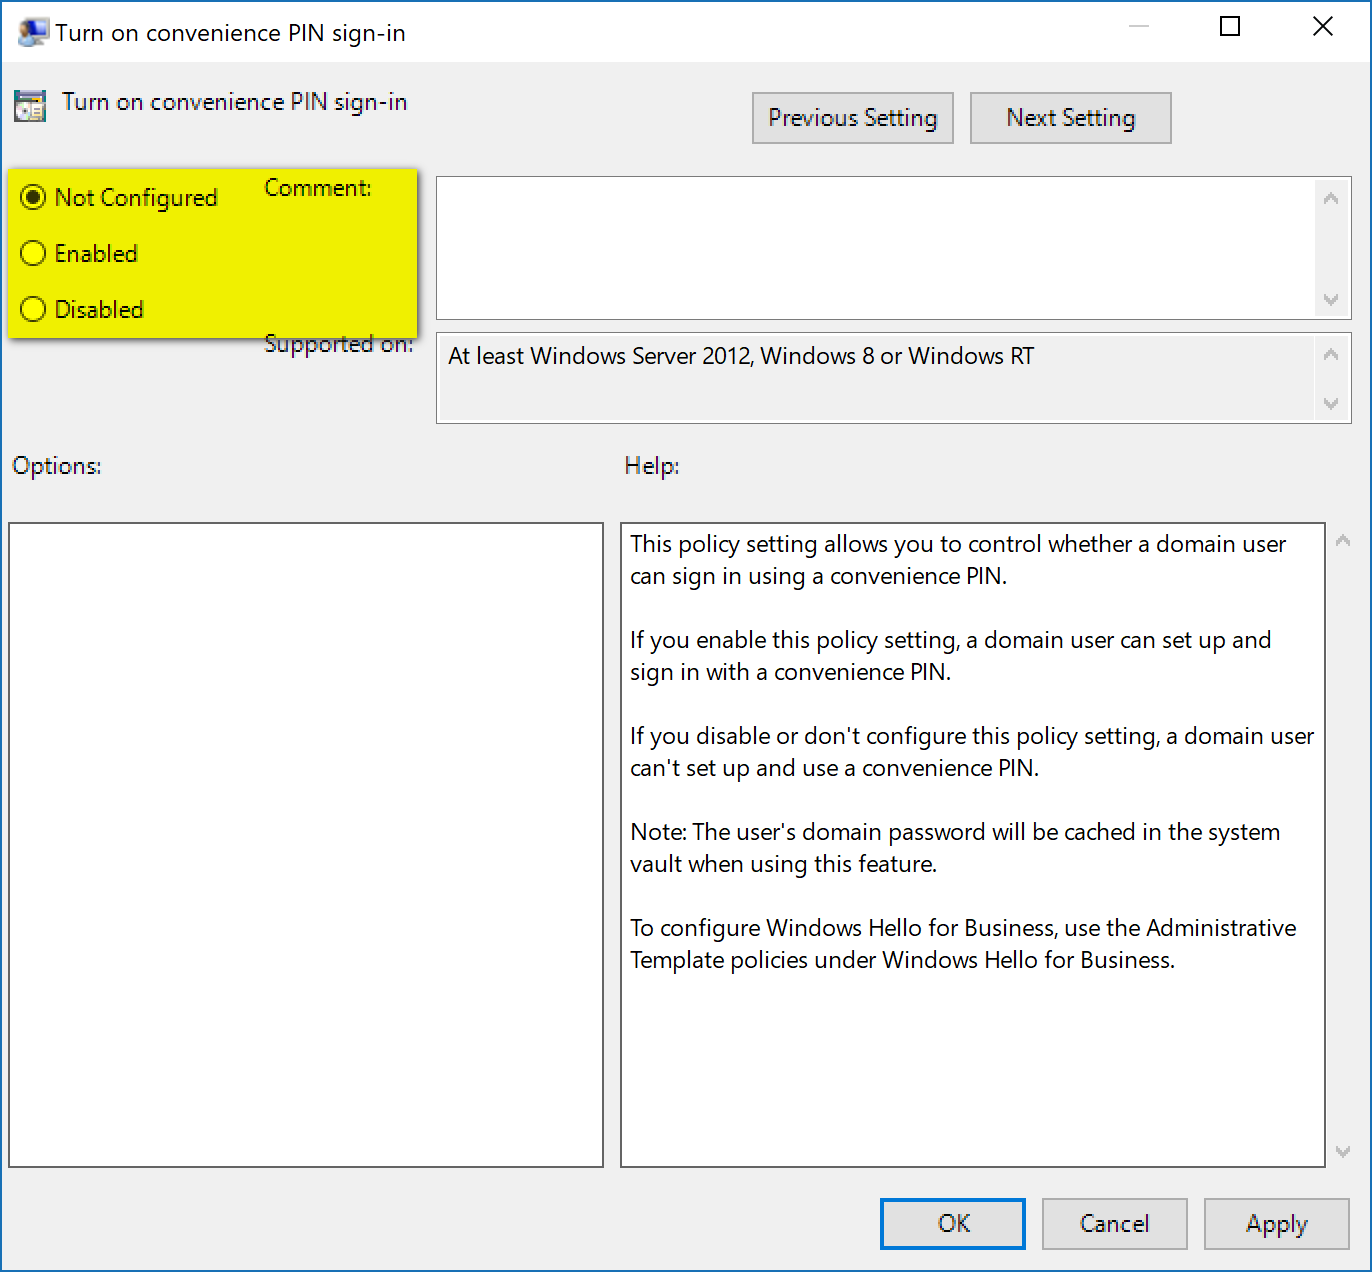
By default, it shows that it is “Not Configured, ” but you can choose to disable it if you want.
To do that, simply move the checkmark to the box that says “Disabled” and then click on the “Apply” and “OK” buttons when you want to apply the changes and then close the “Turn on convenience sign-in” dialog box.
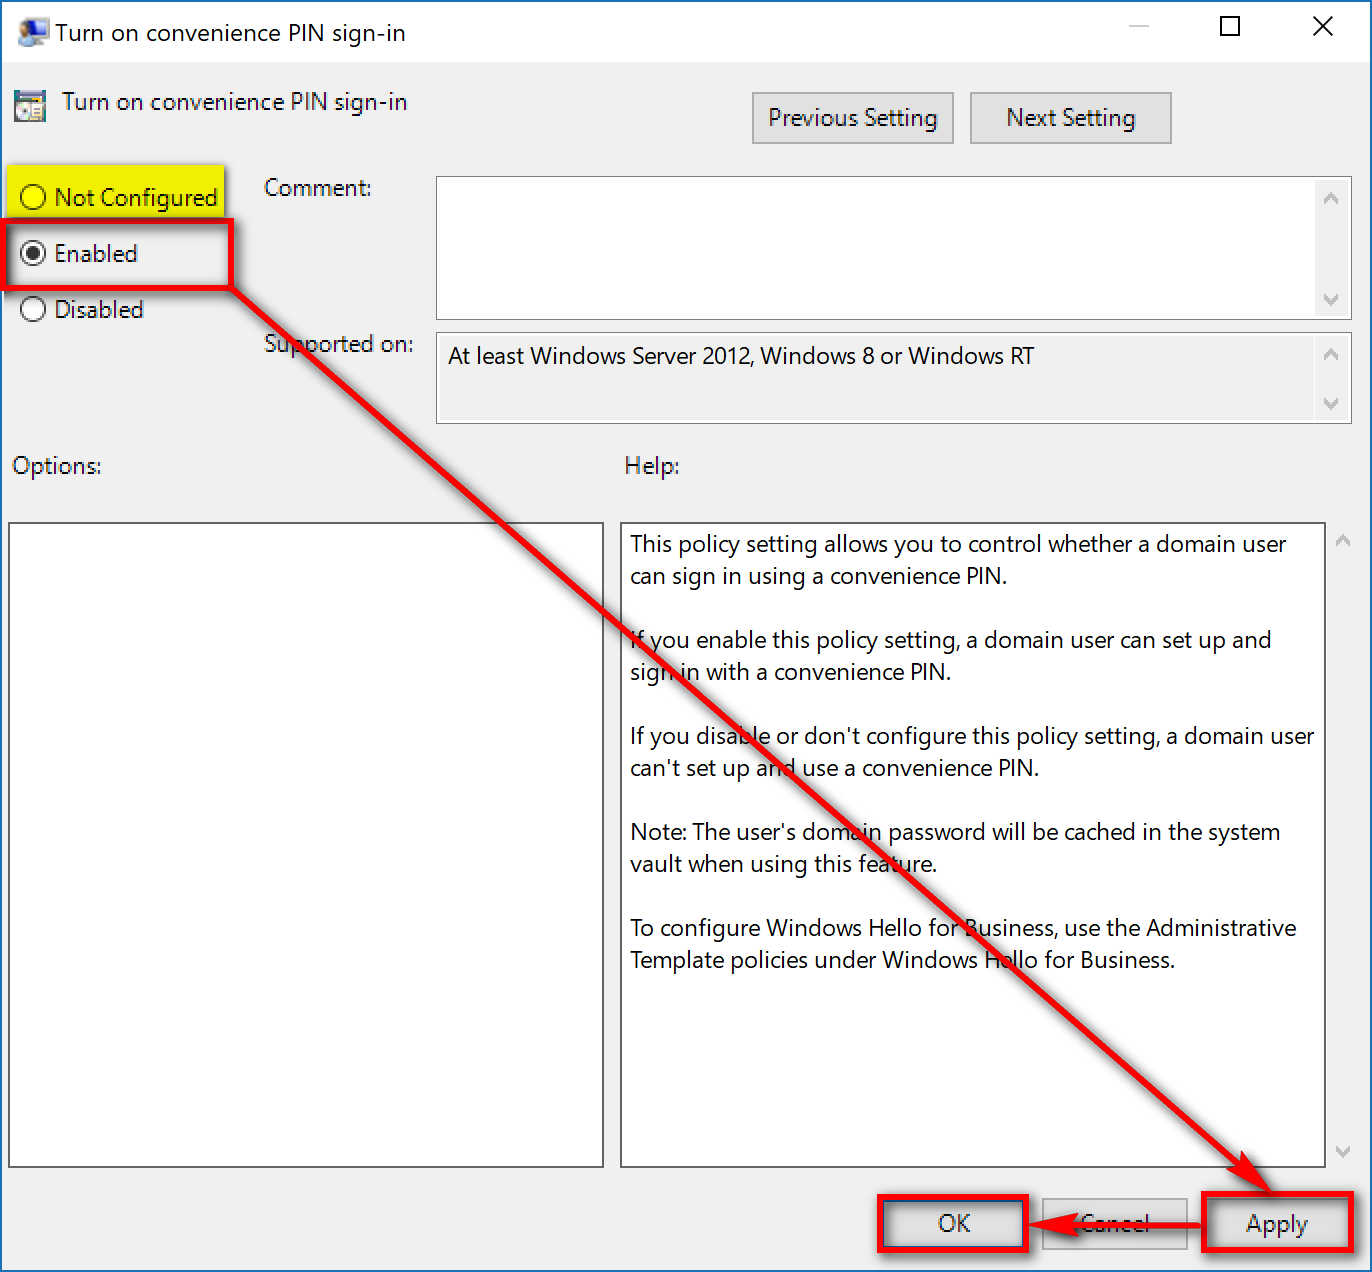
If you ever decide that you would prefer it back on again, you need to head back into the same dialog box and change the checkmark to the “Enabled” box instead.
The Windows Hello PIN code isn’t a feature that Microsoft had planned on letting most people change, but it is a feature that you can still do using the Local Group Policy Editor.
You might also be interested in:
- How to Enable/Disable Elevated Administrator Account in Windows 10
- How to Do a Repair Install of Windows 10 with an In-Place Upgrade
- How to Change Lock Screen Background in Windows 10
- How to Enable AHCI in Windows 10 after Installation
You can subscribe to our RSS, follow us on Twitter or like our Facebook page to keep on consuming more tech.


