Last Updated on December 26, 2022 by Mat Diekhake
The Windows 10 operating system comes with a set of optional features that can usually be turned on or off. Some of these optional features are already on by default and can then be turned off if they aren’t wanted, while other features are off by default and can be turned on when desired.
Administrators who are using a version of the Windows 10 Pro can also set a group policy so that these features cannot be changed should they wish to do so.
Here is what you need to enable or disable the access to the Windows Features in Windows 10 so that the people using the computers can either change the Windows Features or cannot change them.
How to Enable or Disable Access to Windows Features in Local Group Policy Editor
You can enable and disable the access to the Windows Features in Windows 10 by using the Local Group Policy Editor. To get started, open the Local Group Policy Editor by pressing the Windows logo key + R to bring up the Run dialog and then typing “gpedit.msc.” and then hitting the “OK” button at the bottom of the dialog.
You’ll now have the Local Group Policy Editor open. It probably hasn’t shown up on your computer’s display yet though so you’ll need to click on the new icon you can see in your taskbar that looks a bit like a scroll—likely to the right side of your browser icon.
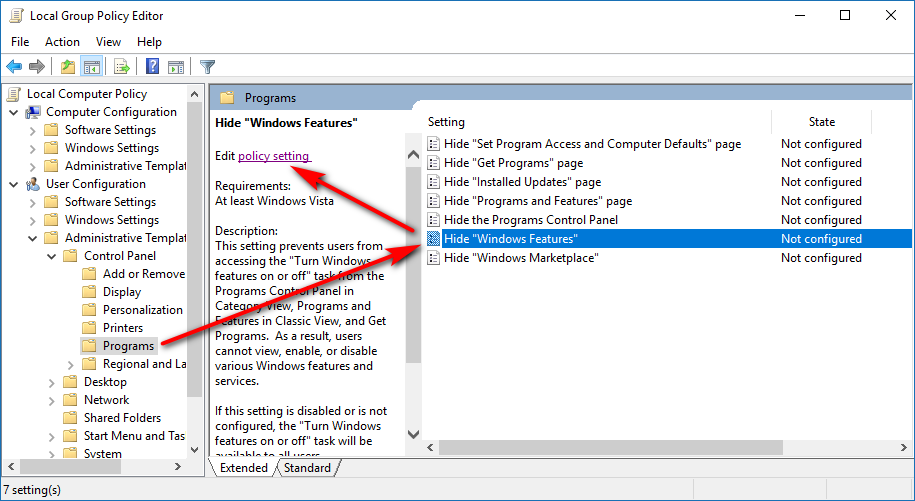
With the LGPE window open, navigate to the User Configuration > Administrative Templates > Control Panel > Programs. When you get there, click on the “Hide ‘Windows Features'” setting in the right side pane just once so that it is highlighted and then click on the “Edit policy setting” link as shown in the image below.
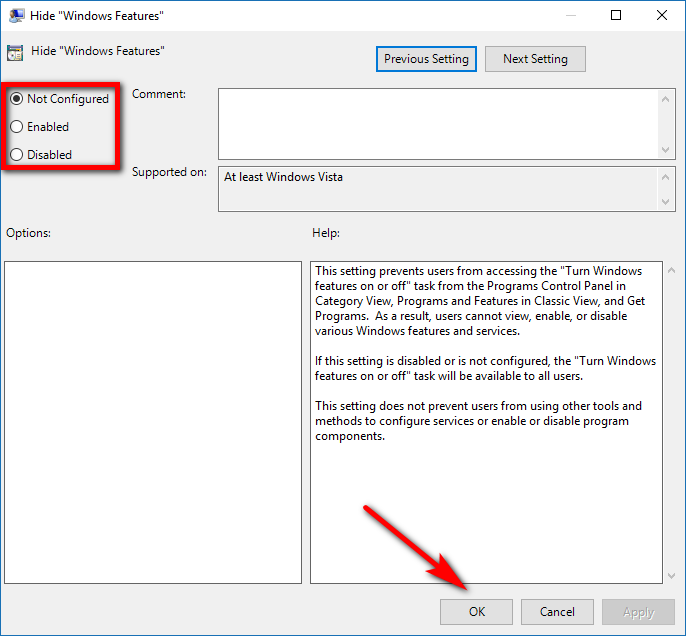
The default setting for the Hide Windows Feature policy is not configured, which means it allows access to features, but that might change if Microsoft changes what it wants as the default. If you want it always enabled no matter what Microsoft does in the future, then change the policy setting over to “Disabled.” On the other hand, if you always want it to be disabled so that people can’t access it at all, then change the policy setting to “Enabled.” Don’t forget to click on the “OK” button at the bottom of the policy window to save the changes you made.
You can now close the Local Group Policy Editor, and the changes will take effect.
You might also be interested in:
- How to Turn Windows Features On/Off in Windows 10
- How to Enable or Disable Win32 Long Paths in Windows 10
- How to Turn On or Off OneDrive Files On-Demand in Windows 10
- Fix: Ctrl Key + Mouse Click Not Selecting Multiple Items in Windows 10
You can subscribe to our RSS, follow us on Twitter or like our Facebook page to keep on consuming more tech.