Last Updated on December 26, 2022 by Mat Diekhake
Some Windows features, such as the Windows Subsystem for Linux, needs to be turned on from the list of features before it’ll work while other features are there at your disposal automatically without you needing to do anything other than find out where they are located and how to use them.
Microsoft does this because it thinks there are some features that only some people will find useful and not everyone, so to deliver the best experience they leave those ones as optional should people want to have them turned on.
Many people don’t realize it, but the Windows features you find turned on by default can also be turned off if you don’t want them on anymore.
The following guide will show you how you can turn the additional Windows features on as well as the existing features off when using the Windows 10 operating system.
How to Turn On or Off Windows Features from Windows Features
You can turn the Windows Features on or off by using the Windows Features window from the Control Panel. To get started, open the Control Panel so that it is showing the classic view with the smaller icons and then click on the Programs and features link from the list of all Control Panel items. Now in the left side pane of the window, click on the link that says Turn Windows features on or off.
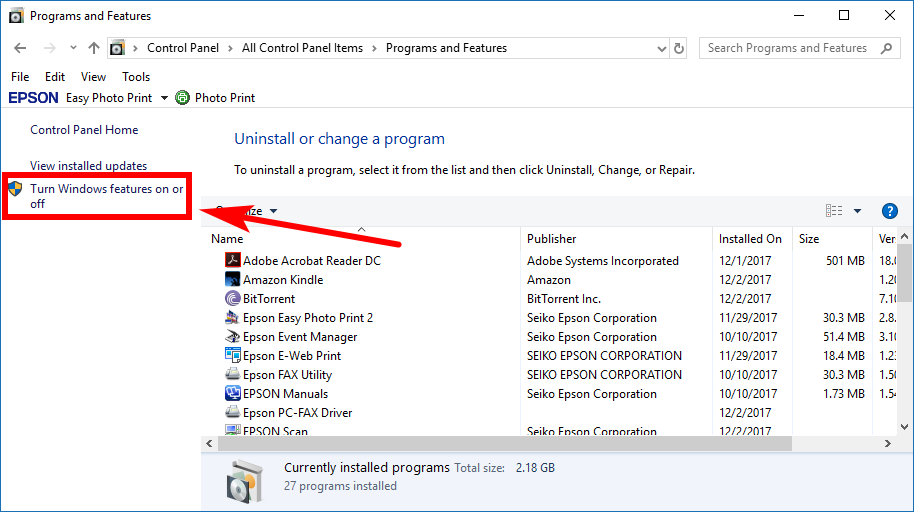
You’ll now see the list of optional Windows features that can be turned on or off by using the checkboxes running down the left side of each of the names. Just make sure you click on the OK button at the bottom of the Windows features window to save the changes or else it won’t remember your changes.

How to Turn On or Off Windows Features in Elevated Windows PowerShell
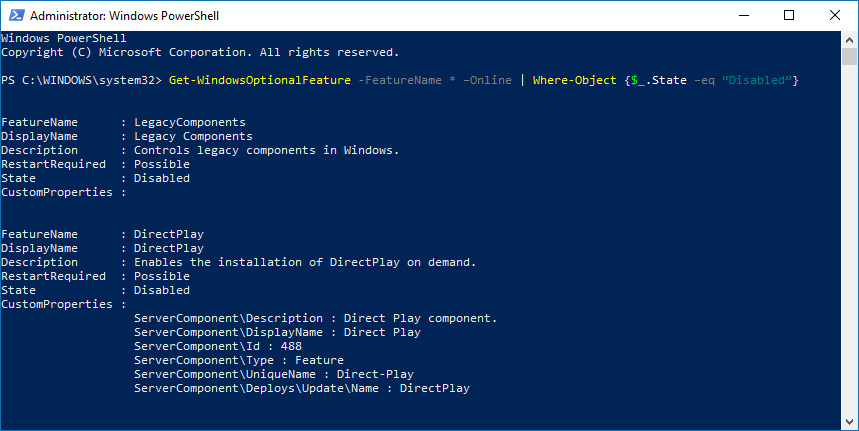
You can also use the elevated version of the Windows PowerShell to turn the Windows features on or off as well. To get started, type Windows PowerShell into Cortana search in the taskbar and then right-click on the PowerShell result under the Best match section and then choose to Run as administrator from the menu.
If you want to enable a Windows feature from the optional list of Windows feature, type the Get-WindowsOptionalFeature –Online | Where-Object {$_.State –eq “Disabled”} command and hit Enter to get the list of currently disabled optional Windows features and find the name of the one that you want to be turned on.
Now type the Enable-WindowsOptionalFeature –FeatureName FeatureName -All -Online command and hit Enter on your keyboard, remembering to swap where it says FeatureName for the actual name of the feature that you found in the step above.
If you want to disable a Windows feature from the optional list of Windows feature, type the Get-WindowsOptionalFeature -FeatureName * –Online | Where-Object {$_.State –eq “Enabled”} command and then hit the Enter key on your keyboards to bring up the full list of features that are enabled and make a note of the name of the feature that you want to turn off.
Now type the Disable-WindowsOptionalFeature –FeatureName FeatureName -Online command and replace where it says FeatureName with the name of the actual feature that you got from the step above and hit Enter again, and it’ll then be disabled.
How to Turn On or Off Windows Features in Command Prompt
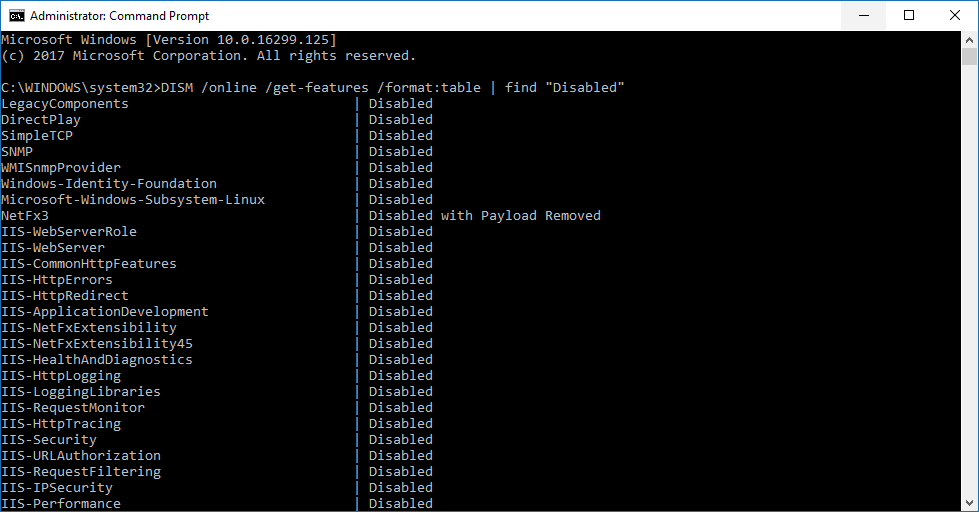
You can also use the Command Prompt to turn Windows features on or off if you prefer. You’ll need to open the elevated version of the Command Prompt window by typing CMD into the Cortana search in the taskbar and then right-clicking on the Command Prompt under the Best match section and then choosing the Run as administrator from the menu.
If you want to enable a Windows feature from the optional list of Windows feature, type the DISM /online /get-features /format:table | find "Disabled" command into the elevated Command prompt window and then press the Enter key on your keyboard. Now take note of the name of the Windows feature that is disabled that you want to make enabled.
Next, type the Dism /online /Enable-Feature /FeatureName:FeatureName -All command into the same elevated Command prompt window and change where it says FeatureName in the code for the actual name of the feature that you got from the step above. You’ll then find that the feature is enabled.
On the other hand, if you currently have one of the optional Windows features enabled and would like for it to be disabled, you need to open the elevated Command Prompt window and type the DISM /online /get-features /format:table | find "Enabled" command and hit Enter on your keyboard and find the name of the feature that you want to disable.
Now with the same elevated Command prompt window open, type the Dism /online /Disable-Feature /FeatureName:FeatureName command and hit Enter, but also remembering to change where it says FeatureName for the actual name of the feature.
Related Tutorials